Infinite-ISP is a full-stack ISP development platform designed for all aspects of a hardware ISP. It includes a collection of camera pipeline modules written in Python, a fixed-point reference model, an optimized RTL design, an FPGA integration framework and its associated firmware ready for Xilinx® Kria KV260 development board. The platform features a stand-alone Python-based Tuning Tool that allows tuning of ISP parameters for different sensors and applications. Finally, it also offers a software solution for Linux by providing required drivers and a custom application development stack to bring Infinite-ISP to the Linux platforms.
| Sr. | Repository name | Description |
|---|---|---|
| 1 | Infinite-ISP_AlgorithmDesign | Python based model of the Infinite-ISP pipeline for algorithm development |
| 2 | Infinite-ISP_ReferenceModel | Python based fixed-point model of the Infinite-ISP pipeline for hardware implementation |
| 3 | Infinite-ISP_RTL | RTL Verilog design of the image signal processor based on the Reference Model |
| 4 | Infinite-ISP_AutomatedTesting | A framework to enable the automated block and multi-block level testing of the image signal processor to ensure a bit accurate design |
| 5 | FPGA Implementation | FPGA implementation of Infinite-ISP on
|
| 6 | Infinite-ISP_FPGABinaries ⚓ | FPGA binaries (bitstream + firmware executable) for the Xilinx® Kria KV260’s XCK26 Zynq UltraScale + MPSoC |
| 7 | Infinite-ISP_TuningTool | Collection of calibration and analysis tools for the Infinite-ISP |
| 8 | Infinite-ISP_LinuxCameraStack | Extending Linux support to Infinite-ISP and the developement of Linux-based camera application stack |
Request Access to Infinite-ISP_RTL, Infinite-ISP_AutomatedTesting and Infinite-ISP_FPGA_XCK26 repositories
Infinite-ISP Image Signal Processing Pipeline FPGA binaries for XCK26 Zynq® UltraScale+™ MPSoC present on Xilinx® Kria™ KV260 Vision AI Starter Kit. Each binary file includes an FPGA bitstream paired with its firmware executable.
- Connect the IMX219 image sensor module to the RPi port on the Kria KV260 AI Starter Kit.
- Insert an SD Card (2GB or above) into the Kria KV260 board.
- Connect the Kria KV260 board with a monitor screen using an HDMI cable.
- Power up the Kria KV260 board and follow the steps for loading the on-board Xilinx Image Recovery Tool.
- Upload the desired binary file (e.g. Infinite-ISP_v1.4-IMX219.bin) provided in the release on the Kria KV260 AI Starter Kit.
- Reset the Kria KV260 board and visualize the Infinite-ISP output on your monitor screen.
- Connect the USB cable with the JTAG/USB port on Kria to read the messages over the serial interface (baud rate 115200).
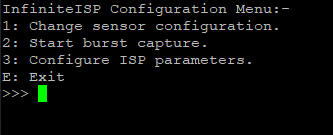
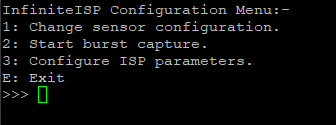
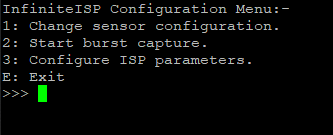
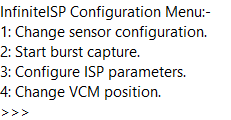
- A configuration menu as shown below will appear. Details of the user menu are provided in the user guide:
-
If you want to dump frame(s), do so by going to option 2, and then you can remove the SD card from the Kria board.
-
Extract the dumped frame(s) from the SD card and visualize them using the provided scripts.
- Connect AR1335 IAS image sensor module to the IAS1 port on Kria KV260 AI Starter Kit.
- Insert SD Card (2GB or above) into the Kria KV260 board.
- Connect the Kria KV260 board with a monitor screen using an HDMI cable.
- Power up the Kria KV260 board and follow the steps for loading the on-board Xilinx Image Recovery Tool.
- Upload the desired binary file (e.g. Infinite-ISP_v1.4-AR1335.bin) provided in the release on the Kria KV260 AI Starter Kit.
- Reset the Kria KV260 board and visualize the Infinite-ISP output on your monitor screen.
- Connect the USB cable with the JTAG/USB port on Kria to read the messages over the serial interface (baud rate 115200).
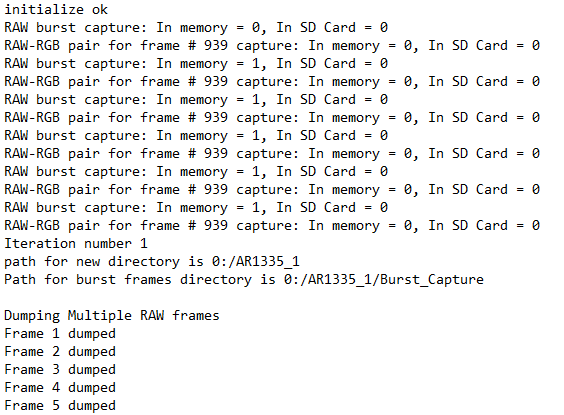
- A configuration menu as shown below will appear. Details of the user menu are provided in the user guide:
-
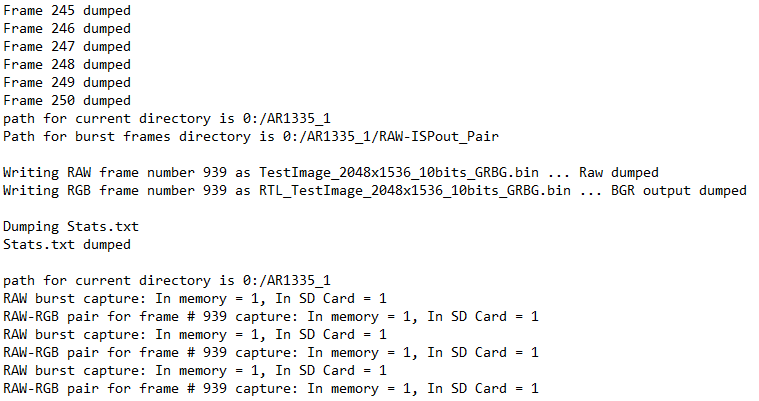
If you want to dump frame(s), do so by going to option 2, and then you can remove the SD card from the Kria board.
-
Extract the dumped frame(s) from the SD card and visualize them using the provided scripts.
- Connect the OV5647 image sensor module to the RPi port on the Kria KV260 AI Starter Kit.
- Insert an SD Card (2GB or above) into the Kria KV260 board.
- Connect the Kria KV260 board with a monitor screen using an HDMI cable.
- Power up the Kria KV260 board and follow the steps for loading the on-board Xilinx Image Recovery Tool.
- Upload the desired binary file (e.g. Infinite-ISP_v1.4-OV5647.bin) provided in the release on the Kria KV260 AI Starter Kit.
- Reset the Kria KV260 board and visualize the Infinite-ISP output on your monitor screen.
- Connect the USB cable with the JTAG/USB port on Kria to read the messages over the serial interface (baud rate 115200).
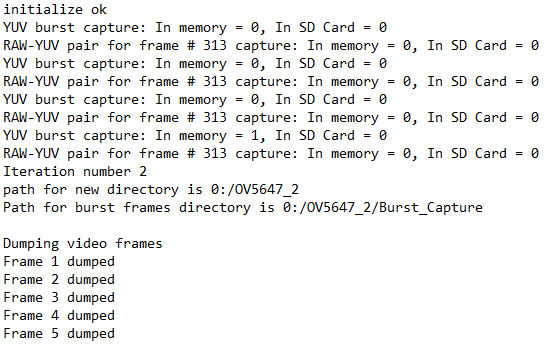
- A configuration menu as shown below will appear. Details of the user menu are provided in the user guide:
-
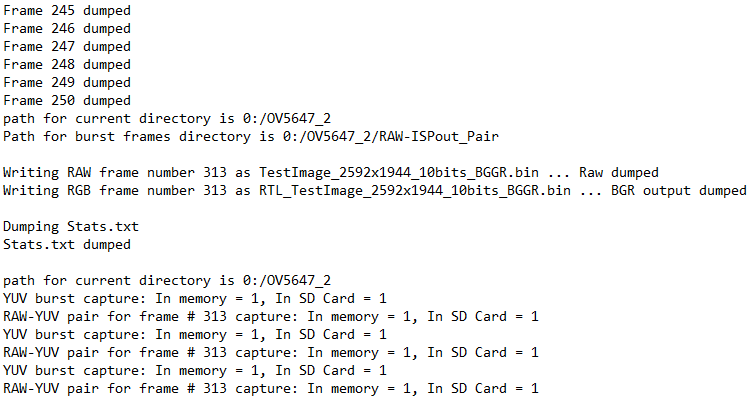
If you want to dump frame(s), do so by going to option 2, and then you can remove the SD card from the Kria board.
-
Extract the dumped frame(s) from the SD card and visualize them using the provided scripts.
- Connect the IMX219 image sensor module to the RPi port on the Kria KV260 AI Starter Kit.
- Insert an SD Card (2GB or above) into the Kria KV260 board.
- Connect the Kria KV260 board with a monitor screen using an HDMI cable.
- Power up the Kria KV260 board and follow the steps for loading the on-board Xilinx Image Recovery Tool.
- Upload the desired binary file (e.g. Infinite-ISP_v1.3-IMX219.bin) provided in the release on the Kria KV260 AI Starter Kit.
- Reset the Kria KV260 board and visualize the Infinite-ISP output on your monitor screen.
- Connect the USB cable with the JTAG/USB port on Kria to read the messages over the serial interface (baud rate 115200).
- A configuration menu as shown below will appear. Details of the user menu are provided in the user guide:
-
If you want to dump frame(s), do so by going to option 2, and then you can remove the SD card from the Kria board.
-
Extract the dumped frame(s) from the SD card and visualize them using the provided scripts.
- Connect AR1335 IAS image sensor module to the IAS1 port on Kria KV260 AI Starter Kit.
- Insert SD Card (2GB or above) into the Kria KV260 board.
- Connect the Kria KV260 board with a monitor screen using an HDMI cable.
- Power up the Kria KV260 board and follow the steps for loading the on-board Xilinx Image Recovery Tool.
- Upload the desired binary file (e.g. Infinite-ISP_v1.3-AR1335.bin) provided in the release on the Kria KV260 AI Starter Kit.
- Reset the Kria KV260 board and visualize the Infinite-ISP output on your monitor screen.
- Connect the USB cable with the JTAG/USB port on Kria to read the messages over the serial interface (baud rate 115200).
- A configuration menu as shown below will appear. Details of the user menu are provided in the user guide:
-
If you want to dump frame(s), do so by going to option 2, and then you can remove the SD card from the Kria board.
-
Extract the dumped frame(s) from the SD card and visualize them using the provided scripts.
- Connect the OV5647 image sensor module to the RPi port on the Kria KV260 AI Starter Kit.
- Insert an SD Card (2GB or above) into the Kria KV260 board.
- Connect the Kria KV260 board with a monitor screen using an HDMI cable.
- Power up the Kria KV260 board and follow the steps for loading the on-board Xilinx Image Recovery Tool.
- Upload the desired binary file (e.g. Infinite-ISP_v1.3-OV5647.bin) provided in the release on the Kria KV260 AI Starter Kit.
- Reset the Kria KV260 board and visualize the Infinite-ISP output on your monitor screen.
- Connect the USB cable with the JTAG/USB port on Kria to read the messages over the serial interface (baud rate 115200).
- A configuration menu as shown below will appear. Details of the user menu are provided in the user guide:
-
If you want to dump frame(s), do so by going to option 2, and then you can remove the SD card from the Kria board.
-
Extract the dumped frame(s) from the SD card and visualize them using the provided scripts.
- Connect AR1335 IAS image sensor module to the IAS1 port on Kria KV260 AI Starter Kit.
- Insert SD Card (2GB or above) into the Kria KV260 board.
- Connect the Kria KV260 board with a monitor screen using an HDMI cable.
- Power up the Kria KV260 board and follow the steps for loading the on-board Xilinx Image Recovery Tool.
- Upload the desired binary file (e.g. Infinite-ISP_v1.2-AR1335.bin) provided in the release on the Kria KV260 AI Starter Kit.
- Reset the Kria KV260 board and visualize the Infinite-ISP output on your monitor screen.
- Connect the USB cable with the JTAG/USB port on Kria to read the messages over the serial interface (baud rate 115200).
- A configuration menu as shown below will appear. Details of the user menu are provided in the user guide:
-
If you want to dump frame(s), do so by going to option 2, and then you can remove the SD card from the Kria board.
-
Extract the dumped frame(s) from the SD card and visualize them using the provided scripts.
- Connect the OV5647 image sensor module to the RPi port on the Kria KV260 AI Starter Kit.
- Insert an SD Card (2GB or above) into the Kria KV260 board.
- Connect the Kria KV260 board with a monitor screen using an HDMI cable.
- Power up the Kria KV260 board and follow the steps for loading the on-board Xilinx Image Recovery Tool.
- Upload the desired binary file (e.g. Infinite-ISP_v1.2-OV5647.bin) provided in the release on the Kria KV260 AI Starter Kit.
- Reset the Kria KV260 board and visualize the Infinite-ISP output on your monitor screen.
- Connect the USB cable with the JTAG/USB port on Kria to read the messages over the serial interface (baud rate 115200).
- RAW-ISPout image pair and Burst Capture frames dump in SD Card status will be displayed over serial interface:
-
If you want to dump frame(s), do so by going to option 2, and then you can remove the SD card from the Kria board.
-
Extract the dumped frame(s) from the SD card and visualize them using the provided scripts.
- Connect AR1335 IAS image sensor module to the IAS1 port on Kria KV260 AI Starter Kit.
- Insert SD Card (2GB or above) into the Kria KV260 board.
- Connect the Kria KV260 board with a monitor screen using HDMI cable.
- Power up the Kria KV260 board and follow the steps for loading the on-board Xilinx Image Recovery Tool.
- Upload the desired binary file (e.g. Infinite-ISP_v1.1-AR1335-1080p.bin) provided in the release on the Kria KV260 AI Starter Kit.
- Reset the Kria KV260 board and visualize the Infinite-ISP output on your monitor screen.
- Connect the USB cable with the JTAG/USB port on Kria to read the messages over serial interface (baud rate 115200).
- RAW-ISPout image pair and Burst Capture frames dump in SD Card status will be displayed over serial interface:
- Once SD Card dumps are complete, you can remove the SD card from the Kria board.
- Extract the dumped single RAW-ISPout pair and Burst Capture frames from the SD card and visualize them using provided scripts.
- Connect OV5647 image sensor module to the RPi port on Kria KV260 AI Starter Kit.
- Insert SD Card (2GB or above) into the Kria KV260 board.
- Connect the Kria KV260 board with a monitor screen using HDMI cable.
- Power up the Kria KV260 board and follow the steps for loading the on-board Xilinx Image Recovery Tool.
- Upload the desired binary file (e.g. Infinite-ISP_v1.1-OV5647-1080p.bin) provided in the release on the Kria KV260 AI Starter Kit.
- Reset the Kria KV260 board and visualize the Infinite-ISP output on your monitor screen.
- Connect the USB cable with the JTAG/USB port on Kria to read the messages over serial interface (baud rate 115200).
- RAW-ISPout image pair and Burst Capture frames dump in SD Card status will be displayed over serial interface:
- Once SD Card dumps are complete, you can remove the SD card from the Kria board.
- Extract the dumped single RAW-ISPout pair and Burst Capture frames from the SD card and visualize them using provided scripts.
- Connect the AR1335 IAS image sensor module (included in Xilinx Kria KV260 Accessory Pack) to the IAS1 port on the Kria KV260 AI Starter Kit.
- Insert an SD Card (2GB or above) into the Kria KV260 board.
- Connect the Kria KV260 board with a monitor screen using an HDMI cable.
- Power up the Kria KV260 board and follow the steps for loading the on-board Xilinx Image Recovery Tool.
- Upload the desired binary file (e.g. 'Infinite-ISP_v1.0-1080p.bin') on the Kria KV260 AI Starter Kit.
- Reset the Kria KV260 board and visualize the Infinite-ISP output on your monitor screen.
- Connect the USB cable with the JTAG/USB port on Kria to read the messages over serial interface (baud rate 115200).
- You can remove the SD card from the Kria board, extract the dumped single RGB-RAW pair and 300 RGB frames (if applicable), and visualize them using the provided scripts.
| Name | Description |
|---|---|
| sensor_bin_to_sensor_raw.py | converts the image sensor memory dump (.bin) data from the FPGA Platform to Bayer RAW frame (.raw) containing valid pixel data. |
| isp_output_bin_to_isp_output_png.py | converts the ISP output memory dump (.bin) data from the FPGA Platform to output image frame (.png) as well as output pixel data frame (.bin) for verification. |
| sensor_bin_to_sensor_raw_burst_capture.py | converts the image sensor memory dumps (.bin) of RAW Burst Capture from the FPGA Platform to Bayer RAW frames (.raw) containing valid pixel data. It also converts the Bayer RAW frames to equivalent grayscale .png for visualization. |
| video_creation.py | converts multiple ISP output memory dumps (.bin) from the FPGA Platform to corresponding output image frames (.png) and stitches them together into a .mp4 video. |
This project is licensed under Apache 2.0 (see LICENSE file).
For any inquiries or feedback, feel free to reach out.
Email: [email protected]
Website: http://www.10xengineers.ai

