PdArray is a plugin for the VCV Rack virtual modular
synthesizer that allows creating custom envelopes, much like the array object
in Pure Data. You can enter values into the array
either by manually drawing, recording an input, or loading a sample. A CV input
controls the position of a cursor for reading out the array values. There are
two outputs: one will output the stepped values of the array directly (useful
for e.g. sequencing), and the other will output smooth interpolated values,
using the same interpolation algorithm as the tabread4~ object in Pd.
PdArray can be used as an envelope generator, sequencer, sample player, waveshaper or in a number of other weird and interesting ways.
The plugin also contains two small companion modules called Miniramp and Ministep. Miniramp can be used to to easily record or read out the array sequentially, while Ministep helps with stepping through the array using a clock, like a traditional sequencer.
Array is the main module of the PdArray plugin. This is its interface:
On the top row, you will find one input and two outputs. The POS input takes a CV (or audio) signal which determines which value from the array to read, or play back. The value at this position will then be output to OUT STEP and OUT SMTH. The OUT STEP output contains the array values directly, while OUT SMTH will output smoothed (interpolated) values.
The POS input supports polyphony. When a polyphonic cable is inserted into POS, each voltage in the input will have its own cursor, and the OUT STEP and OUT SMTH outputs will output polyphonic signals at each of the cursors.
The POS RANGE switch can be used to select the expected range of the POS input; use +10V for e.g. unipolar LFO's and Miniramp, +-5V for bipolar LFO's and audio signals. Similarly, the I/O RANGE switch selects the range of values that you wish to record and what the outputs will have. Setting the switch to +10V means that the top edge of the visual representation of the array corresponds to +10V and the bottom edge to 0V, while for +-5 and +-10 the top and bottom edges of the array are plus and minus 5 or 10 volts, respectively, and the middle corresponds to 0V.
The SIZE screen displays the current number of elements in the array. You can click on the screen to type a value up to 999999. If the array has more elements than there are pixels on the display, drawing will affect multiple array values at once.
By default, the array values are saved along with the patch file. If the array has less than 5000 elements, the array data is serialized directly as a JSON array. Otherwise, the array is saved as a wav file in the patch storage folder. To reduce disk space, it is also possible to save only the path to a loaded wav file, or to not save the array data at all, in which case only the array SIZE is saved in the patch. This behavior can be changed from the "Data persistence" right-click menu.
The bottom row contains CV inputs related to recording. The REC POS dictates the position in the array where a recorded value will be written. Its expected values are set using POS RANGE, just as for the playback POS. Input the signal or values you want to record to the REC IN input, and click and hold the REC LED or send a gate voltage to the REC input to record. Only monophonic recording is supported.
Right-clicking on the module will open up some additional options, like initializing or sorting the array, loading an audio file and setting the interpolation mode.
If the Array module is bypassed, the signal that is being sent to REC IN is directly output to both OUT STEP and OUT SMTH.
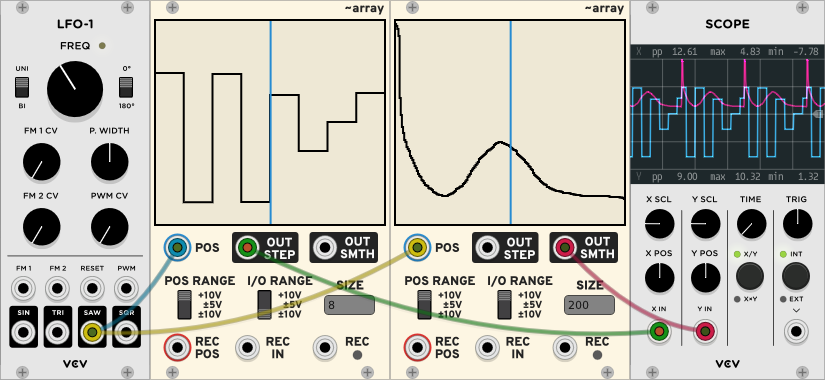
The most basic usage of PdArray is to just draw a sequence of values or an envelope with your mouse. Increase the SIZE to get a smoother array, although you can get reasonably smooth envelopes even with a small SIZE if you use the OUT SMTH output.
Input a ramp or LFO signal to REC POS, send audio or CV (or anything really) to REC IN, send a high gate to the REC input or click on the LED, and watch how the input signal gets imprinted to the array in real time.
By right-clicking on the module, you can switch between gate and toggle modes for recording. In gate mode, the input is recorded while the REC input is high (or you hold down the LED), while in toggle mode, recording is toggled on or off by a trigger to the REC input or when clicking the LED, as the name suggests.
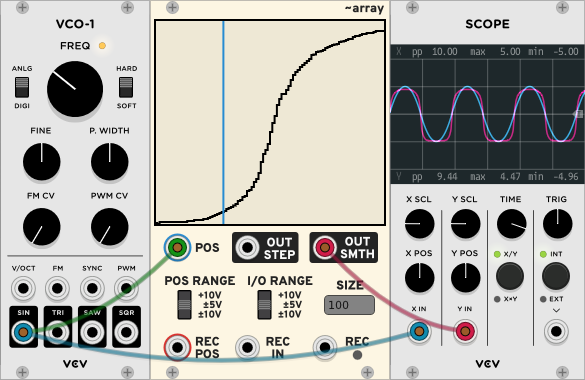
PdArray can be easily used as a waveshaper by either drawing or recording a waveshaper curve, and then sending an audio signal to the POS CV input, with a POS RANGE of +-5V for typical audio signals. You can even re-record the curve while the audio is playing for interesting effects!
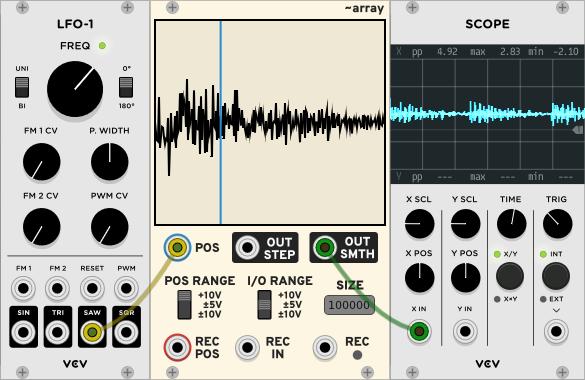
By right-clicking on the Array module, you can load a wav sample file. You can choose to keep the current SIZE of the array when loading the file, or you can automatically resize the array to the number of samples in the wav file, up to the maximum of 999999 samples. In the non-resizing version, the number in the right-click menu shows the duration of the loaded sample at the current sample rate. After selecting a file, the array will contain the first N samples of the audio file, where N is the array size shown in the SIZE display. If N is larger than the number of samples in the wav file, the rest of the array will be left unchanged.
The audio file will always be loaded from the beginning, so you will need to trim your file with an external audio editing application if you wish to load it starting from another position.
Playing back a sample works the same way as reading the array in general: input a voltage to POS and connect the outputs to wherever.
After loading a sample, drawing will be automatically locked to prevent accidentally modifying the sample, but it can be unlocked from the right-click menu.
If you want to automatically load the audio file the next time you open the patch, you can set "Data persistence" to "Save path to loaded sample".
The Array module gives you a lot of freedom in the way you can play back samples, but this comes with some downsides. If the sample you are using doesn't start or end at a zero crossing, you may hear a click during playback.
There are a couple of ways to deal with this. A simple trick is to click the Array REC button once with the REC POS and REC IN ports disconnected. This way, the first sample in the array will be set to zero. A slightly better method is to use the "Add fade in/out to prevent clicks" option in the right-click menu of Array, which creates short fades at the array start and end (the length is indicated in the right-click menu as a number of samples, or data points, in the array). This should work well for most samples, but note that if you're not using the "save full array data to patch" setting, this will not be saved the next time you open the patch. Lastly, if you're playing back the samples using Miniramp (see below), you can also try changing the "ramp value when finished" setting from the right-click menu.
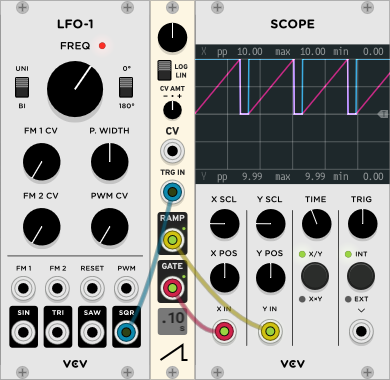
Miniramp is a small envelope generator that outputs a linear ramp from 0 to 10V in a certain time. The duration of the ramp is shown on the bottom. The large knob controls the base duration, either with linear or logarithmic scaling as selected by the LIN/LOG switch. You can control the ramp duration / speed with the CV input and CV amount knob. When you send a trigger to TRG IN, RAMP will output the ramp, and the GATE output will output 10V while the ramp is in progress, useful for e.g. the REC input of Array.
You can right-click on Miniramp to control how it behaves after the ramp has finished. By default, the output value will reset to 0V, but if the 10V option is selected, the output value will remain at 10V. This may help preventing clicks if you're using Miniramp for playing back samples using Array.
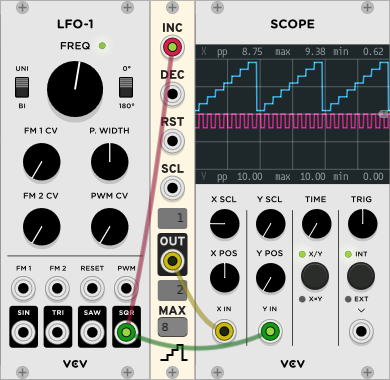
Ministep is a counter that can be used to step through an Array, like a sequencer. The current value of the counter is shown on the middle display. Sending a trigger to INC increments the counter, while a trigger to DEC decrements it. The RST input resets the counter to 1. You can click on the MAX display to change the maximum number of steps, up to 999.
The SCL CV input controls how much the counter increments/decrements on each step. The step size is shown on the top display. When no cable is connected, the step size is 1, but note that connecting a 0V signal sets the step size to zero (you can also input negative values!). By default, setting SCL to 10 volts makes the step size equal to MAX, but the behavior can be changed to make one volt correspond to one step from the "scale mode" right-click menu. The step size is always rounded towards zero.
By default, the output will be 10V divided into N steps, where N is the maximum number. This way, it is easy to use with an Array whose SIZE is set equal to N. However, from the "output mode" right-click menu, you can also configure Ministep to output the step number directly as a voltage. In this mode, step 1 outputs 0V, step 2 outputs 1V and so on.
For polyphonic signals, there will be one counter per channel. Sending a monophonic trigger to the reset input resets all channels, while a polyphonic trigger can be used to reset individual channels. Similarly, a monophonic CV connected to SCL scales the step size of all channels, while a polyphonic signal affects each channel separately.
By detecting the falling edge of the output or applying a threshold to the output value near zero, you can use Ministep as a clock divider! Fiddling with SCL can also lead to interesting results. A step size that has few divisors can be used to generate somewhat random voltages, or triggering the increment at audio rate and adjusting the step size can create interesting harmonics.
If you have suggestions or feedback or find a bug or whatever, feel free to open an issue or a pull request in this repository!
Building the modules follows the standard procedure:
export RACK_DIR=/path/to/Rack_SDK/
make install
The source code and panel artwork are copyright 2021 Márton Gunyhó. Licensed under the EUPL (see LICENSE). This repo also contains the fonts used for creating the panels: Overpass is licensed under the Open Font License (see here) and Roboto is licensed under the Apache 2 License (see here).


