| title | description | services | documentationcenter | author | manager | editor | ms.assetid | ms.service | ms.workload | ms.tgt_pltfrm | ms.devlang | ms.topic | ms.date | ms.author |
|---|---|---|---|---|---|---|---|---|---|---|---|---|---|---|
Get started with Azure Scheduler in Azure portal | Microsoft Docs |
Get started with Azure Scheduler in Azure portal |
scheduler |
.NET |
derek1ee |
kevinlam1 |
e69542ec-d10f-4f17-9b7a-2ee441ee7d68 |
scheduler |
infrastructure-services |
na |
dotnet |
hero-article |
08/10/2016 |
deli |
It's easy to create scheduled jobs in Azure Scheduler. In this tutorial, you'll learn how to create a job. You'll also learn Scheduler's monitoring and management capabilities.
-
Sign in to Azure portal.
-
Click +New > type Scheduler in the search box > select Scheduler in results > click Create.

-
Let’s create a job that simply hits http://www.microsoft.com/ with a GET request. In the Scheduler Job screen, enter the following information:
- Name:
getmicrosoft - Subscription: Your Azure subscription
- Job Collection: Select an existing job collection, or click Create New > enter a name.
- Name:
-
Next, in Action Settings, define the following values:
-
Action Type:
HTTP -
Method:
GET -
URL:
http://www.microsoft.com
-
-
Finally, let's define a schedule. The job could be defined as a one-time job, but let’s pick a recurrence schedule:
-
Recurrence:
Recurring -
Start: Today's date
-
Recur every:
12 Hours -
End by: Two days from today's date

-
-
Click Create


Once a job is created, it appears in the main Azure dashboard. Click the job and a new window opens with the following tabs:
-
Properties
-
Action Settings
-
Schedule
-
History
-
Users


These read-only properties describe the management metadata for the Scheduler job.

Clicking on a job in the Jobs screen allows you to configure that job. This lets you configure advanced settings, if you didn't configure them in the quick-create wizard.
For all action types, you may change the retry policy and the error action.
For HTTP and HTTPS job action types, you may change the method to any allowed HTTP verb. You may also add, delete, or change the headers and basic authentication information.
For storage queue action types, you may change the storage account, queue name, SAS token, and body.
For service bus action types, you may change the namespace, topic/queue path, authentication settings, transport type, message properties, and message body.

This lets you reconfigure the schedule, if you'd like to change the schedule you created in the quick-create wizard.
This is an opportunity to build complex schedules and advanced recurrence in your job
You may change the start date and time, recurrence schedule, and the end date and time (if the job is recurring.)

The History tab displays selected metrics for every job execution in the system for the selected job. These metrics provide real-time values regarding the health of your Scheduler:
-
Status
-
Details
-
Retry attempts
-
Occurrence: 1st, 2nd, 3rd, etc.
-
Start time of execution
-
End time of execution
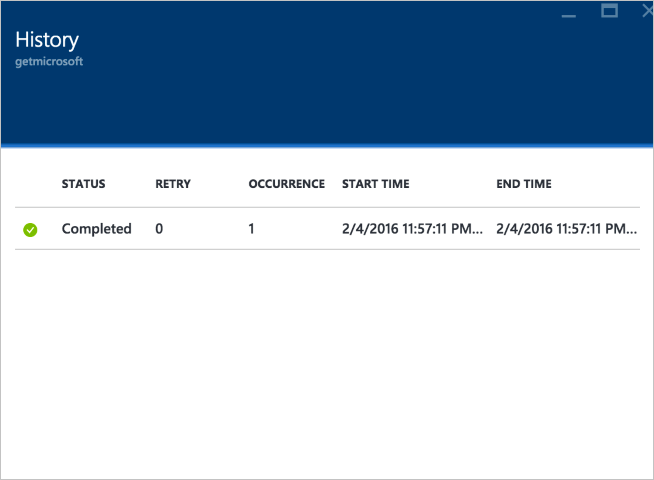

You can click on a run to view its History Details, including the whole response for every execution. This dialog box also allows you to copy the response to the clipboard.

Azure Role-Based Access Control (RBAC) enables fine-grained access management for Azure Scheduler. To learn how to use the Users tab, refer to Azure Role-Based Access Control
Scheduler concepts, terminology, and entity hierarchy
Plans and billing in Azure Scheduler
How to build complex schedules and advanced recurrence with Azure Scheduler
Scheduler PowerShell cmdlets reference
Scheduler high-availability and reliability