Similar to GitBook, you can deploy files to GitHub Pages, GitLab Pages or VPS.
There're three places to populate your docs for your Github repository:
docs/folder- master branch
- gh-pages branch
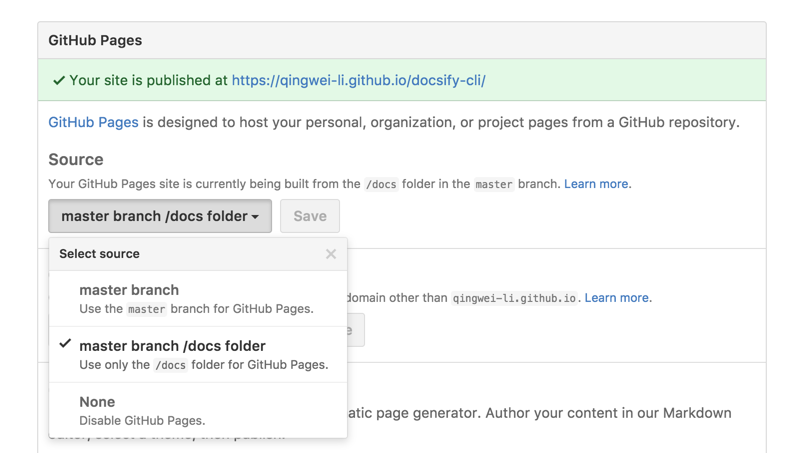
It is recommended that you save your files to the ./docs subfolder of the master branch of your repository. Then select master branch /docs folder as your Github Pages source in your repositories' settings page.
!> You can also save files in the root directory and select master branch.
You'll need to place a .nojekyll file in the deploy location (such as /docs or the gh-pages branch)
If you are deploying your master branch, include .gitlab-ci.yml with the following script:
?> The .public workaround is so cp doesn't also copy public/ to itself in an infinite loop.
pages:
  stage: deploy
  script:
  - mkdir .public
  - cp -r * .public
  - mv .public public
  artifacts:
    paths:
    - public
  only:
  - master
!> You can replace script with - cp -r docs/. public, if ./docs is your Docsify subfolder.
!> You'll need to install the Firebase CLI using npm i -g firebase-tools after signing into the Firebase Console using a Google Account.
Using Terminal determine and navigate to the directory for your Firebase Project - this could be ~/Projects/Docs etc. From there, run firebase init, choosing Hosting from the menu (use space to select, arrow keys to change options and enter to confirm). Follow the setup instructions.
You should have your firebase.json file looking similar to this (I changed the deployment directory from public to site):
{
  "hosting": {
    "public": "site",
    "ignore": ["firebase.json", "**/.*", "**/node_modules/**"]
  }
}
Once finished, build the starting template by running docsify init ./site (replacing site with the deployment directory you determined when running firebase init - public by default). Add/edit the documentation, then run firebase deploy from the base project directory.
Try following nginx config.
server {
  listen 80;
  server_name  your.domain.com;

  location / {
    alias /path/to/dir/of/docs/;
    index index.html;
  }
}- Login to your Netlify account.
- In the dashboard page, click New site from Git.
- Choose a repository where you store your docs, leave the Build Command area blank, fill in the Publish directory area with the directory of your
index.html, for example it should be docs if you populated it atdocs/index.html.
When using the HTML5 router, you need to set up redirect rules that redirect all requests to your index.html, it's pretty simple when you're using Netlify, populate a \redirects file in the docs directory and you're all set:
/* /index.html 200- Set the routerMode in the Docsify project
index.htmlto history mode.
<script>
    window.$docsify = {
      loadSidebar: true,
      routerMode: 'history'
    }
</script>- Login to your AWS Console.
- Go to the AWS Amplify Dashboard.
- Choose the Deploy route to setup your project.
- When prompted, keep the build settings empty if you're serving your docs within the root directory. If you're serving your docs from a different directory, customise your amplify.yml
version: 0.1
frontend:
  phases:
    build:
      commands:
        - echo "Nothing to build"
  artifacts:
    baseDirectory: /docs
    files:
      - '**/*'
  cache:
    paths: []
- Add the following Redirect rules in their displayed order.
| Source address | Target address | Type |
|---|---|---|
| /<*>.md | /<*>.md | 200 (Rewrite) |
| /<*> | /index.html | 200 (Rewrite) |
