- Setting up Miunie - Explains how to get a development version ready.
- First time contributing - Free course walking you through your first contribution.
- Discord Server - Always someone ready to help on our Discord Server.
- DSharpPlus Docs - Documentation for the library we're using.
These instructions cover how to get a copy of the project running on your local machine for development and testing purposes.
You can find all prerequisites in the prerequisites section of the main readme file.
This is a step by step guide to get Miunie up and running on your machine.
- Fork The Original Repository
- Navigate to your fork.
- Clone your fork to your local machine.
Depending on what front-end you want to use, it is possible that you will have to select the project as a "StartUp project".
You can do that by right clicking the project in Visual Studio and selecting the "Set as StartUp project" option.
- The root directory of the project contains
Miunie.sln, this is a solution file and you can open it with Visual Studio (See Prerequisites) - Once Visual Studio is open, you should try to build the solution.
- You can do so by using the shortcut
F6or going toBuild>Build Solution.
- You can do so by using the shortcut
- If the build fails due to some kind of error, make sure to fix it before continuing with this guide.
If you cannot figure out the cause of an error, feel free to contact us on our Discord server:

- Open Visual Studio Code
- Open the project's
srcfolder (the one withMiunie.slnin it) in Visual Studio Code. - To build the application, open the Integrated Terminal and type
dotnet build. - You should see the build succeeded with no errors.
- Open Rider IDE and on the "Welcome to JetBrains Rider" screen select the "Open Solution or Project" option.

-
Navigate to your cloned Directory and select the
Miunie.slnfile. -
To build the project, navigate to
Build>Build Solutionor press Ctrl + Shift + B
To run the unit tests already inclduded in the project follow the directions that are relevent to you.
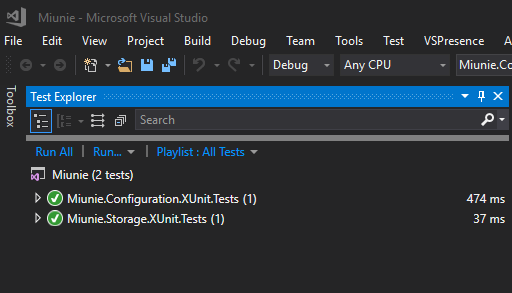
- Visual Studio IDE
- Either use the shortcut CTRL + R, A or go to
Test>Run>All Tests - Test output Example:
- Either use the shortcut CTRL + R, A or go to
ℹ️ You can
Restore>Build>Testvia the CLI as shown below in Visual Studio Code setup.
- Visual Studio Code
- Open your terminal application and navigate into the project's
srcdirectory. dotnet test [Name of any .Tests directory]- This runs the unit tests for specific modules. You should see a completed output stating that all tests passed.
- Open your terminal application and navigate into the project's

- Rider IDE
- To run the Project's unit tests, navigate to
Tests>Run Unit Tests. - You should see the test results in a "Unit Tests" window:
- To run the Project's unit tests, navigate to


Forking is a way of collecting all of the code and other good stuff we have in this repository and making a new repository off of it that is just yours to play with.
You are fully in charge of your fork and don't need to worry about making any changes you have in mind.
-
To fork Miunie, you will need a GitHub account.
-
Once you are logged in, just click the "Fork" button near the top of the page:

Once you have forked the repository, you can view it on your profile page under "Repositories".
If you're not sure whether you're looking at a fork or at the original, look near the top of the page where the name of the repository is.
You can be sure you're looking at your fork if there is your name in front of / Miunie and if it has a little "Forked from..." message underneath it.

After your fork is ready, you are free to clone it to your local machine.

What happens when the original repository gets updated with some sweet features you'd like in your own fork? (this can also be done to avoid merge conflicts)
You can in fact get your fork up-to-date with the original repository. For that, you will need to have it cloned to your local machine.
You can do it by using the command line. You will have to navigate to your cloned repository using following command:
cd <filePath>
First thing to do is checking if you have a remote reference to the upstream (=original repository). This is done by executing:
git remote -v
This will output a list of remote locations your repository is connected to.
If you only see entries starting with origin, you do not have an upstream link and will need to create it.
- Setting up an upstream remote
To setup an upstream remote run the following command in your cloned repo:
git remote add origin https://github.com/discord-bot-tutorial/Miunie.git
You can verify if the origin has been added by running git remote -v command once again.
- Updating your fork
Once you have the upstream remote setup, you can fetch and merge it with:
git fetch upstream
and
git merge upstream/master
This will update your local clone with the upstream changes. Now you just need to push these changes to your fork with
git push
and you're all set!

Once your fork is head of the upstream (original repository), you have an option to create a pull request (request for your changes to be merge into the main repository).
To create a pull request, you have to open your forked repository on GitHub. You should see a Pull request button right above the list of files.

Once you select to create the Pull request, GitHub will show you what changes you've made, if everything looks alright, click on "Create pull request".
After that, you will see a form with a pull request template. Try to fill the description as best as you can, describe what changes you've made.
Once you confirm your pull request, you just need to wait for the automated tests to finish and to get your changes reviewed by a staff member.
With Miunie, a pull request must pass all Unit Tests and get a code review by a staff member. Once you create it, however, don't worry, we will check it as soon as possible.
NOTE: While we do ask that you add Unit Tests it is not a requirement. If you're not sure how to do them yourself then simply say so in the pull request.
😊 We all make mistakes, so don't worry about it. After all, it's a learning experience. If you have any questions, feel free to ask on our Discord Server or in the appropriate comment section. Nobody is here to mock anyone and we appreciate any contribution no matter how small.
Unit test are required on everything except Miunie.Discord. Ideally you would follow TDD (Test Driven Development). However like metioned above, if you're not sure how to add Unit Tests. Just make sure you add a note in your PR that states you're not sure. This will allow others to either help you out in adding them or they can add the tests for you.
Here are some tips to help you understand our style before you contribute your first changes.
- Write your commit message in the present tense - "Add file" not "Added file"
- Provide detailed descriptions of what you did.
To report a 🐛 bug, create a new Issue and try to describe it as much as possible. Here are some tips:
- Write a guide to reproducing the problem if possible
- Add some information about your system, such as OS, CPU, GPU, etc.
- You can also follow a cool template, like this one.
And if you can fix the bug as well, that would be super stellar! 💞
To make sure we all understand each other's code, we have a unified standard to follow.
This means, if you can add a body to an if, else, foreach or any other statement that can have a body { } you should do it.
- if(foo is null) return;
+ if(foo is null) { return; }- All comments should follow the following template.
Below is am example of how to correctly comment a note. Note how you should include your name when quoting.
// NOTE (Peter) : Something happens hereBelow is an example for a TODO comment. Note how it follows the same idea as the Notes template. Please remember to keep TODO comments as short and to the point as possible.
// TODO (Peter): Your Todo HereThe standard is derived from JetBrain's Resharper default settings. ReSharper is a Visual Studio extension that helps you with styling, debugging and IntelliSense. If you follow its advice, you will conform to our style.
Feel free to check out MSDN Coding Conventions. We, however, recommend you look through the project to better understand the style we use. Don't worry, nobody will reject your contribution because of a line-break.