Overeasy allows you to chain zero-shot vision models to create custom end-to-end pipelines for tasks like:
- 📦 Bounding Box Detection
- 🏷️ Classification
- 🖌️ Segmentation (Coming Soon!)
All of this can be achieved without needing to collect and annotate large training datasets.
Overeasy makes it simple to combine pre-trained zero-shot models to build powerful custom computer vision solutions.
It's as easy as
pip install overeasyFor installing extras refer to our Docs.
🤖 Agents: Specialized tools that perform specific image processing tasks.🧩 Workflows: Define a sequence of Agents to process images in a structured manner.🔗 Execution Graphs: Manage and visualize the image processing pipeline.🔎 Detections: Represent bounding boxes, segmentation, and classifications.
For more details on types, library structure, and available models please refer to our Docs.
Note: If you don't have a local GPU, you can run our examples by making a copy of this Colab notebook.
Download example image
!wget https://github.com/overeasy-sh/overeasy/blob/73adbaeba51f532a7023243266da826ed1ced6ec/examples/construction.jpg?raw=true -O construction.jpgExample workflow to identify if a person is wearing a PPE on a work site:
from overeasy import *
from overeasy.models import OwlV2
from PIL import Image

workflow = Workflow([
    # Detect each head in the input image
    BoundingBoxSelectAgent(classes=["person's head"], model=OwlV2()),
    # Applies Non-Maximum Suppression to remove overlapping bounding boxes
    NMSAgent(iou_threshold=0.5, score_threshold=0),
    # Splits the input image into images of each detected head
    SplitAgent(),
    # Classifies the split images using CLIP
    ClassificationAgent(classes=["hard hat", "no hard hat"]),
    # Maps the returned class names
    ClassMapAgent({"hard hat": "has ppe", "no hard hat": "no ppe"}),
    # Combines results back into a BoundingBox Detection
    JoinAgent()
])

image = Image.open("./construction.jpg")
result, graph = workflow.execute(image)
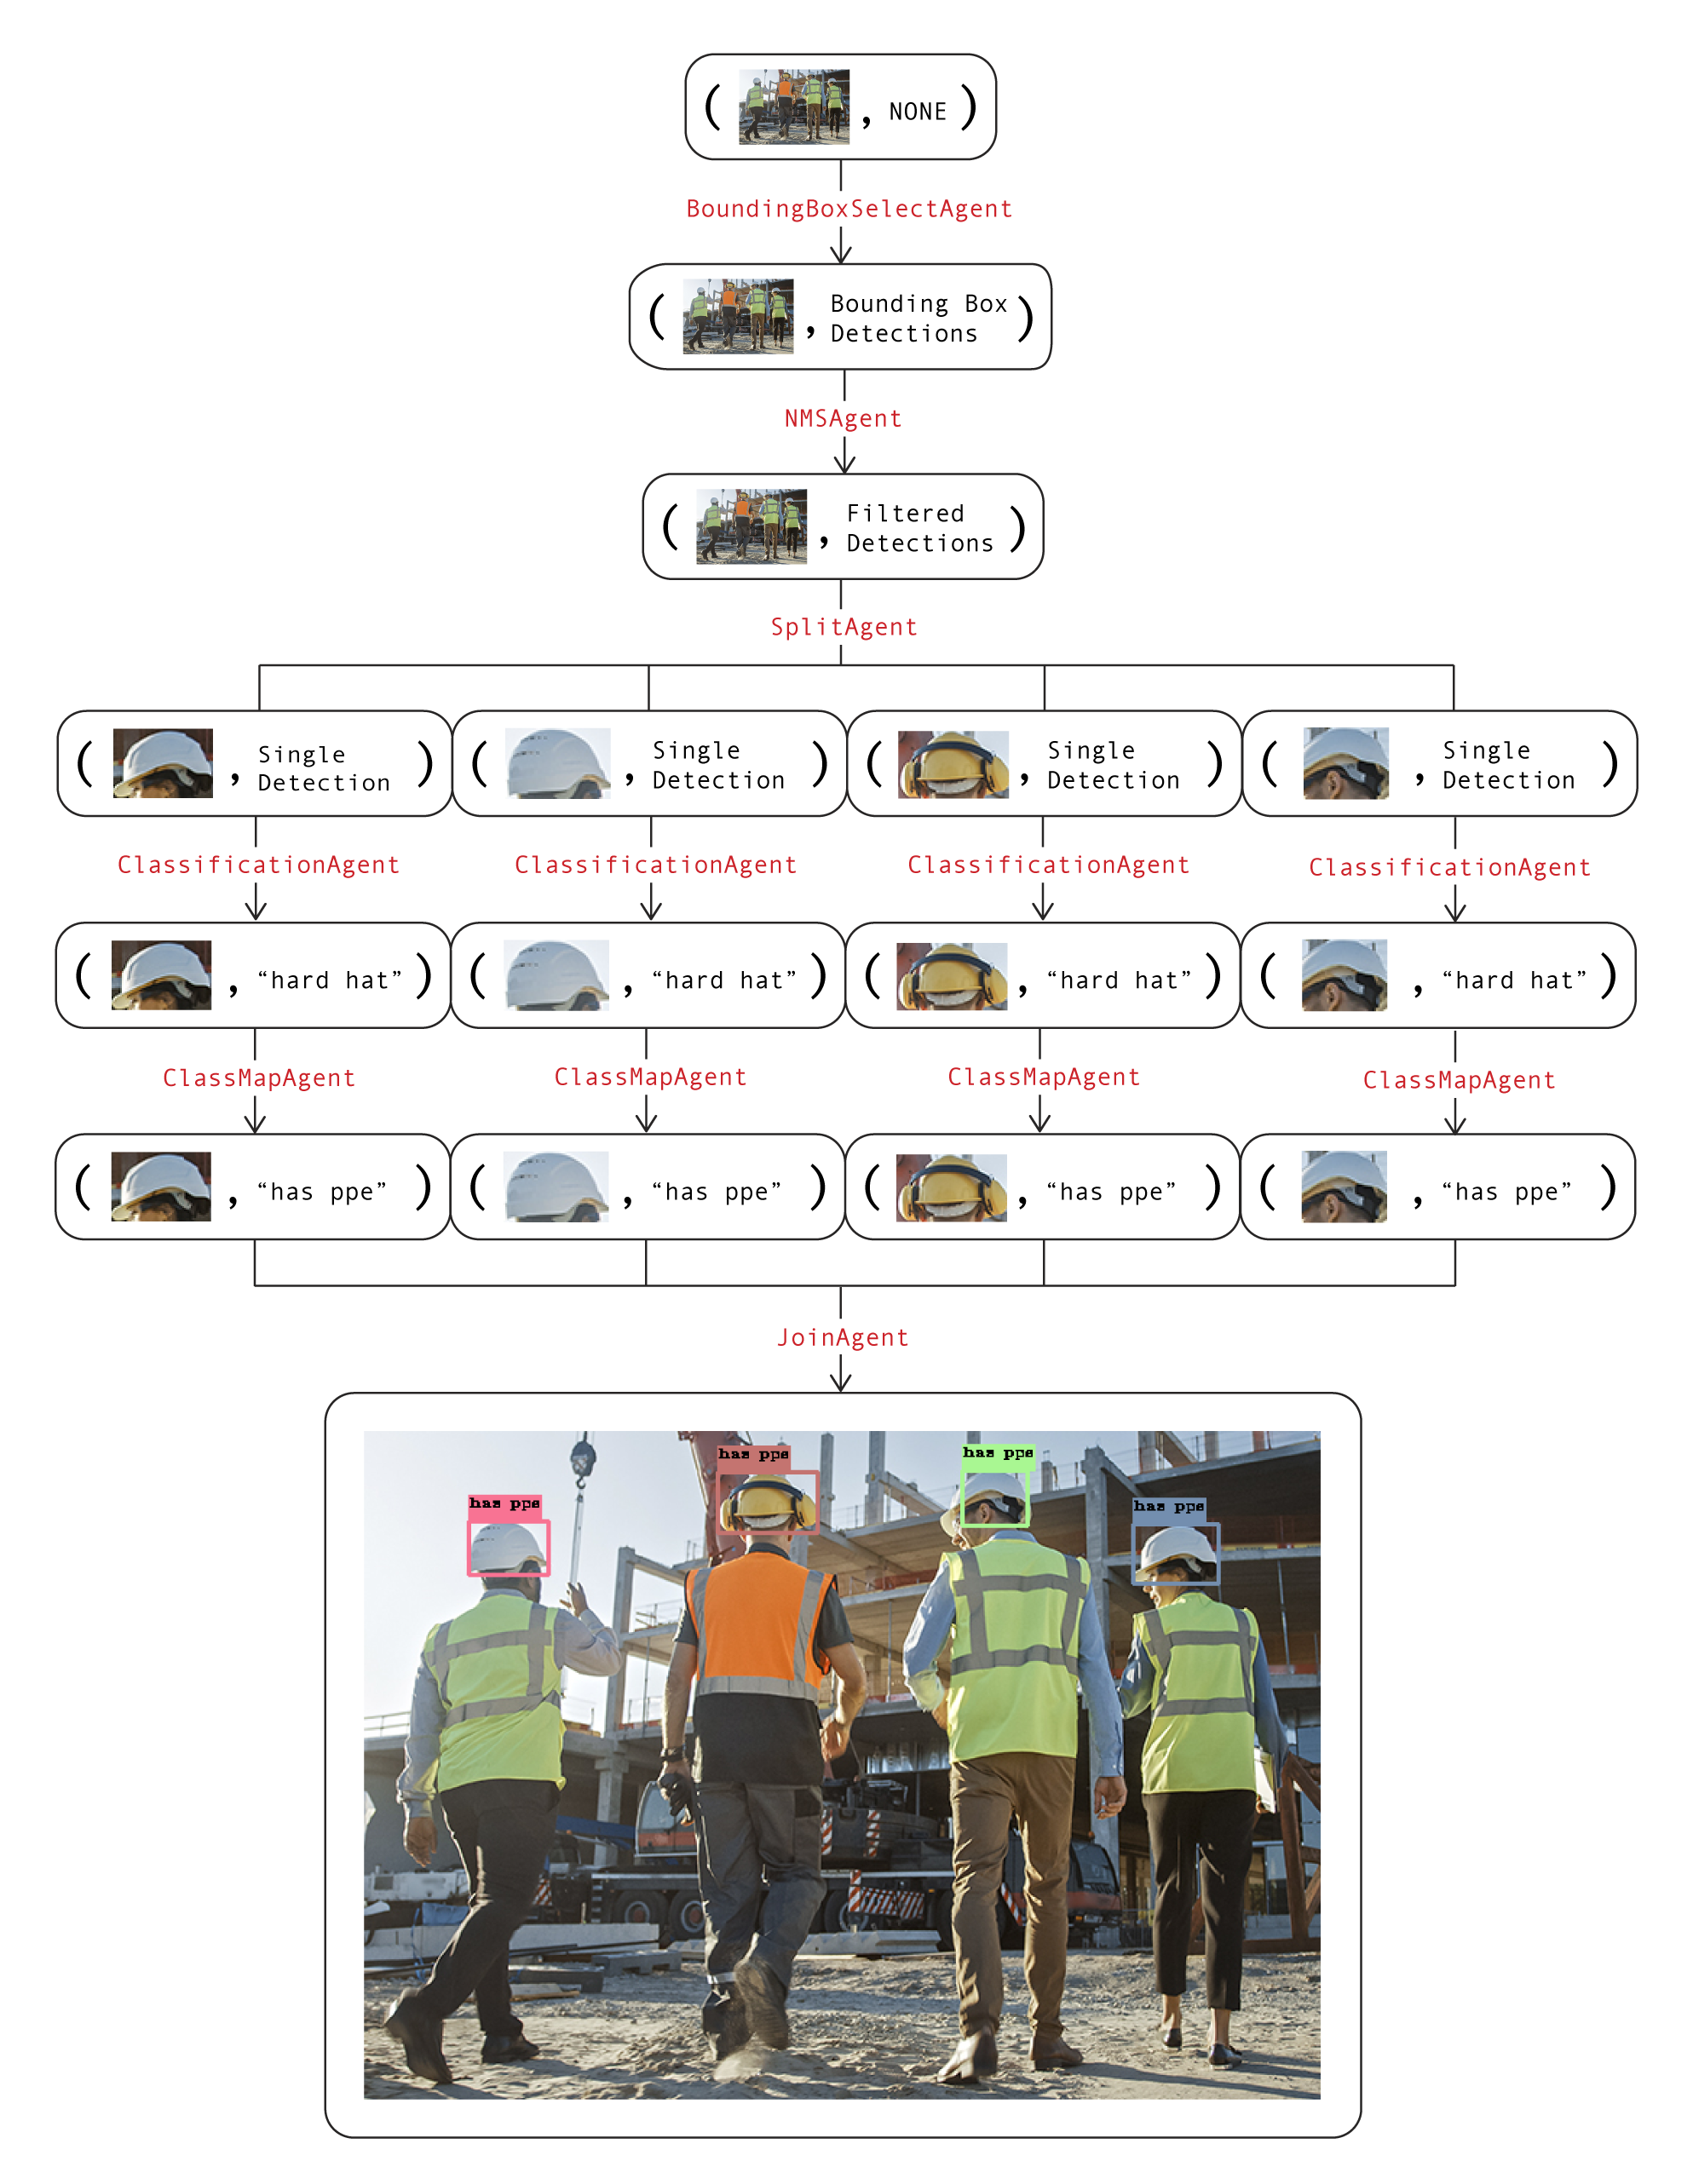
workflow.visualize(graph)Here's a diagram of this workflow. Each layer in the graph represents a step in the workflow:

The image and data attributes in each node are used together to visualize the current state of the workflow. Calling the visualize function on the workflow will spawn a Gradio instance that looks like this.
If you have any questions or need assistance, please open an issue or reach out to us at [email protected].
Let's build amazing vision models together 🍳!


