Alternative to the official AKAI MPKMini MkII Editor
MPK M2-editor
Copyright (C) 2017 Damien Picard dam.pic AT free.fr
This program is free software: you can redistribute it and/or modify it under the terms of the GNU General Public License as published by the Free Software Foundation, either version 3 of the License, or (at your option) any later version.
This program is distributed in the hope that it will be useful, but WITHOUT ANY WARRANTY; without even the implied warranty of MERCHANTABILITY or FITNESS FOR A PARTICULAR PURPOSE. See the GNU General Public License for more details.
You should have received a copy of the GNU General Public License along with this program. If not, see http://www.gnu.org/licenses/.
This programme is a replacement for the official Akai MPK Mini MkII Editor. Although less fancy, it is just as usable.
The programme is written in Python3 and relies on PyQt5 and python-rtmidi. It was tested on GNU/Linux, Mac OS X and Windows.
A good way would be to use pip for the dependencies.
  apt-get install build-essential python3-dev python3-pip libasound2-dev libjack-dev
  pip3 install -r requirements.txt
You can install Python and pip using homebrew. You may need a recent version of Mac OS X.
  brew install python3
  pip3 install -r requirements.txt
- Download and install
python3from the python website. Make sure you installpipas well in the installer wizard - Download and install Visual C++ build tools 2015
- In a command prompt, type:
pip3 install -r requirements.txt
Connect your controller, then start the editor with ./mpk_m2-editor.py
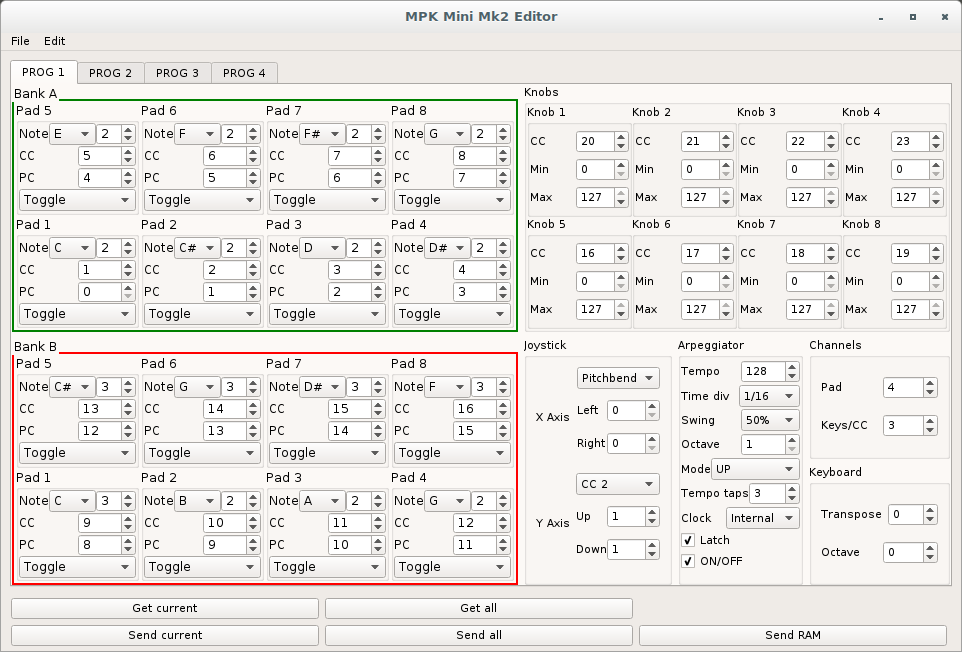
If you're familiar with the official editor, you should find it's similar, except that programmes are grouped in tabs at the top of the window. You can send an individual programme or all of them at once. Some fields have tooltips, don't hesitate to hover them.
You can use the scrollwheel to modify any value. If you use it with CTRL, the values will change by increments of 10.
The Send RAM button allows you to send the current controller configuration, without overriding any programme.
The joystick options work this way:
- First, select the basic behaviour: Pitchbend, CC1 or CC2.
- Pitchbend: you're done.
- CC1: The joystick sends a CC message on the canal specified in Left for the X Axis, Up for the Y axis.
- CC2: The joystick sends a CC message on the canals specified in Left OR Right for the X Axis, Up OR Down for the Y axis.
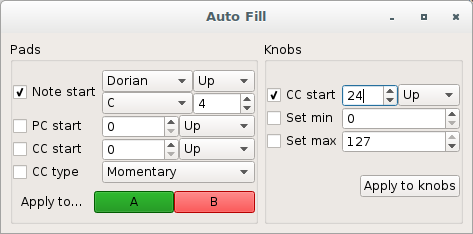
Click the menu Edit -> Auto fill... This dialog allows you to fill several fields at once. First tick the check boxes for the options you would like to have filled (eg. PC start). Fill the corresponding fields, and press the button corresponding to the options you'd like to fill (eg. A for Bank A). This will fill the options for the selected programme tab only.
This is a good starting point. If you would like to contribute, please do so!

