Triggered via Hotkey: Take an OCR Screenshot.
- Similar to the default Mac Hotkey
⌘ ⇧ + 4, you will be able to select part of your screen for a screenshot. However, instead of saving a screenshot, a new note will be created which contains the OCRed content of the selection. - For best results, you should set the languages to be recognized in the workflow settings, e.g.
eng+deufor English and German. You can find out the code for your language(s) in this list. - 💡 There are various settings in the workflow configurations for OCR-screenshots.
For the OCR-Screenshot Feature, you need to install Tesseract. If you use Homebrew, you can do so with the following two commands:
brew install tesseract
brew install tesseract-lang # for non-English languages
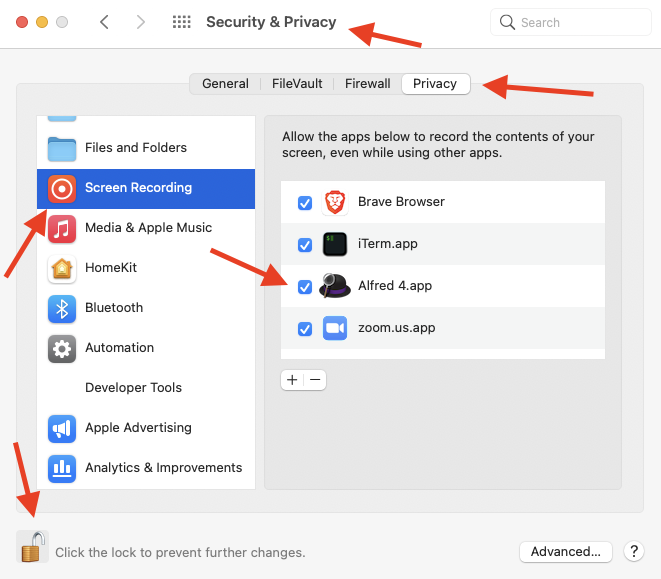
💡 The first time you use the OCR or image screenshot feature, you might need to give Alfred permission to record your screen. You can do so under the macOS system settings (see image below).
Triggered via Hotkey: Take an Image Screenshot.
- Similar to the default Mac Hotkey
⌘ ⇧ + 4, you will be able to select part of your screen for a screenshot. The image will be directly saved in your vault with the file nameScreenshot {date} {time}.pngand the image will be embedded (![[image_file_name.png]]) in the noteImages.mdin your vault root. - The images will be saved in
{vault-path}/screenshots/by default. You can use the workflow configuration to specify a folder in your vault where to save the images instead. - If the file
Images.mdalready exists in your vault root, any subsequent screenshots will instead append to this note. This is intended for taking screenshots in quick succession, e.g., during a live lecture or presentation. - 💡 There are various settings in the workflow configurations for screenshots.
At the top left of the workflow, there are some sky-blue fields. You need to double-click them to set the keyboard shortcuts you want to use for the respective commands.
💡 To stay in line with the other macOS keyboard shortcuts for taking screenshots, you can use something like ⌘⇧ + 1 as hotkey.


