| title | description | position | slug |
|---|---|---|---|
Setup Android Emulators |
How to create, set up and use AVDs (Android emulators). |
60 |
android-emulators |
Using Android emulator a.k.a. Android Virtual Device (AVD) eases the development process by providing an option to test mobile applications on various virtual devices. By default, the Android SDK does not provide an instance of an AVD, so in this article we are going to cover the process of creating and using one.
-
Open Android SDK Manager
It can be started from command prompt / shell with command
android -
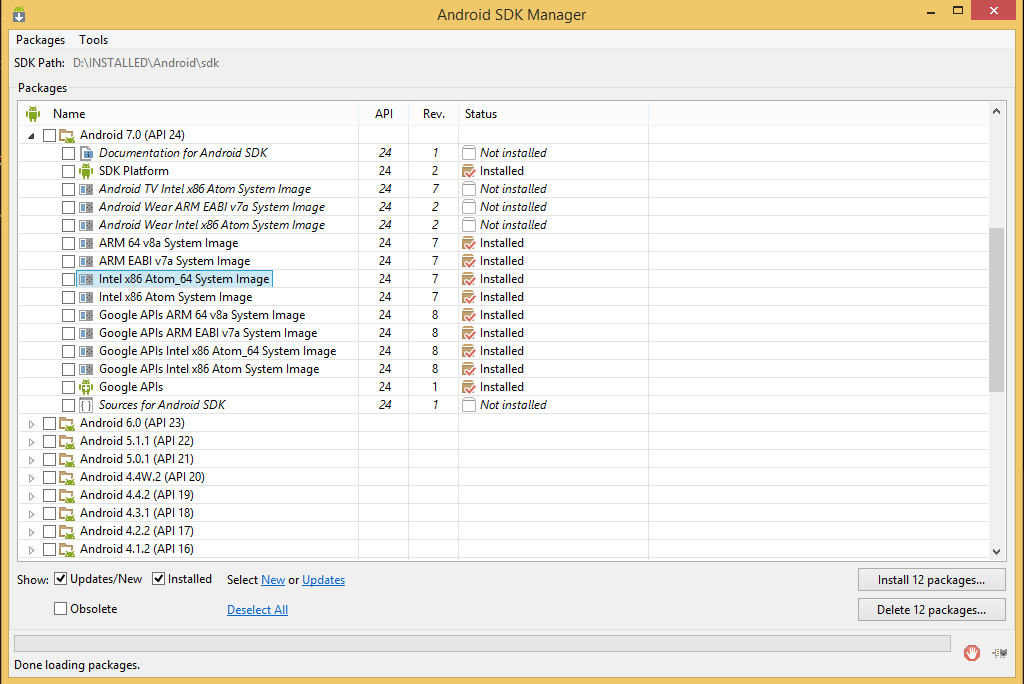
Make sure that the system images for the AVDs are installed.
The screenshow below shows the Android API 24 system images installed on the computer. If additional system images are needed (e.g. for different API level) select them and press Install Packages button at the bottom right corner.
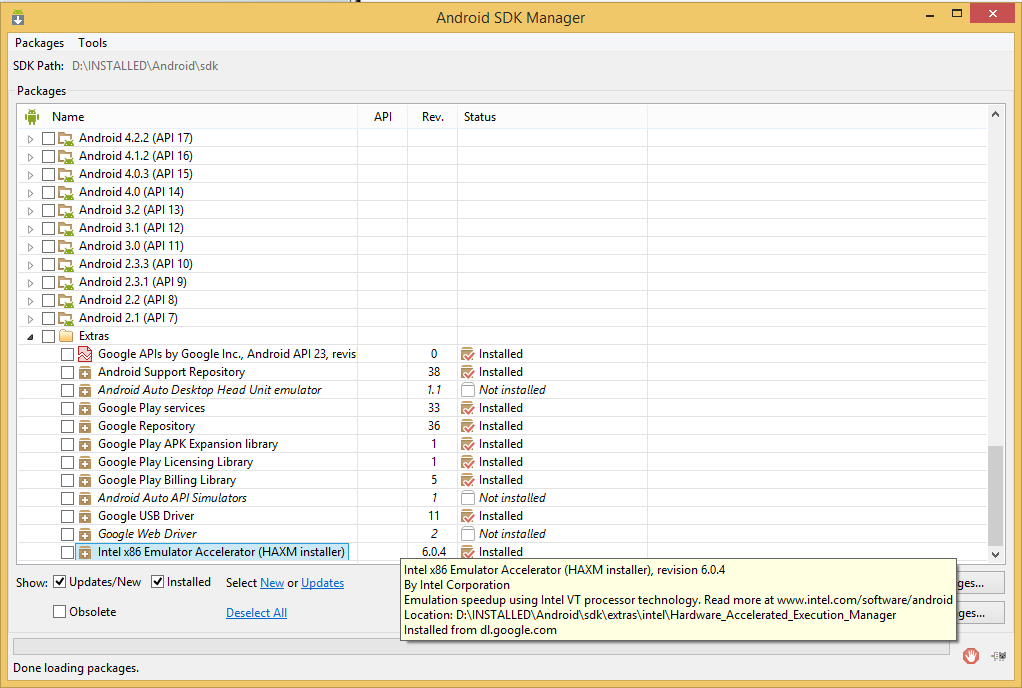
You can accelerate the virtual device using Virtualization Technology. For hardware with Intel CPUs this can be achieved with HAXM installer.
Once the SDK Manager downloads the HAXM installer, navigate to the source folder (usually in
<sdk_path>\extras\intel\Hardware_Accelerated_Execution_Manager\) and manually install Intel HAXM (intelhaxm-android.exe). For additional information on HAXM follow this linkNote: To Use HAXM make sure that the system image is of type Intel x86 Atom or Intel x86_x64 Atom
-
Go to Tools > Manage AVDs
This will load the Android Virtual Device Manager On the first tab called "Android Virtual Devices" you will see a list of your enabled AVDs. By default, with a fresh Android SDK installation, this list will be empty.
-
Press Create
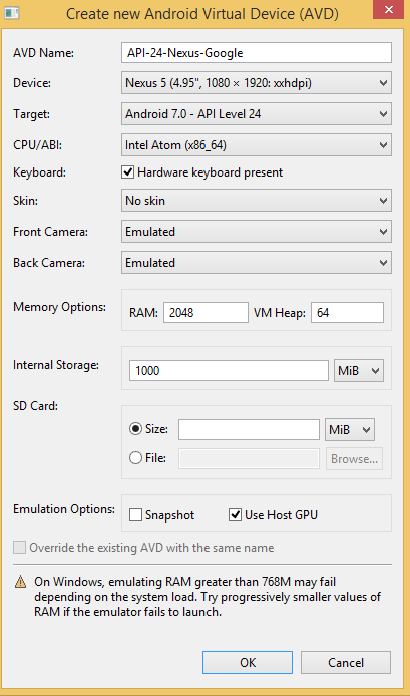
This step will load the AVD creation tool. Set the following parameters:
- AVD Name : The emulator name in "Android Virtual Devices"
- Device : Choose the hardware device to emulate (e.g. Nexus 5)
- Target : Choose the API Level (e.g. Android Nougat API Level 24)
- CPU/ABI : Choose the CPU architecture (e.g. Intel Atom x86_x64) for use with HAXM use Intel Atom images!
- Keyboard : Check "hardware keyboard present"
- Skin : Choose the skin type for the emulator
- Front & Back Camera : Enable/disable support for emulated or web cameras
- Memory Options : Recommended to leave this as set by default!
- Internal Storage : Default value 200MB - Increase this value to ensure that there is enough space for the applications that will be deployed later.
- Check "Use Host GPU" to improve performance if your GPU provides enough resources.
Once you have the AVD parameters set click "OK" then confirm all params and once again click "OK" and the emulator will be created.
-
Press Start
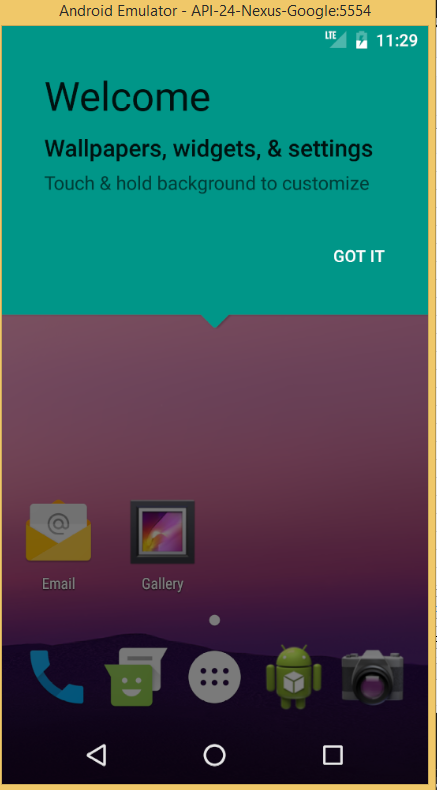
From "Android Virtual Devices" select the created emulator and press Start. An additional popup screen will give options to scale the emulator and to wipe previously used data. Once all is set press Launch.
Once the emulator is launched, we can start the development process with NativeScript. In many occasions the developers would like to work with several emulators simultaneously. The best practice for this scenarios is to have all emulators opened in advance (to avoid launch timings and possible timeouts during build). Once all the selected emulators are launched and all the real devices are attached we can check their status.
tns device

┌───┬──────────────────┬──────────┬──────────────────────┬──────────┬───────────┐
│ # │ Device Name      │ Platform │ Device Identifier    │ Type     │ Status    │
│ 1 │ bullhead         │ Android  │ 00bd261c1580a7d3     │ Device   │ Connected │
│ 2 │ sdk_phone_x86_64 │ Android  │ emulator-5554        │ Emulator │ Connected │
│ 3 │ vbox86p          │ Android  │ 192.168.206.103:5555 │ Emulator │ Connected │
└───┴──────────────────┴──────────┴──────────────────────┴──────────┴───────────┘
In the example case we have three devices connected. The first one is real device, the second one is Android Virtual Device and the third one is a third party emulator.
To launch a NativeScript application on a specific device you can pass --device <id> or --device <device-identifier> .
e.g. run on device with ID
tns run android --device 2
e.g. run on device with Device Identifier
tns run android --device 00bd261c1580a7d3
The example above will start the application on device with id 2 (sdk_phone_x86_64). The same rule applies for livesync command
To launch a NativeScript application on all connected devices simultaneously, simply ignore the --device <id> flag.
tns run android


