| title | description | services | documentationcenter | author | manager | editor | ms.assetid | ms.service | ms.custom | ms.workload | ms.tgt_pltfrm | ms.devlang | ms.topic | ms.date | ms.author |
|---|---|---|---|---|---|---|---|---|---|---|---|---|---|---|---|
Restore a single table from Azure SQL Database backup | Microsoft Docs |
Learn how to restore a single table from Azure SQL Database backup. |
sql-database |
dalechen |
cshepard |
340b41bd-9df8-47fb-adfc-03216de38a5e |
sql-database |
migrate and move |
data-management |
na |
na |
article |
01/20/2017 |
daleche |
You may encounter a situation in which you accidentally modified some data in a SQL database and now you want to recover the single affected table. This article describes how to restore a single table in a database from one of the SQL Database automatic backups.
-
Identify the table in your Azure SQL database that you want to replace with the restored copy. Use Microsoft SQL Management Studio to rename the table. For example, rename the table as <table name>_old.
[!NOTE] To avoid being blocked, make sure that there's no activity running on the table that you are renaming. If you encounter issues, make sure that perform this procedure during a maintenance window.
-
Restore a backup of your database to a point in time that you want to recover to using the Point-In_Time Restore steps.
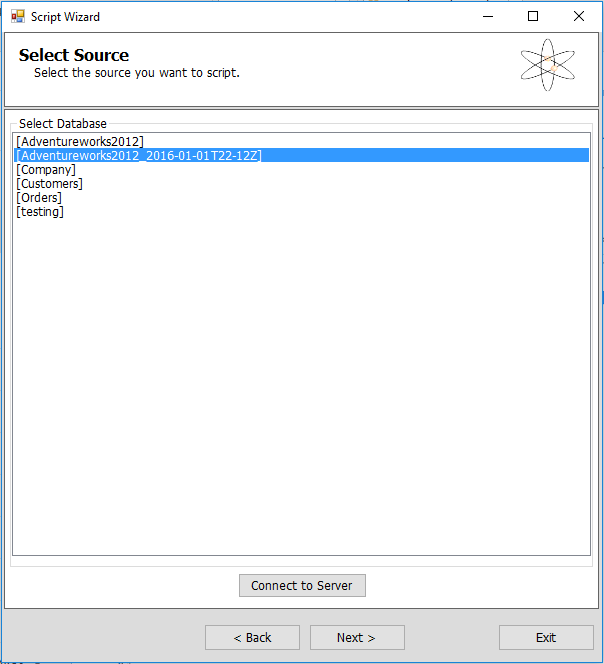
[!NOTE] The name of the restored database will be in the DBName+TimeStamp format; for example, Adventureworks2012_2016-01-01T22-12Z. This step doesn't overwrite the existing database name on the server. This is a safety measure, and it's intended to allow you to verify the restored database before they drop their current database and rename the restored database for production use.
-
Download and install the SQL Database Migration Wizard.
-
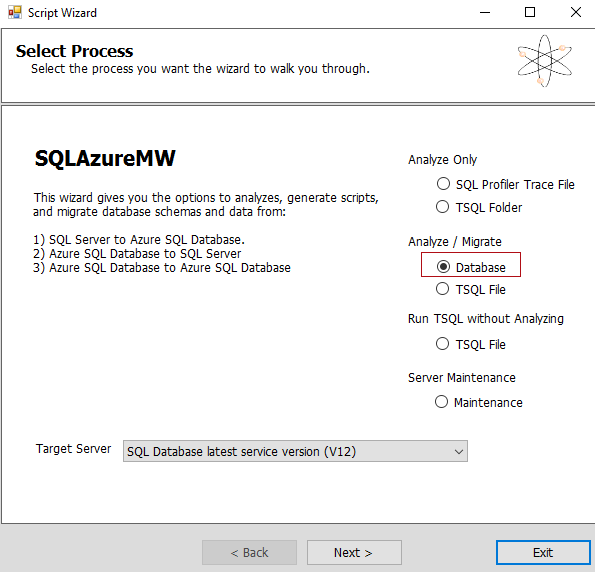
Open the SQL Database Migration Wizard, on the Select Process page, select Database under Analyze/Migrate, and then click Next.
-
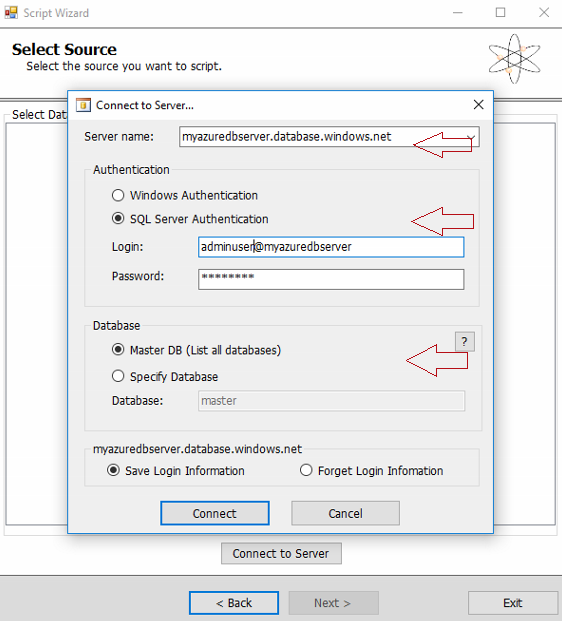
In the Connect to Server dialog box, apply the following settings:
- Server name: Your SQL server
- Authentication: SQL Server Authentication
- Login: Your login
- Password: Your password
- Database: Master DB (List all databases)
[!NOTE] By default the wizard saves your login information. If you don't want it to, select Forget Login Information.
-
In the Select Source dialog box, select the restored database name from the Preparation steps section as your source, and then click Next.
-
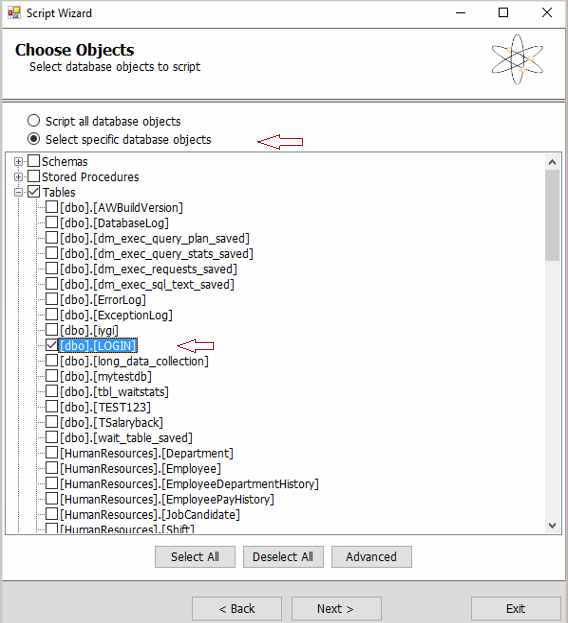
In the Choose Objects dialog box, select the Select specific database objects option, and then select the table(or tables) that you want to migrate to the target server.
-
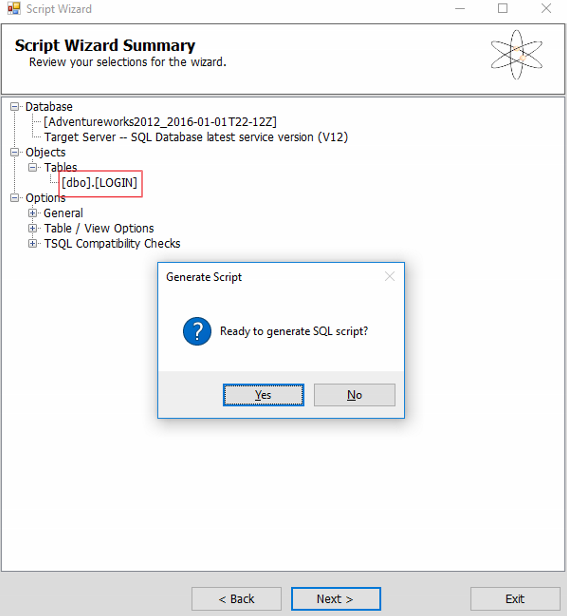
On the Script Wizard Summary page, click Yes when you’re prompted about whether you’re ready to generate a SQL script. You also have the option to save the TSQL Script for later use.
-
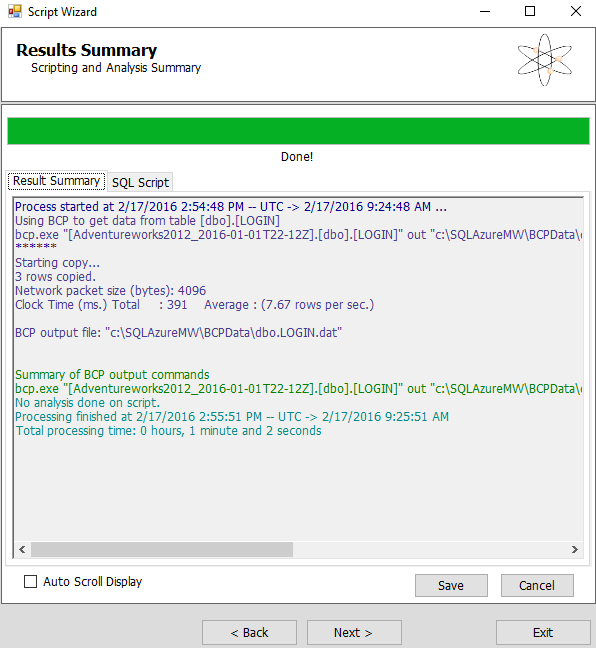
On the Results Summary page, click Next.
-
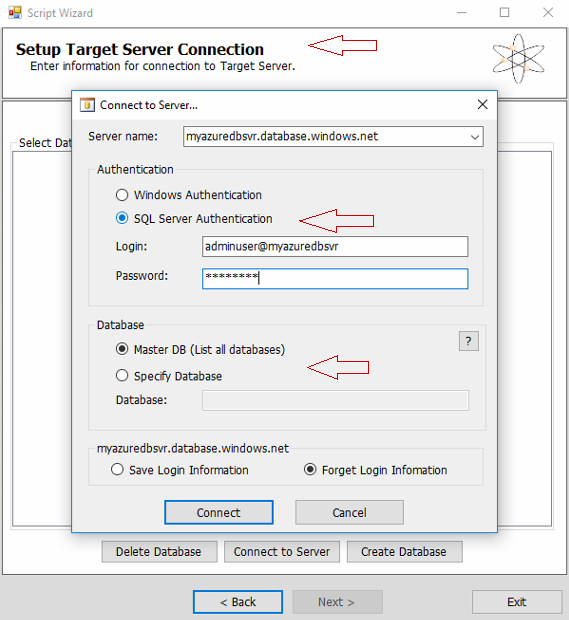
On the Setup Target Server Connection page, click Connect to Server, and then enter the details as follows:
-
Server Name: Target server instance
-
Authentication: SQL Server authentication. Enter your login credentials.
-
Database: Master DB (List all databases). This option lists all the databases on the target server.
-
-
Click Connect, select the target database that you want to move the table to, and then click Next. This should finish running the previously generated script, and you should see the newly moved table copied to the target database.


- Query and test the newly copied table to make sure that the data is intact. Upon confirmation, you can drop the renamed table form Preparation steps section. (for example, <table name>_old).