As described earlier, AsciiDoc is a text document format for writing notes, documentation, articles, books, ebooks, slideshows, web pages, man pages and blogs. The main advantage of AsciiDoc is that it plays well with DocBook, O’Reilly’s native content format, but is something that you can actually write in.
This Asciidoc cheat sheet covers most of what you’ll need to know. As you’ll see, AsciiDoc is most similar to wiki markup — if you can write a wikipedia article, then you’re pretty much 99% of the way there.
|
Note
|
Formatting O’Reilly books in AscciDoc
You can get the official guide for writing a full O’Reilly book in AsciiDoc from our Subversion repository: svn checkout --username "[email protected]" "https://prod.oreilly.com/internal/books/sandbox_odewahn_RT79726/current/tools/cookbook_demo.pdf" I’ve also placed relevant files into the "samples" directory in this repository. This document (still in R&D, BTW!) tells you how to do pretty much anything you’d like. I anticipate that Maker Press will only use a subset of the markup features, but this guide is there if you need it. |
The best way to get started with AsciiDoc and Maker Press is to pull down the repository for this document (how’s that for recursion!) and look out how the files are structured. Here’s how you can get the repo:
Need to have a link to the git repository for this doc
Once you have the files, you can open them in TextMate using the command:
mate .
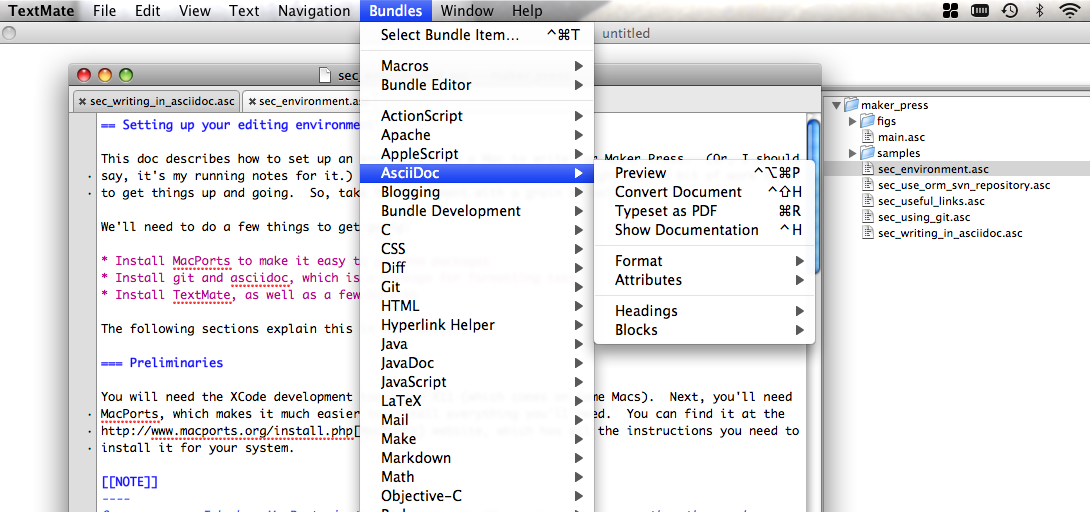
This will open the editor and display the project drawer, which is a navigation tree that you can use to move around between files. Use the project drawer to open the file called sec_environments.asc, as shown in Use TextMate’s bundle editor to add in the path.
If you’ve done any wiki markup, this should look pretty familiar. Also, note how the various AsciiDoc elements are all nicely color coded — this is thanks to the AsciiDoc bundle we installed earlier.
Muck around in there for a while and make a few changes (remember — this is all in your local git repository, so you can’t hurt anything). When you’re ready, you can use the "Bundles → AsciiDoc → Preview" to see how your document will look when it is rendered in HTML, as shown in Generating a preview.
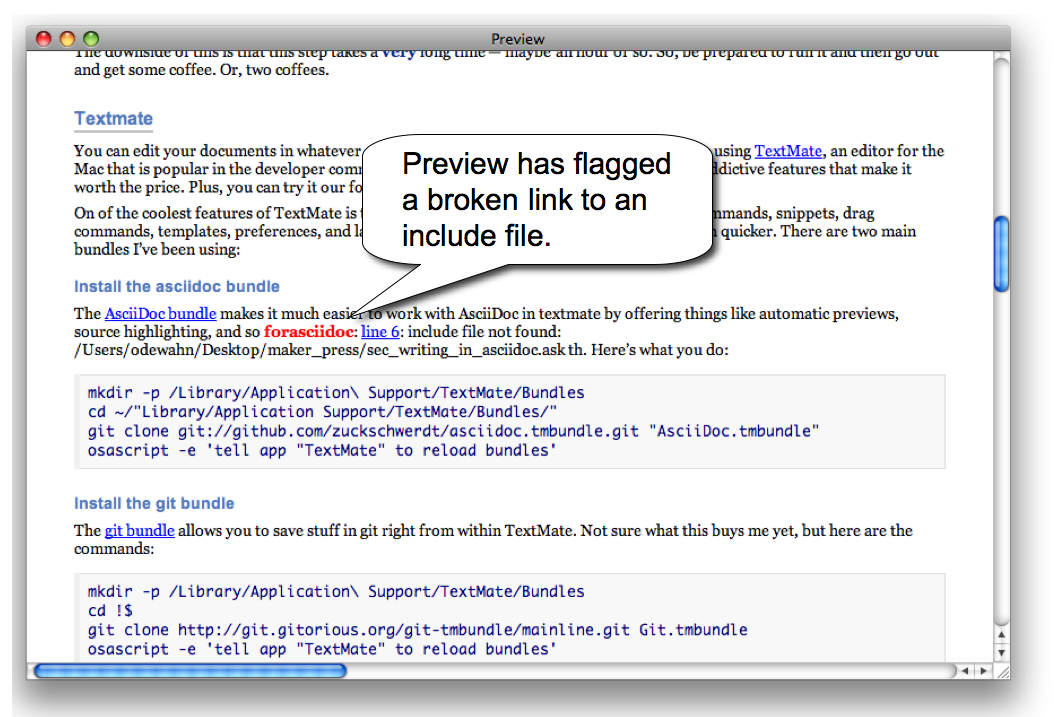
The preview will convert the AsciiDoc into HTML as best it can. If preview identifies any errors, it will flag in red. For example, A broken link to an include file shows up as a red hyperlink shows how preview has found a broken link to an include file.
Most times, though, you’ll have to scan the document and make sure it looks right, just like you would a wiki page. The advantage of using Preview to clean up your errors is that it will save you time when you try to render the document in the O’Reilly toolchain.
|
Caution
|
If you have trouble with Preview, try this first
On my system, there was a weird problem when I tried to run the bundle commands — it couldn’t locate the asciidoc command. There’s probably some environment variable or the other that I need to set, but here’s what I did to fix it. First, I located where MacPorts installed asciidoc, which you can do by dropping into a terminal and typing this: $ which asciidoc /opt/local/bin/asciidoc Then go into the bundle editor (Bundles → Bundle Editor → Show Bundle Editor) and select the asciidoc bundle. You can then go into the commands (the have "c" in fromt of them) and add this path in front of everyplace where asciidoc appears. For example, here’s the revised version of the "Preview" command: if [[ -z $TM_FILENAME ]] then doc="-" else doc="$TM_FILEPATH" fi /opt/local/bin/asciidoc --attribute=imagesdir="file://$(pwd)" --out-file - "$doc" 2>&1 | perl -pe 's%(\w+): .*?: line ([0-9]+):%<b style="color:red">$1</b>: <a href="txmt://open/?line=$2">line $2</a>:%g' It should look something like Use TextMate’s bundle editor to add in the path in Textmate. |
You should review your TOC often to make sure that the document is structured correctly. It’s really easy to generate this automatically — all you have to do is use the bundle editor to add the option "-a toc" to the asciidoc command.
Open up the bundle editor (Bundles → Bundle Editor), select the AsciiDoc bundle, and then click the "Preview" command. Then, add the put "-a toc" after the AsciiDoc command, as shown in Automatically adding a TOC to Preview
If you just want to generate something that you can use for copyediting or sharing with your friends, the following command will generate a PDF using the default stylesheets that come with AsciiDoc:
a2x -v --fop --no-xmllint book.asc
This --no-xmllint option turns off the XML validator.
AsciiDoc has options to create stand-alone documents containing embedded images, stylesheets and scripts. The following AsciiDoc command creates a single file containing embedded images, CSS stylesheets, and JavaScript (for table of contents and footnotes):
$ asciidoc -a data-uri -a icons -a toc -a max-width=55em article.txt


