University of Pennsylvania, CIS 565: GPU Programming and Architecture
Dhruv Karthik: LinkedIn
Tested on: Windows 10 Home, Intel(R) Core(TM) i7-8700 CPU @ 3.20GHz, 16GM, GTX 2070 - Compute Capability 7.5
- Scan Matching Algorithm
- Results
- Octree Optimization
- Performance Analysis
- Build Instructions
- Running The Code
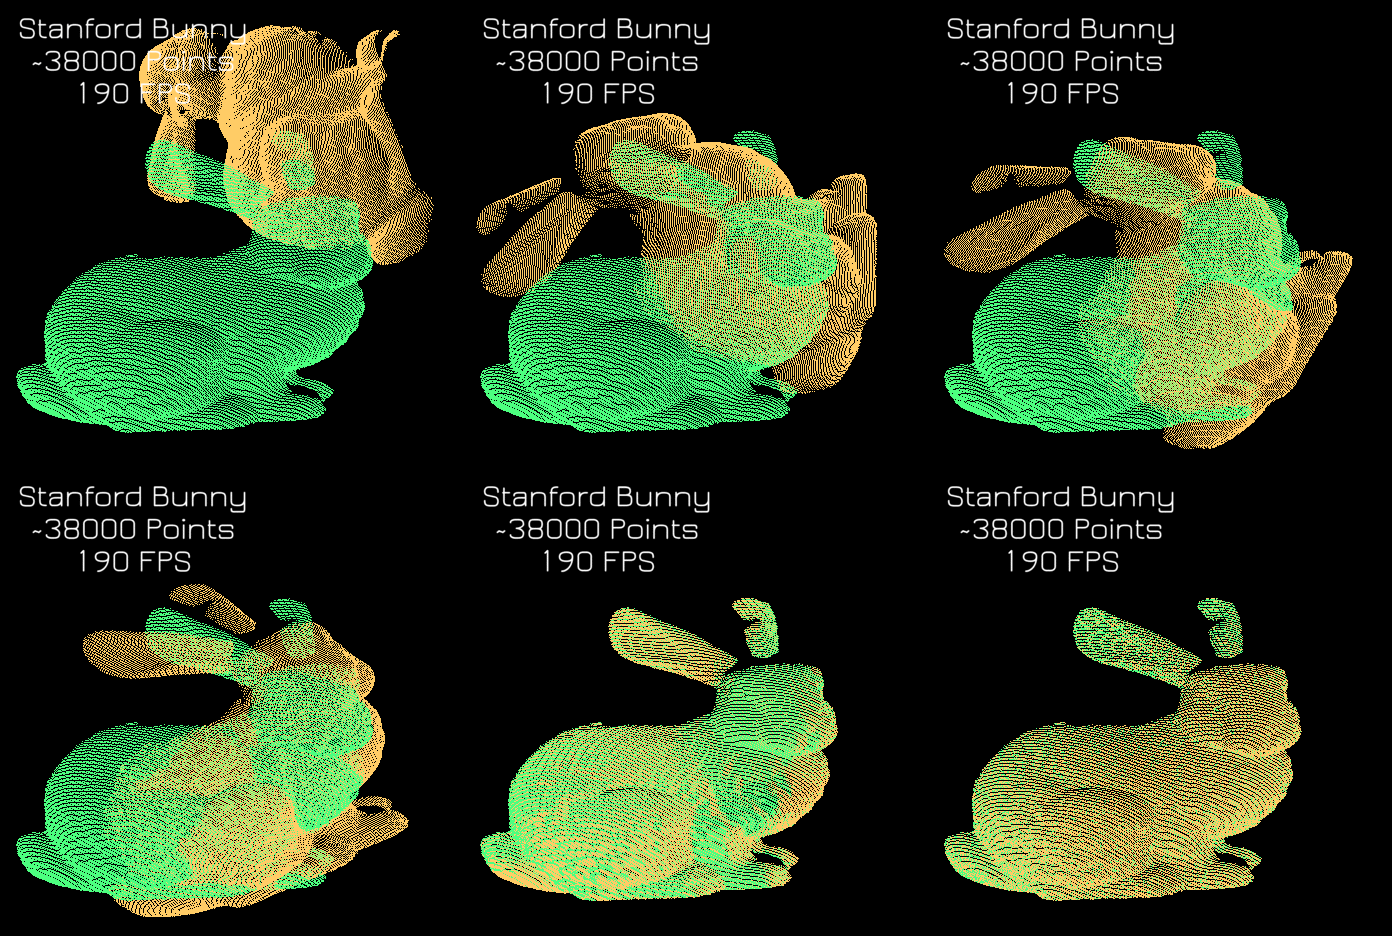
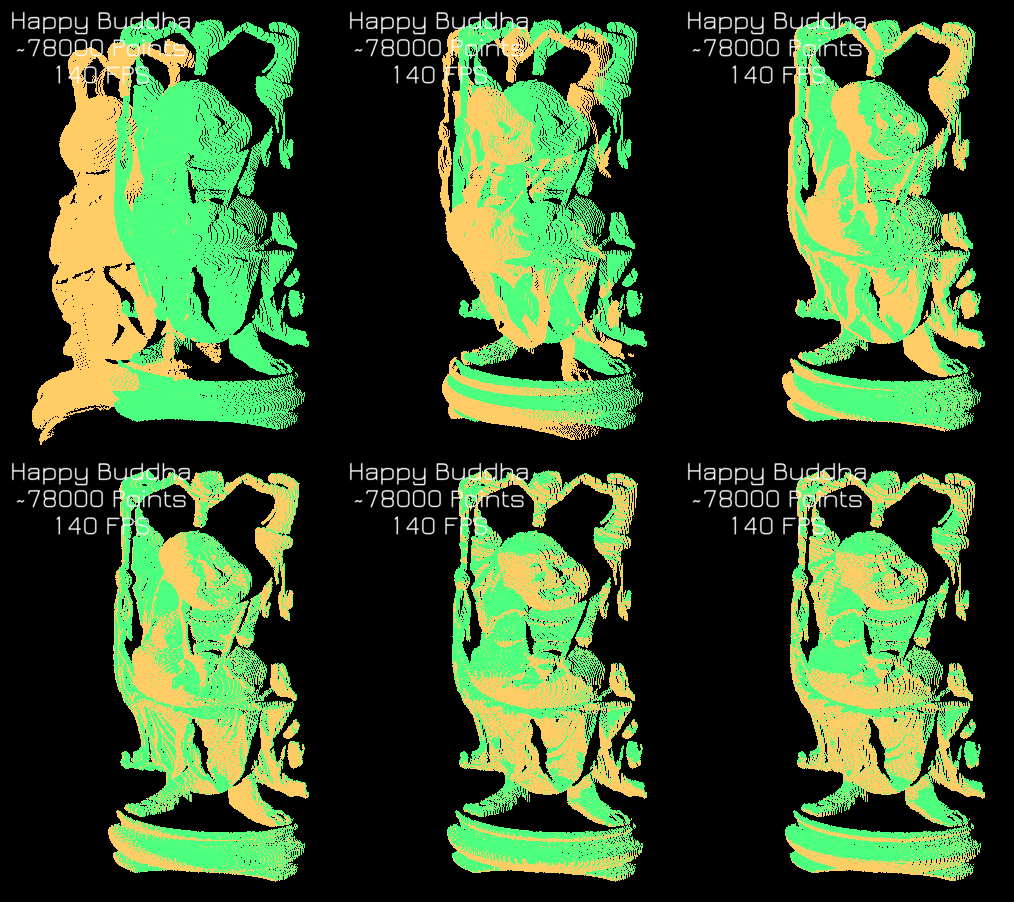
An intuitive understanding of Scan Matching is best illustrated in this 11 second video. Scan Matching seeks to align two similar pointclouds by finding the transformation between them. It does so via the iterative closest point algorithm outlined below in pseudocode:
#Aligns pointcloud A to pointcloud B
def scan_match(pointcloud A, pointcloud B):
  1. For each point in A, find the closest point in B
  2. Compute a 3-D transformation matrix that aligns the points (Use SVD & Least Squares Regression)
  3. Update all points in the target by the transformation matrix
  4. Repeat steps 1-3 until some epsilon convergence
  RETURN : Some Transformation matrix T
The key benefit from CUDA is in step 1. Finding the nearest neighbors synchronously takes far longer than finding nearest neighbors via some optimized datastructure like an octree. I implemented 3 versions: A CPU version, a Naive CUDA version, and an Octree version.
A sparse octree is an optimized datastructure that allows for fast nearest neighbor calculations. It is represented as a tree in which each internal node has exactly eight children. We use octrees in order to subdivide our 3D space, ensuring that no octant has more than n points. If some node has more than n vertices, we recursively subdivide this node by splitting it into eight children, and redistributing the points among these 8 children. This speeds up nearest neighbor searches as now, we only need to search for neighbors within our octant.
In order to test the varying number of points, I generated a 3D sinusoid with various widths, thereby increasing the number of points.
The table below illustrates the effect of each algorithm on the speed of nearest neighbor search. Clearly, the GPU-Octree performs NN the fastest, as it iterates only through points inside its octant. The Naive GPU iterates through all the points, but does so paralelly, and is therefore faster than the CPU that does so in a triple for loop sequentially.
Number of points vs Time Taken (ms) for Nearest Neighbor Search (lower is better)
| Num Points | CPU | GPU-Naive | GPU-Octree |
|---|---|---|---|
| 5 | 0 | 5 | 8 |
| 500 | 1268 | 8 | 3 |
| 2500 | 23000 | 573 | 164 |
| 5000 | 94000 | 903 | 193 |
| 250000 | 861000 | 14000 | 400 |
Below, we clearly see that the decrease in time across the algorithm directly contributes to an increase in framerate. Astonishingly, we see an over 1000% improvement over the CPU algorithm:
Taken from CIS 565 Getting Started Instructions
- In Git Bash, navigate to your cloned project directory.
- Create a
builddirectory:mkdir build- (This "out-of-source" build makes it easy to delete the
builddirectory and try again if something goes wrong with the configuration.)
- (This "out-of-source" build makes it easy to delete the
- Navigate into that directory:
cd build - Open the CMake GUI to configure the project:
cmake-gui ..or"C:\Program Files (x86)\cmake\bin\cmake-gui.exe" ..- Don't forget the
..part! This tells CMake that theCMakeLists.txtfile is in the parent directory ofbuild.
- Don't forget the
- Make sure that the "Source" directory points to the directory
cuda-getting-started. - Click Configure.
- Select
Visual Studio 15 2017, Win641. (NOTE: you must use Win64, as we don't provide libraries for Win32.) - Optionally, if the 2017 build ends being unstable, type in
v140in theOptional toolset to usebar. This will use VS2015 build tools.
- Select
- Click Generate.
- If generation was successful, there should now be a Visual Studio solution
(
.sln) file in thebuilddirectory that you just created. Open this. (from the command line:explorer *.sln) - Build. (Note that there are Debug and Release configuration options.)
- Run. Make sure you run the
cis565_target (notALL_BUILD) by right-clicking it and selecting "Set as StartUp Project".- If you have switchable graphics (NVIDIA Optimus), you may need to force your program to run with only the NVIDIA card. In NVIDIA Control Panel, under "Manage 3D Settings," set "Multi-display/Mixed GPU acceleration" to "Single display performance mode".
It is recommended that you use Nsight. Nsight is shipped with CUDA. If you set up the environment path correctly export PATH=/usr/local/cuda-10.0/bin${PATH:+:${PATH}} (Note that simply typing the export command is a temporary change. The PATH variable won't be updated permanently. For permanent change, add it to your shell configuration file, e.g. ~/.profile on Ubuntu), you can run Nsight by typing nsight in your terminal.
- Open Nsight. Set the workspace to the one containing your cloned repo.
- File->Import...->General->Existing Projects Into Workspace.
- Select the
cuda-getting-starteddirectory as the root directory.
- Select the
- Select the cis565- project in the Project Explorer. Right click the project. Select Build Project.
- For later use, note that you can select various Debug and Release build configurations under Project->Build Configurations->Set Active....
- If you see an error like
CUDA_SDK_ROOT_DIR-NOTFOUND:- In a terminal, navigate to the build directory, then run:
cmake-gui .. - Set
CUDA_SDK_ROOT_DIRto your CUDA install path. This will be something like:/usr/local/cuda - Click Configure, then Generate.
- In a terminal, navigate to the build directory, then run:
- Right click and Refresh the project.
- From the Run menu, Run. Select "Local C/C++ Application" and the
cis565_binary.
The file main.cpp should have the following at the top:
#define VISUALIZE 1
#define STEP true
#define CPU false
#define GPU_NAIVE true
#define GPU_OCTREE false
#define MODEL true;
To test the GPU_NAIVE, set it to True, and set GPU_OCTREE to False. Do the opposite to test GPU_OCTREE. GPU_OCTREE should be way faster, but is also a bit more sensitive to initialization. If you're having convergence difficulties with GPU_OCTREE, some rules of thumbs are:
- Tune the
#define MAX_PTS_PER_OCTANTinsideoctree.h.


