| title | description | services | documentationcenter | author | manager | editor | ms.assetid | ms.service | ms.workload | ms.tgt_pltfrm | ms.devlang | ms.topic | ms.date | ms.author |
|---|---|---|---|---|---|---|---|---|---|---|---|---|---|---|
Configure Secure LDAP (LDAPS) in Azure AD Domain Services | Microsoft Docs |
Configure Secure LDAP (LDAPS) for an Azure AD Domain Services managed domain |
active-directory-ds |
mahesh-unnikrishnan |
stevenpo |
curtand |
c6da94b6-4328-4230-801a-4b646055d4d7 |
active-directory-ds |
identity |
na |
na |
article |
06/30/2017 |
maheshu |
Ensure you've completed Task 1 - obtain a certificate for secure LDAP.
Before you start this task, ensure that you have obtained the secure LDAP certificate from a public certification authority or have created a self-signed certificate.
Perform the following steps, to export the LDAPS certificate to a .PFX file.
-
Press the Start button and type R. In the Run dialog, type mmc and click OK.

-
On the User Account Control prompt, click YES to launch MMC (Microsoft Management Console) as administrator.
-
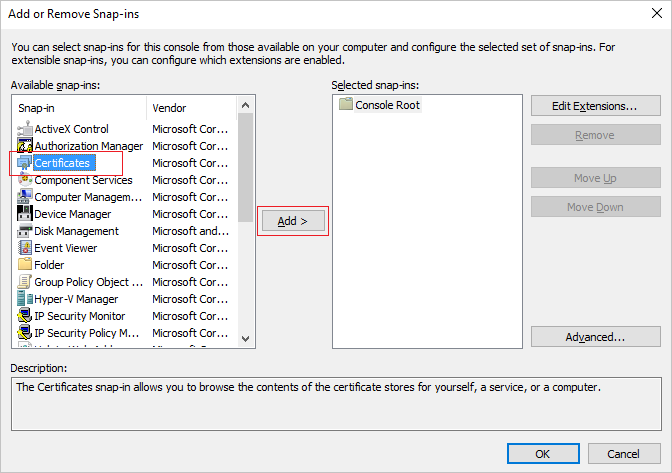
From the File menu, click Add/Remove Snap-in....

-
In the Add or Remove Snap-ins dialog, select the Certificates snap-in, and click the Add > button.
-
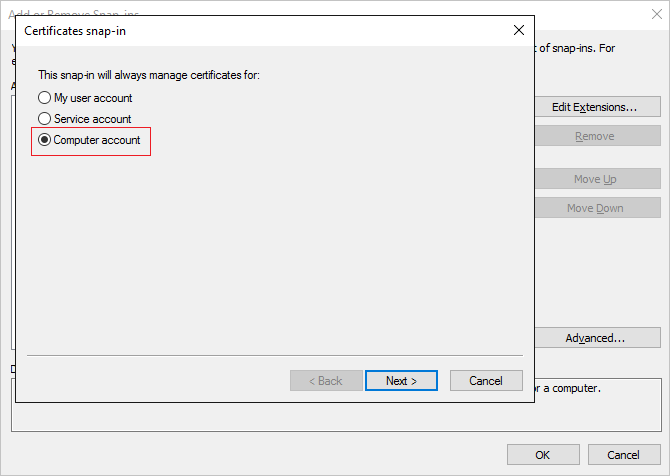
In the Certificates snap-in wizard, select Computer account and click Next.
-
On the Select Computer page, select Local computer: (the computer this console is running on) and click Finish.

-
In the Add or Remove Snap-ins dialog, click OK to add the certificates snap-in to MMC.

-
In the MMC window, click to expand Console Root. You should see the Certificates snap-in loaded. Click Certificates (Local Computer) to expand. Click to expand the Personal node, followed by the Certificates node.

-
You should see the self-signed certificate we created. You can examine the properties of the certificate to ensure the thumbprint matches that reported on the PowerShell windows when you created the certificate.
-
Select the self-signed certificate and right click. From the right-click menu, select All Tasks and select Export....

-
In the Certificate Export Wizard, click Next.

-
On the Export Private Key page, select Yes, export the private key, and click Next.

[!WARNING] You MUST export the private key along with the certificate. If you provide a PFX that does not contain the private key for the certificate, enabling secure LDAP for your managed domain fails.
-
On the Export File Format page, select Personal Information Exchange - PKCS #12 (.PFX) as the file format for the exported certificate.

[!NOTE] Only the .PFX file format is supported. Do not export the certificate to the .CER file format.
-
On the Security page, select the Password option and type in a password to protect the .PFX file. Remember this password since it will be needed in the next task. Click Next to proceed.

[!NOTE] Make a note of this password. You need it while enabling secure LDAP for this managed domain in Task 3 - enable secure LDAP for the managed domain
-
On the File to Export page, specify the file name and location where you'd like to export the certificate.

-
On the following page, click Finish to export the certificate to a PFX file. You should see confirmation dialog when the certificate has been exported.


