| title | description | services | documentationcenter | author | manager | ms.assetid | ms.service | ms.workload | ms.tgt_pltfrm | ms.devlang | ms.topic | ms.date | ms.author |
|---|---|---|---|---|---|---|---|---|---|---|---|---|---|
Create an HTTP Trigger with an Azure Cosmos DB input binding | Microsoft Docs |
Learn how to use Azure Functions with HTTP Triggers to query Azure Cosmos DB. |
cosmos-db |
mimig1 |
jhubbard |
cosmos-db |
data-services |
na |
na |
mvc |
09/25/2017 |
mimig |
Azure Cosmos DB is a globally distributed, multi-model database that is both schemaless and serverless. Azure Function is a serverless compute service that enables you to run code on-demand. Pair up these two Azure services and you have the foundation for a serverless architecture that enables you to focus on building great apps and not worry about provisioning and maintaining servers for your compute and database needs.
This tutorial builds on the code created in the Graph API Quickstart for .NET. This tutorial adds an Azure Function that contains an HTTP trigger. The HTTP trigger uses an Azure Cosmos DB input binding to retrieve data from the graph database created in the quickstart. This particular HTTP trigger queries Azure Cosmos DB for data, but input bindings from Azure Cosmos DB can be used to retrieve data input values for whatever your function requires.
This tutorial covers the following tasks:
[!div class="checklist"]
- Create an Azure Function project
- Create an HTTP trigger
- Publish the Azure Function
- Connect the Azure Function to the Azure Cosmos DB database
-
Visual Studio 2017 version 15.3, including the Azure development workload.

-
After you install or upgrade to Visual Studio 2017 version 15.3, you must manually update the Visual Studio 2017 tools for Azure Functions. You can update the tools from the Tools menu under Extensions and Updates... > Updates > Visual Studio Marketplace > Azure Functions and Web Jobs Tools > Update.
-
Complete the Build a .NET application using the Graph API tutorial, or get the example code from the azure-cosmos-db-graph-dotnet-getting-started GitHub repo and build the project.

-
Add an Azure Functions project to your solution by right-clicking on the solution node in Solution Explorer, the choose Add > New Project. Choose Azure Functions from the dialog box, and name it PeopleDataFunctions.

-
After you create the Azure Functions project, there are a few NuGet related updates and installs to perform.
a. To make sure you have the latest Functions SDK, use the NuGet Manager to update the Microsoft.NET.Sdk.Functions package. In Solution Explorer, right-click the project, and select Manage NuGet Packages. In the Installed tab, select Microsoft.NET.Sdk.Functions, then click Update.

b. In the Browse tab, enter azure.graphs to find the Microsoft.Azure.Graphs package, and then click Install. This package contains the Graph API .NET Client SDK.

c. In the Browse tab, enter mono.csharp to find the Mono.CSharp package, and then click Install.

-
Your Solution Explorer should now include the packages you installed, as shown here.
Next, we need to write some code, so we'll add a new Azure Function item to the project.
a. Right mouse click on the project node in Solution Explorer, then choose Add > New Item.
b. In the Add New Item dialog, select Visual C# Items, select Azure Function, type Search as the name for your project, and then click Add.
-
The Azure Function will respond to HTTP requests, so the Http trigger template is appropriate here.
In the New Azure Function box, select Http trigger. We want this Azure Function to be "wide open," too, so we set the Access rights to Anonymous, which lets everyone through. Click OK.

-
After you add Search.cs to the Azure Function project, copy these using statements over the existing using statements:
using Microsoft.Azure.Documents;
using Microsoft.Azure.Documents.Client;
using Microsoft.Azure.Documents.Linq;
using Microsoft.Azure.Graphs;
using Microsoft.Azure.WebJobs;
using Microsoft.Azure.WebJobs.Extensions.Http;
using Microsoft.Azure.WebJobs.Host;
using System;
using System.Collections.Generic;
using System.Configuration;
using System.Linq;
using System.Net;
using System.Net.Http;
using System.Threading.Tasks;
-
Next, replace the Azure Function's class code with the code below. The code searches the Azure Cosmos DB database using the Graph API for either all the people, or for the specific person identified by the
namequery string parameter.public static class Search { static string endpoint = ConfigurationManager.AppSettings["Endpoint"]; static string authKey = ConfigurationManager.AppSettings["AuthKey"]; [FunctionName("Search")] public static async Task<HttpResponseMessage> Run( [HttpTrigger(AuthorizationLevel.Anonymous, "get", "post", Route = null)]HttpRequestMessage req, TraceWriter log) { log.Info("C# HTTP trigger function processed a request."); // the person objects are free-form in structure List<dynamic> results = new List<dynamic>(); // open the client's connection using (DocumentClient client = new DocumentClient( new Uri(endpoint), authKey, new ConnectionPolicy { ConnectionMode = ConnectionMode.Direct, ConnectionProtocol = Protocol.Tcp })) { // get a reference to the database the console app created Database database = await client.CreateDatabaseIfNotExistsAsync( new Database { Id = "graphdb" }); // get an instance of the database's graph DocumentCollection graph = await client.CreateDocumentCollectionIfNotExistsAsync( UriFactory.CreateDatabaseUri("graphdb"), new DocumentCollection { Id = "graphcollz" }, new RequestOptions { OfferThroughput = 1000 }); // build a gremlin query based on the existence of a name parameter string name = req.GetQueryNameValuePairs() .FirstOrDefault(q => string.Compare(q.Key, "name", true) == 0) .Value; IDocumentQuery<dynamic> query = (!String.IsNullOrEmpty(name)) ? client.CreateGremlinQuery<dynamic>(graph, string.Format("g.V('{0}')", name)) : client.CreateGremlinQuery<dynamic>(graph, "g.V()"); // iterate over all the results and add them to the list while (query.HasMoreResults) foreach (dynamic result in await query.ExecuteNextAsync()) results.Add(result); } // return the list with an OK response return req.CreateResponse<List<dynamic>>(HttpStatusCode.OK, results); } }
The code is basically the same connection logic as in the original console application that seeded the database, with a simple query to retrieve the matching records.


Now that the code is complete, you can use the Azure Function's local debugging tools and emulator to run the code locally to test it.
-
Before the code runs properly, you must configure it for local execution with your Azure Cosmos DB connection information. You can use the local.settings.json file to configure the Azure Function for local execution much in the same way you would use the App.config file to configure the original console application for execution.
To do this, add the following lines of code to local.settings.json, and then copy in your Endpoint and AuthKey from the App.Config file in the GraphGetStarted project as shown in the following image.
 "Endpoint": "",
 "AuthKey": ""

-
Change the StartUp project to the new Functions app. In Solution Explorer, right-click PeopleDataFunctions, and select Set as StartUp Project.
-
In Solution Explorer, right click Dependencies in the PeopleDataFunctions project, and then click Add Reference. From the list, select System.Configuration and then click OK.
-
Now let's run the app. Press F5 to launch the local debugging tool, func.exe, with the Azure Function code hosted and ready for use.
At the end of the initial output from func.exe, we see that Azure Function is being hosted at localhost:7071. This is helpful to test it in a client.

-
To test the Azure Function, use Visual Studio Code with Huachao Mao's extension, REST Client. REST Client offers local or remote HTTP request capability in a single right-click.
To do this, create a new file named test-function-locally.http and add the following code:
get http://localhost:7071/api/Search

get http://localhost:7071/api/Search?name=ben
Now right-click the first line of code, then select Send Request as shown in the following image.

You are presented with the raw HTTP response from the locally-running Azure Function headers, JSON body content, everything.

-
Now select the second line of code, and then select Send Request. By adding the
namequery string parameter with a value known to be in the database, we can filter the results the Azure Function returns.


After the Azure Function is validated and seems to be working properly, the last step is to publish it to Azure App Service and configure it to run in the cloud.
-
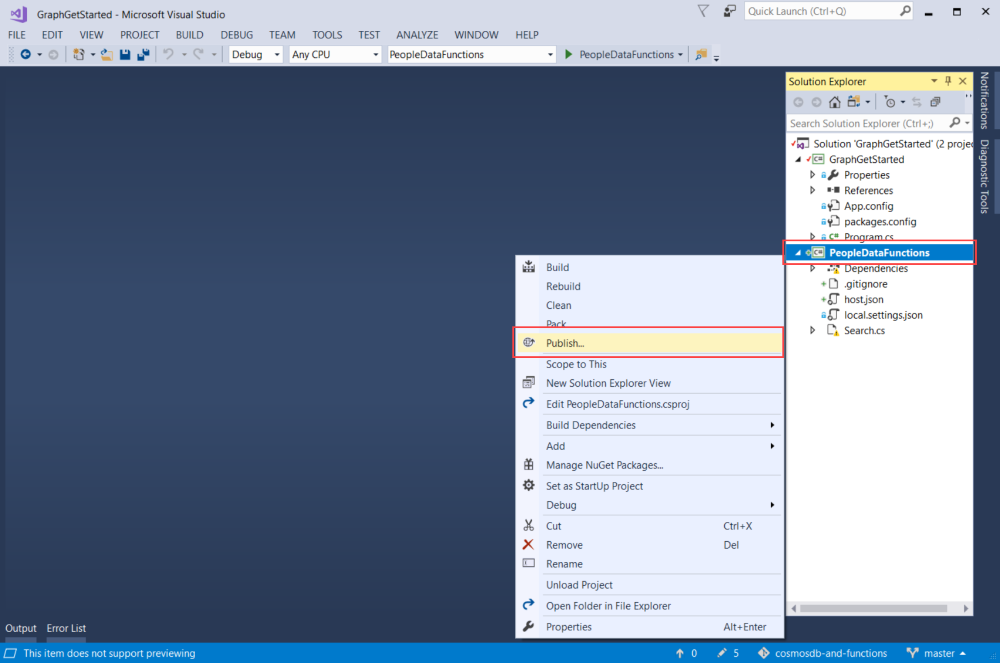
In Solution Explorer, right-click the project, then select Publish.
-
We're ready to publish this to the cloud to test it in a publicly available scenario. In the Publish tab, select Azure Function App, select Create New to create an Azure Function in your Azure subscription, then click Publish.

-
In the Publish dialog, do the following:
a. In App Name, give the function a unique name.
b. In Subscription, select the Azure subscription to use.
c. In Resource Group, create a new resource group and use the same name as the app name.
d. For App Service Plan, click New to create a new Consumption-based App Service Plan because we intend to use the pay-per-use billing method for the serverless Azure Function. Use the defaults on the Configure App Service Plan page, and then click OK.
e. For Storage Account, also click New to create a new Storage Account to use with the Azure Function in case we ever need support for Blobs, Tables, or Queues to trigger execution of other functionality. Use the defaults on the Storage Account page, and then click OK.
f. Then click the Create button in the dialog to create all the resources in your Azure subscription. Visual Studio downloads a publish profile (a simple XML file) that it uses the next time you publish your Azure Function code.

Visual Studio then displays a Publish page that you can use if you make changes to the Function and need to republish it. You don't have to take any action on that page now.
-
After the Azure Function is published, you can go to the Azure portal page for your Azure Function. There, you can see a link to the Azure Function's Application settings. Open this link to configure the live Azure Function for connectivity to the Azure Cosmos DB database with your Person data.

-
Just as you did earlier in the console application's App.config file and in the Azure Function app's local.settings.json file, you'll need to add the Endpoint and AuthKey to the Azure Cosmos DB database to the published function. This way, you never have to check in configuration code that contains your keys - you can configure them in the portal and be sure they're not stored in source control. To add each value, click the Add new setting button, add Endpoint and your value from app.config, then click Add new setting again and add AuthKey and your custom value. Once you've added and saved the values, your settings should look like the following.

-
Once the Azure Function is configured properly in your Azure subscription, you can again use the Visual Studio Code REST Client extension to query the publicly available Azure Function URL. Add these two lines of code to the test-function-locally.http and then run each line to test this function. Replace the name of the function in the URL with the name of your function.
get https://peoplesearchfunction.azurewebsites.net/api/Search

get https://peoplesearchfunction.azurewebsites.net/api/Search?name=thomas
The function responds with the data retrieved from Azure Cosmos DB.


In this tutorial, you've done the following:
[!div class="checklist"]
- Created an Azure Function project
- Created an HTTP trigger
- Published the Azure Function
- Connected the Function to the Azure Cosmos DB database
You can now proceed to the Concepts section for more information about Cosmos DB.
[!div class="nextstepaction"] Global distribution
This article is based on a blog from Brady Gaster's Schemaless & Serverless blog series. Visit his blog for additional posts in the series.