Ddosify is a multi location based load testing and DDOS attack simulation tool written in Golang.
✔️ Protocol Agnostic - Currently supporting HTTP, HTTPS, HTTP/2. Other protocols are on the way.
✔️ Scenario-Based - Create your flow in a JSON file. Without a line of code!
✔️ Different Load Types - Test your system's limits across different load types.
TODO: GIF KOY
ddosify is available via Docker, Homebrew, Homebrew Tap, Conda and as a downloadable pre-compiled binaries from the releases page.
docker run -it --rm --name ddosify ddosify/ddosifybrew install ddosifybrew install ddosify/ddosifyconda install ddosify --channel conda-forge- The script requires root or sudo privileges to move ddosify binary to
/usr/bin. - The script attempts to detect your operating system (macos or linux) and architecture (arm64, x86, x8664, i386) to download the appropriate binary from the releases page.
- By default, the scripts installs the latest version of
ddosify.
curl -sSfL https://raw.githubusercontent.com/ddosify/ddosify/master/scripts/install.sh | shgo install -v github.com/ddosify/ddosify@latestThis section aims to show you how to easily use Ddosify without deep dive into its details.
-
ddosify -t target_site.comThe above command runs a load test with the default value that is 200 requests in 10 seconds.
-
ddosify -t target_site.com -n 1000 -d 20 -p HTTPS -m PUT -T 7 -P http://proxy_server.com:80Ddosify sends a total of 1000 PUT requests to https://target_site.com over proxy http://proxy_server.com:80 in 20 seconds with a timeout of 7 seconds per request.
-
ddosify -t config_examples/config.jsonDdosify first sends HTTP/2 POST request to https://test_site1.com/endpoint_1 using basic auth credentials test_user:12345 over proxy http://proxy_host.com:proxy_port and with a timeout of 3 seconds. Once the response is received, HTTPS GET request will be sent to https://test_site1.com/endpoint_2 along with the payload included in config_examples/payload.txt file with a timeout of 2 seconds. This flow will be repeated 20 times in 5 seconds and response will be written to stdout.
You can configure your load test by the CLI options or a config file. Config file supports more features than the CLI. For example, you can't create a scenario-based load test with CLI options.
-
ddosify -t <target_website> [options...]-
-nTotal request count. Default is 200.
-
-dTest duration in seconds. Default is 10 second.
-
-lType of the load test. Default is linear. Ddosify supports 3 load types;
-
-l linearExample;
ddosify -t target_site.com -n 200 -d 10 -l linearResult;
Note: If the request count is too low for the given duration, the test might be finished earlier than you expect.
-
-l incrementalExample;
ddosify -t target_site.com -n 200 -d 10 -l incrementalResult;
-
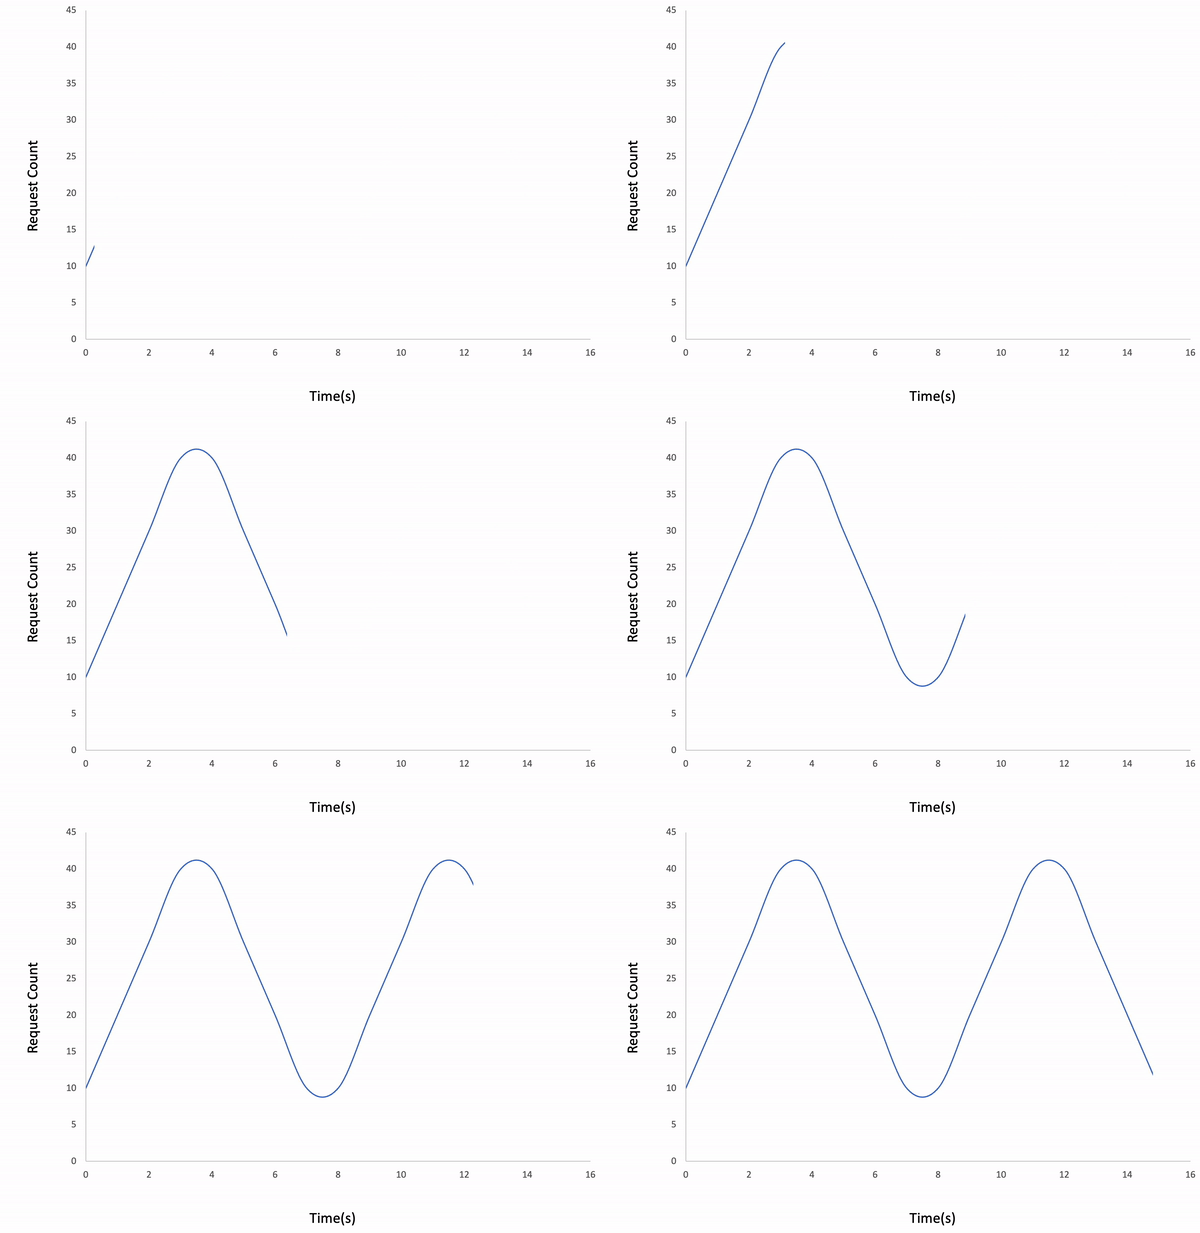
-l wavedExample;
ddosify -t target_site.com -n 400 -d 16 -l wavedResult;
-
-
-pProtocol of the request. Default is HTTPS. Supported protocols are HTTP, HTTPS. HTTP/2 support is only available by using a config file as described. More protocols will be added.
Note: If the target URL passed with
-toption includes protocol inside of it, then the value of the-pwill be ignored. -
-mRequest method. Default is GET. Available methods for HTTP(s) are GET, POST, PUT, DELETE, UPDATE, PATCH
-
-bThe payload of the network packet. AKA body for the HTTP.
-
-aBasic authentication.
ddosify -t target_site.com -a username:password -
-hHeaders of the request. You can provide multiple headers.
ddosify -t target_site.com -h 'Accept: text/html' -h 'Content-Type: application/xml' -
-TTimeout of the request in seconds. Default is 5 seconds.
-
-PProxy address as host:port.
ddosify -t target_site.com -P http://proxy_host.com:port' -
-oTest result output destination. Default is stdout. Other output types will be added.
-
-
Config file lets you use all capabilities of Ddosify.
The features you can use by config file;
- Scenario creation
- Payload from a file
- Extra connection configuration, like keep-alive enable/disable logic
- HTTP2 support
Usage;
ddosify -config <json_config_path>There is an example config file at config_examples/config.json. This file contains all of the parameters you can use. Details of each parameter;
-
request_countoptionalThis is the equivalent of the
-nflag. The difference is that if you have multiple steps in your scenario then this value represents the iteration count of the steps. -
load_typeoptionalThis is the equivalent of the
-lflag. -
durationoptionalThis is the equivalent of the
-dflag. -
proxyoptionalThis is the equivalent of the
-Pflag. -
outputoptionalThis is the equivalent of the
-oflag. -
stepsmandatoryThis parameter lets you create your own scenario. Ddosify runs the provided steps respectively. For the given example file step id: 2 will be executed immediately after the response of step id: 1 is received. The order of the execution is the same as the order of the steps in the config file.
Details of each parameter for a step;
-
idmandatoryEach step must have a unique integer id.
-
urlmandatoryThis is the equivalent of the
-tflag. -
protocoloptionalThis is the equivalent of the
-pflag. -
methodoptionalThis is the equivalent of the
-mflag. -
headersoptionalList of headers with key:value format.
-
payloadoptionalThis is the equivalent of the
-bflag. -
payload_fileoptionalIf you need a long payload, we suggest using this parameter instead of
payload. -
authoptionalBasic authentication.
"auth": { "username": "test_user", "password": "12345" } -
othersoptionalThis parameter accepts dynamic key: value pairs to configure connection details of the protocol in use.
"others": {
    "keep-alive": true,              // Default false
    "disable-compression": false,    // Default true
    "h2": true,                      // Enables HTTP/2. Default false.
    "disable-redirect": true         // Default false
}
-


