If you are a developer yourself, you might want to setup a development environment, so that you can debug and develop openHAB yourself.
Note that the project build is completely mavenized - so running "mvn install" on any repository root will nicely build all artifacts. For development and debugging, we recommend using an Eclipse IDE though. It should be possible to use other IDEs (e.g. NetBeans or IntelliJ), but you will have to work out how to resolve OSGi dependencies etc. yourself. So unless you have a strong reason to go for another IDE, we recommend using Eclipse.
Please ensure that you have the following prerequisites installed on your machine:
- Git
- Maven 3.x (optional, Eclipse m2e can also be used)
- Oracle JDK 8
The Eclipse IDE is used for openHAB developments. The Eclipse Installer automatically prepares the IDE so that it comes with all required plug-ins, the correct workspace encoding settings, pre-configured code formatters and more. Simply follow these steps:
- Download the Eclipse Installer
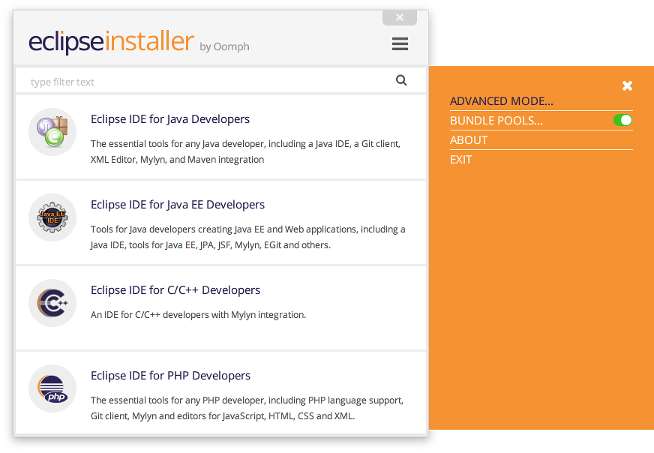
- Launch the Eclipse Installer and switch to "Advanced Mode" in the top right menu:

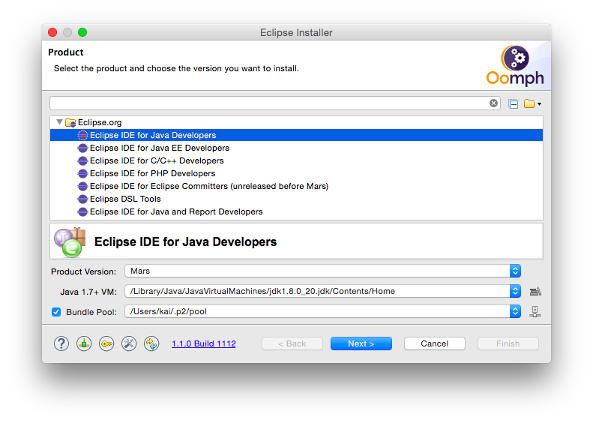
- Choose the "Eclipse IDE for Java Developers" and select "Next":

- Expand the "Github.com/openHAB" entry, double click "openHAB Development" (the double click is important: The entry has to appear in the empty table at the bottom). Furthermore double-click all entries that you would want to have available in your workspace (you can select multiple/all of them). Make sure that all of them are listed in the table at the bottom and select "Next".
- Now provide an installation folder (don't use spaces in the path on Windows!) and your Github id (used to push your changesets to) and select "Next".
- The installation will now begin when pressing "Finish".
- Once it is done, you will see the Eclipse Welcome Screen, which you can close by clicking "Workbench" on the top right. You will see that the installer not only set up an Eclipse IDE instance for you, but also checked out all selected git repositories and imported all projects into the workspace.
- Your workspace should now fully compile and you can start the runtime by launching the "openHAB_Runtime" launch configuration.
Note that you will find the sources in a subfolder called "git" within your selected installation folder. You can use any kind of git client here, if you do not want to use the git support from within the Eclipse IDE. If you want to push changes, you need to do so to your personal fork of the repository in order to create a pull request. You will find more details in the "How to contribute" documentation.
Now that you have the development environment set up, let's try to build, run and debug.
Building:
Building for the purpose of running is done from within eclipse. First take a look at the problems tab and check for existing errors. If you see something there after a clean install, do Help > Perform Setup Tasks. If errors remain, try to find them in the project. In my case a couple of bindings were failing to compile for unknown reasons. Simply right click on the offenders and "close project" them.
Let's do a Clean/Build cycle. Project > Clean ... > Clean all projects/Start build immediately. Eclipse should now take a short time to build everything. Check the Problems tab for errors. All errors should now be gone, and we can proceed to running.
Note, that if you wish to produce a distribution binary that you will later copy to a different machine, you will need to build in a different manner. Distribution builds are done with maven. Go into the root directory of the project and run 'mvn install'
Running:
In the Package Explorer tab you will see the OpenHAB components that were installed. Open the "Infrastructure > launch" folder. Right click on openHAB_Runtime.launch, select "Run as > openHAB_Runtime". You should now begin to see output in the console window.
Debugging:
For this exercise we will need the "ESH Extensions" package installed. Go into "ESH Extensions/org.eclipse.smarthome.binding.yahooweather" folder. This is the yahoo weather binding and we will use it as an example. Let's add a small change to the code, and put a breakpoint on the location so that we can see our changes show up in the debugger.
Open YahooWeatherHandler.java and take a look at line 60. It is the log print from the initialize function.
logger.debug("Initializing YahooWeather handler.");
Add some text to the string and save the file. Now put a breakpoint on this line. Build as above.
Debugging is done in the same way as running, but instead of Run as, select "Debug as > openHAB_Runtime". OpenHAB will launch, and the debugger will stop at the breakpoint, but our change won't be there. To fix this we need to let eclipse know that we've made changes to this binding.
Right click on openHAB_Runtime.launch > Run as > Run configurations ... Go to the Plug-ins tab. Notice that under "Target Platform" org.eclipse.smarthome.binding.yahooweather is checked. But, under Workspace the same org.eclipse.smarthome.binding.yahooweather is not checked. Do so now. Try the debug session again. You should now see the modified code show up in the debugger.