Start using Symfony2 in 10 minutes! This chapter will walk you through some of the most important concepts behind Symfony2 and explain how you can get started quickly by showing you a simple project in action.
If you've used a web framework before, you should feel right at home with Symfony2. If not, welcome to a whole new way of developing web applications.
First, check that the PHP version installed on your computer meets the Symfony2
requirements: 5.3.3 or higher. Then, open a console and execute the following
command to install the latest version of Symfony2 in the myproject/
directory:
$ composer create-project symfony/framework-standard-edition myproject/ '~2.5'Note
Composer is the package manager used by modern PHP applications and the only recommended way to install Symfony2. To install Composer on your Linux or Mac system, execute the following commands:
$ curl -sS https://getcomposer.org/installer | php
$ sudo mv composer.phar /usr/local/bin/composer
To install Composer on a Windows system, download the executable installer.
Beware that the first time you install Symfony2, it may take a few minutes to download all its components. At the end of the installation process, the installer will ask you four questions:
- Would you like to use Symfony 3 directory structure? [y/N] The upcoming
Symfony 3 version will modify the default directory structure for Symfony
applications. If you want to test drive this new structure, type
y. In order to follow this tutorial, press the<Enter>key to accept the defaultNvalue and to keep using the default Symfony2 structure. - Would you like to install Acme demo bundle? [y/N] Symfony versions prior
to 2.5 included a demo application to test drive some features of the
framework. However, as this demo application is only useful for newcomers,
installing it is now optional. In order to follow this tutorial, type the
ykey to install the demo application. - Some parameters are missing. Please provide them. Symfony2 asks you for
the value of all the configuration parameters. For this first project,
you can safely ignore this configuration by pressing the
<Enter>key repeatedly. - Do you want to remove the existing VCS (.git, .svn..) history? [Y,n]?
The development history of large projects such as Symfony can take a lot of
disk space. Press the
<Enter>key to safely remove all this history data.
Before running Symfony2 for the first time, execute the following command to make sure that your system meets all the technical requirements:
$ cd myproject/
$ php app/check.php
Fix any error reported by the command and then use the PHP built-in web server to run Symfony:
$ php app/console server:run.. seealso::
Read more about the internal server :doc:`in the cookbook </cookbook/web_server/built_in>`.
If you get the error There are no commands defined in the "server" namespace., then you are probably using PHP 5.3. That's ok! But the built-in web server is only available for PHP 5.4.0 or higher. If you have an older version of PHP or if you prefer a traditional web server such as Apache or Nginx, read the :doc:`/cookbook/configuration/web_server_configuration` article.
Open your browser and access the http://localhost:8000 URL to see the
Welcome page of Symfony2:
One of the main goals of a framework is to keep your code organized and to allow your application to evolve easily over time by avoiding the mixing of database calls, HTML tags and business logic in the same script. To achieve this goal with Symfony, you'll first need to learn a few fundamental concepts and terms.
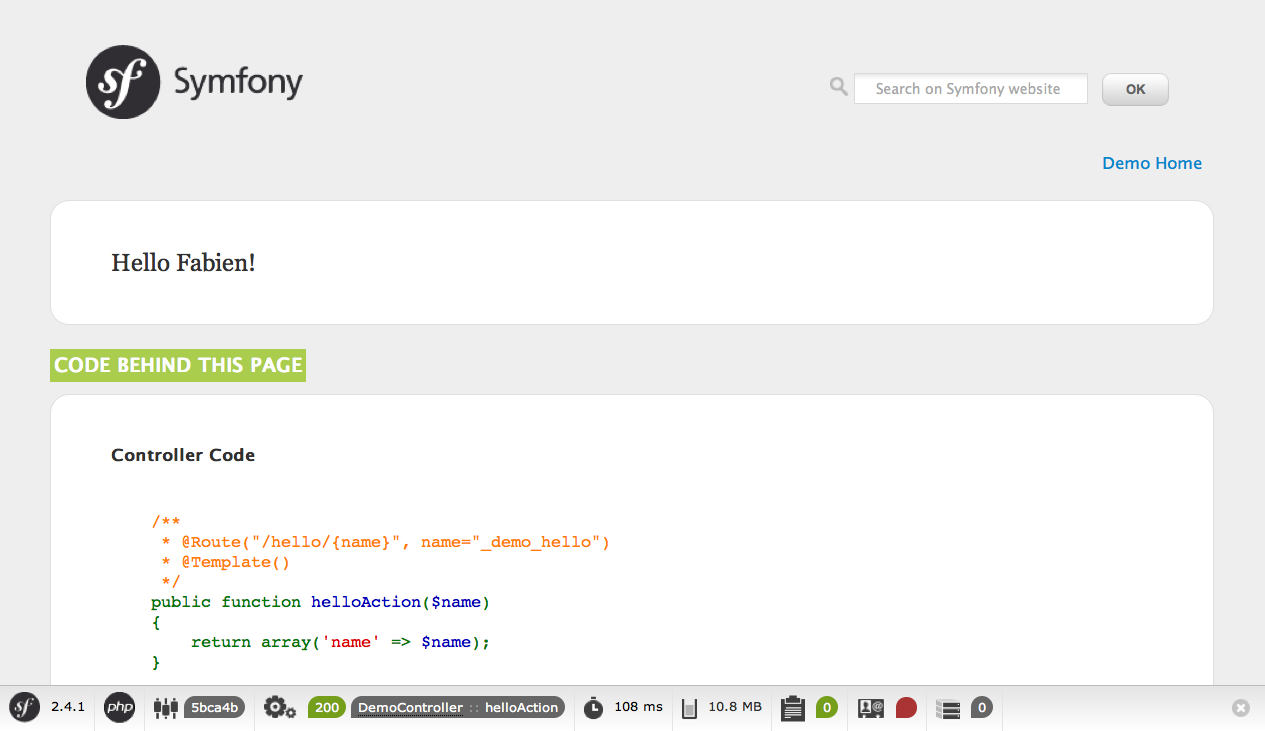
Symfony comes with some sample code that you can use to learn more about its main concepts. Go to the following URL to be greeted by Symfony2 (replace Fabien with your first name):
http://localhost:8000/app_dev.php/demo/hello/Fabien
Note
Instead of the greeting page, you may see a blank page or an error page. This is caused by a directory permission misconfiguration. There are several possible solutions depending on your operating system. All of them are explained in the :ref:`Setting up Permissions <book-installation-permissions>` section of the official book.
What's going on here? Have a look at each part of the URL:
app_dev.php: This is a :term:`front controller`. It is the unique entry point of the application and it responds to all user requests;/demo/hello/Fabien: This is the virtual path to the resource the user wants to access.
Your responsibility as a developer is to write the code that maps the user's
request (/demo/hello/Fabien) to the resource associated with it
(the Hello Fabien! HTML page).
Symfony2 routes the request to the code that handles it by matching the
requested URL (i.e. the virtual path) against some configured paths. The demo
paths are defined in the app/config/routing_dev.yml configuration file:
# app/config/routing_dev.yml
# ...

# AcmeDemoBundle routes (to be removed)
_acme_demo:
    resource: "@AcmeDemoBundle/Resources/config/routing.yml"
This imports a routing.yml file that lives inside the AcmeDemoBundle:
# src/Acme/DemoBundle/Resources/config/routing.yml
_welcome:
    path:     /
    defaults: { _controller: AcmeDemoBundle:Welcome:index }

_demo:
    resource: "@AcmeDemoBundle/Controller/DemoController.php"
    type:     annotation
    prefix:   /demo

# ...
The first three lines (after the comment) define the code that is executed
when the user requests the "/" resource (i.e. the welcome page you saw
earlier). When requested, the AcmeDemoBundle:Welcome:index controller
will be executed. In the next section, you'll learn exactly what that means.
Tip
In addition to YAML files, routes can be configured in XML or PHP files and can even be embedded in PHP annotations. This flexibility is one of the main features of Symfony2, a framework that never imposes a particular configuration format on you.
A controller is a PHP function or method that handles incoming requests and
returns responses (often HTML code). Instead of using the PHP global variables
and functions (like $_GET or header()) to manage these HTTP messages,
Symfony uses objects: :ref:`Request <component-http-foundation-request>`
and :ref:`Response <component-http-foundation-response>`. The simplest possible
controller might create the response by hand, based on the request:
use Symfony\Component\HttpFoundation\Response;

$name = $request->get('name');

return new Response('Hello '.$name);
Symfony2 chooses the controller based on the _controller value from the
routing configuration: AcmeDemoBundle:Welcome:index. This string is the
controller logical name, and it references the indexAction method from
the Acme\DemoBundle\Controller\WelcomeController class:
// src/Acme/DemoBundle/Controller/WelcomeController.php
namespace Acme\DemoBundle\Controller;

use Symfony\Bundle\FrameworkBundle\Controller\Controller;

class WelcomeController extends Controller
{
    public function indexAction()
    {
        return $this->render('AcmeDemoBundle:Welcome:index.html.twig');
    }
}
Tip
You could have used the full class and method name -
Acme\DemoBundle\Controller\WelcomeController::indexAction - for the
_controller value. But using the logical name is shorter and allows
for more flexibility.
The WelcomeController class extends the built-in Controller class,
which provides useful shortcut methods, like the
:ref:`render()<controller-rendering-templates>` method that loads and renders
a template (AcmeDemoBundle:Welcome:index.html.twig). The returned value
is a Response object populated with the rendered content. So, if the need
arises, the Response can be tweaked before it is sent to the browser:
public function indexAction()
{
    $response = $this->render('AcmeDemoBundle:Welcome:index.txt.twig');
    $response->headers->set('Content-Type', 'text/plain');

    return $response;
}
No matter how you do it, the end goal of your controller is always to return
the Response object that should be delivered back to the user. This Response
object can be populated with HTML code, represent a client redirect, or even
return the contents of a JPG image with a Content-Type header of image/jpg.
The template name, AcmeDemoBundle:Welcome:index.html.twig, is the template
logical name and it references the Resources/views/Welcome/index.html.twig
file inside the AcmeDemoBundle (located at src/Acme/DemoBundle).
The Bundles section below will explain why this is useful.
Now, take a look at the routing configuration again and find the _demo
key:
# src/Acme/DemoBundle/Resources/config/routing.yml
# ...
_demo:
    resource: "@AcmeDemoBundle/Controller/DemoController.php"
    type:     annotation
    prefix:   /demo
The logical name of the file containing the _demo routes is
@AcmeDemoBundle/Controller/DemoController.php and refers
to the src/Acme/DemoBundle/Controller/DemoController.php file. In this
file, routes are defined as annotations on action methods:
// src/Acme/DemoBundle/Controller/DemoController.php
use Sensio\Bundle\FrameworkExtraBundle\Configuration\Route;
use Sensio\Bundle\FrameworkExtraBundle\Configuration\Template;

class DemoController extends Controller
{
    /**
     * @Route("/hello/{name}", name="_demo_hello")
     * @Template()
     */
    public function helloAction($name)
    {
        return array('name' => $name);
    }

    // ...
}
The @Route() annotation creates a new route matching the /hello/{name}
path to the helloAction() method. Any string enclosed in curly brackets,
like {name}, is considered a variable that can be directly retrieved as a
method argument with the same name.
If you take a closer look at the controller code, you can see that instead of
rendering a template and returning a Response object like before, it
just returns an array of parameters. The @Template() annotation tells
Symfony to render the template for you, passing to it each variable of the
returned array. The name of the template that's rendered follows the name
of the controller. So, in this example, the AcmeDemoBundle:Demo:hello.html.twig
template is rendered (located at src/Acme/DemoBundle/Resources/views/Demo/hello.html.twig).
The controller renders the src/Acme/DemoBundle/Resources/views/Demo/hello.html.twig
template (or AcmeDemoBundle:Demo:hello.html.twig if you use the logical name):
{# src/Acme/DemoBundle/Resources/views/Demo/hello.html.twig #}
{% extends "AcmeDemoBundle::layout.html.twig" %}

{% block title "Hello " ~ name %}

{% block content %}
    <h1>Hello {{ name }}!</h1>
{% endblock %}
By default, Symfony2 uses Twig as its template engine but you can also use traditional PHP templates if you choose. The :doc:`second part of this tutorial</quick_tour/the_view>` will introduce how templates work in Symfony2.
You might have wondered why the :term:`Bundle` word is used in many names you have seen so far. All the code you write for your application is organized in bundles. In Symfony2 speak, a bundle is a structured set of files (PHP files, stylesheets, JavaScripts, images, ...) that implements a single feature (a blog, a forum, ...) and which can be easily shared with other developers. As of now, you have manipulated one bundle, AcmeDemoBundle. You will learn more about bundles in the :doc:`last part of this tutorial</quick_tour/the_architecture>`.
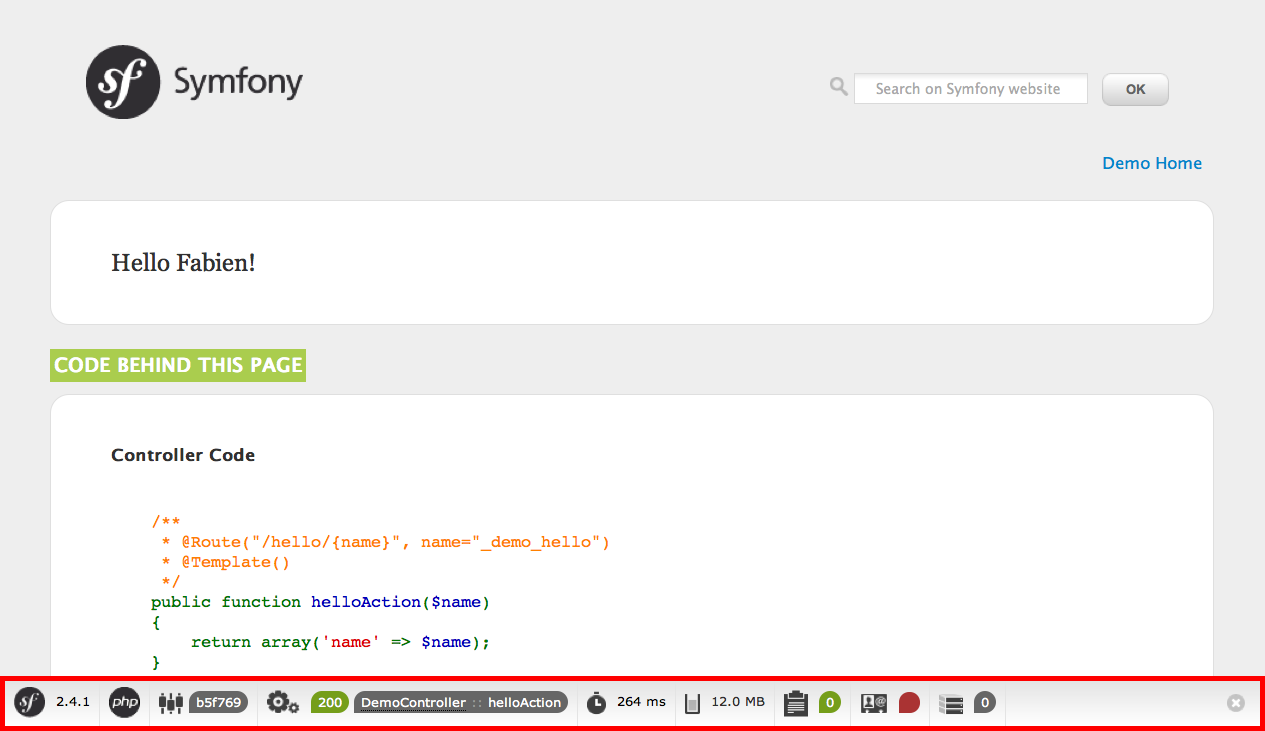
Now that you have a better understanding of how Symfony2 works, take a closer look at the bottom of any Symfony2 rendered page. You should notice a small bar with the Symfony2 logo. This is the "Web Debug Toolbar", and it is a Symfony2 developer's best friend!
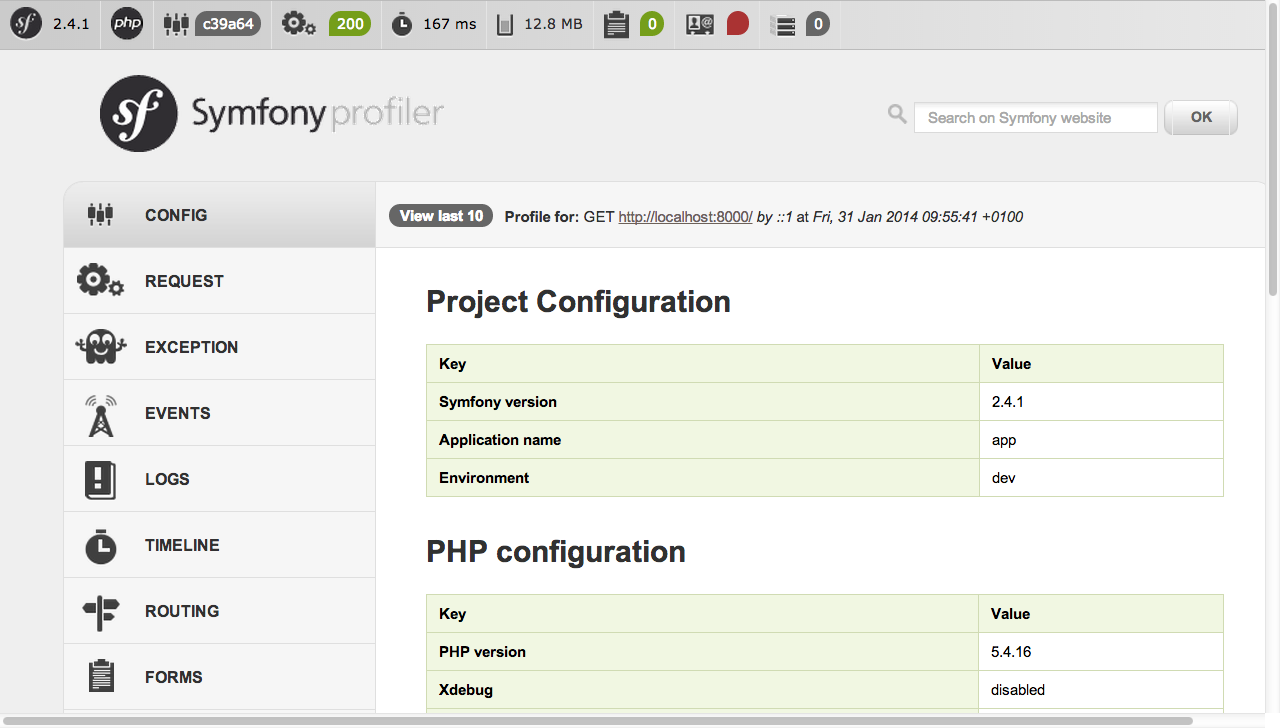
But what you see initially is only the tip of the iceberg; click on any of the bar sections to open the profiler and get much more detailed information about the request, the query parameters, security details, and database queries:
Of course, it would be unwise to have this tool enabled when you deploy your
application, so by default, the profiler is not enabled in the prod
environment.
An :term:`Environment` represents a group of configurations that's used to run
your application. Symfony2 defines two environments by default: dev
(suited for when developing the application locally) and prod (optimized
for when executing the application on production).
Typically, the environments share a large amount of configuration options. For
that reason, you put your common configuration in config.yml and override
the specific configuration file for each environment where necessary:
# app/config/config_dev.yml
imports:
    - { resource: config.yml }

web_profiler:
    toolbar: true
    intercept_redirects: false
In this example, the dev environment loads the config_dev.yml configuration
file, which itself imports the common config.yml file and then modifies it
by enabling the web debug toolbar.
When you visit the app_dev.php file in your browser, you're executing
your Symfony application in the dev environment. To visit your application
in the prod environment, visit the app.php file instead.
The demo routes in our application are only available in the dev environment.
Therefore, if you try to access the http://localhost/app.php/demo/hello/Fabien
URL, you'll get a 404 error.
Tip
If instead of using PHP's built-in webserver, you use Apache with
mod_rewrite enabled and take advantage of the .htaccess file
Symfony2 provides in web/, you can even omit the app.php part of the
URL. The default .htaccess points all requests to the app.php front
controller:
http://localhost/demo/hello/Fabien
For more details on environments, see ":ref:`Environments & Front Controllers <page-creation-environments>`" article.
Congratulations! You've had your first taste of Symfony2 code. That wasn't so hard, was it? There's a lot more to explore, but you should already see how Symfony2 makes it really easy to implement web sites better and faster. If you are eager to learn more about Symfony2, dive into the next section: ":doc:`The View<the_view>`".


