An open sourced, AI-powered creator for everyone.
- WebUI (Recommended!)
- Google Colab (Very limited features, but very customizable!)
This repo (
carefree-creator) contains the backend server's codes, the WebUI codes (noli-creator) will be open sourced as well if it gains enough interests 😉.
- tl;dr
- WebUI & Local Deployment
- Image Generating Features
- Image Processing Features
- Installation
- Q&A
- Where are my creations stored?
- How do I save / load my project?
- How can I contribute to
carefree-creator? - How can I get my own models interactable on the WebUI?
- Why no
GFPGAN? - Is it FREE?
- Do you like cats?
- What about dogs?
- Why did you build this project?
- Will there be a Discord Community?
- What is
Nolibox???
- Known Issues
- TODO
- Credits
- An infinite draw board for you to save, review and edit all your creations.
- Almost EVERY feature about Stable Diffusion (txt2img, img2img, sketch2img, variations, outpainting, circular/tiling textures, sharing, ...).
- Many useful image editing methods (super resolution, inpainting, ...).
- Integrations of different Stable Diffusion versions (waifu diffusion, ...).
- GPU RAM optimizations, which makes it possible to enjoy these features with an NVIDIA GeForce GTX 1080 Ti!
It might be fair to consider this as:
- An AI-powered, open sourced(*) Figma.
- A more 'interactable' Hugging Face Space.
- A place where you can try all the exciting and cutting-edge models, together.
*: The WebUI codes are not open sourced yet, but we are happy to open source them if it is truely helpful 😉.
Here is the deployment guide.
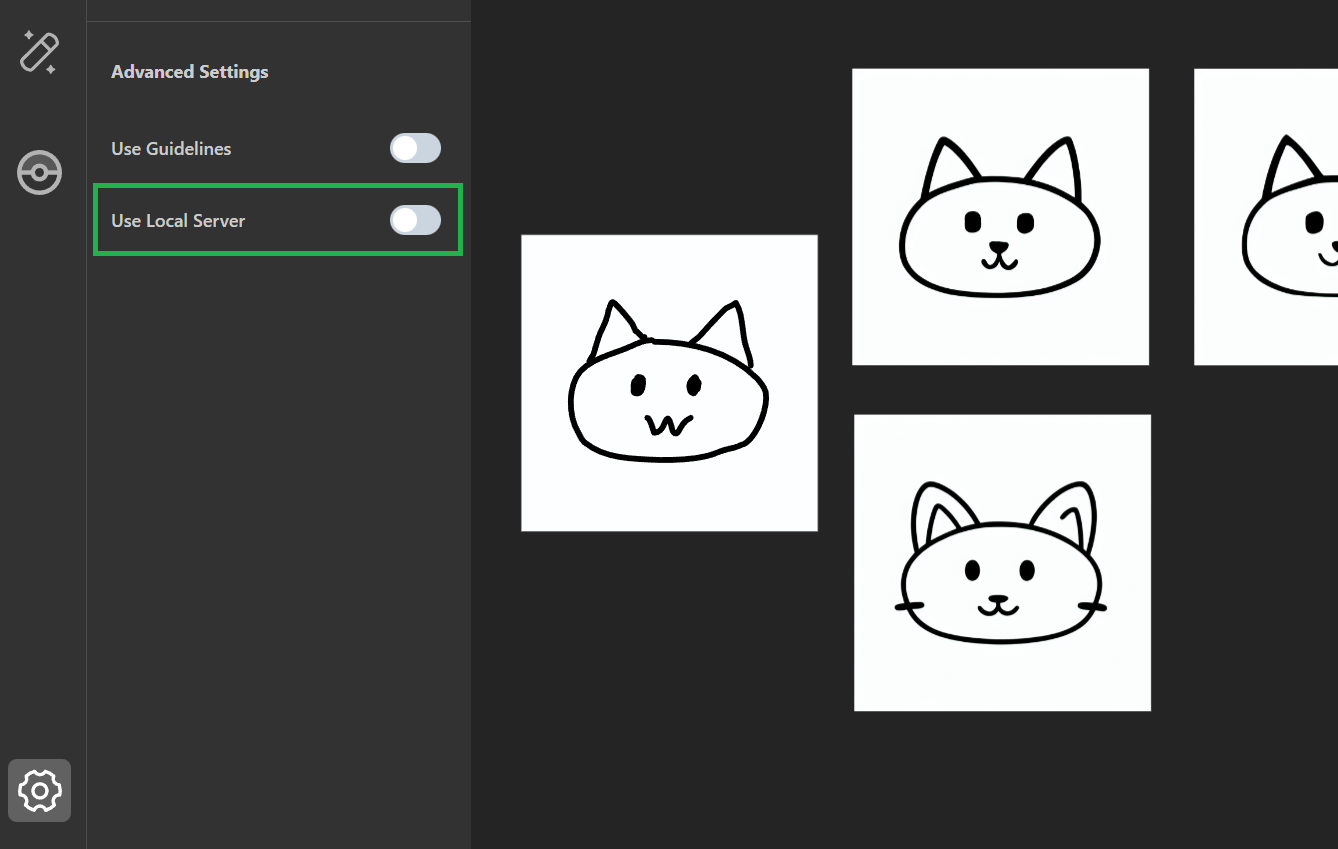
Since carefree-creator is a (fairly) stand-alone FastAPI service, it is possible to use our hosted WebUI along with your local server. In fact, we've already provided a switch for you:
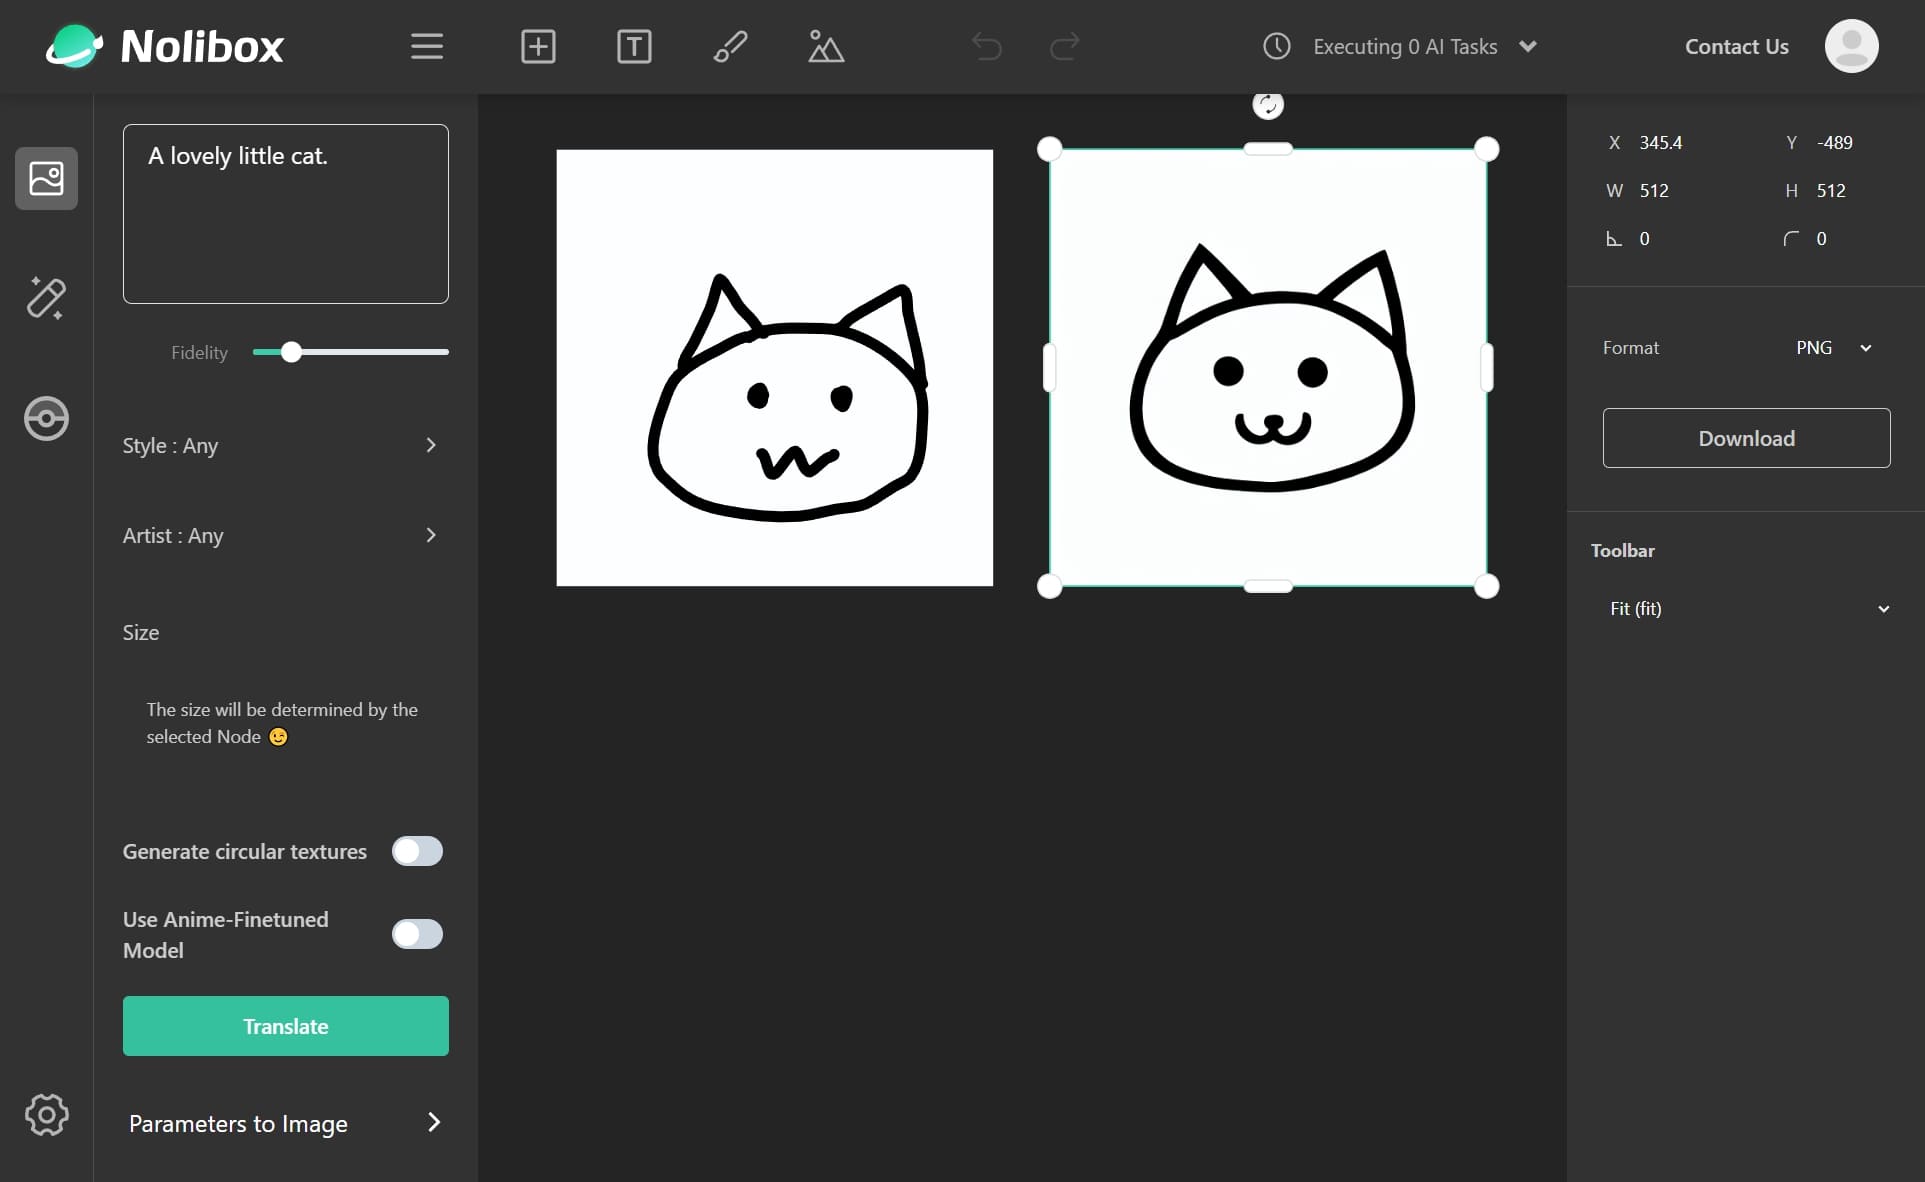
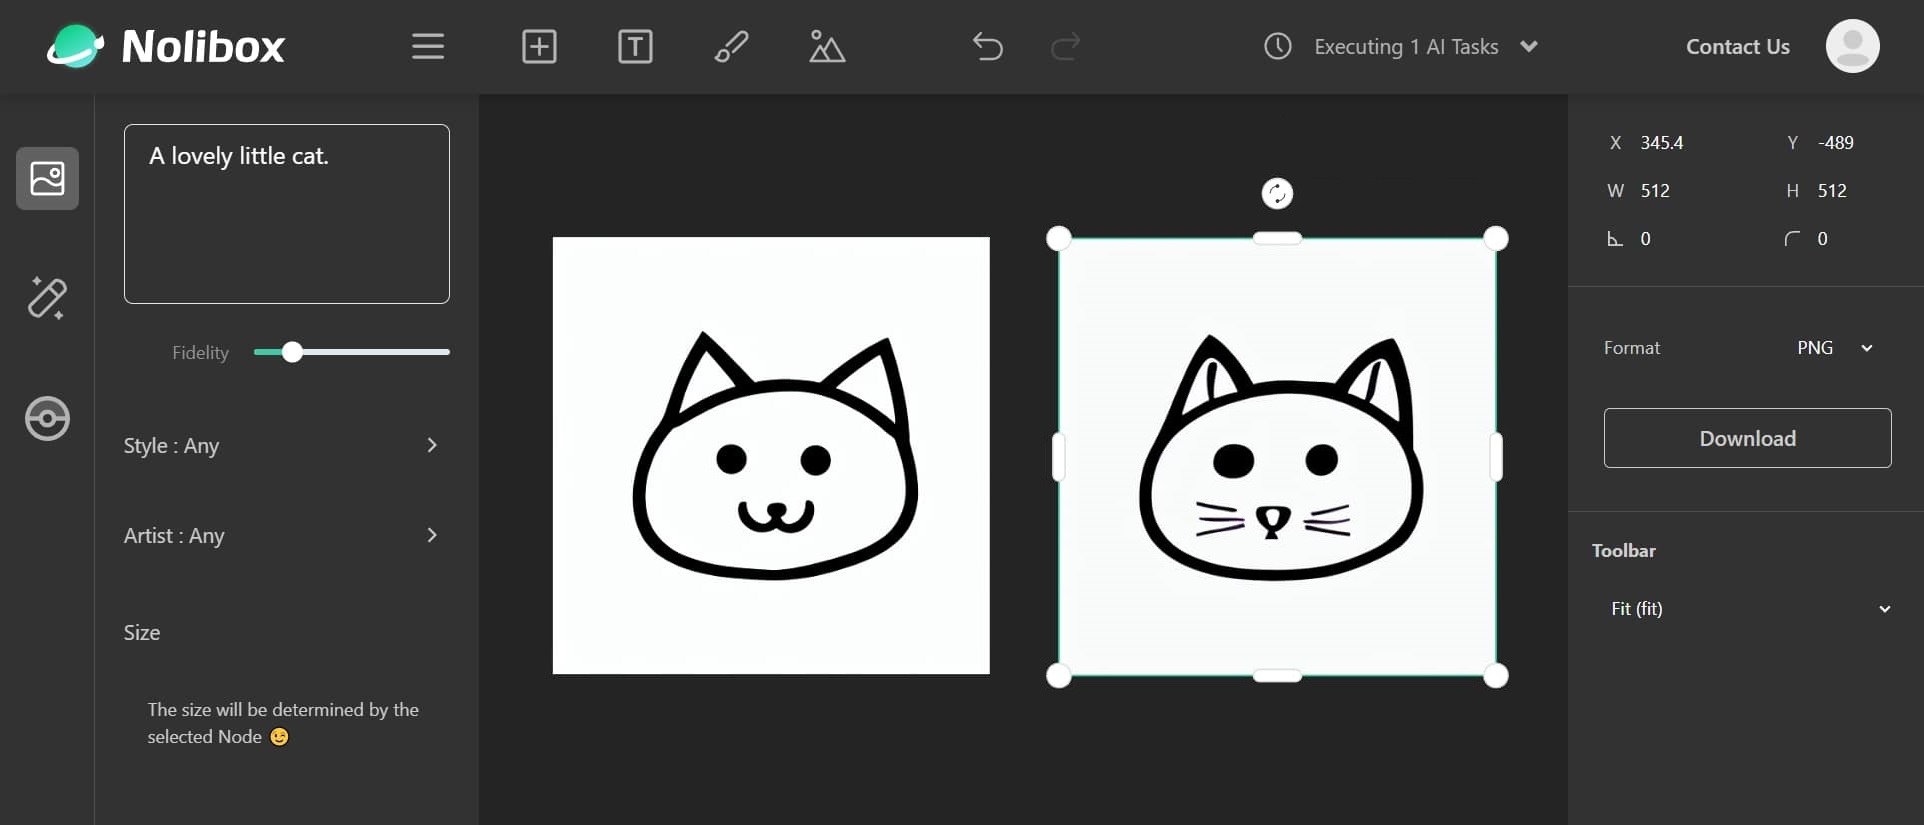
The left-most, hand drawing cat is my creation, and
carefree-creatorhelped me 'beautify' it a little bit on the right 🤣.We will show you how to perform
sketch2imgin this section.
To make things fancy we can call it a 'Decentralized Deployment Method' (🤨). Anyway, with local deployment, you can then utilize your own machines to avoid waiting my poor cloud server to generate the images for one or few minutes. What's more, since you deployed for yourself, it will be FREE forever!
This also reveals the goal of
carefree-creator: we handle the messy WebUI parts for you, so you can focus on developing cool models and algorithms that can later seamlessly integrate into it.And, with the possibility to deploy locally, you don't have to wait for me to update my poor cloud server. You can simply make a pull request to the
carefree-creatorand tell me: hey, get this feature to the WebUI 😆. And after I updated the WebUI, you can already play with it on your local machines!And of course, as mentioned before, if it gains enough interests, we are happy to open souce the WebUI codes as well. In this case, you will have the ability to complete the whole cycle: you can develop your own models, wrap them around to expose APIs, modify WebUI to interact with these APIs, and have fun! You can keep your own forks if you want to make them private, or you can make pull requests to the main fork so everyone in the world can also enjoy your works!
Image generating features really opens a brand new world for someone who wants to create but lack of corresponding skills (just like me 🤣). However, generating one single (or, a couple) image at a time without the ability to review/further edit them easily makes creation harder than expected. That's why we support putting all generated images on one single infinite draw board, and support trying almost every cool image generating features, together.
The features listed in this section hide behind that picture-icon on the left:
This is the most basic and foundamental feature:
But we added something more. For example, you can choose the style:
And as you can see, there are some other options as well - we will cover most of them in the following sections.
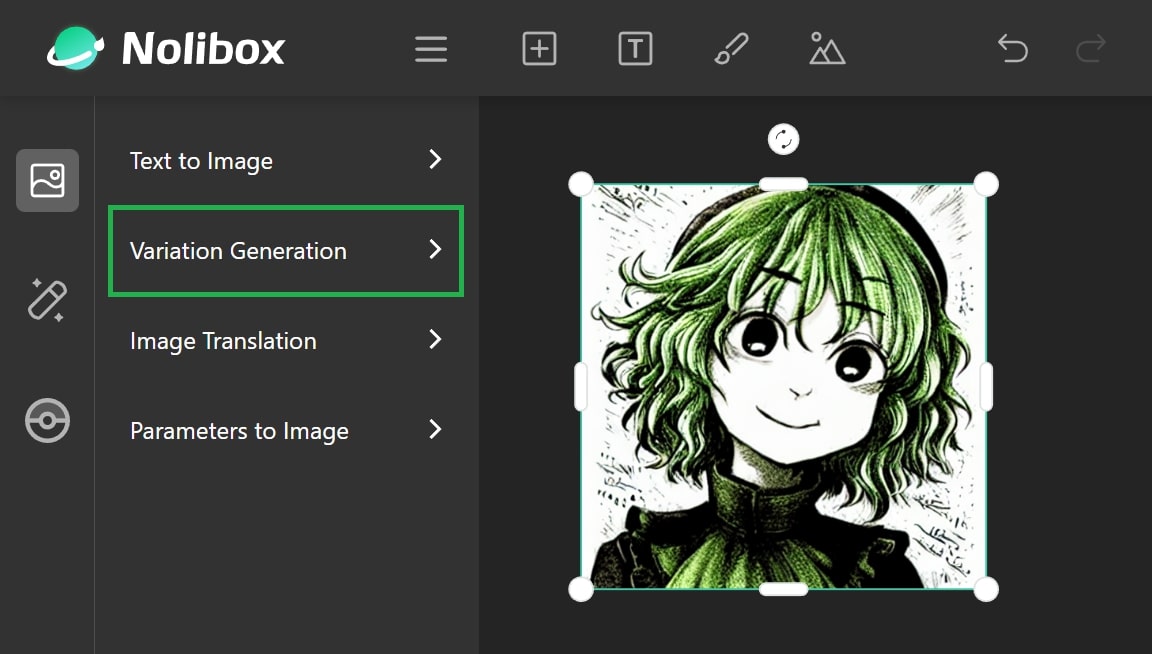
A very powerful feature that we support is to generate variations. Let's say you generated a nice portrait of komeiji koishi:
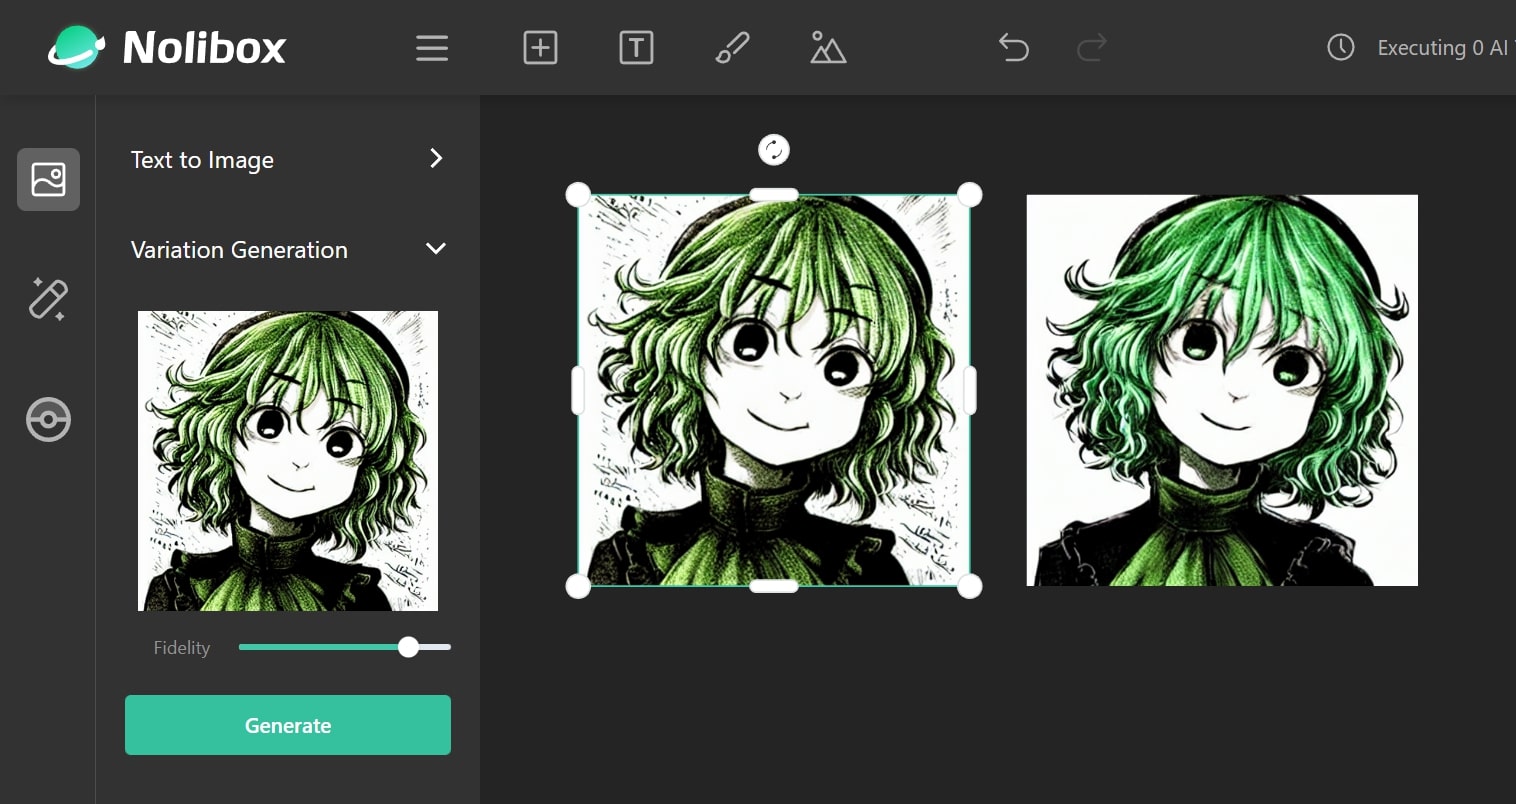
As I've already highlighted, there is a panel called Variation Generation. You can simply click the Generate button in it and see what happens:
Another komeiji koishi appears!
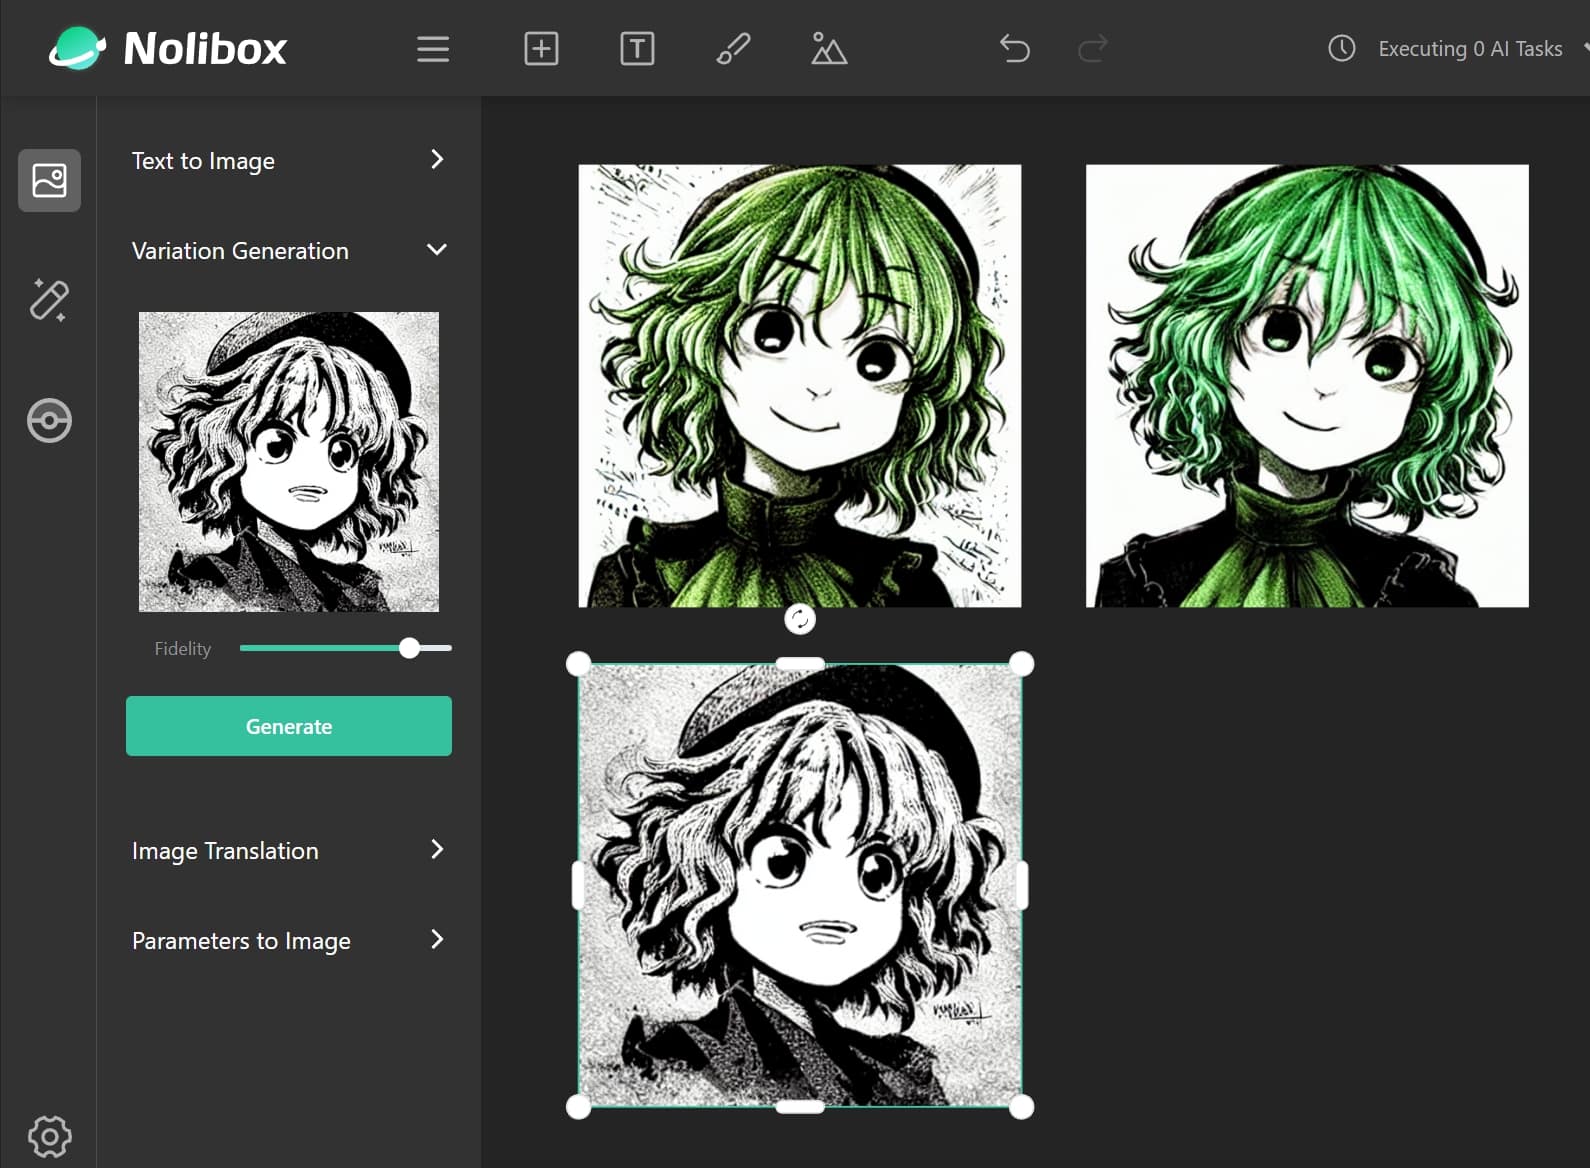
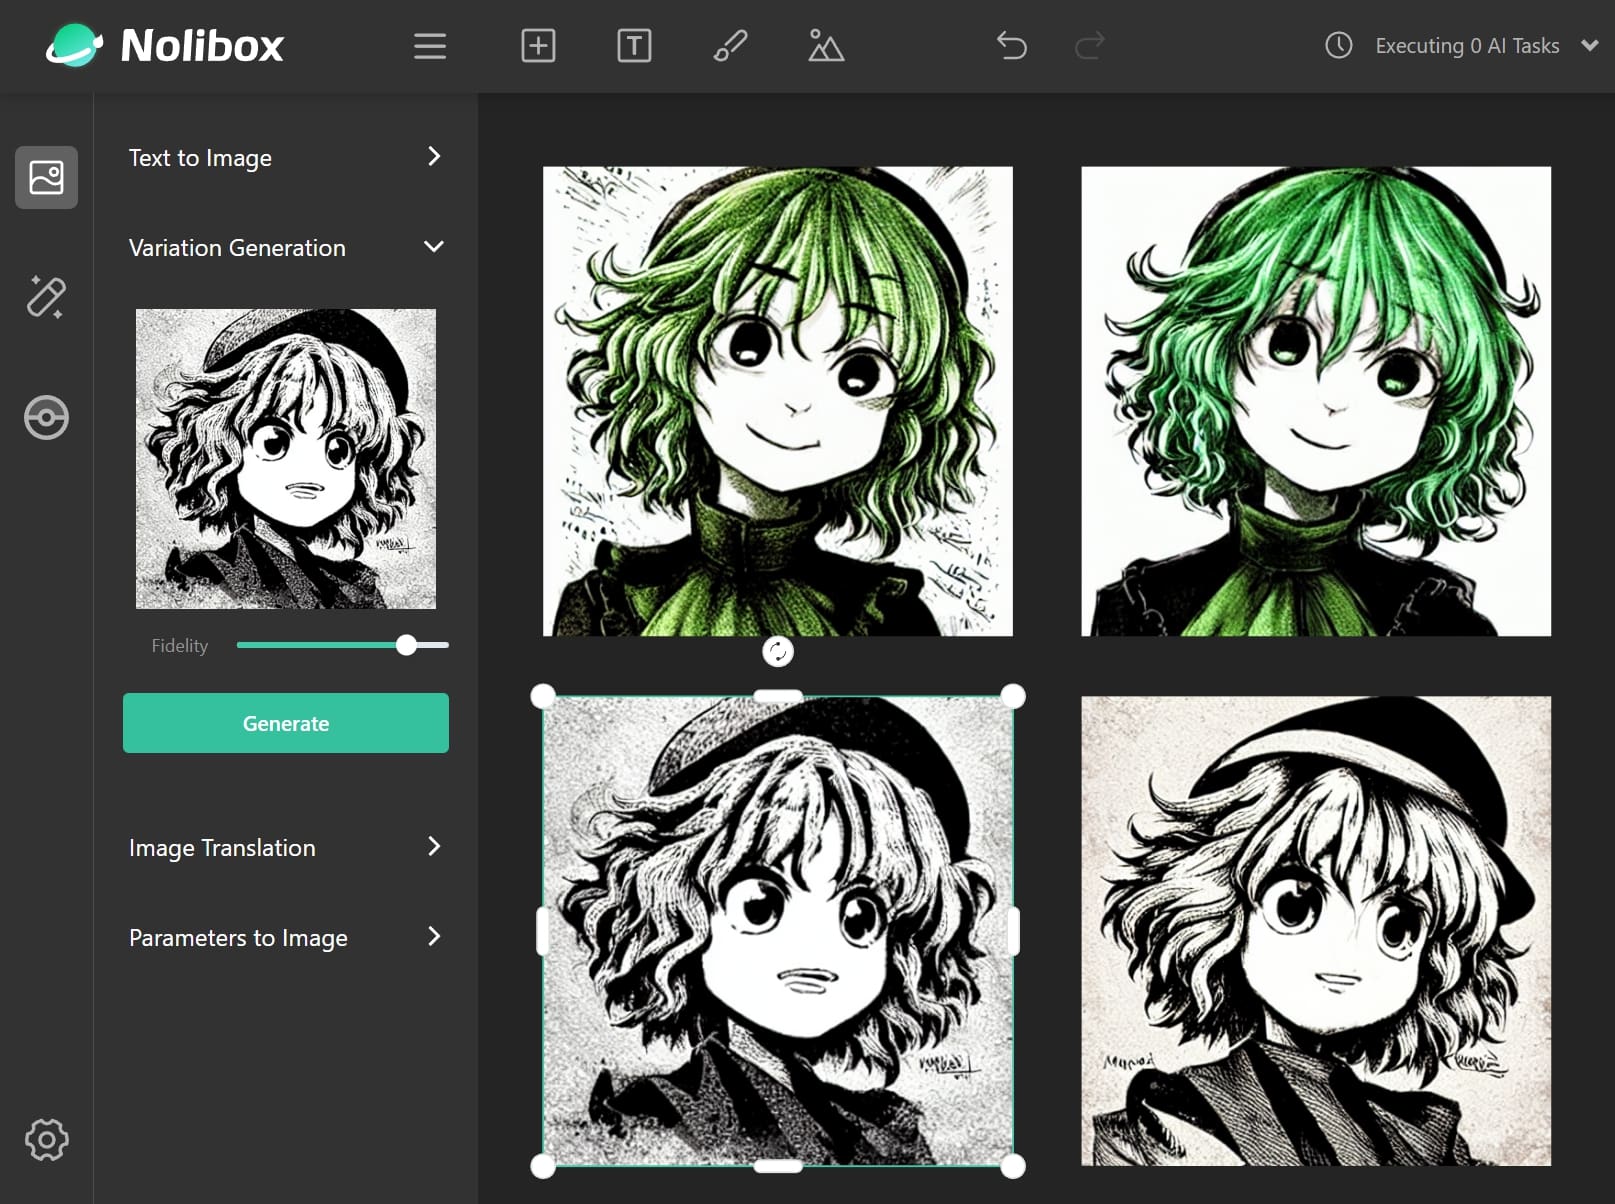
You might have noticed that you can adjust the Fidelity of the variation, it indicates how 'similar' the generated image will be to the original image. By lowering it a little bit, you can get even more interesting results:
Cool!
And why not generate variations based on the generated variations:
The last komeiji koishi somehow mimics the art style of ZUN 😆!
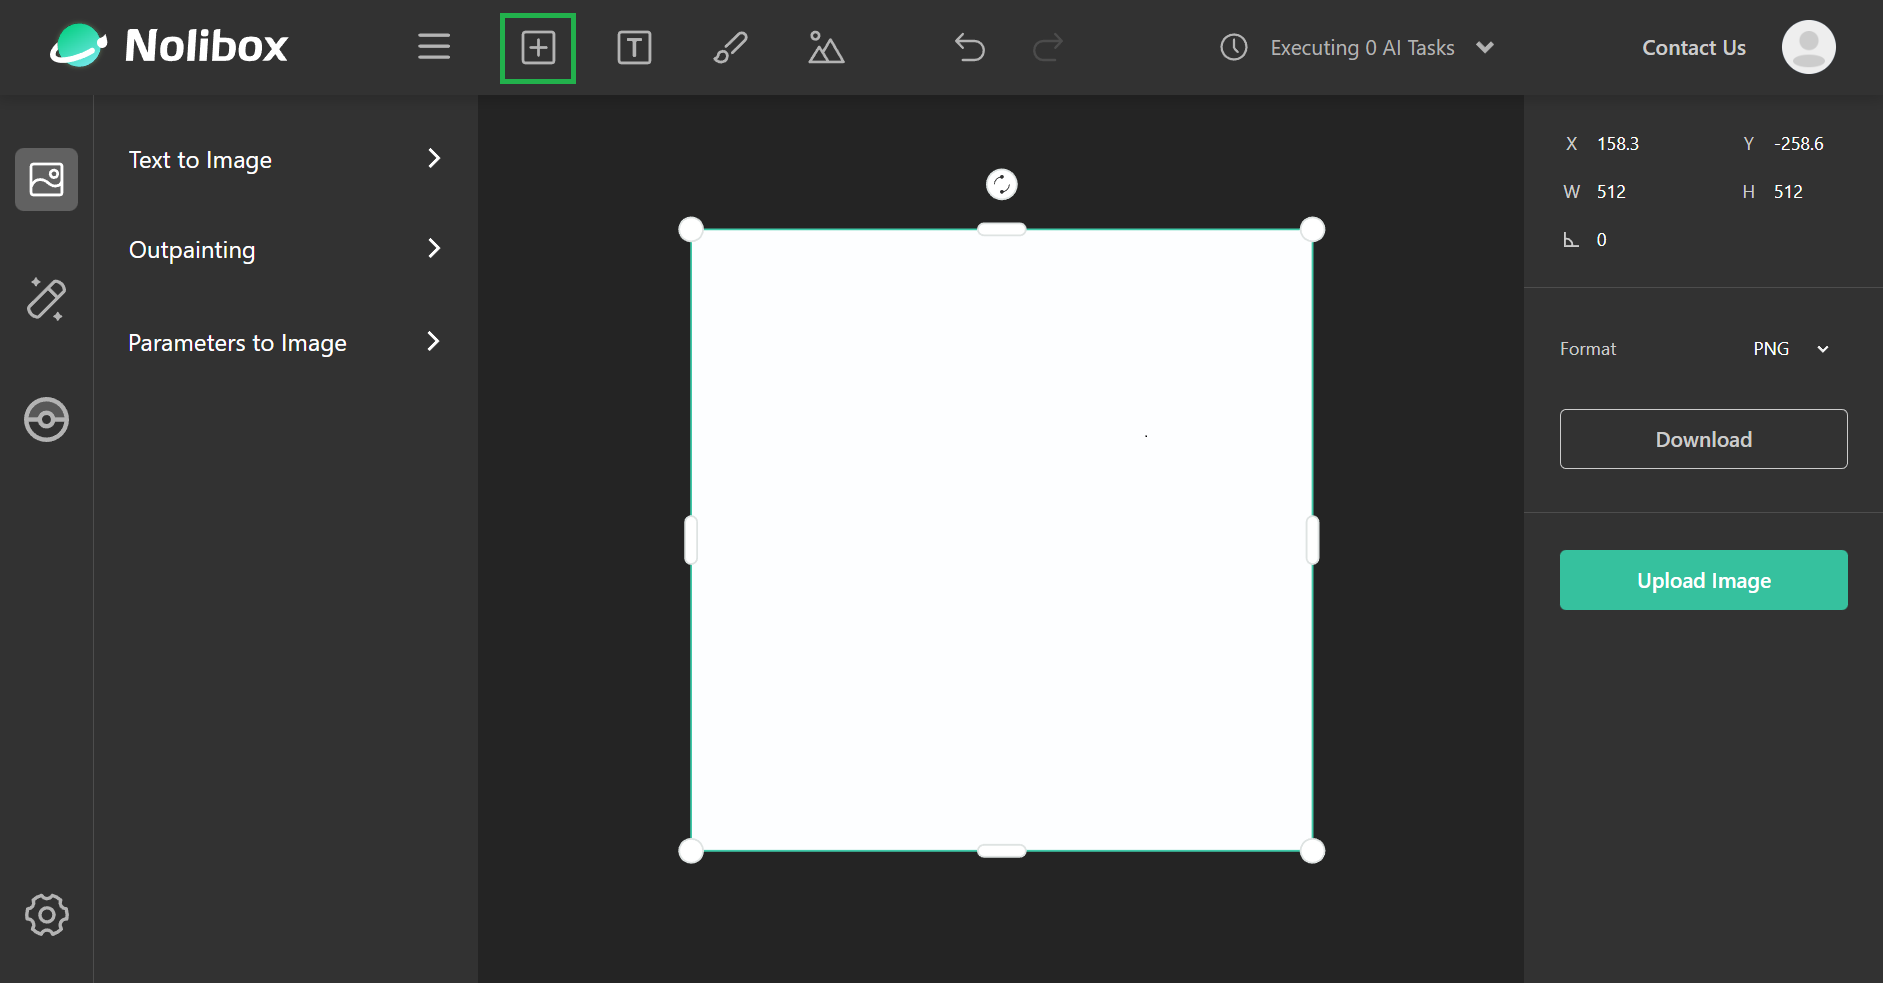
We support 'translating' any sketches to images with the given prompt. Although it is not required, we recommend adding an 'Empty Node' (with the 'plus' icon on the top) as a 'canvas' for you to draw on:
You might notice that there is an
Outpaintingpanel on the left when you select an Empty Node. We will cover its usage in this section.
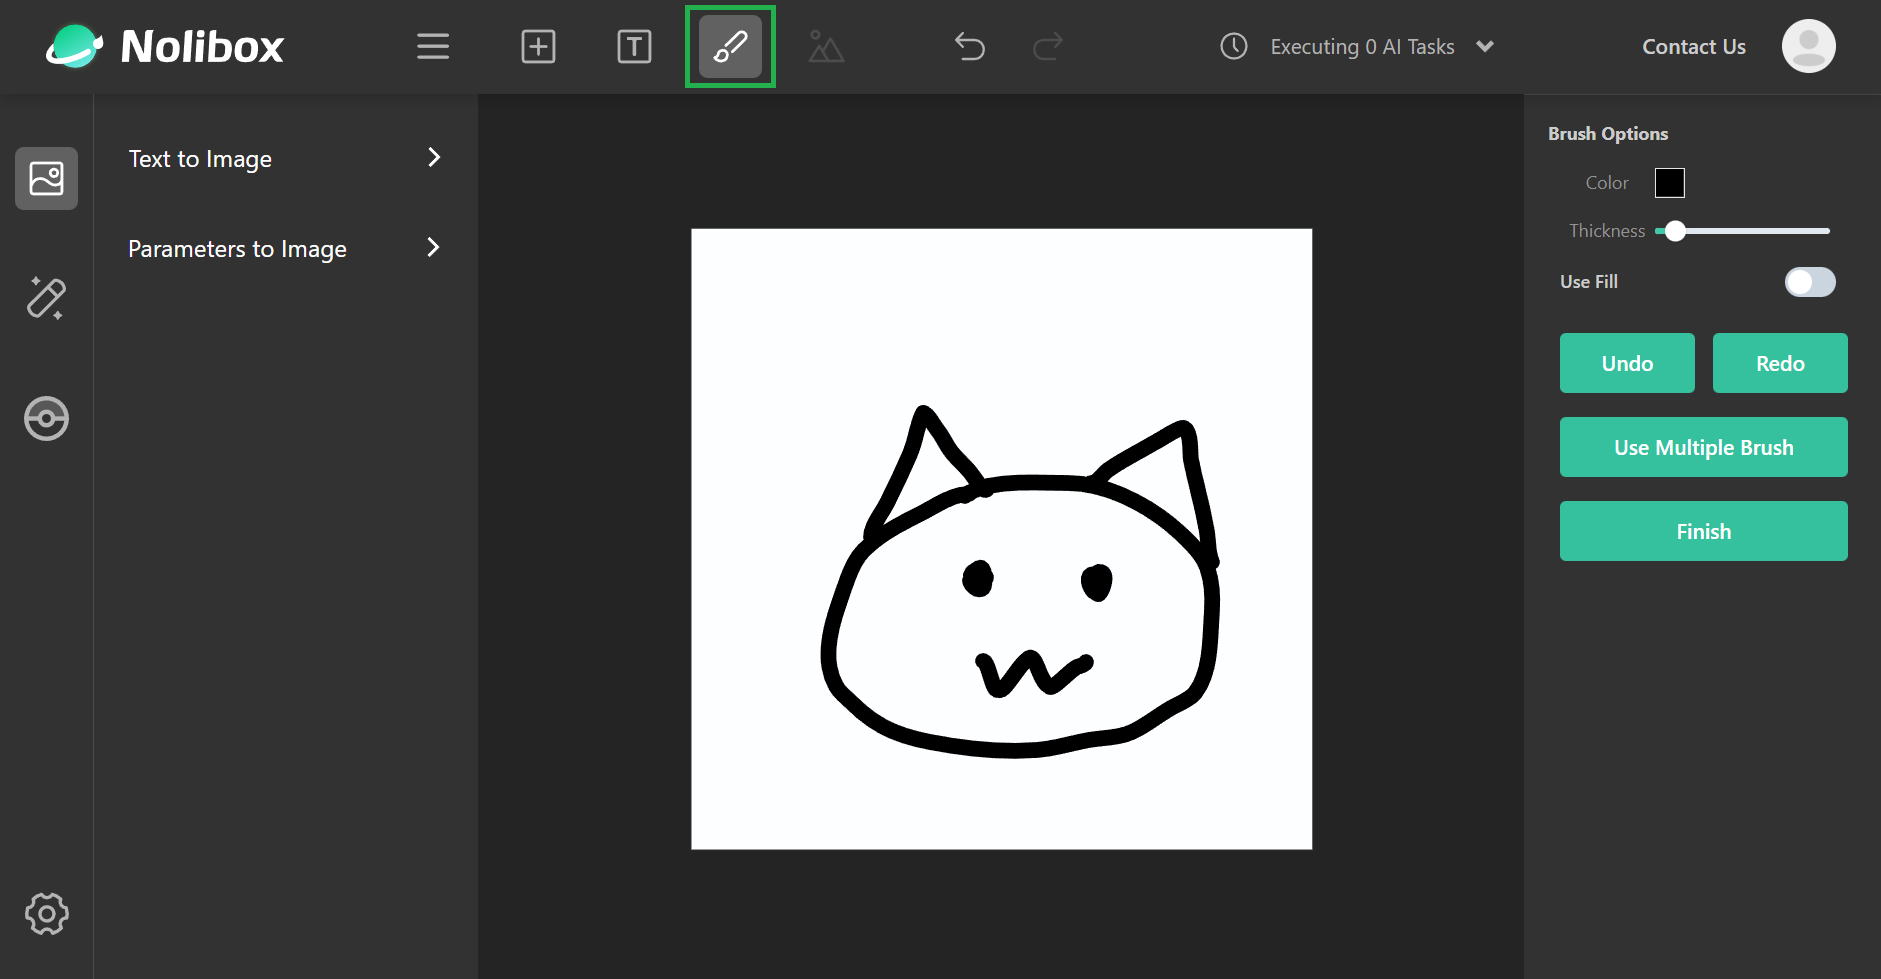
After our 'canvas' is ready, you can trigger the 'brush' and start drawing!
The position doesn't really matter, we will always center your sketch before uploading it to our server 😉.
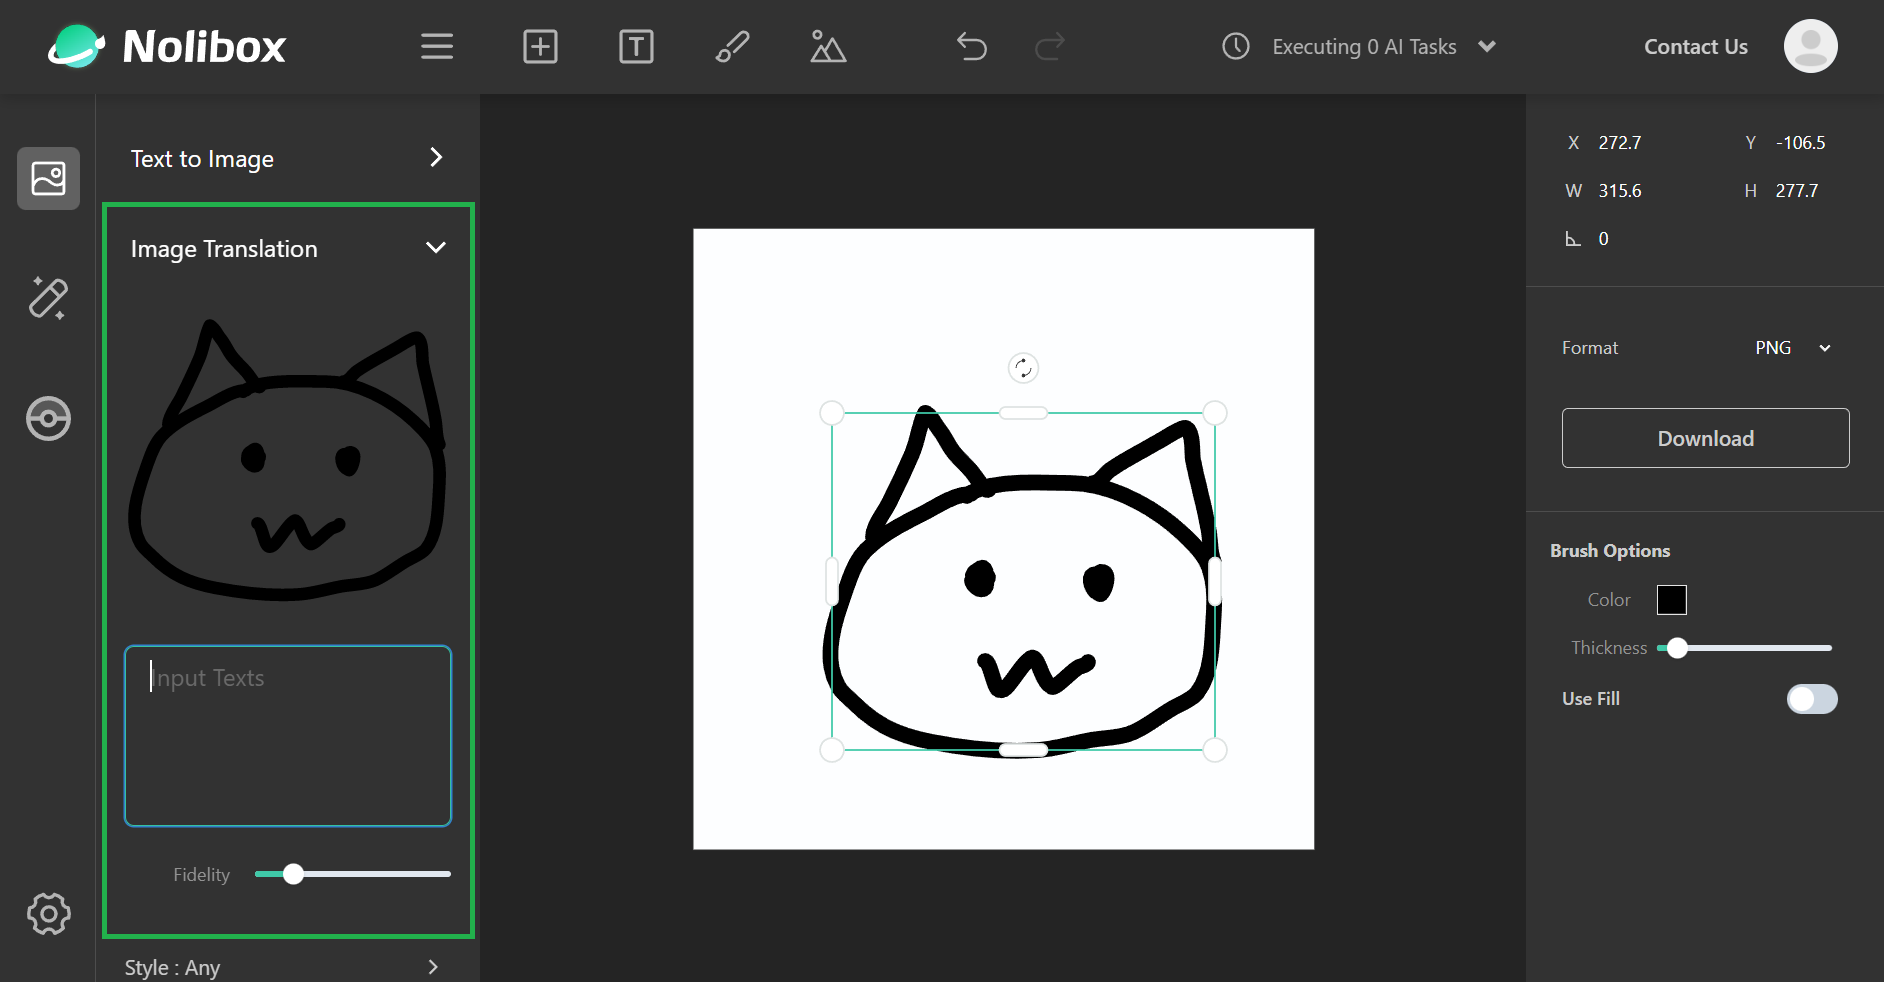
Once you are satisfied with your wonderful sketch, click the Finish button on the right, your drawing will then turn into a selectable Node, and an Image Translation panel will appear on the left:
As you can see, the preview sketch does not contain the 'canvas', that's why we said the 'canvas' is not required.
When the sketch is uploaded to our server, we will fill the background with white color - so don't use white color to draw 😆!
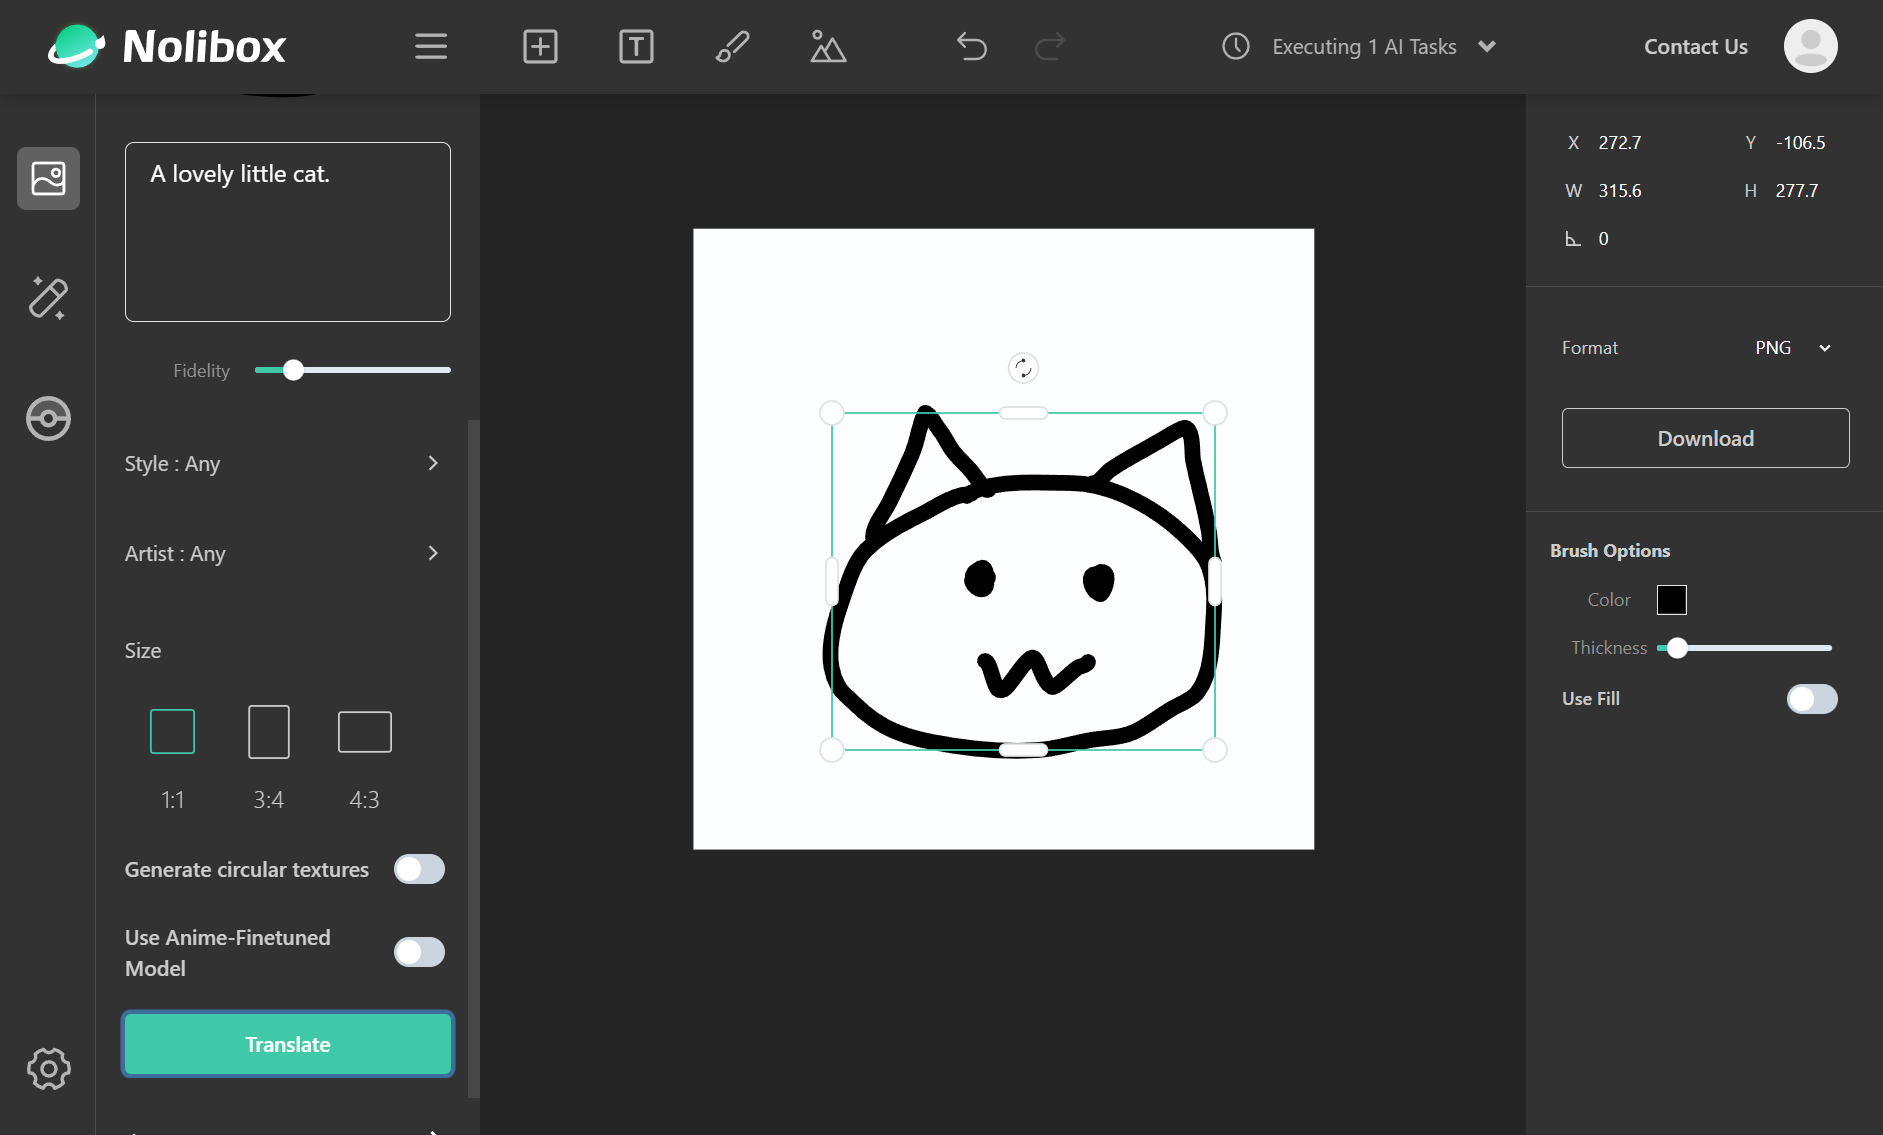
After inputing some related texts, you can scroll down the Image Translation panel and click the Translate button:
And the result should be poped up in a few seconds:
Not bad!
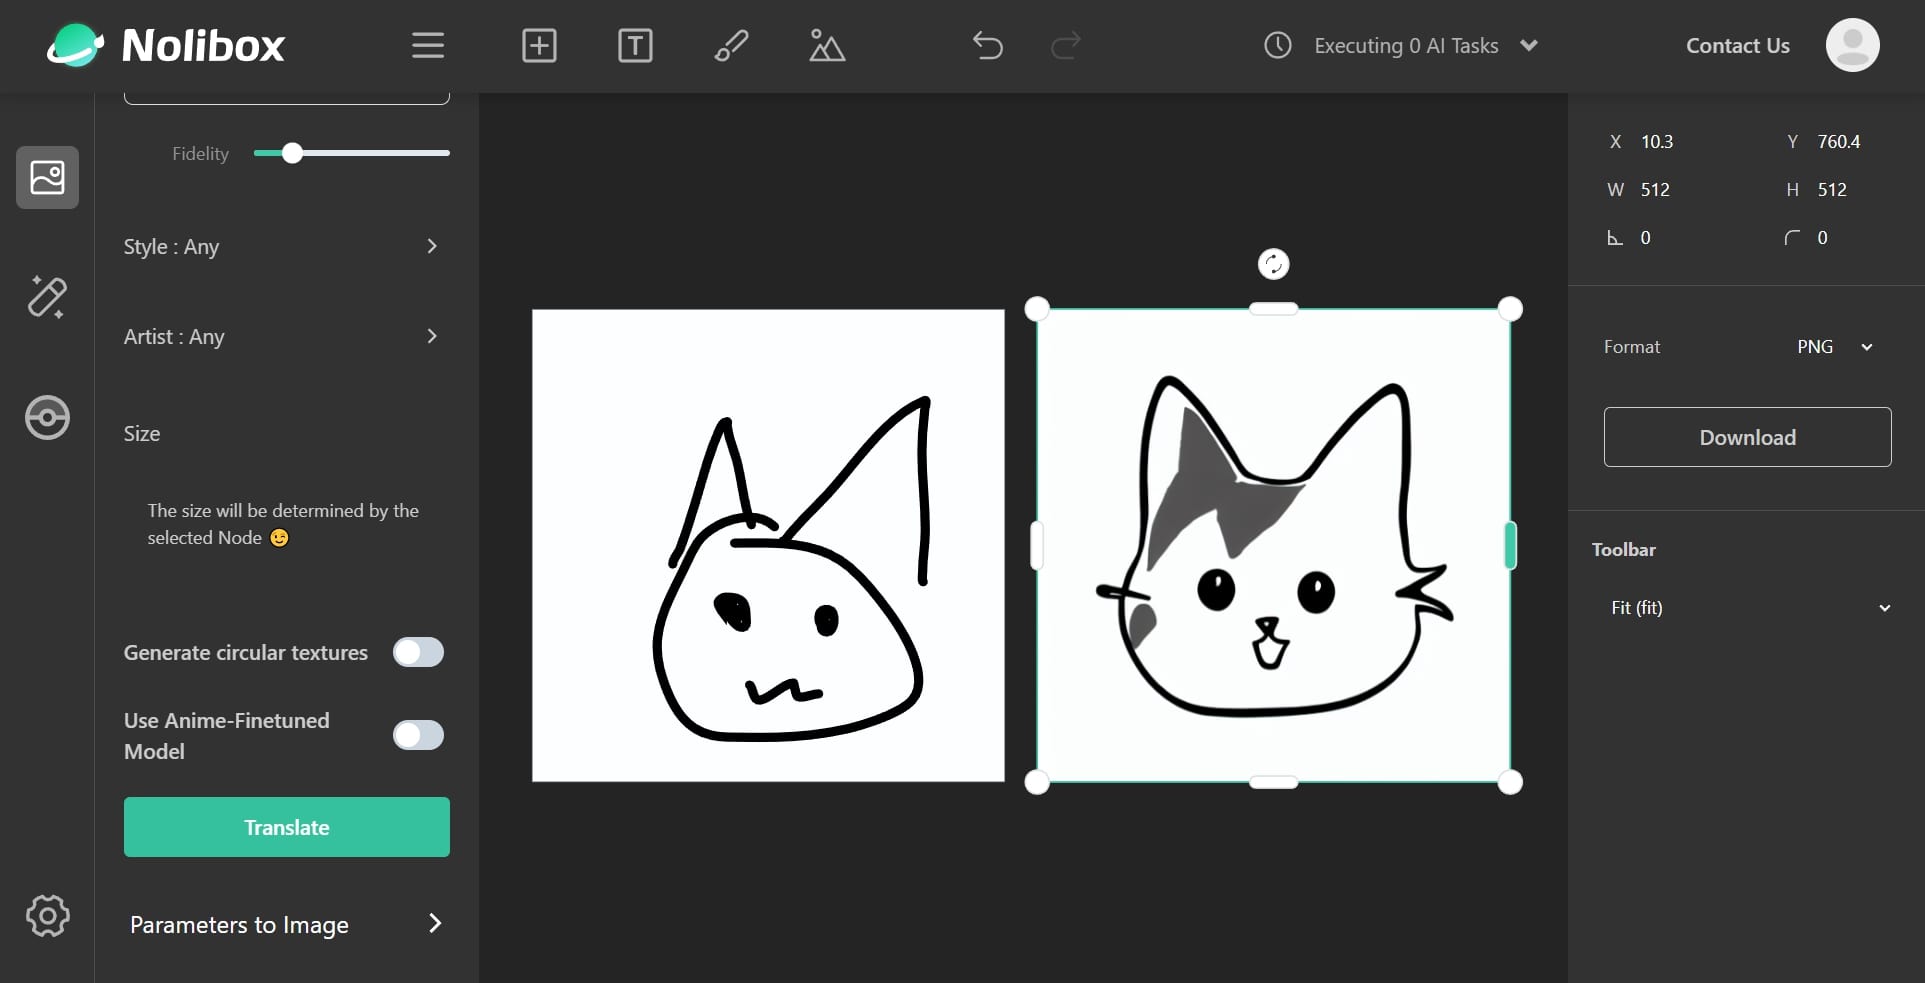
You don't actually need to worry whether your drawings could be recognized or not - it turns out that Stable Diffusion is pretty capable of recognizing them 😆:
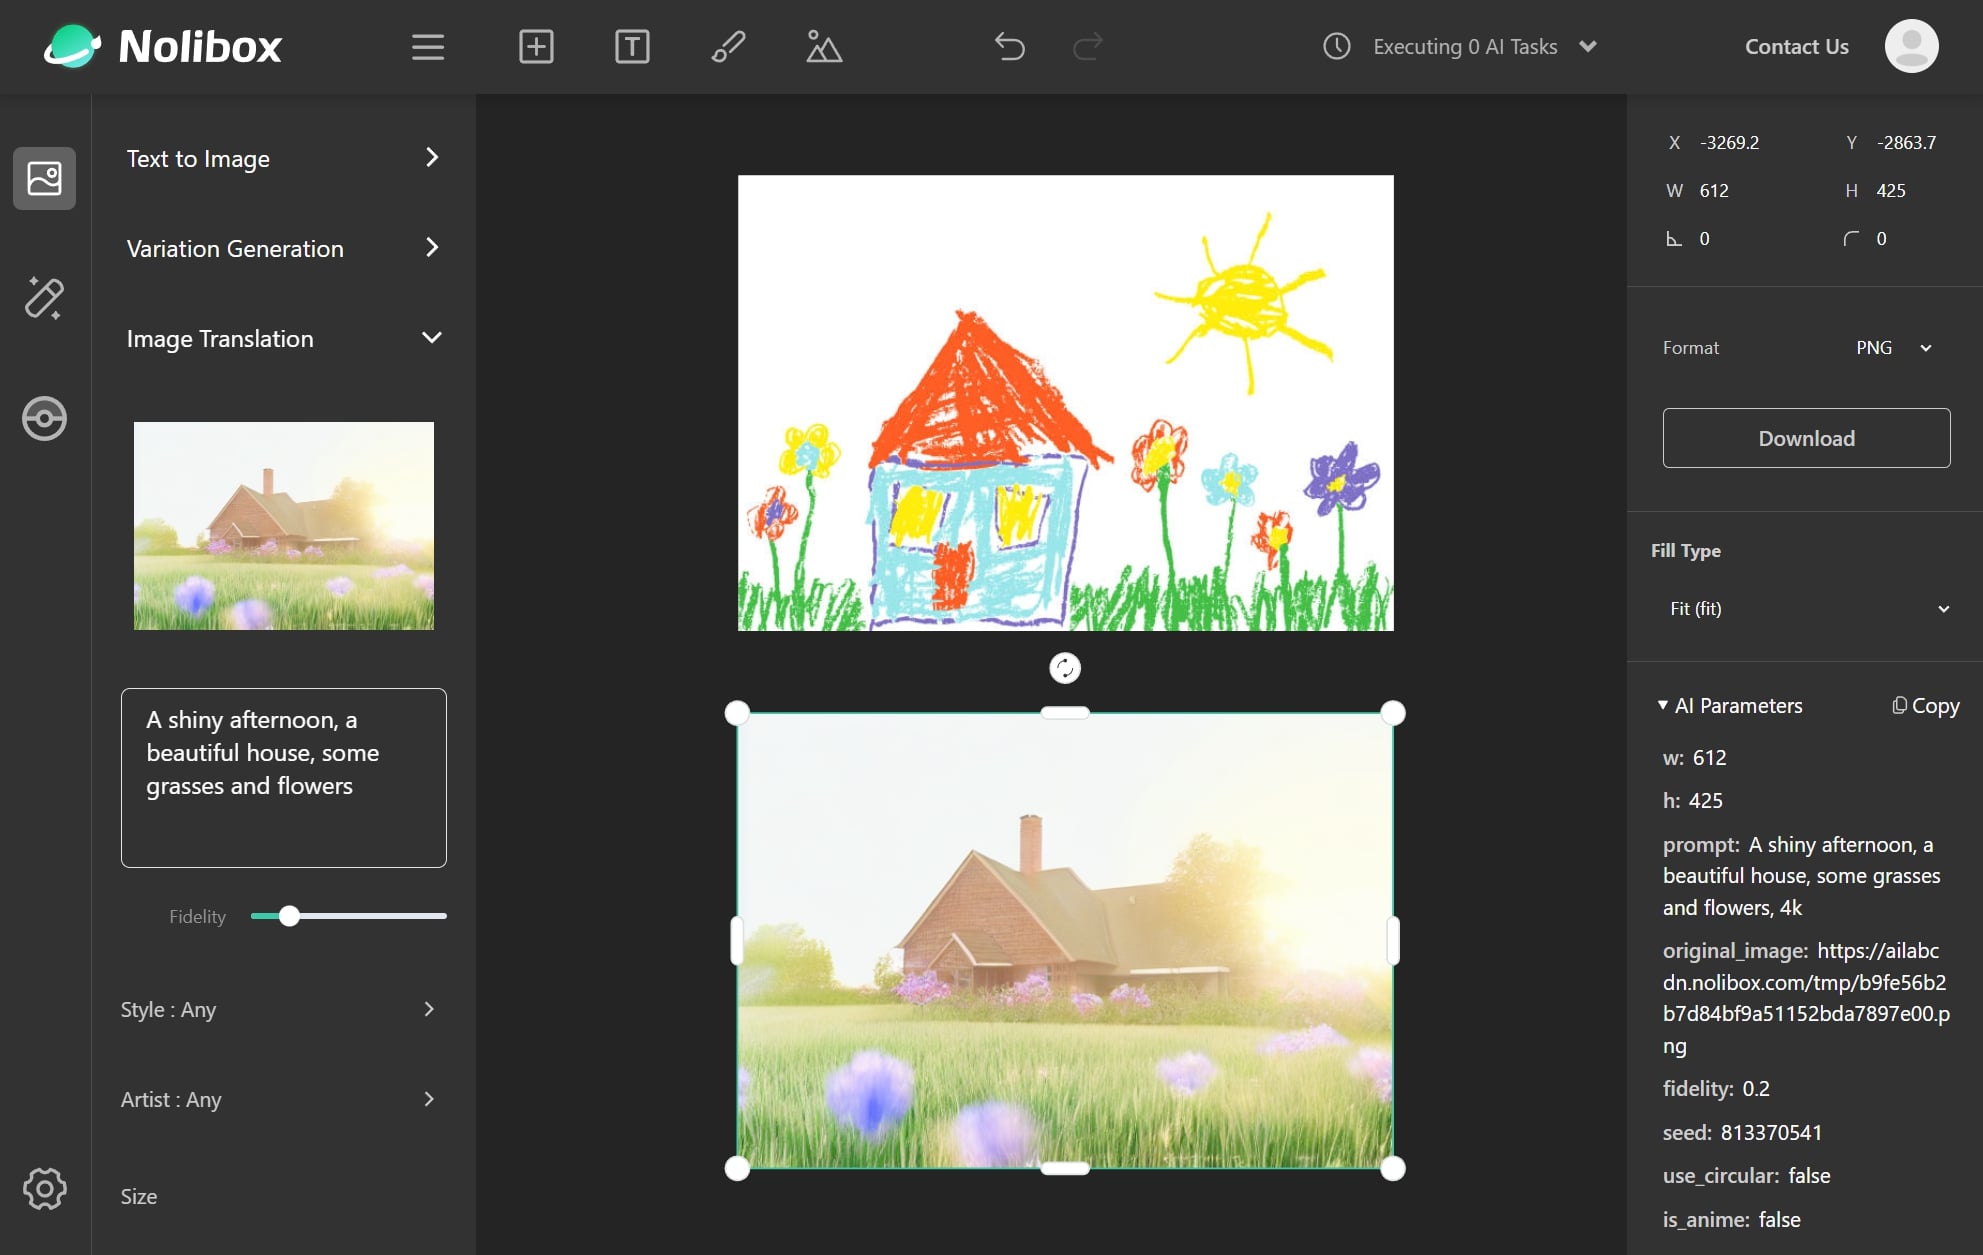
Although I'm using a built-in sketch-to-image to illustrate the concepts, the Image Translation is in fact a general img2img technique, so you can actually apply it to any images. For instance, you can apply it to the generated image:
Seems that more details are added!
With this technique, you can actually upload your own images (for instance, the paintings that are drawn by kids), and turn them into an 'art piece':
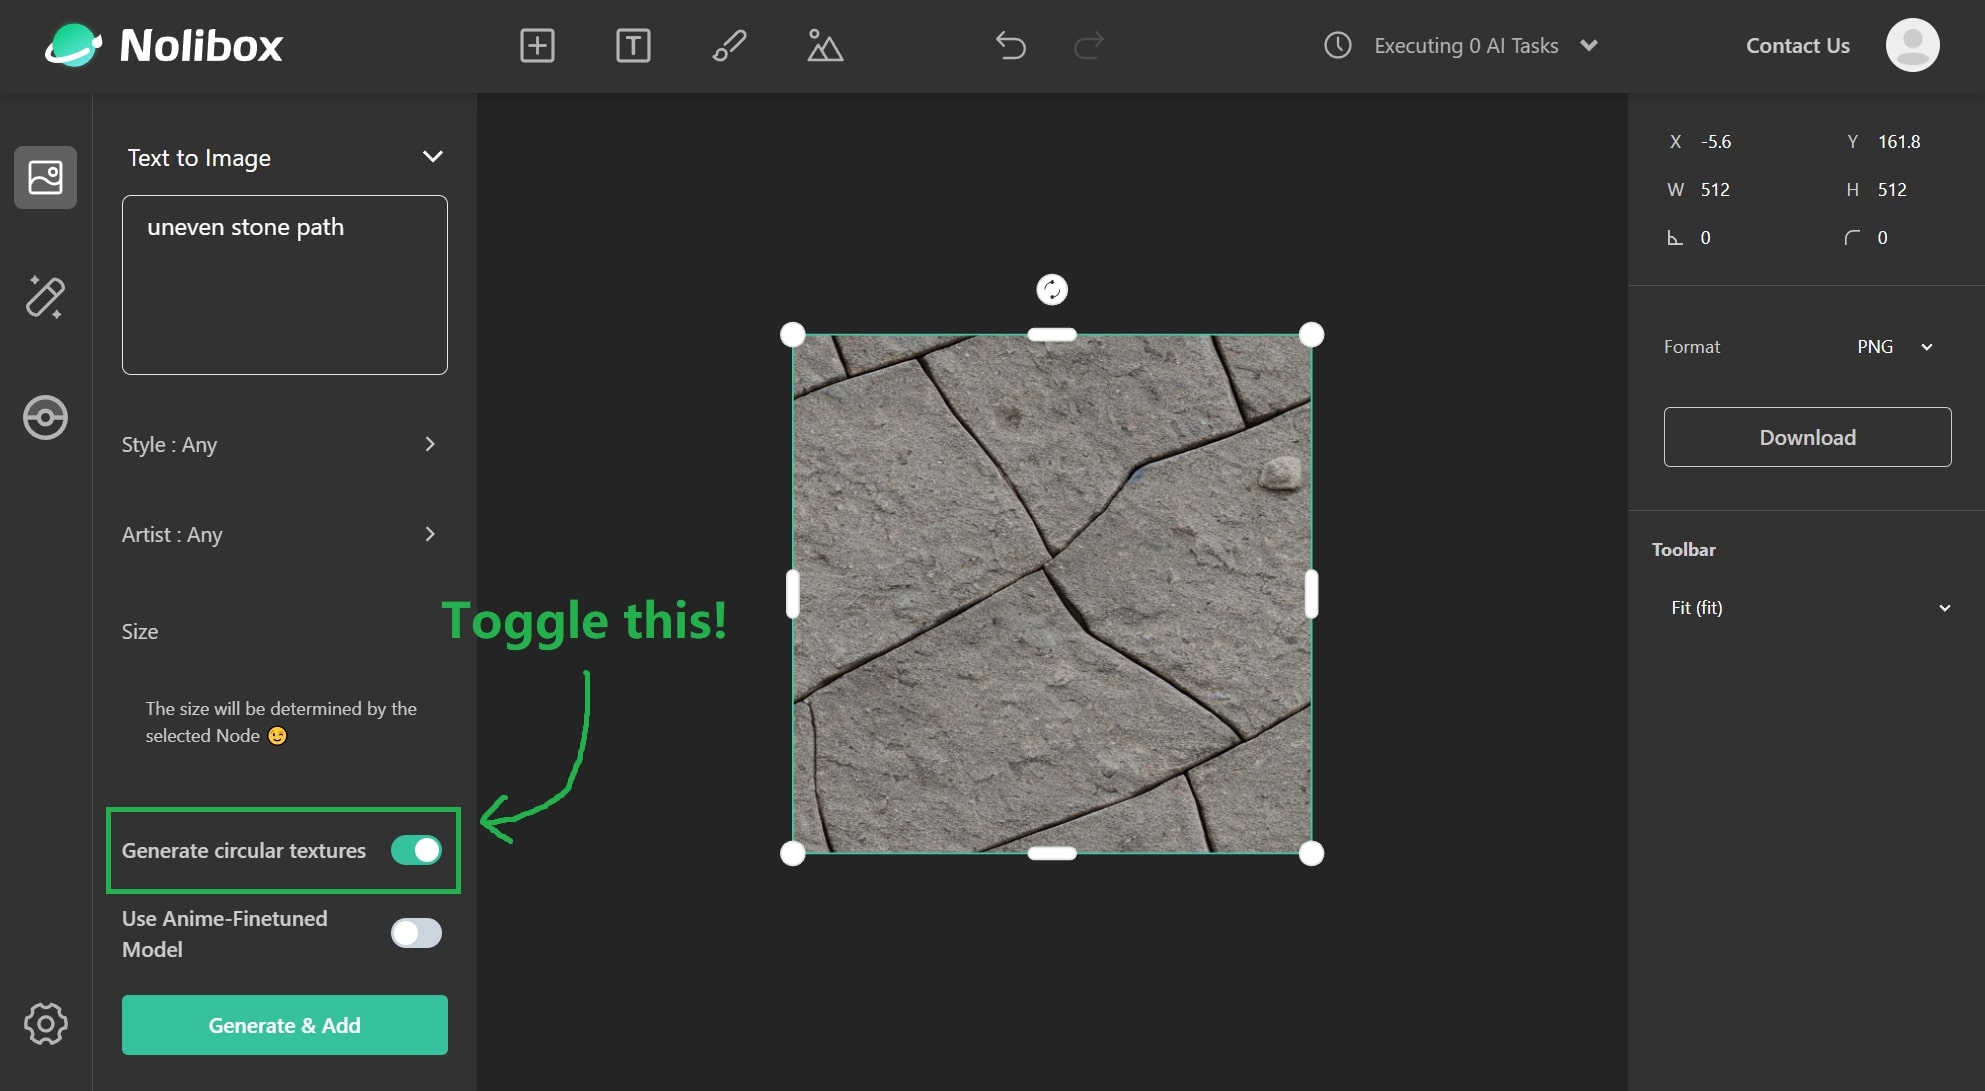
So what are circular textures? Circular textures are images that can be 'tiled' together, and it is easy to specify carefree-creator to generate such textures by toggling the corresponding switch:
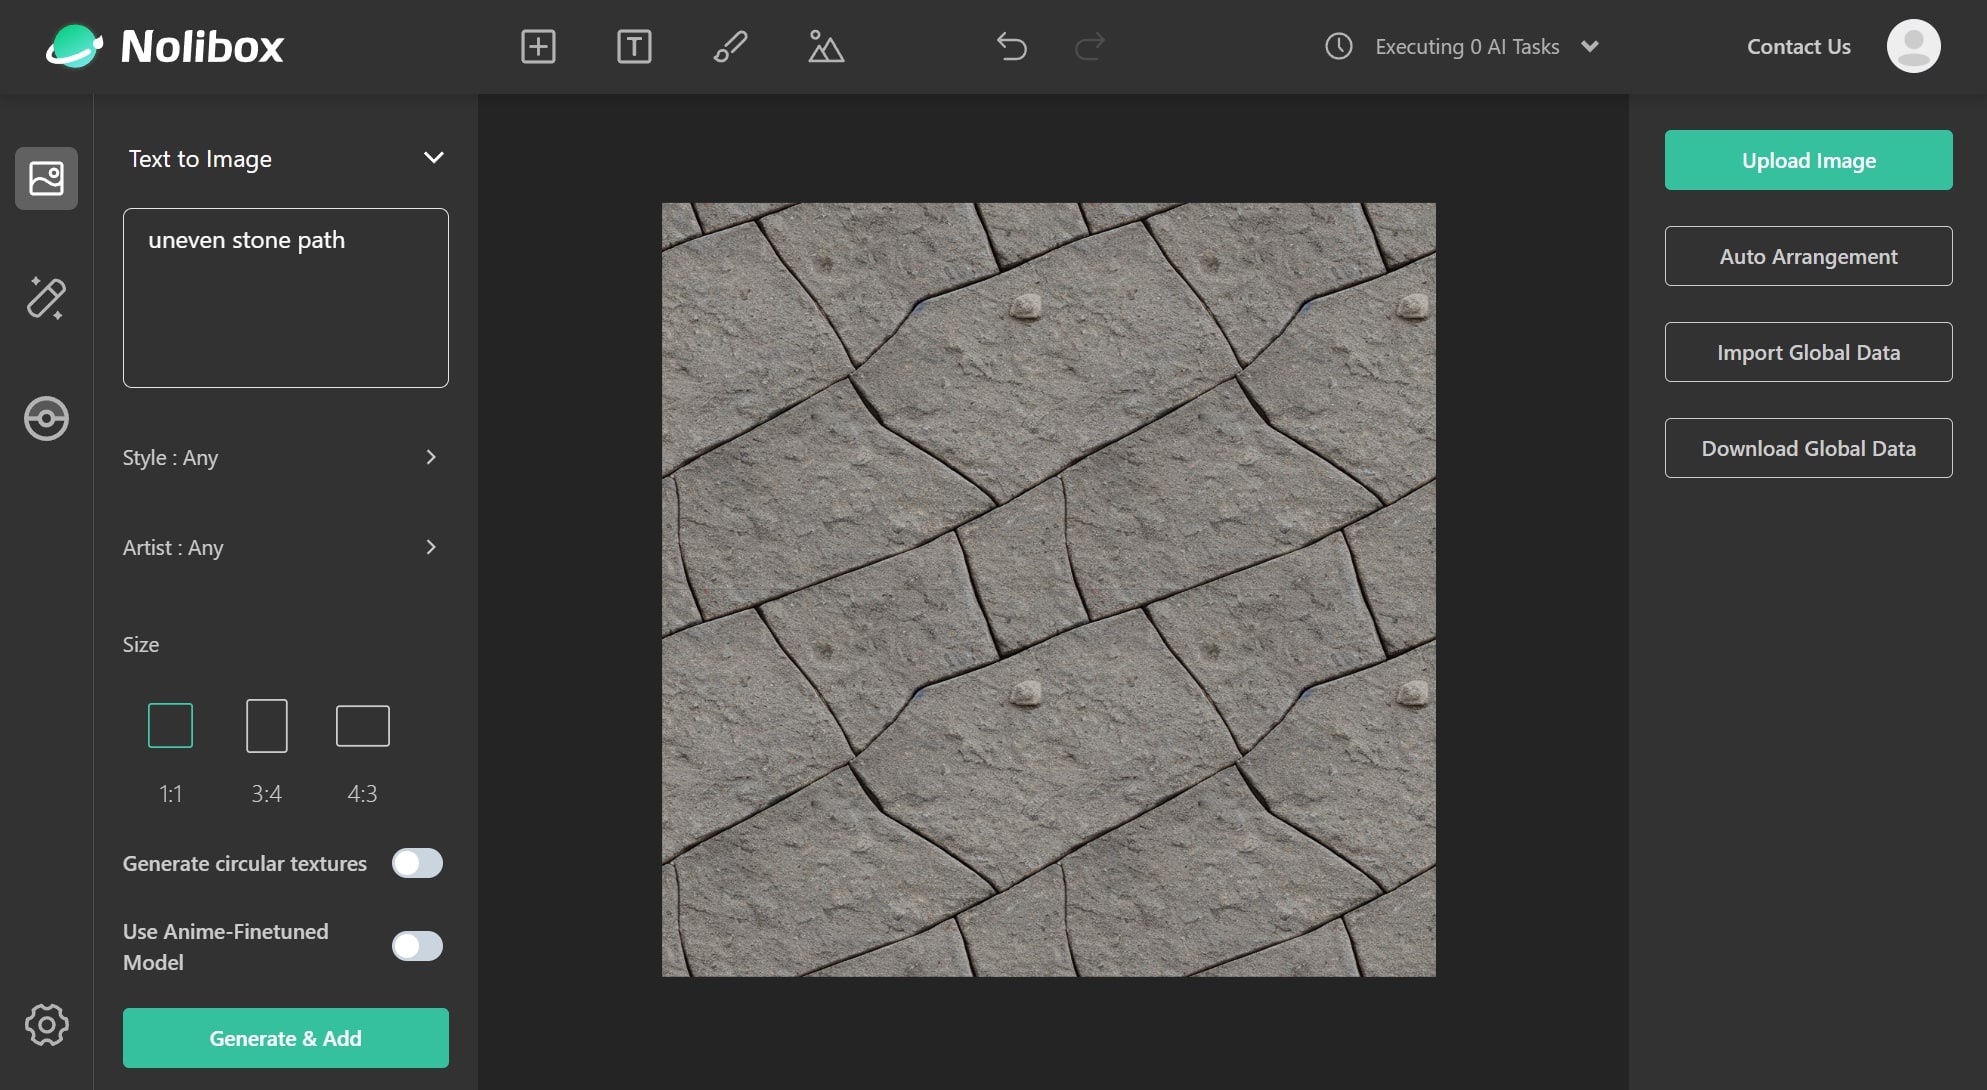
Hmm, nothing special, right? That's because the magic only happens if you 'tile' them together:
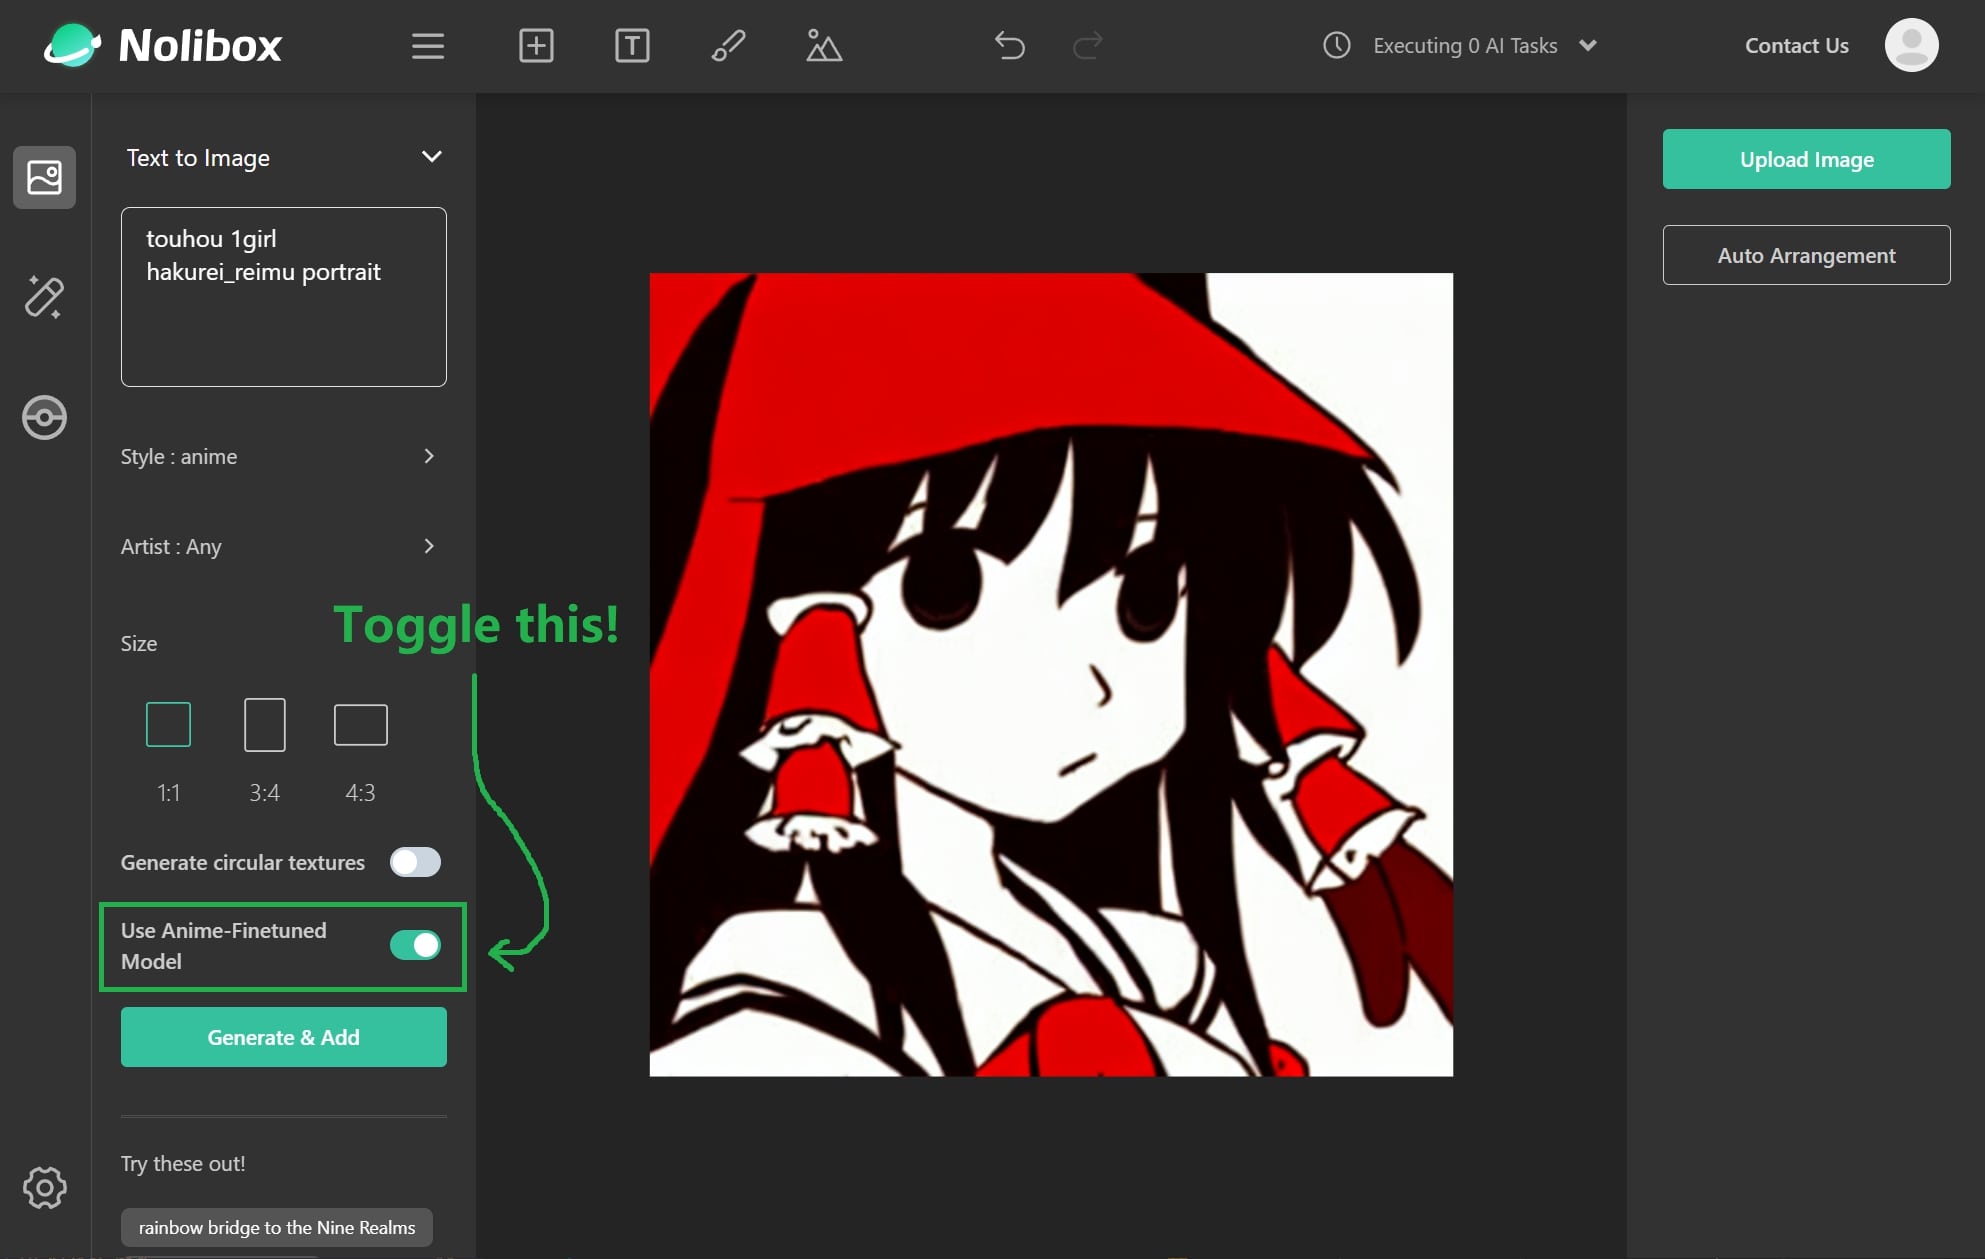
Thanks to Waifu Diffusion, we are able to generate better anime images by toggling the corresponding switch:
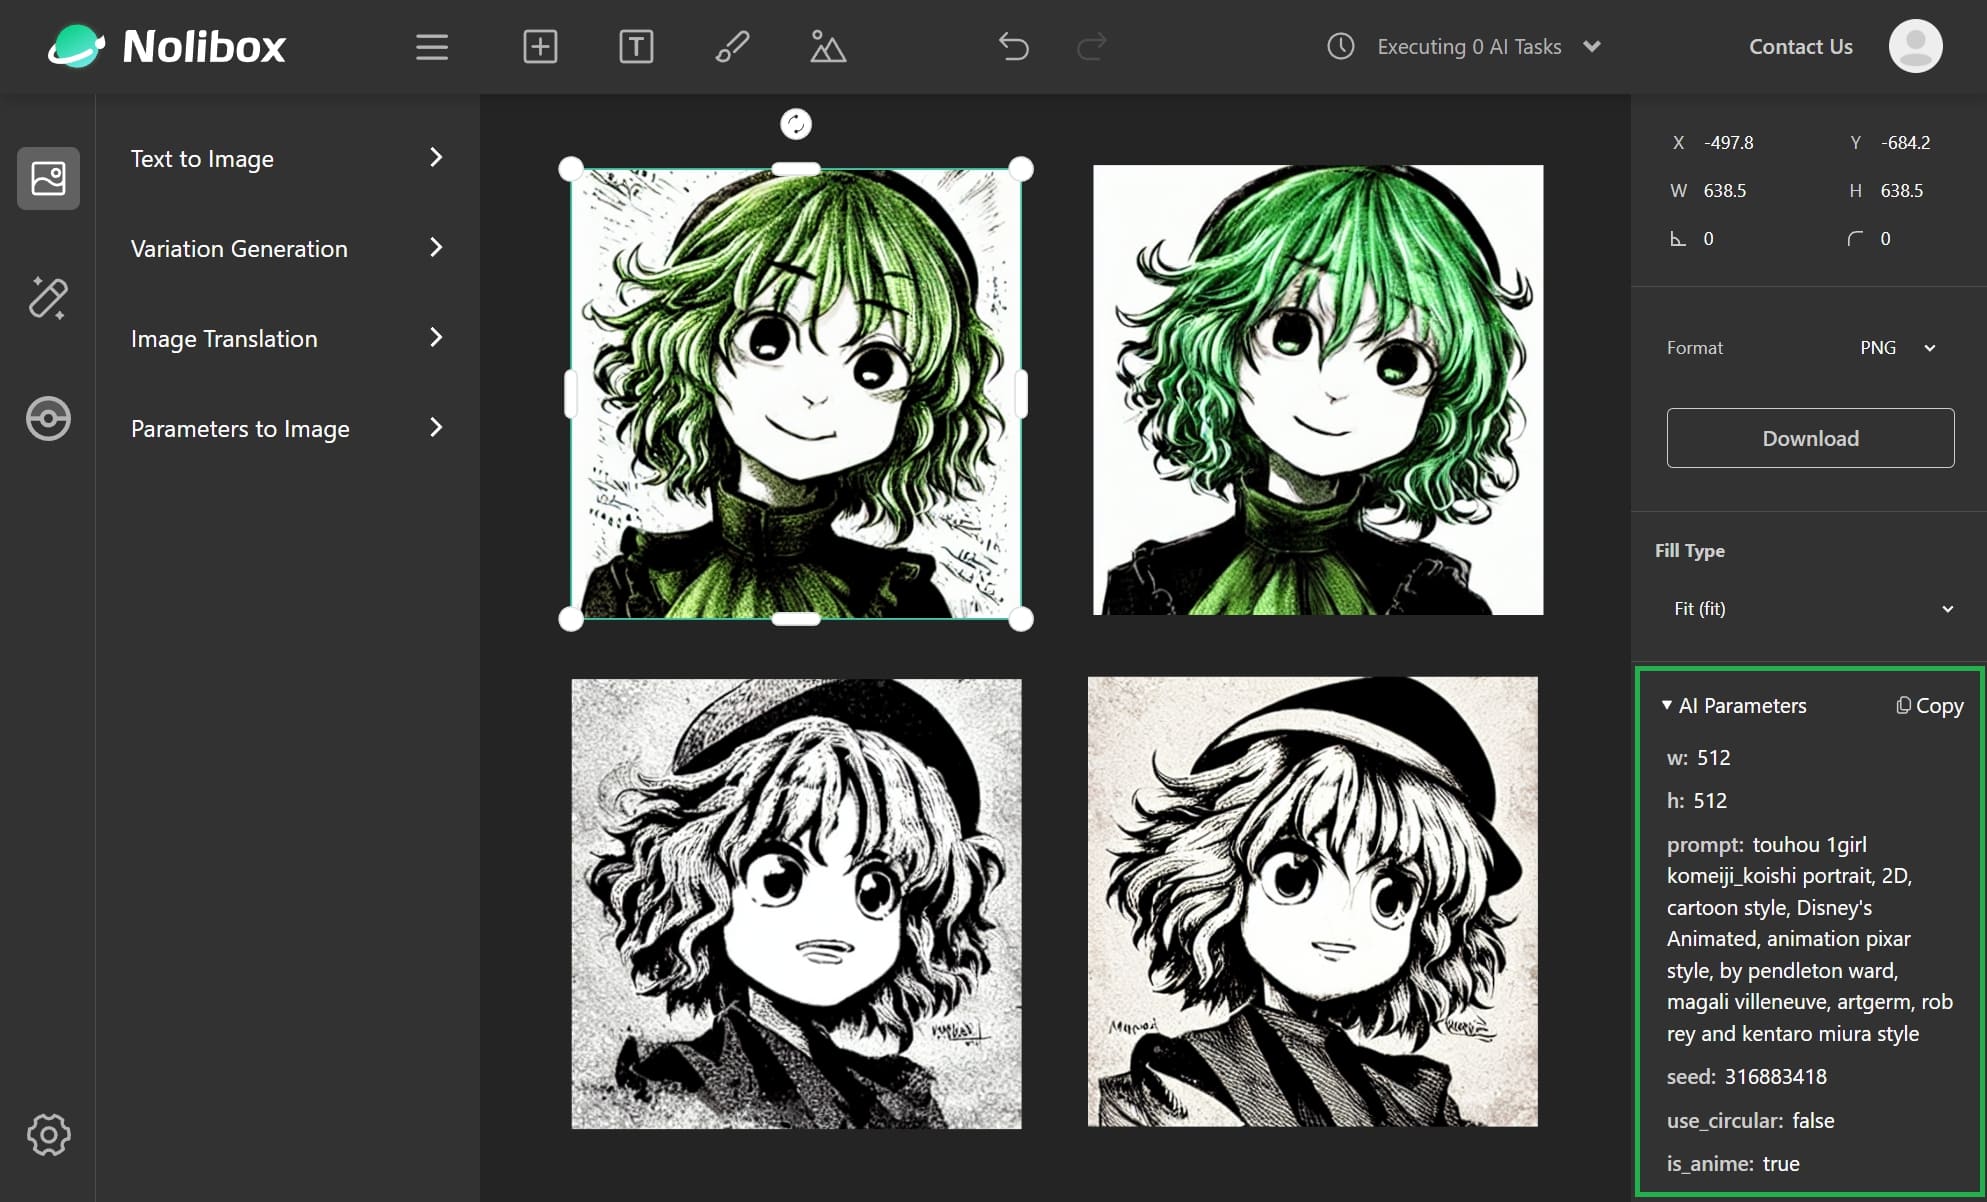
It's well known that x-Diffusion models need good 'prompts' to generate good images, but what makes good 'prompts' remains mystery. Therefore, we support inspecting parameters of every generated image:
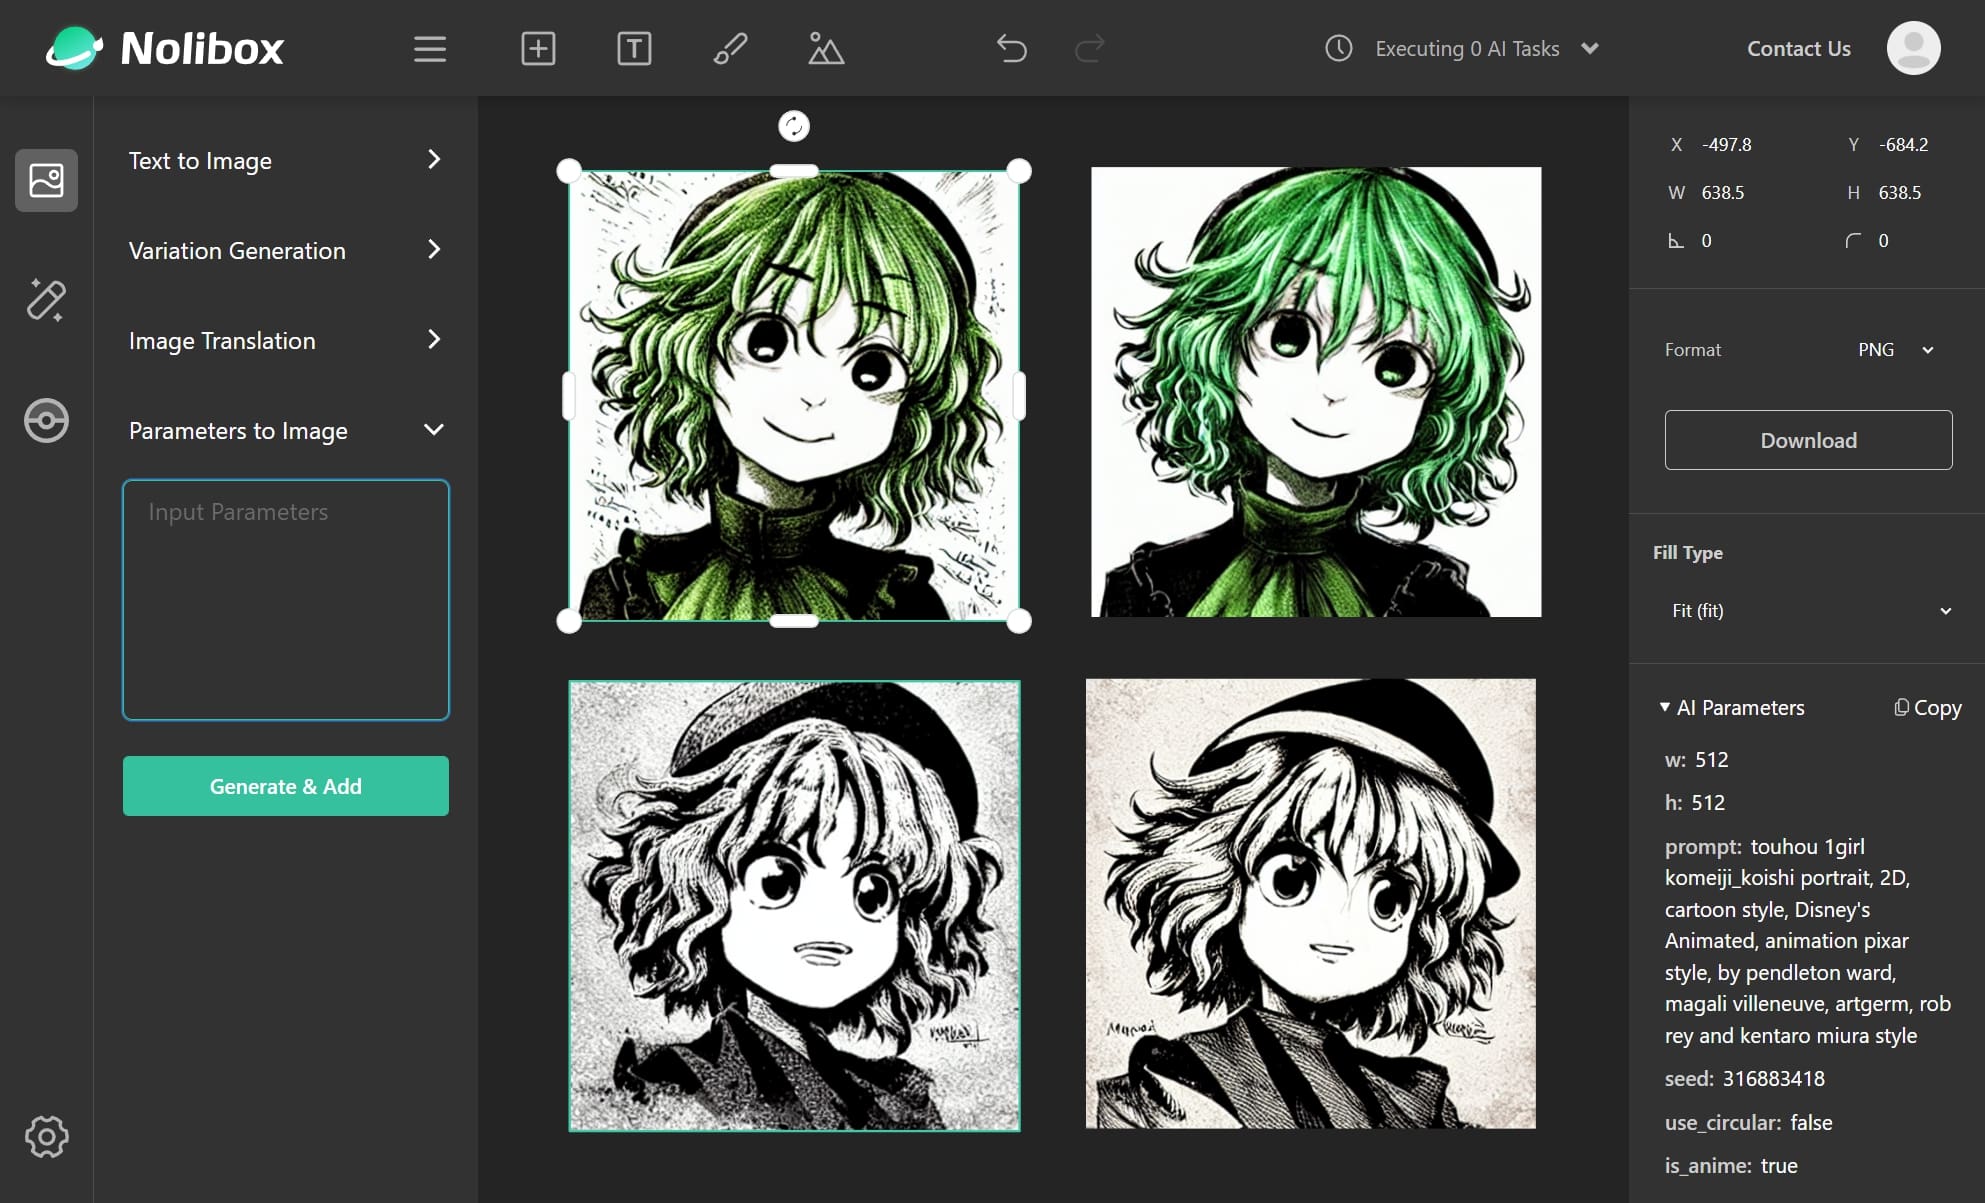
You can copy the parameters with the little Copy button, and the copied parameters can then be pasted to the Parameters to Image panel on the left:
In this way, all the creations will be sharable, reproducible and (sort of) understandable!
If you want to generate some really fancy images (like the ones that fly around the internet these days), a good starting point is to use our presets.
And by leveraging the
Inspect Parametersfunction metioned in the previous section, we can understand what prompts / parameters are used behind these results, and possibly 'learn' how to master these models!
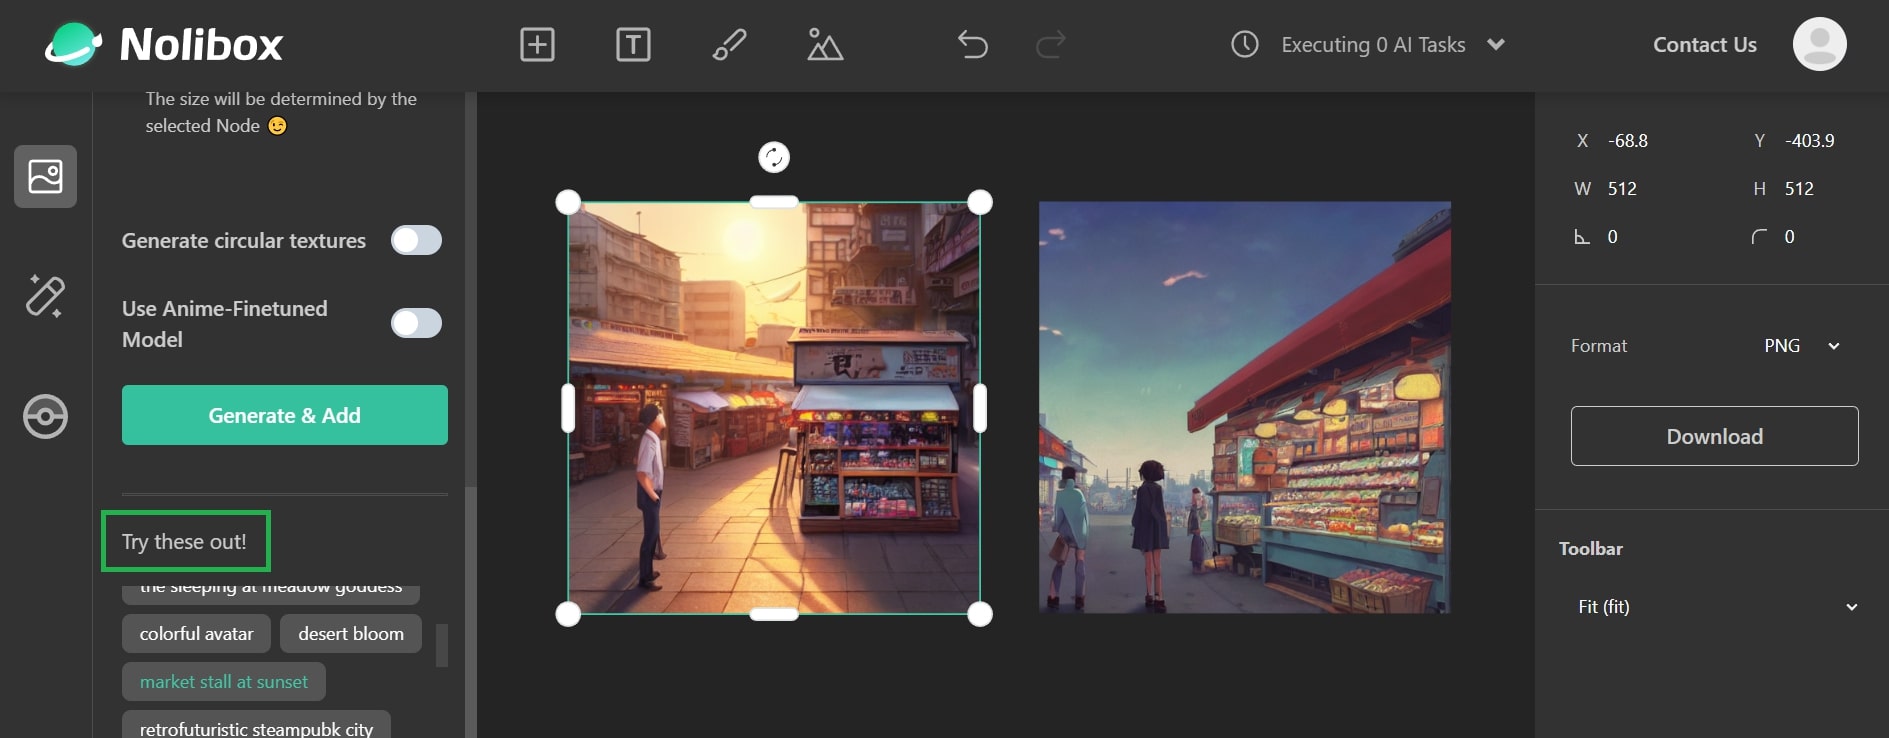
If you scroll down the Text to Image panel, you will see a Try these out! section with many 'capsules':
We will generate the corresponding images if you click one of these capsules.
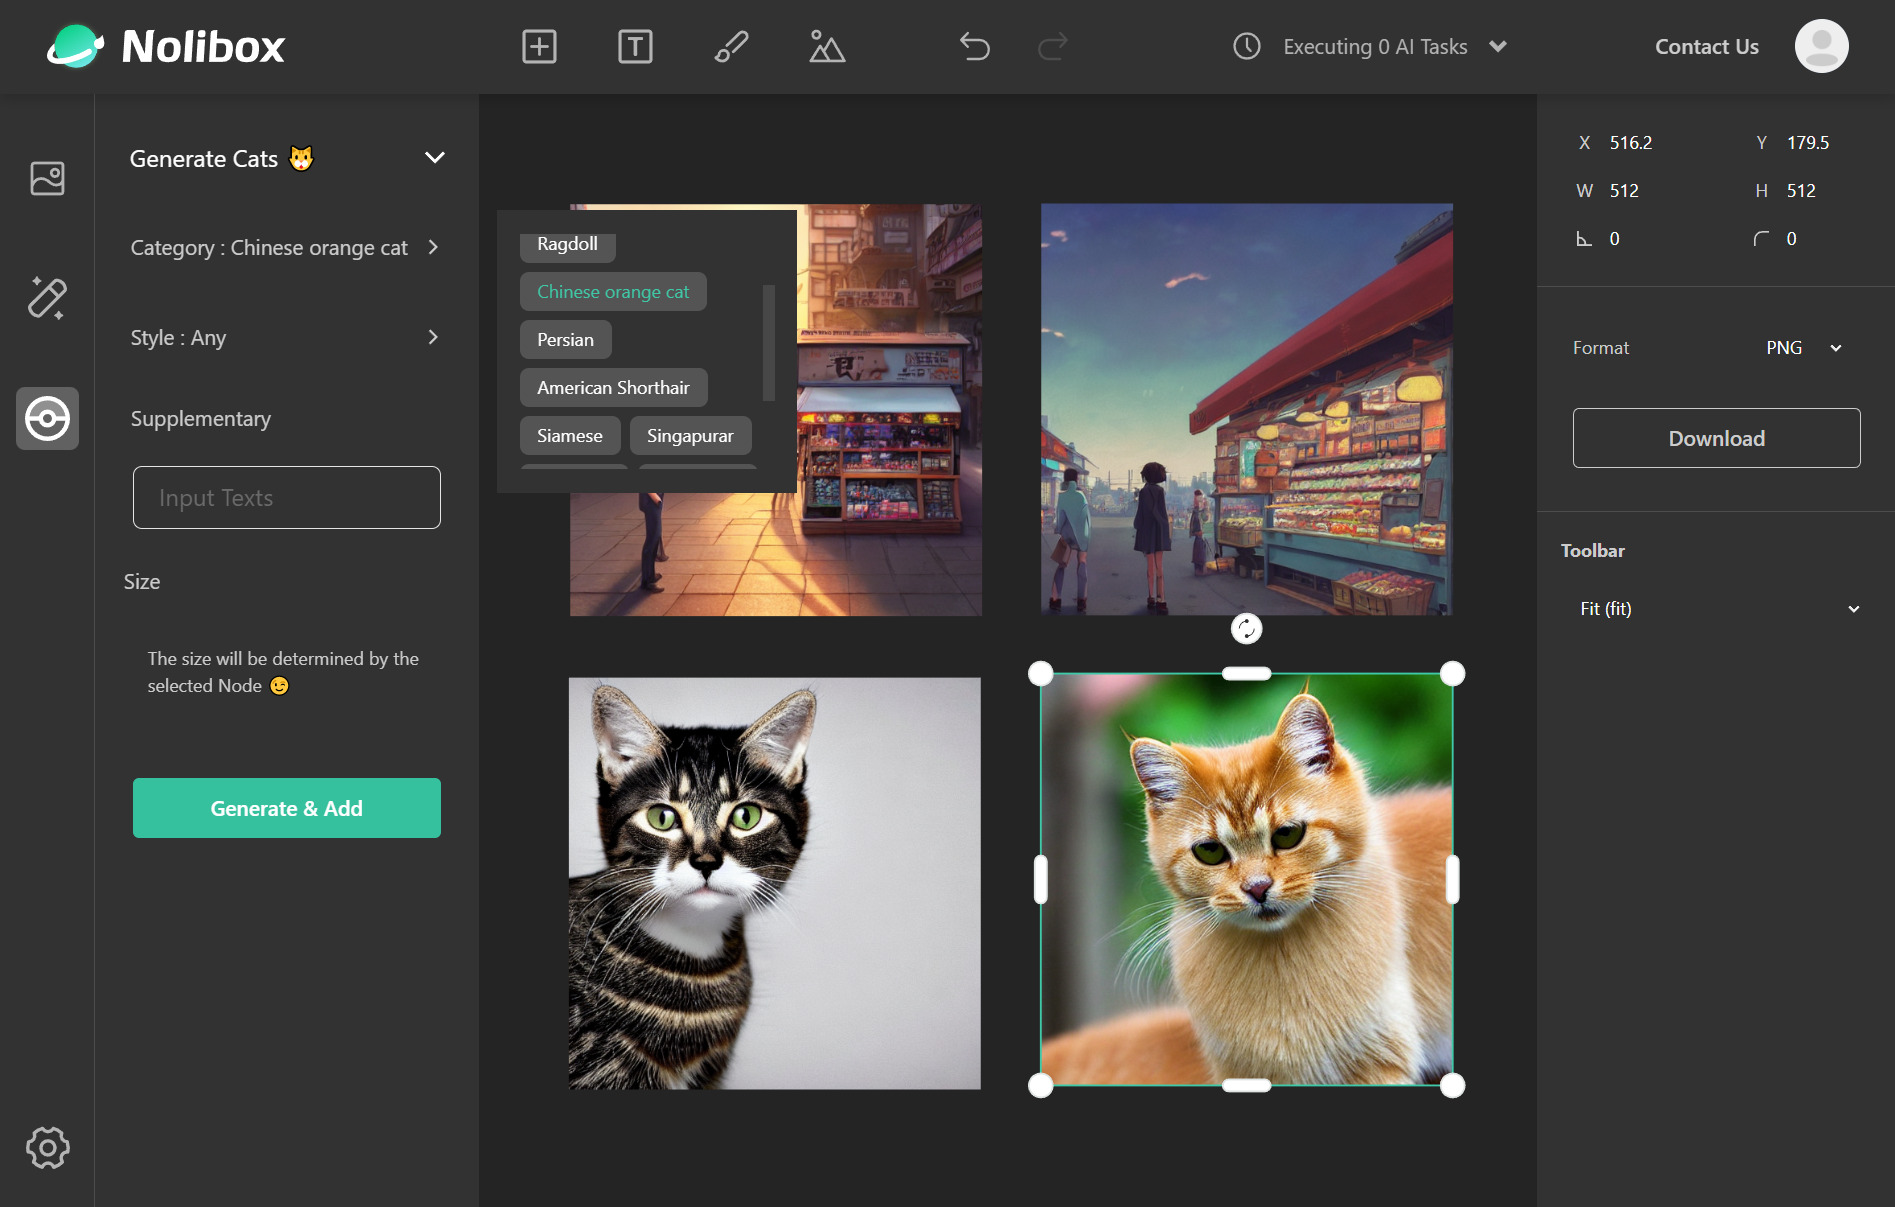
We also provide a Preset Panel on the left (that nice, little, Pokémon-ish icon 🤣):
Currently we only support Generate Cats 🐱, but we will add more in the future (for instance, Generate Dogs 🐶)!
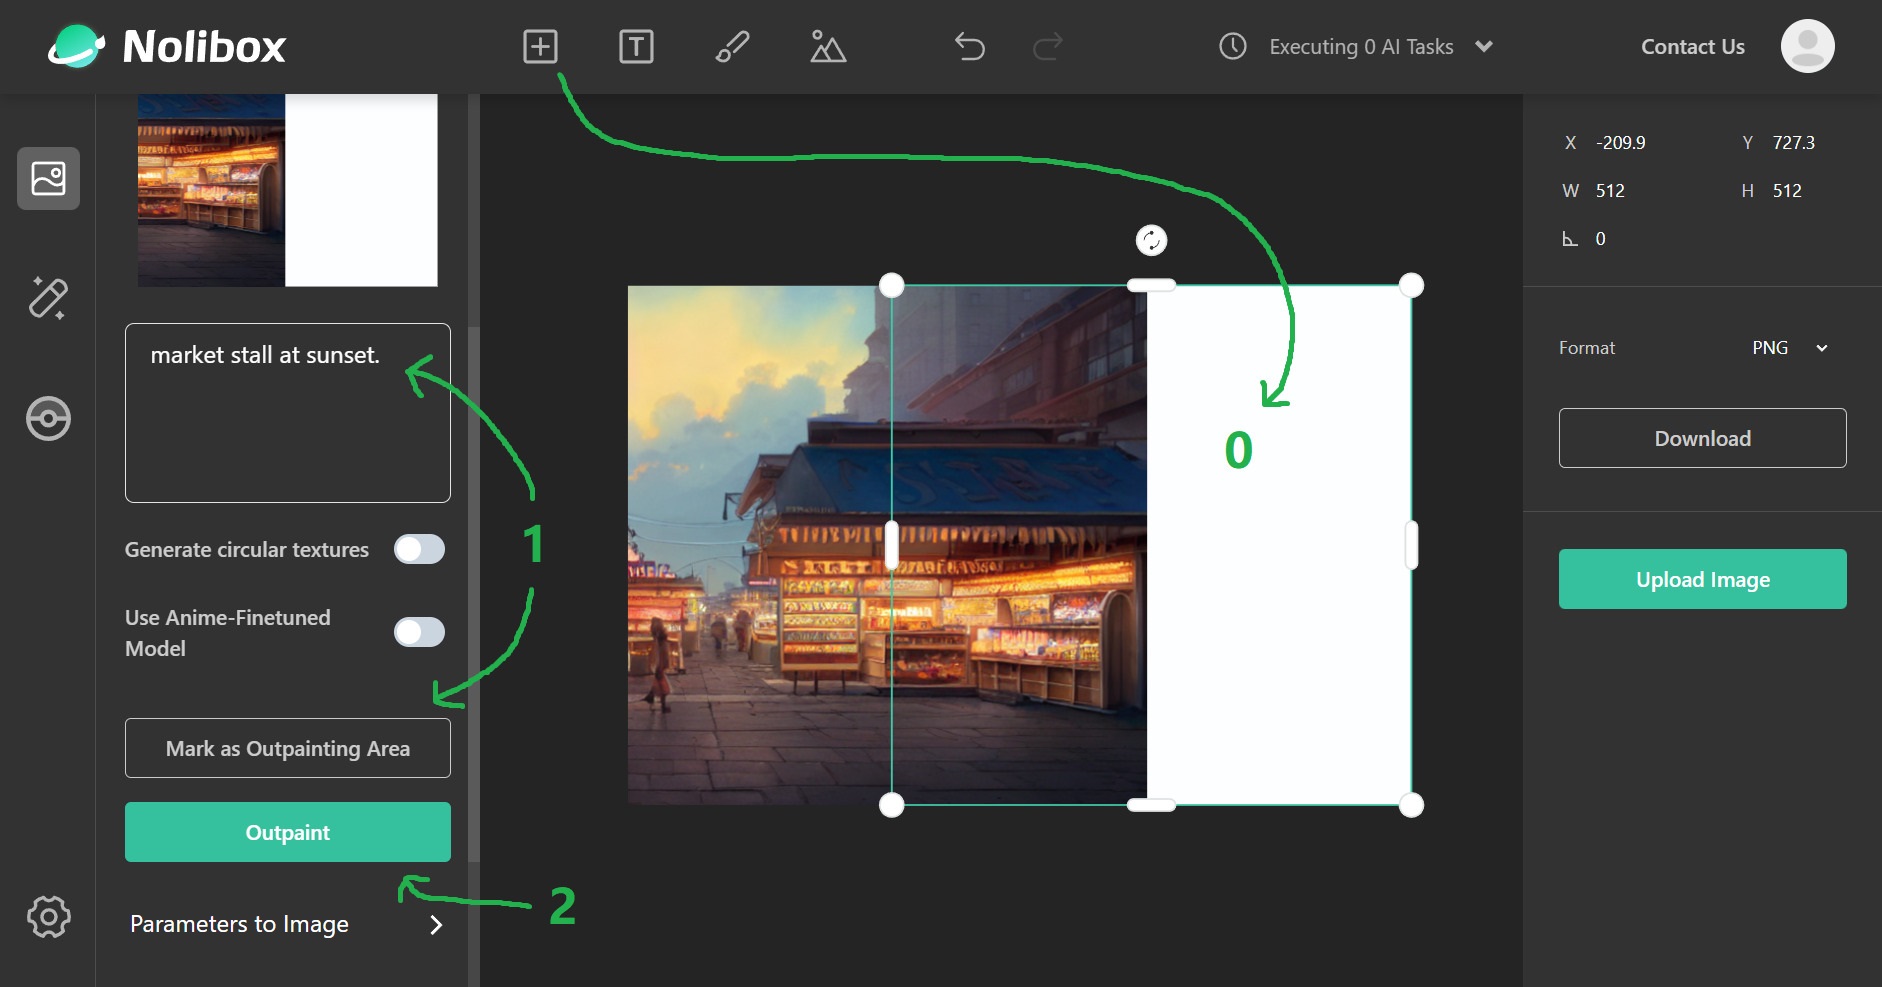
We in fact support outpainting algorithm, but I shall be honest: that the Stable Diffusion model is not as good as the DALLE·2 model in this case. So I will simply put a single-image demonstration here:
- 0 - Create an Empty Node and drag it to the area that you want to outpaint on
- It needs to be placed 'below' the original image. The keyboard shortcut is
ctrl+[for Windows andcmd+[for Mac.
- It needs to be placed 'below' the original image. The keyboard shortcut is
- 1 - Expand the
Outpaintingon the left and:- Input some texts in the text area.
- Click the
Mark as Outpainting Areabutton.- A nice little preview image should then pop up above the text area with this action.
- 2 - Click the
Outpaintbutton and wait for the result.
It is likely that some goofy results will appear 🤣. In this case, you can undo it by ctrl+z / cmd+z and try it one more time. (Maybe) Eventually, you will get nice result.
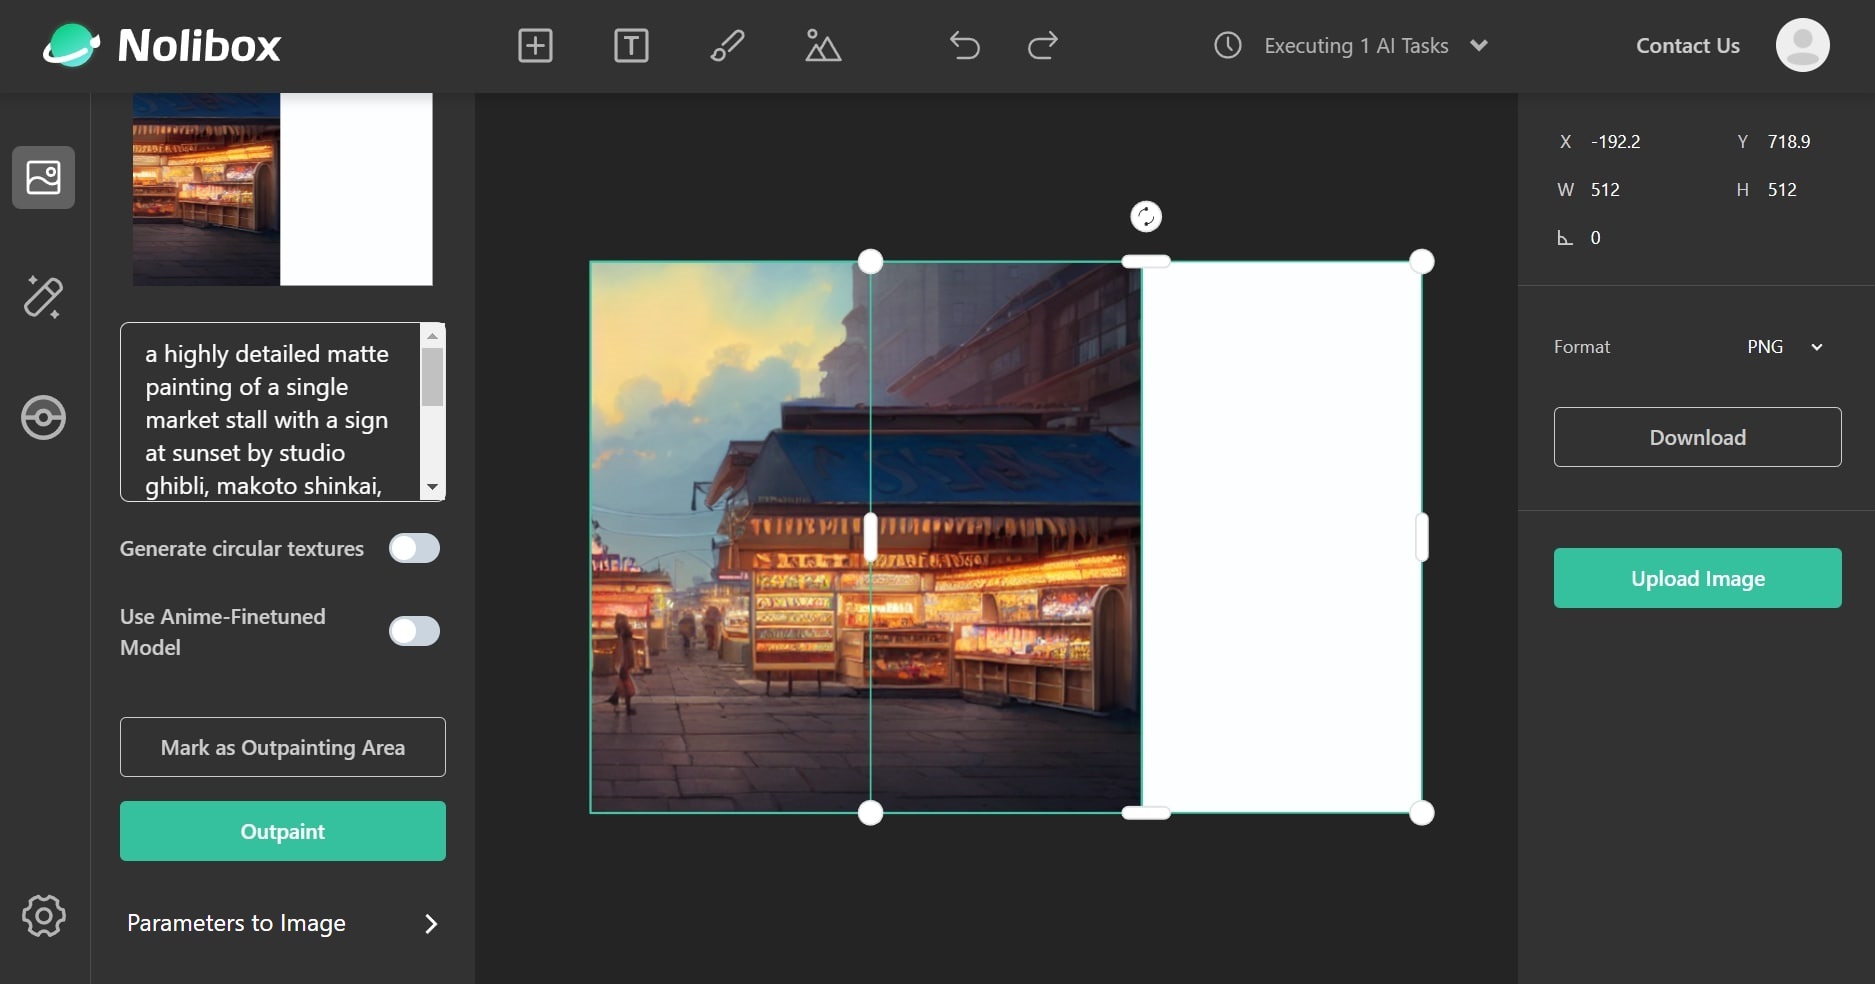
But - there are some tricks here. If you are trying to outpaint a generated image, recall that you can copy the parameters of every generated image, so why not use exactly the same prompt to outpaint:
That's a REALLY long prompt 😆!
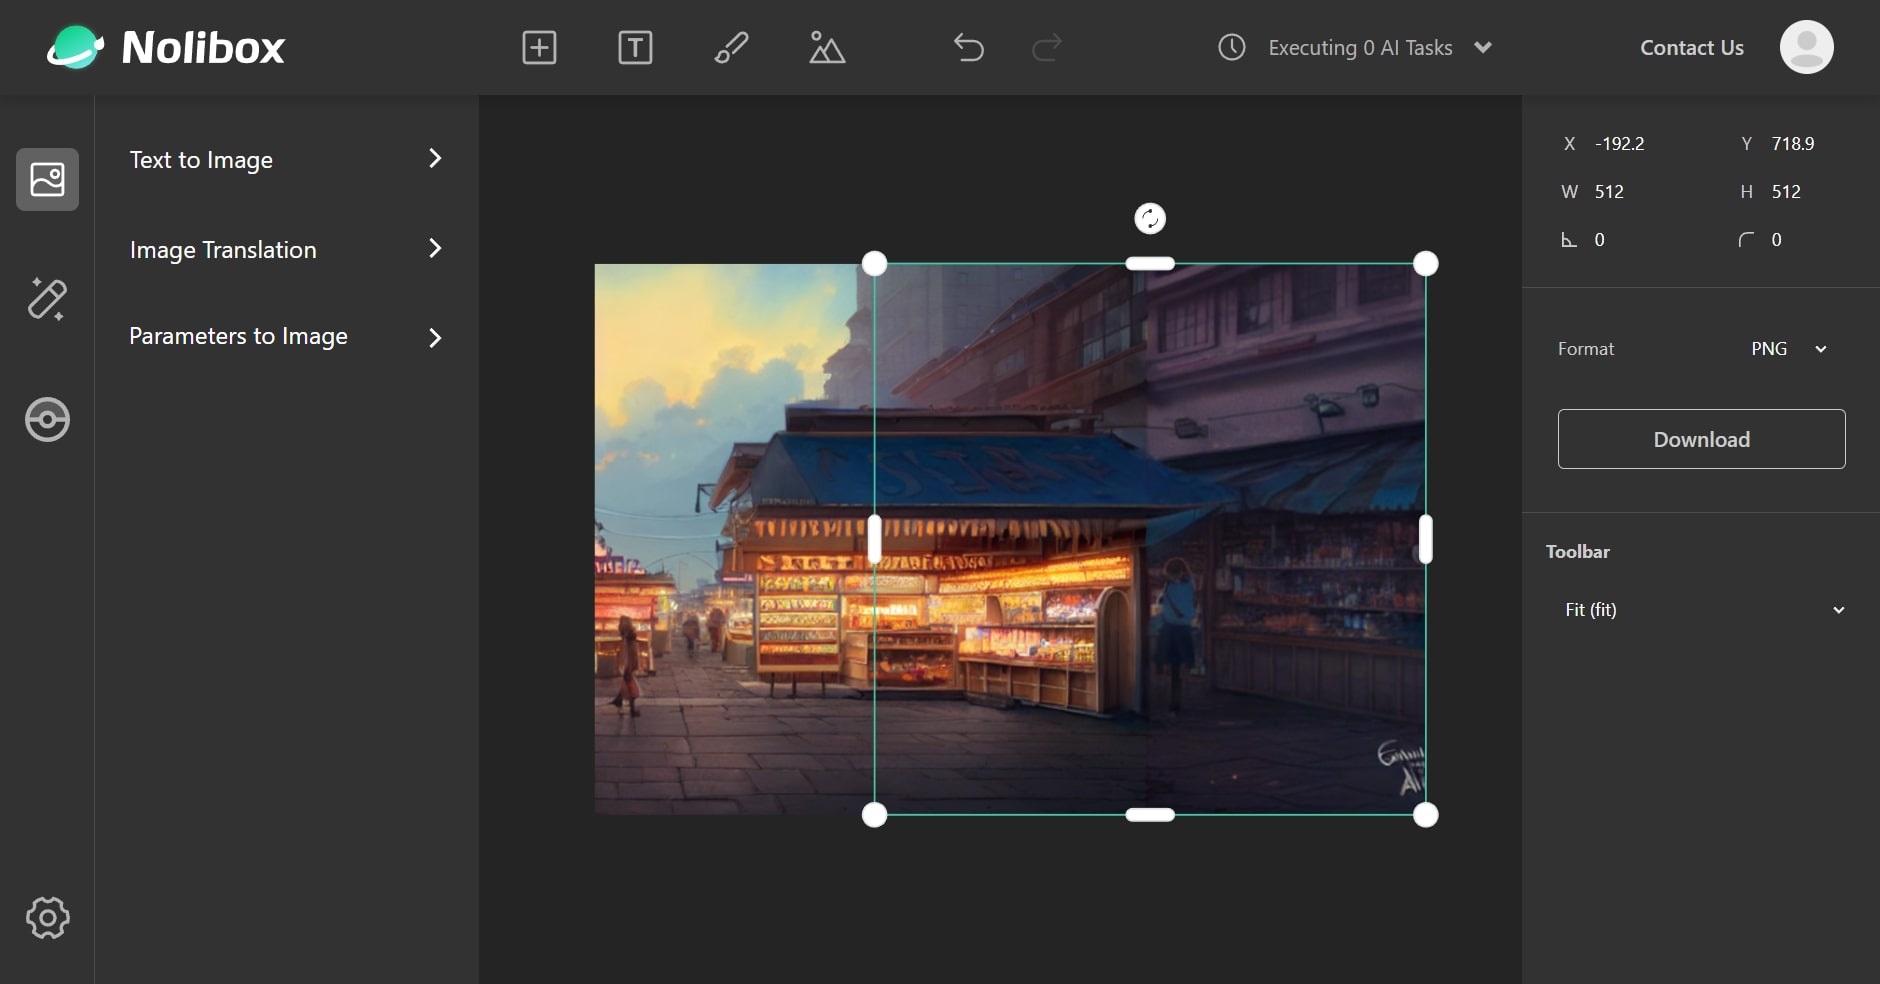
And after a few tries, I get this result:
Still far from good, but it's quite interesting!
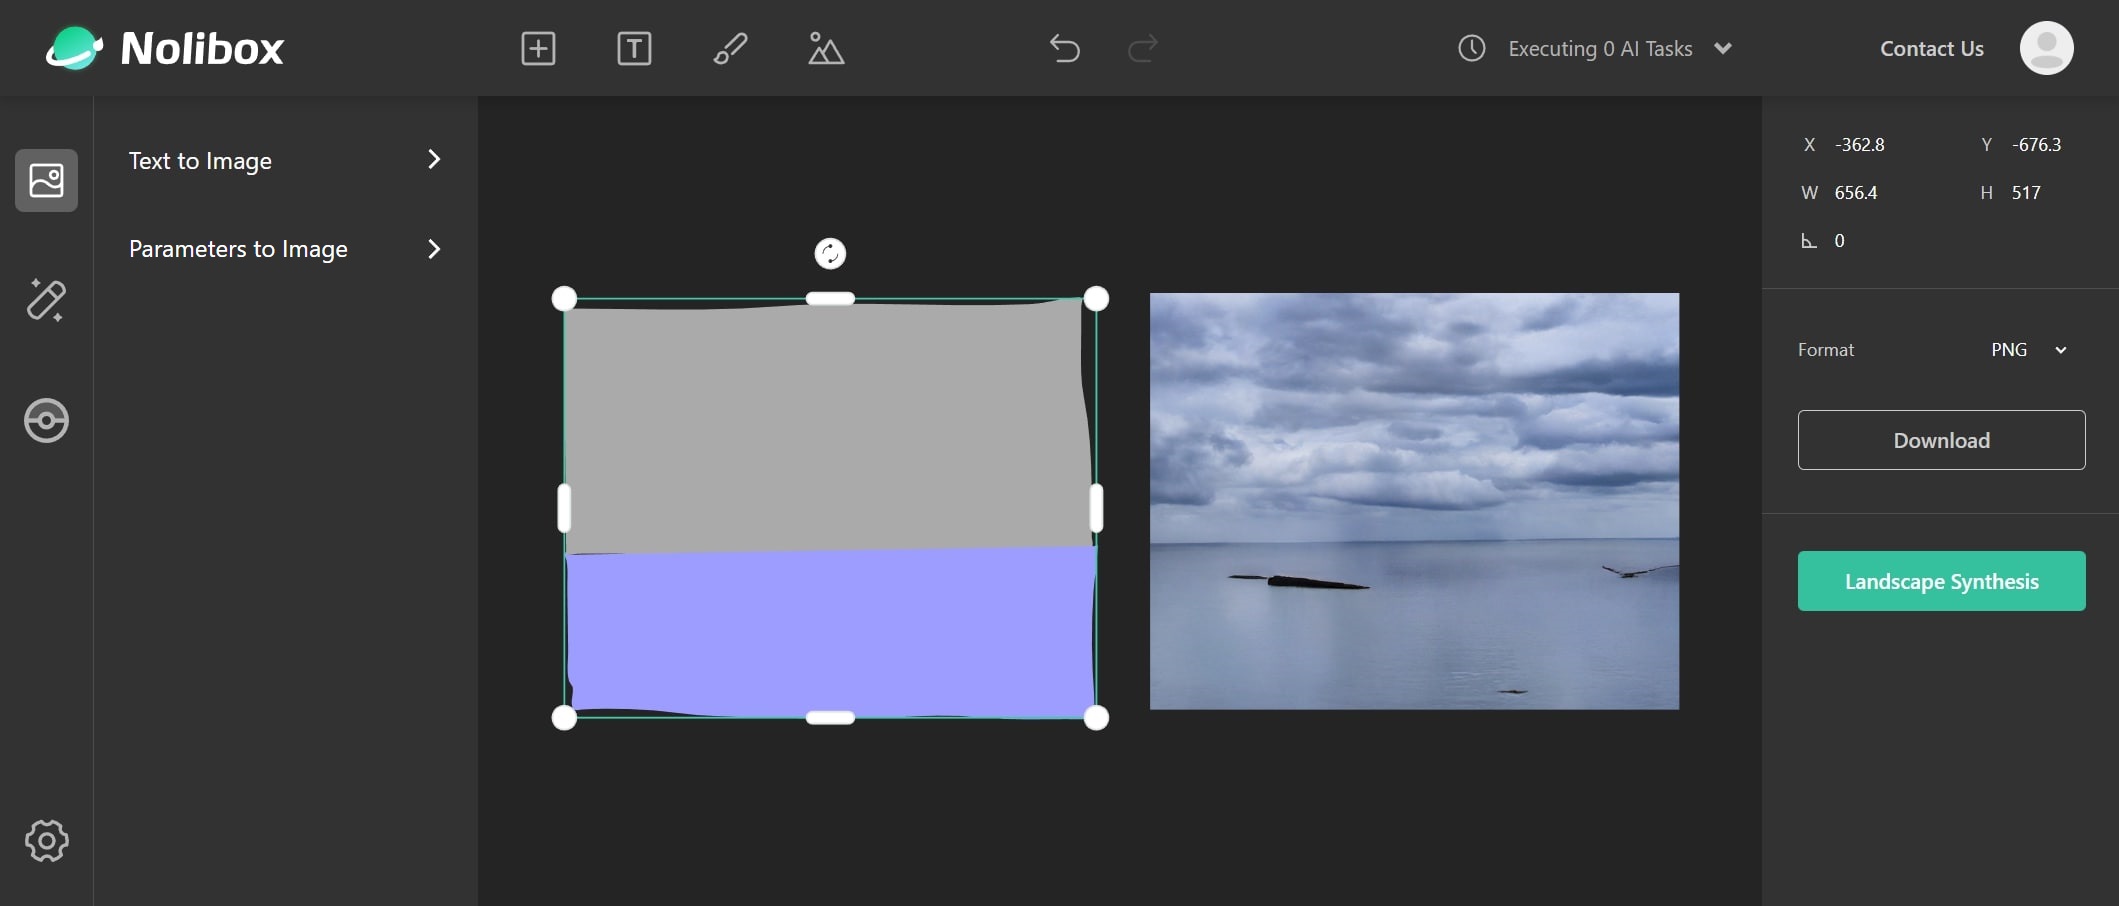
Another interesting feature is that you can do landscape synthesis, similar to GauGAN:
But again, the result is quite unpredictable, so I will simply put a single-image demonstration here:
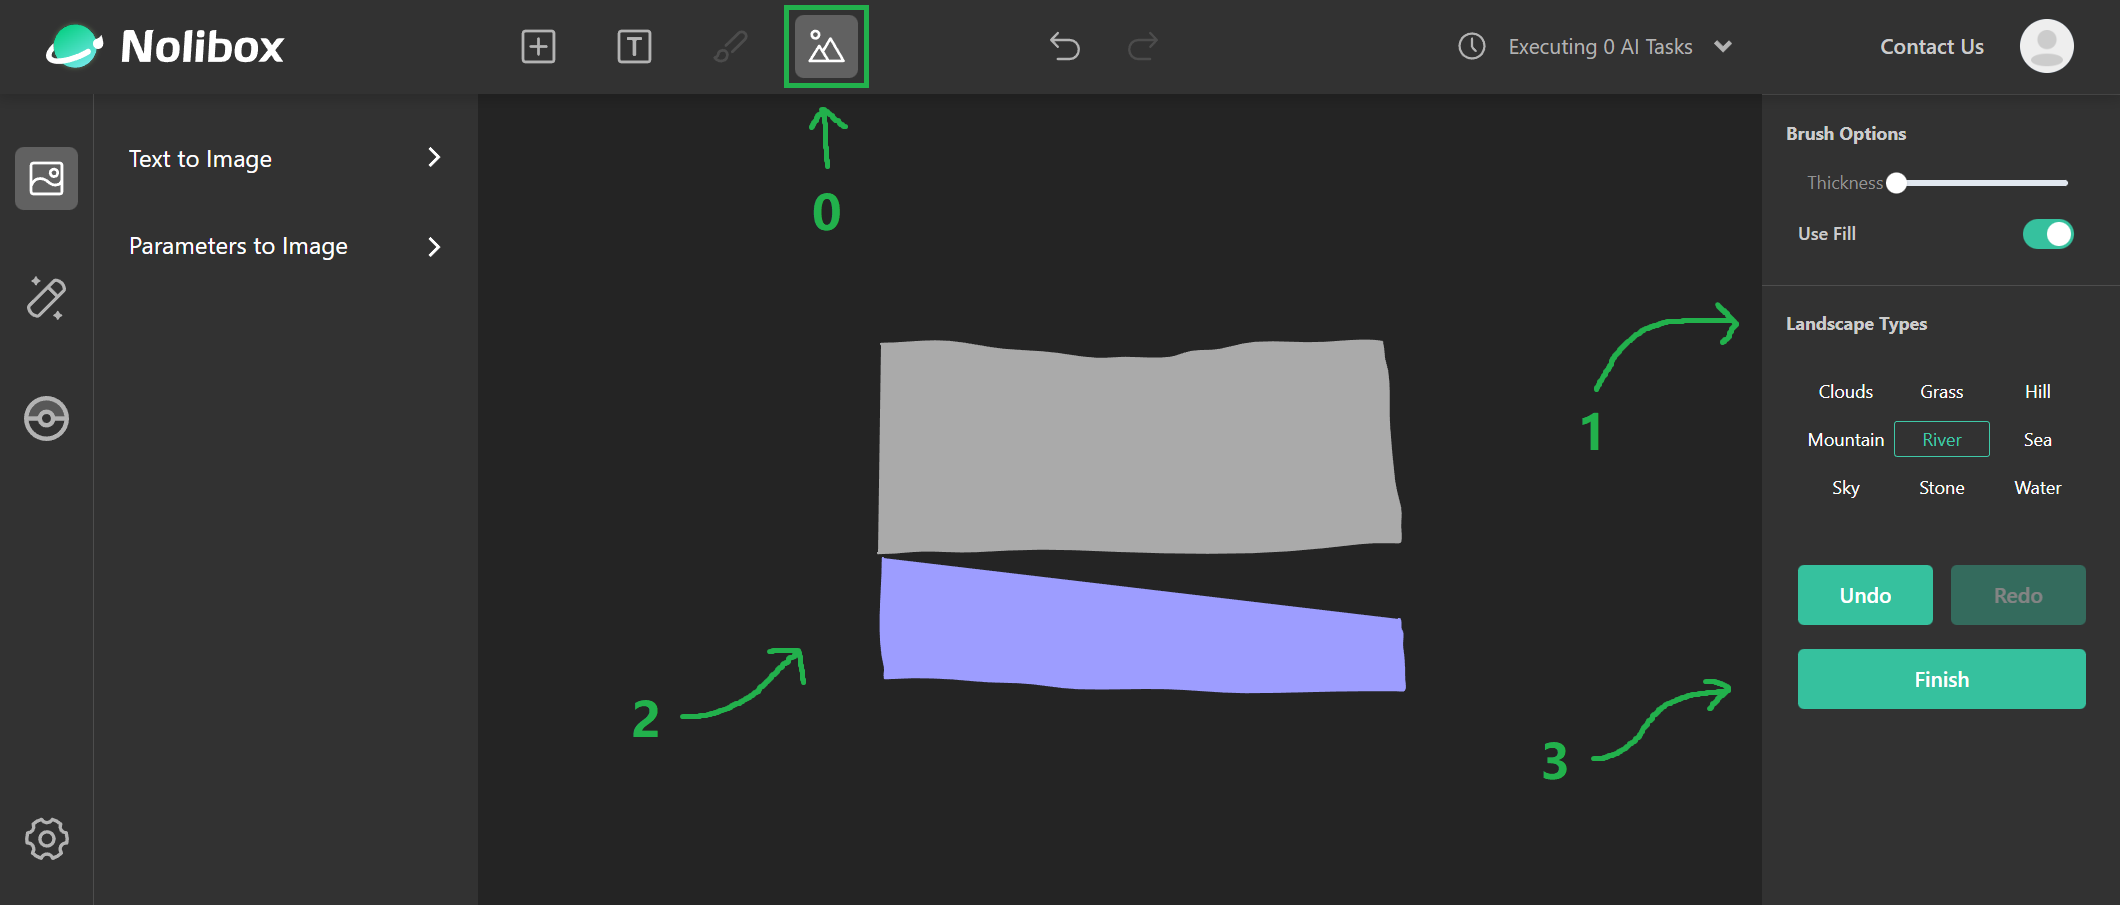
- 0 - Click the landscape icon on the toolbar, and you will enter the 'Landscape drawing' mode.
- 1 - You will draw an area of the landscape per mouse down & mouse up. Before that, you can choose which type of landscape that you are going to draw on the right panel.
- 2 - You can draw wherever you want on the draw board, but better keep everything together.
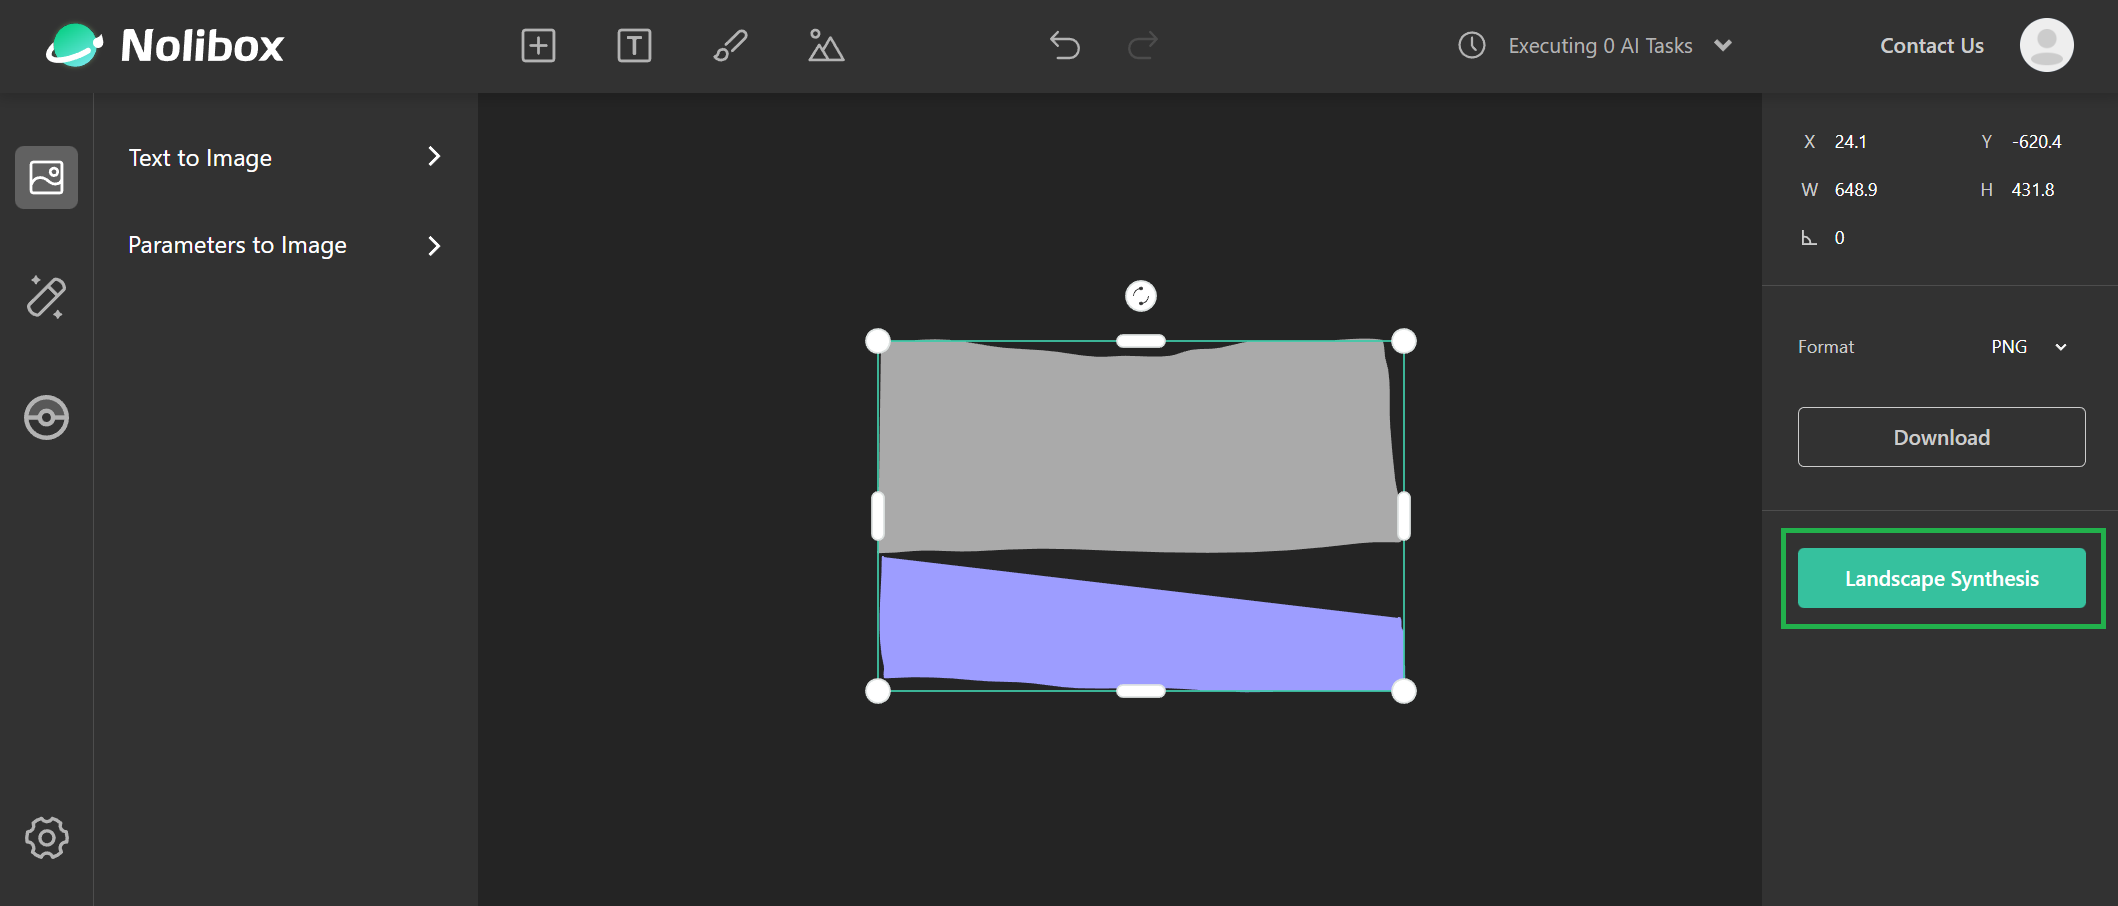
- 3 - Once you are satisfied with your wonderful sketch, click the
Finishbutton on the right, your drawing will then turn into a selectable Node, and aLandscape Synthesisbutton will appear on the right:
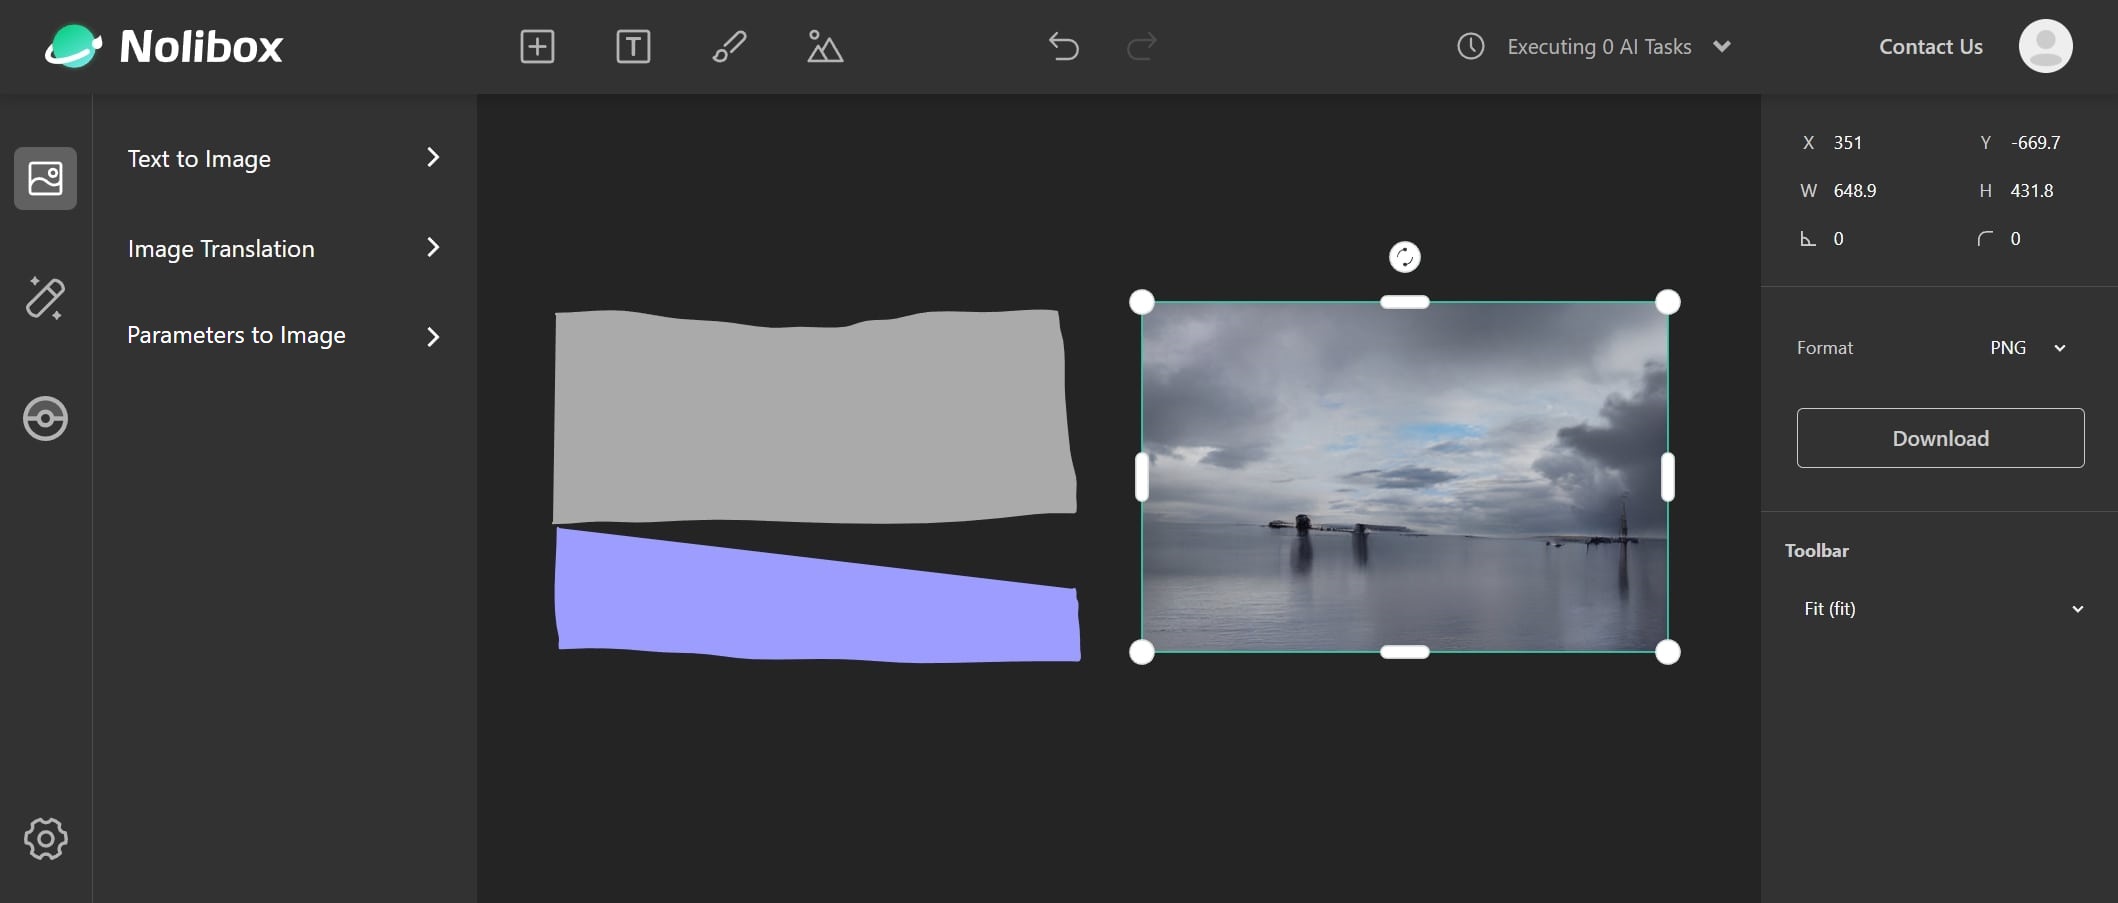
Click it, and the result should be poped up in a few seconds:
Far from good, but not so bad!
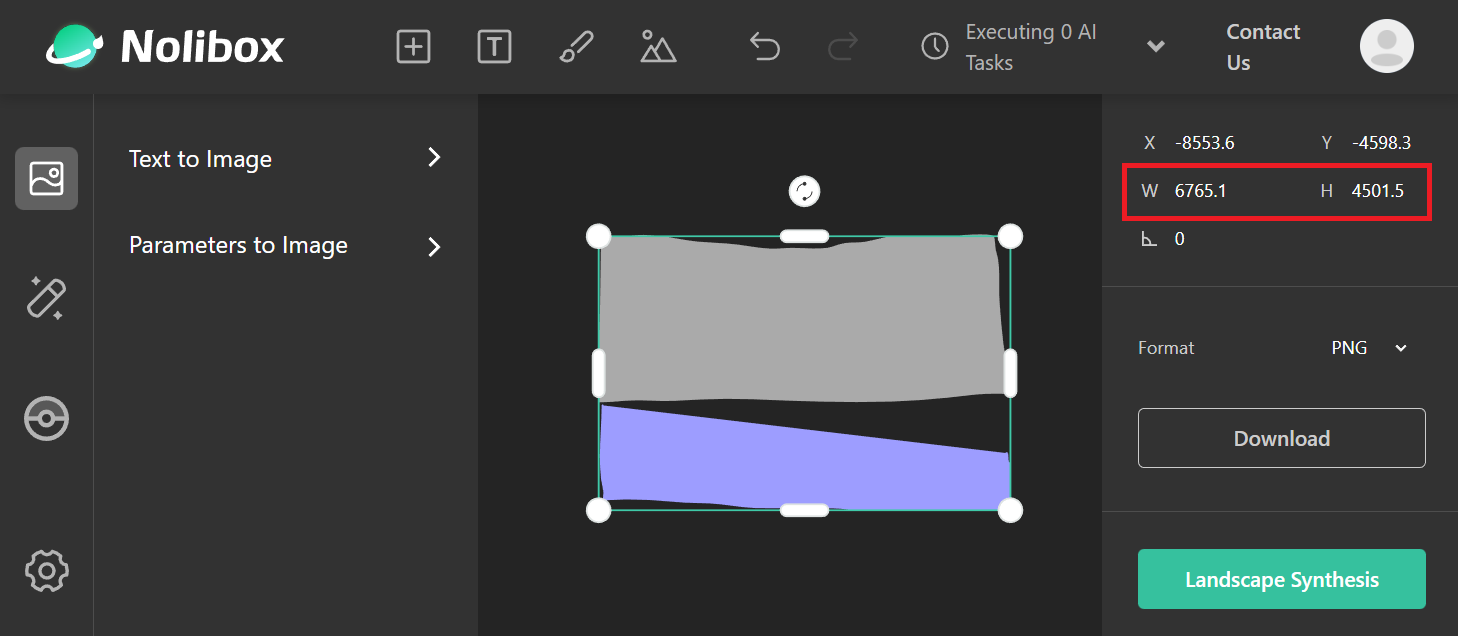
The generated image will have the same size as the sketch, so it will be dangerous if you accidentally submit a HUGE sketch without even noticing:
The sketch looks small, but the actual size is 6765.1 x 4501.5!! This happened because we support global scaling, and some huge stuffs will 'look small' on the draw board.
I've implemented something like 'nearest search' to fill those holes, so don't worry: they should be working as expected in most cases!
Apart from the image generating features, we also provided some rather stand-alone image processing features that can be used on any images. Our goal here is to provide an AI-powered toolbox that can do something difficult with only one or a few clicks.
The features listed in this section hide behind that magic-wand-icon on the left:
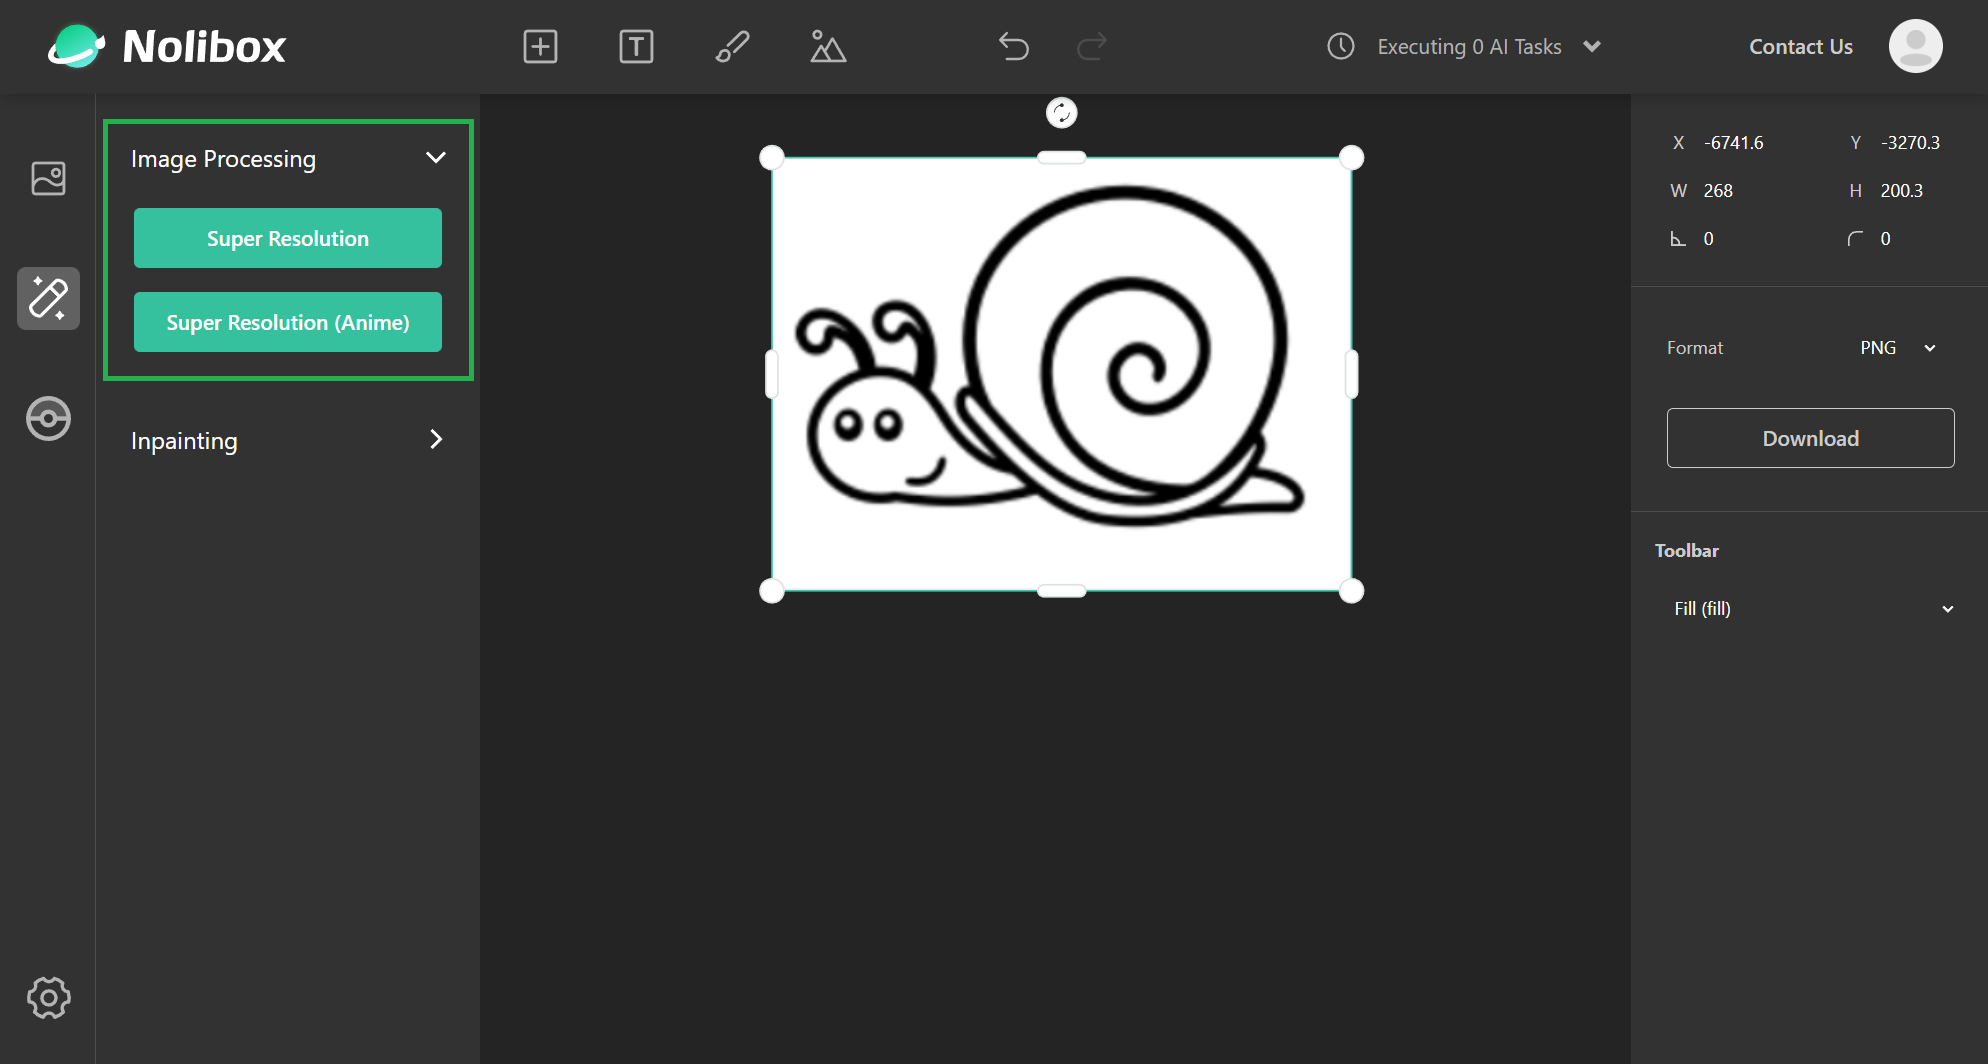
Worried that the generated image is not high-res enough? Then our Super Resolution feature can come to rescue:
There are two buttons: Super Resolution and Super Resolution (Anime). They are basically two versions from Real ESRGAN, where the former is a 'general' SR solution, and the latter does some optimizations on anime pictures.
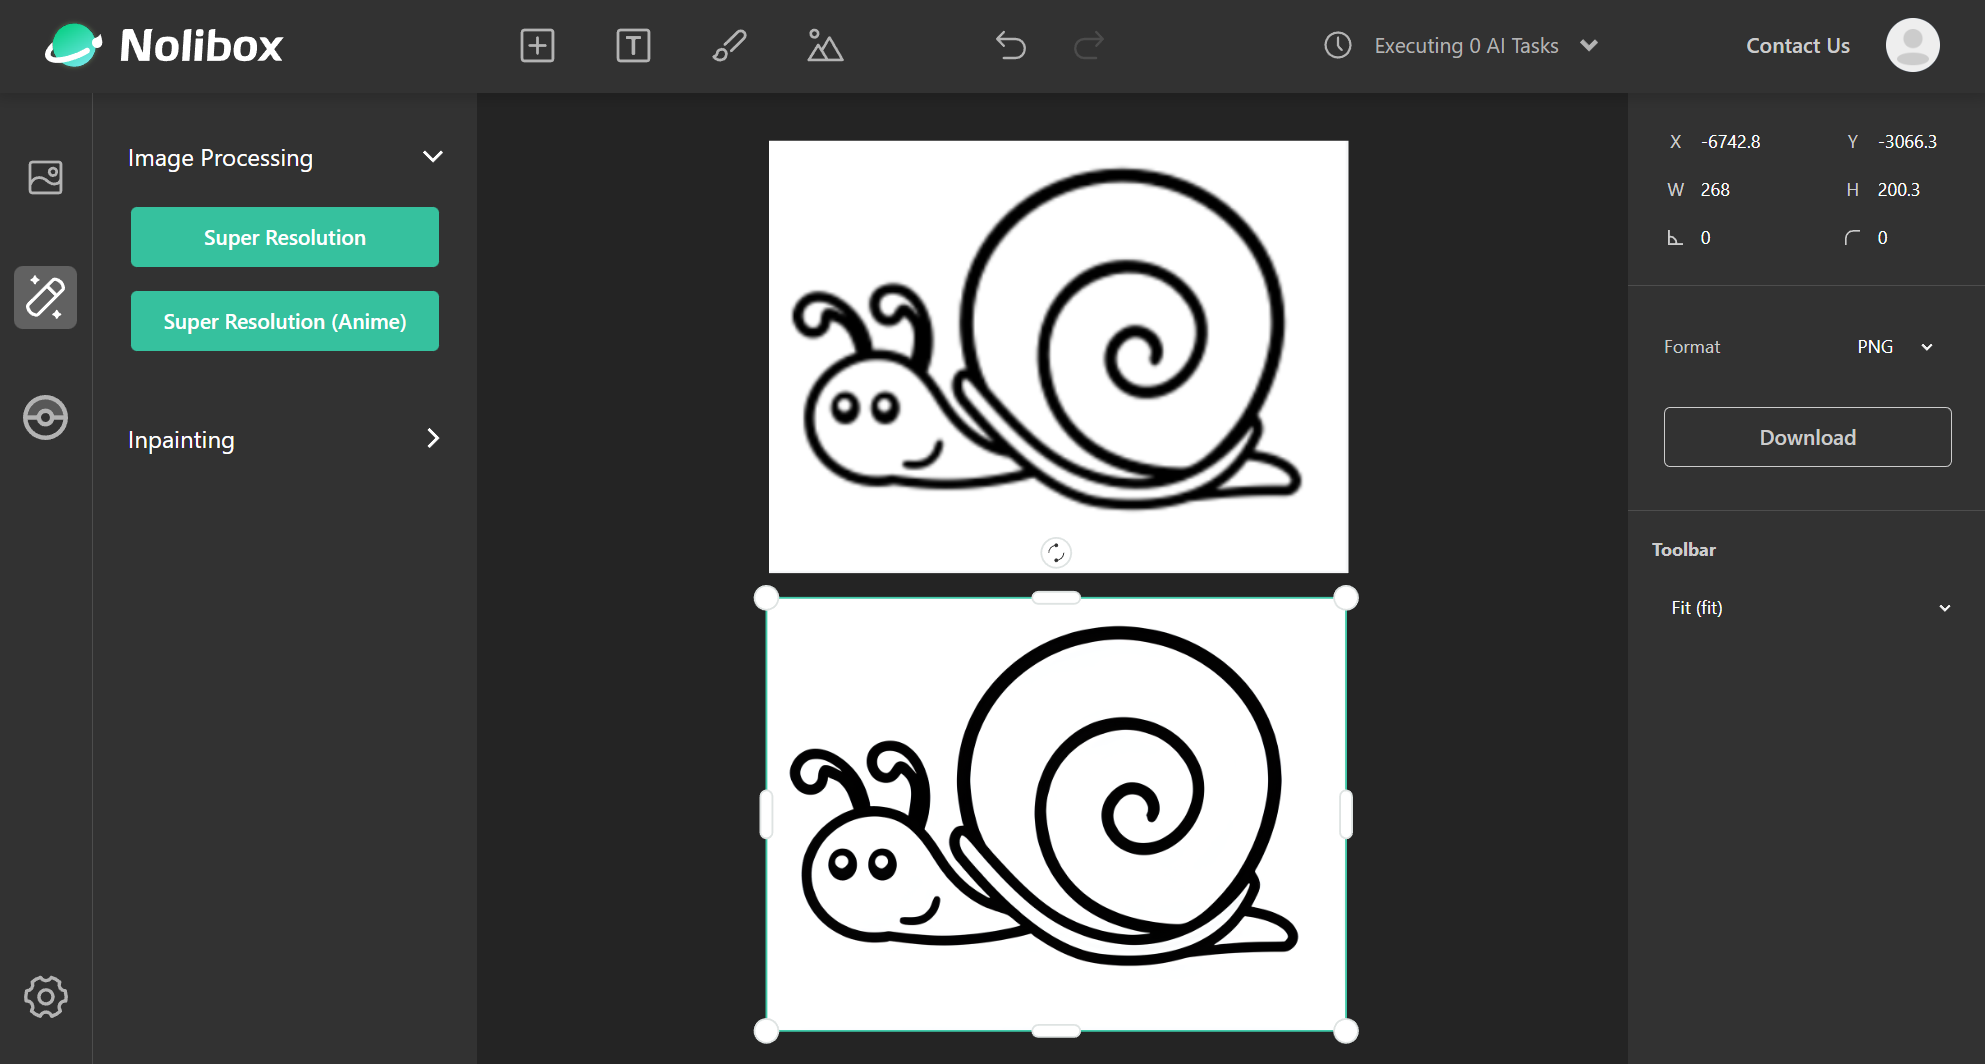
By clicking one of these buttons, you will get a high-res image in a few seconds:
As you can see, the result even looks like a vector graphic, nice!
Although you can SR the already SR-ed image, the image size will grow exponentially (
4xeach), and soon explode my (or your, if you deployed locally) machine 😮!
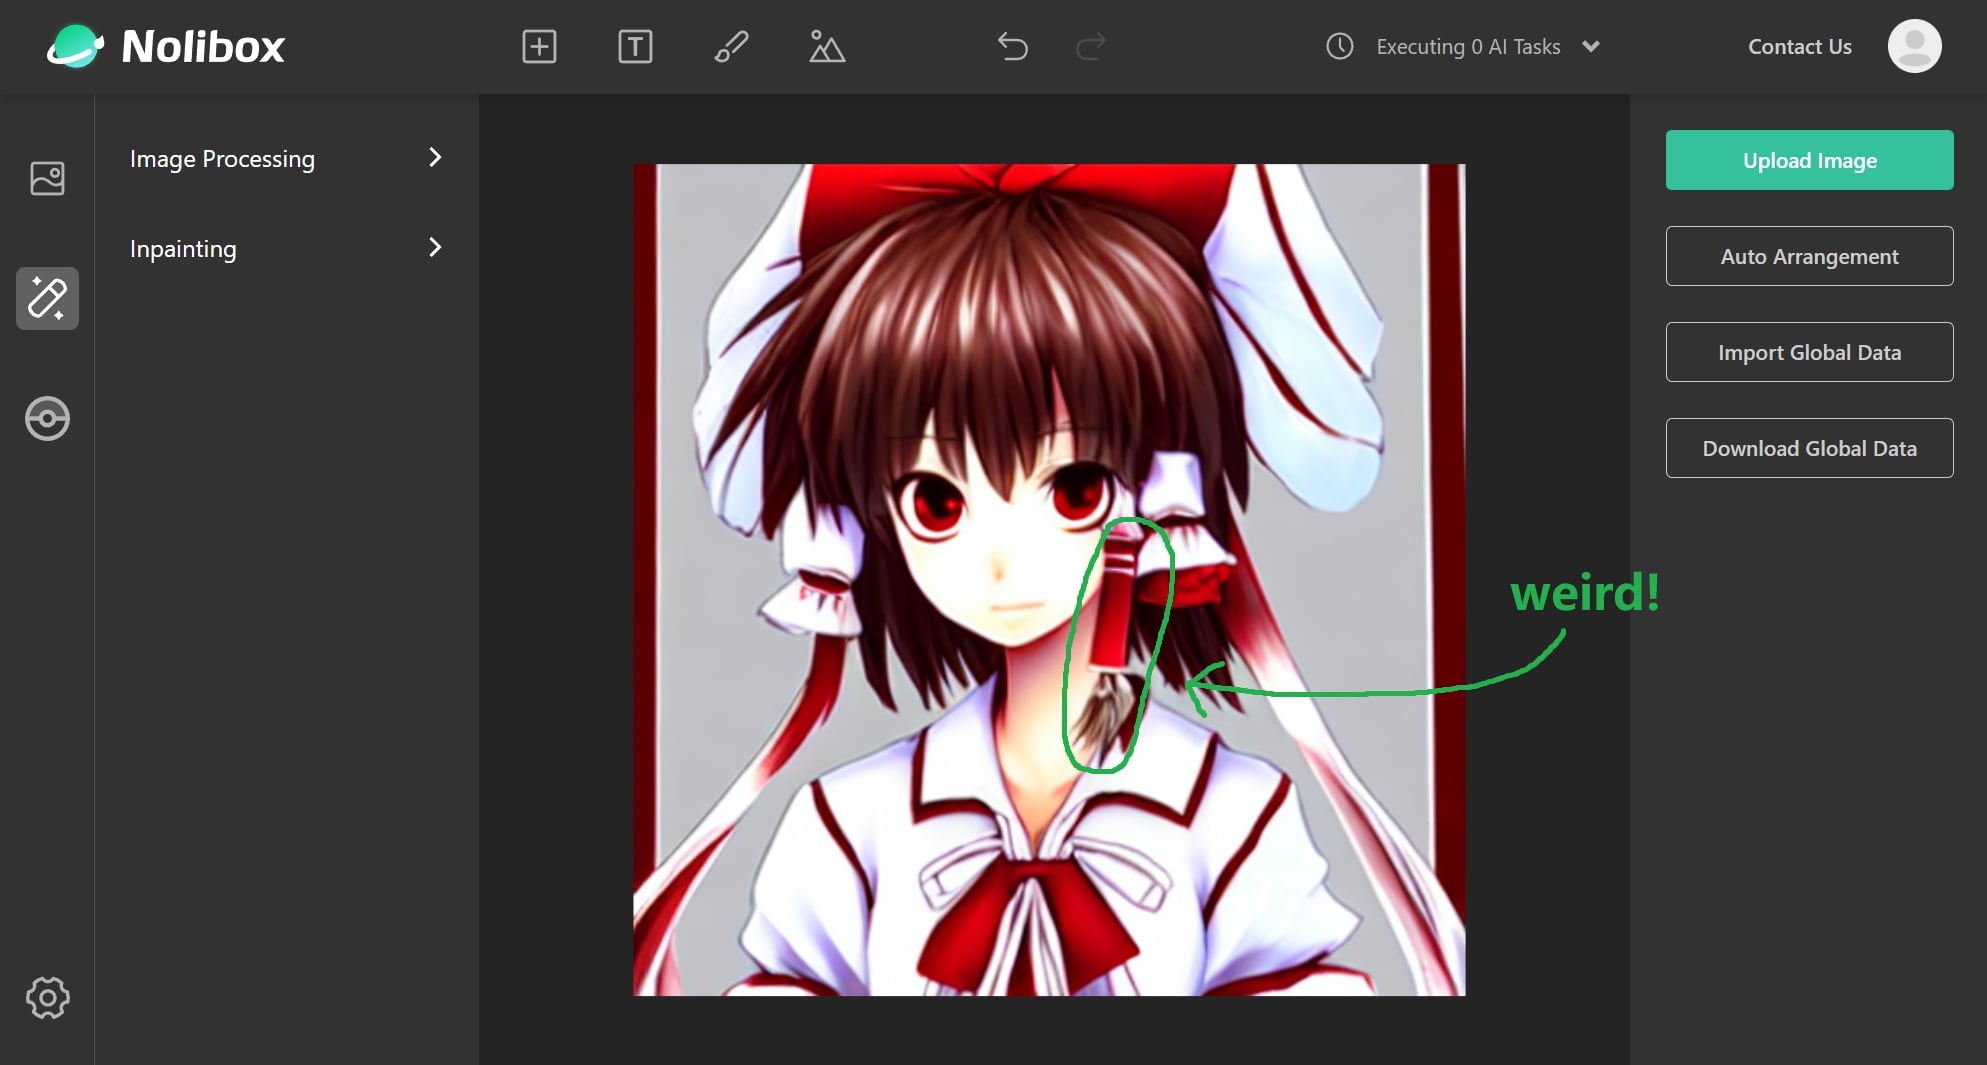
Annoyed that only a small part of a generated image is not what you want? Then our Inpainting feature can come to rescue. Let's say we've generated a nice portrait of hakurei reimu, but you might notice that there is something weird:
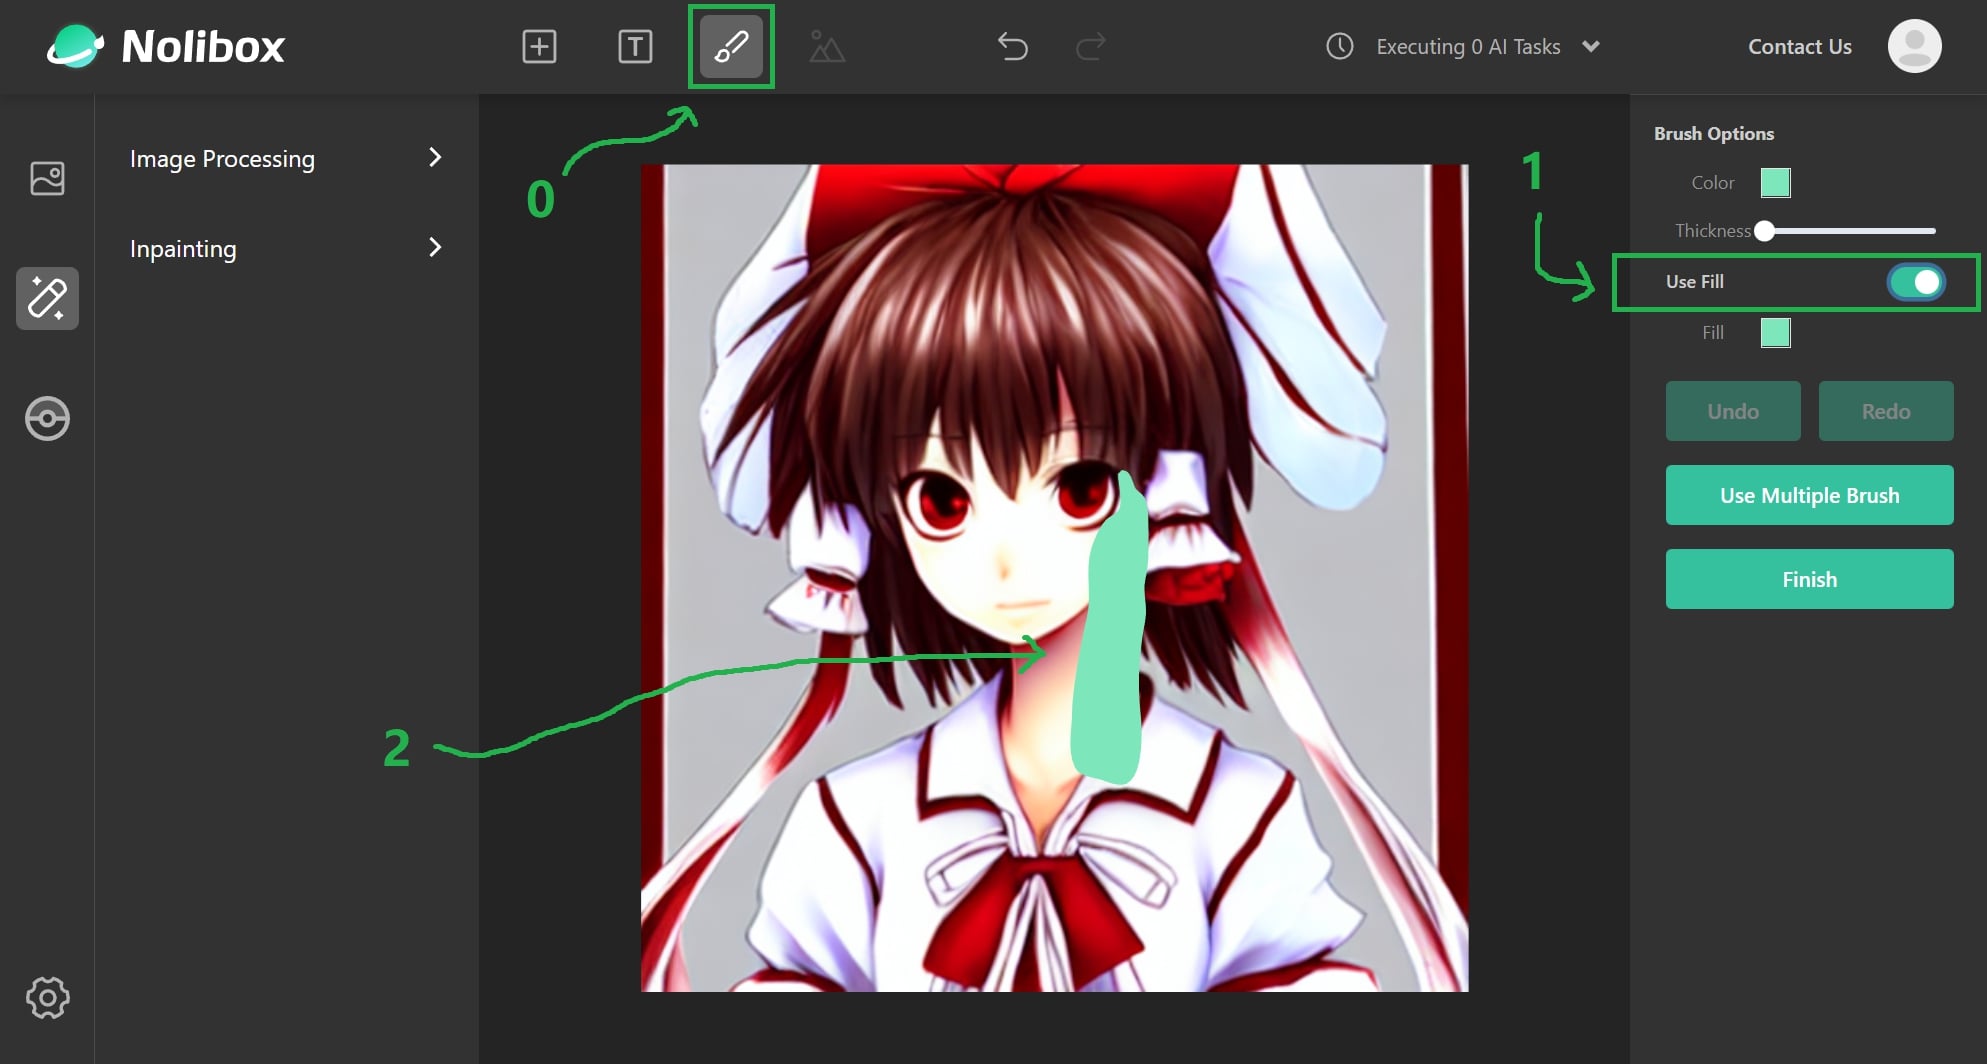
So let's use our brush tool to 'overwrite' the weird area:
- 0 - Click the brush icon on the toolbar, and you will enter the 'brushing' mode.
- 1 - Trigger the
Use Fillmode on the right, so it will be convenient to draw areas. - 2 - Draw the contour of the target area, and the
Use Fillmode will help you fill the center.
The color could be any color, not necessary to be green 😉.
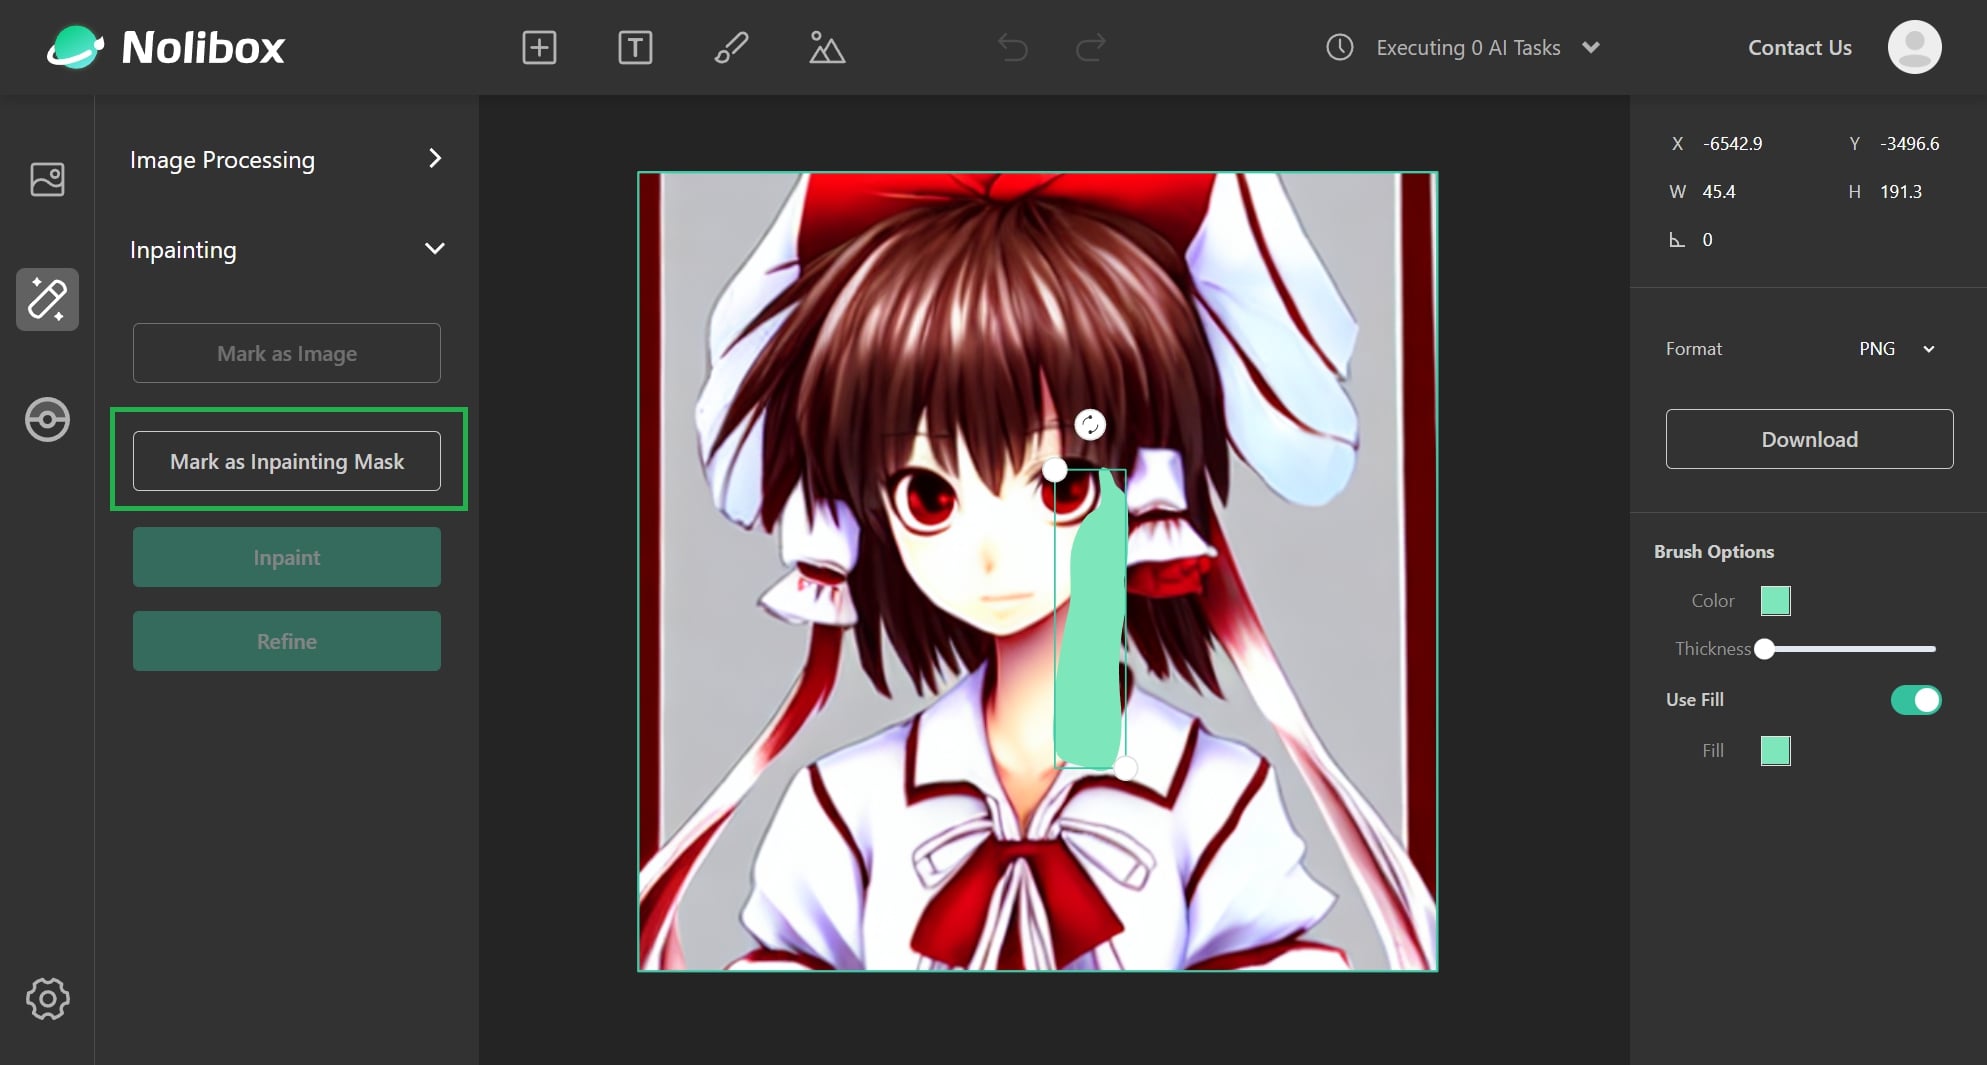
After clicking the Finish button on the right, the drawing will then turn into a selectable Node, and the Inpainting panel on the left can now be utilized:
- click the
Mark as Inpainting Maskto mark your drawing as mask. - click the portrait, then click the
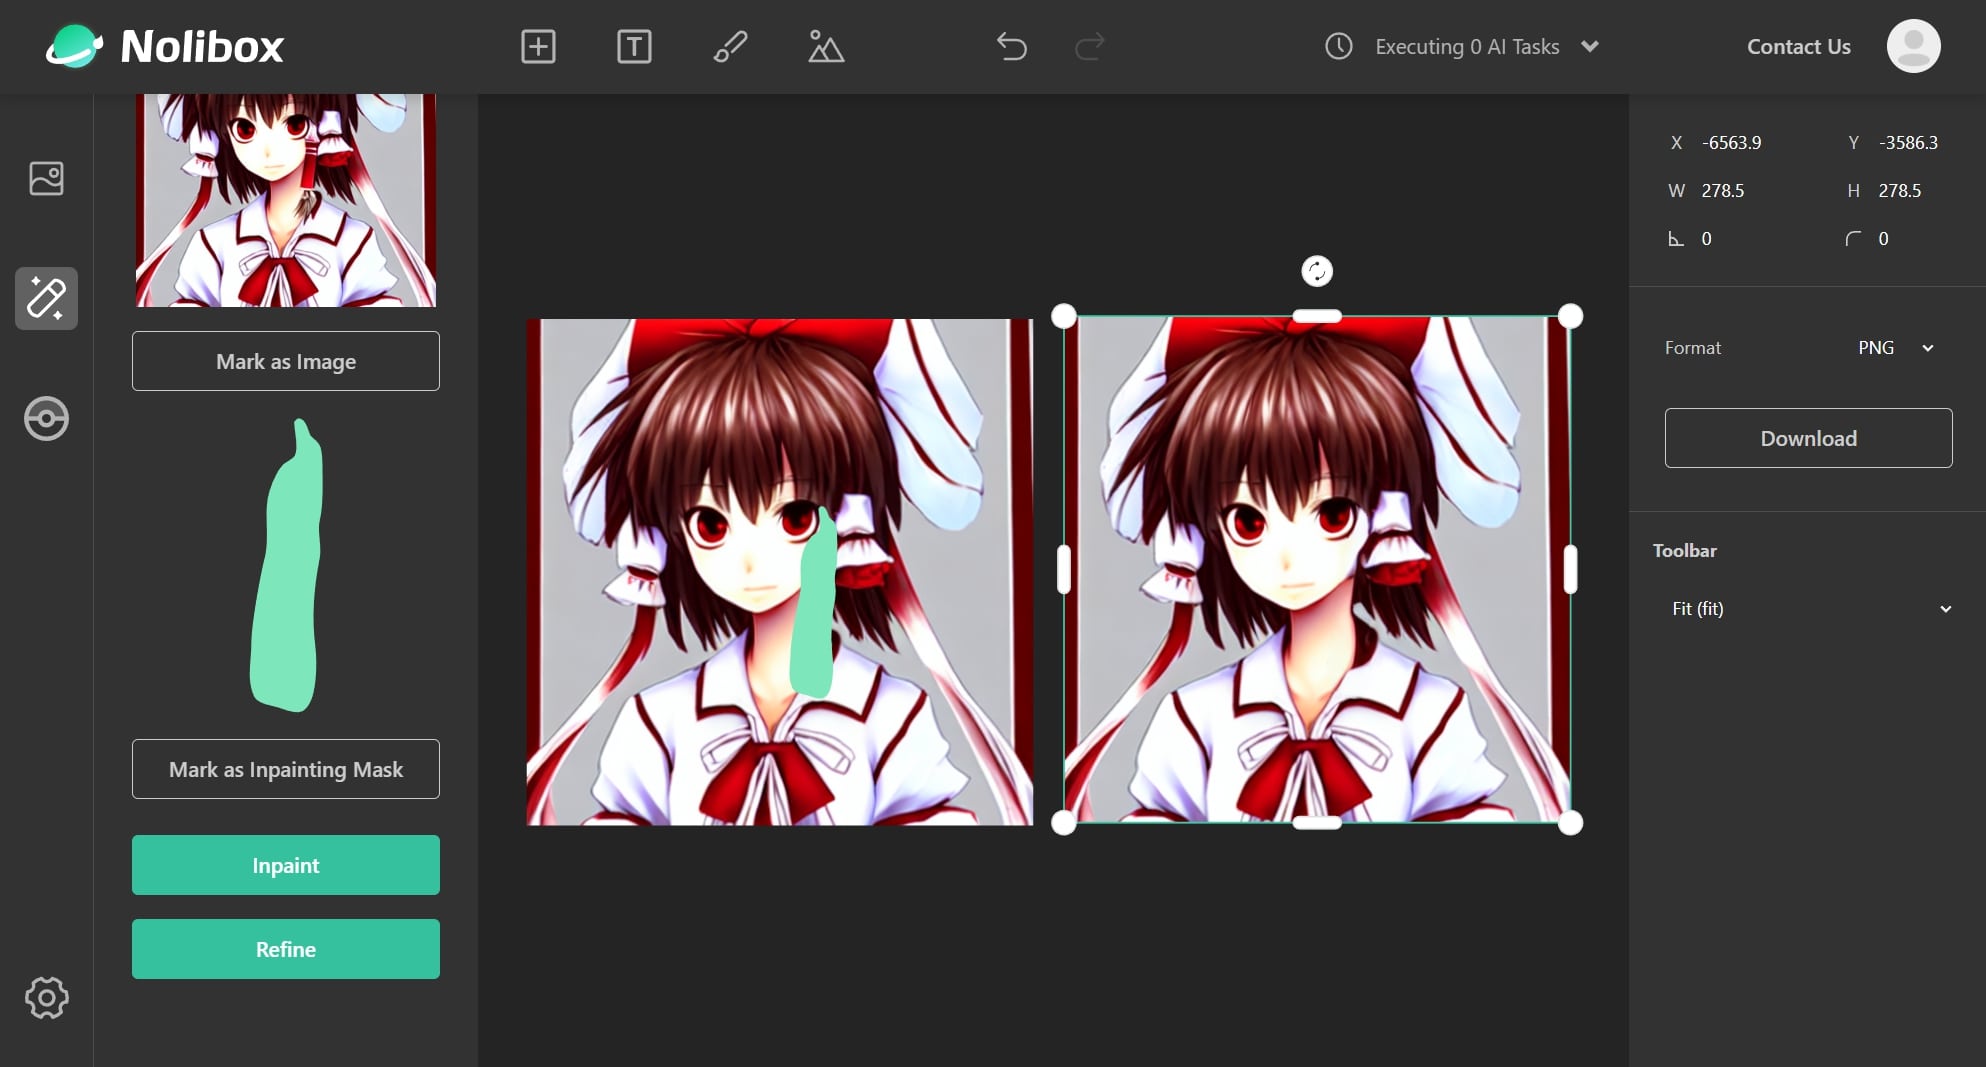
Mark as Imageto mark the portrait as background image.
Then the Inpaint button should be available, click it and wait for the result:
Not bad! But can we do something more?
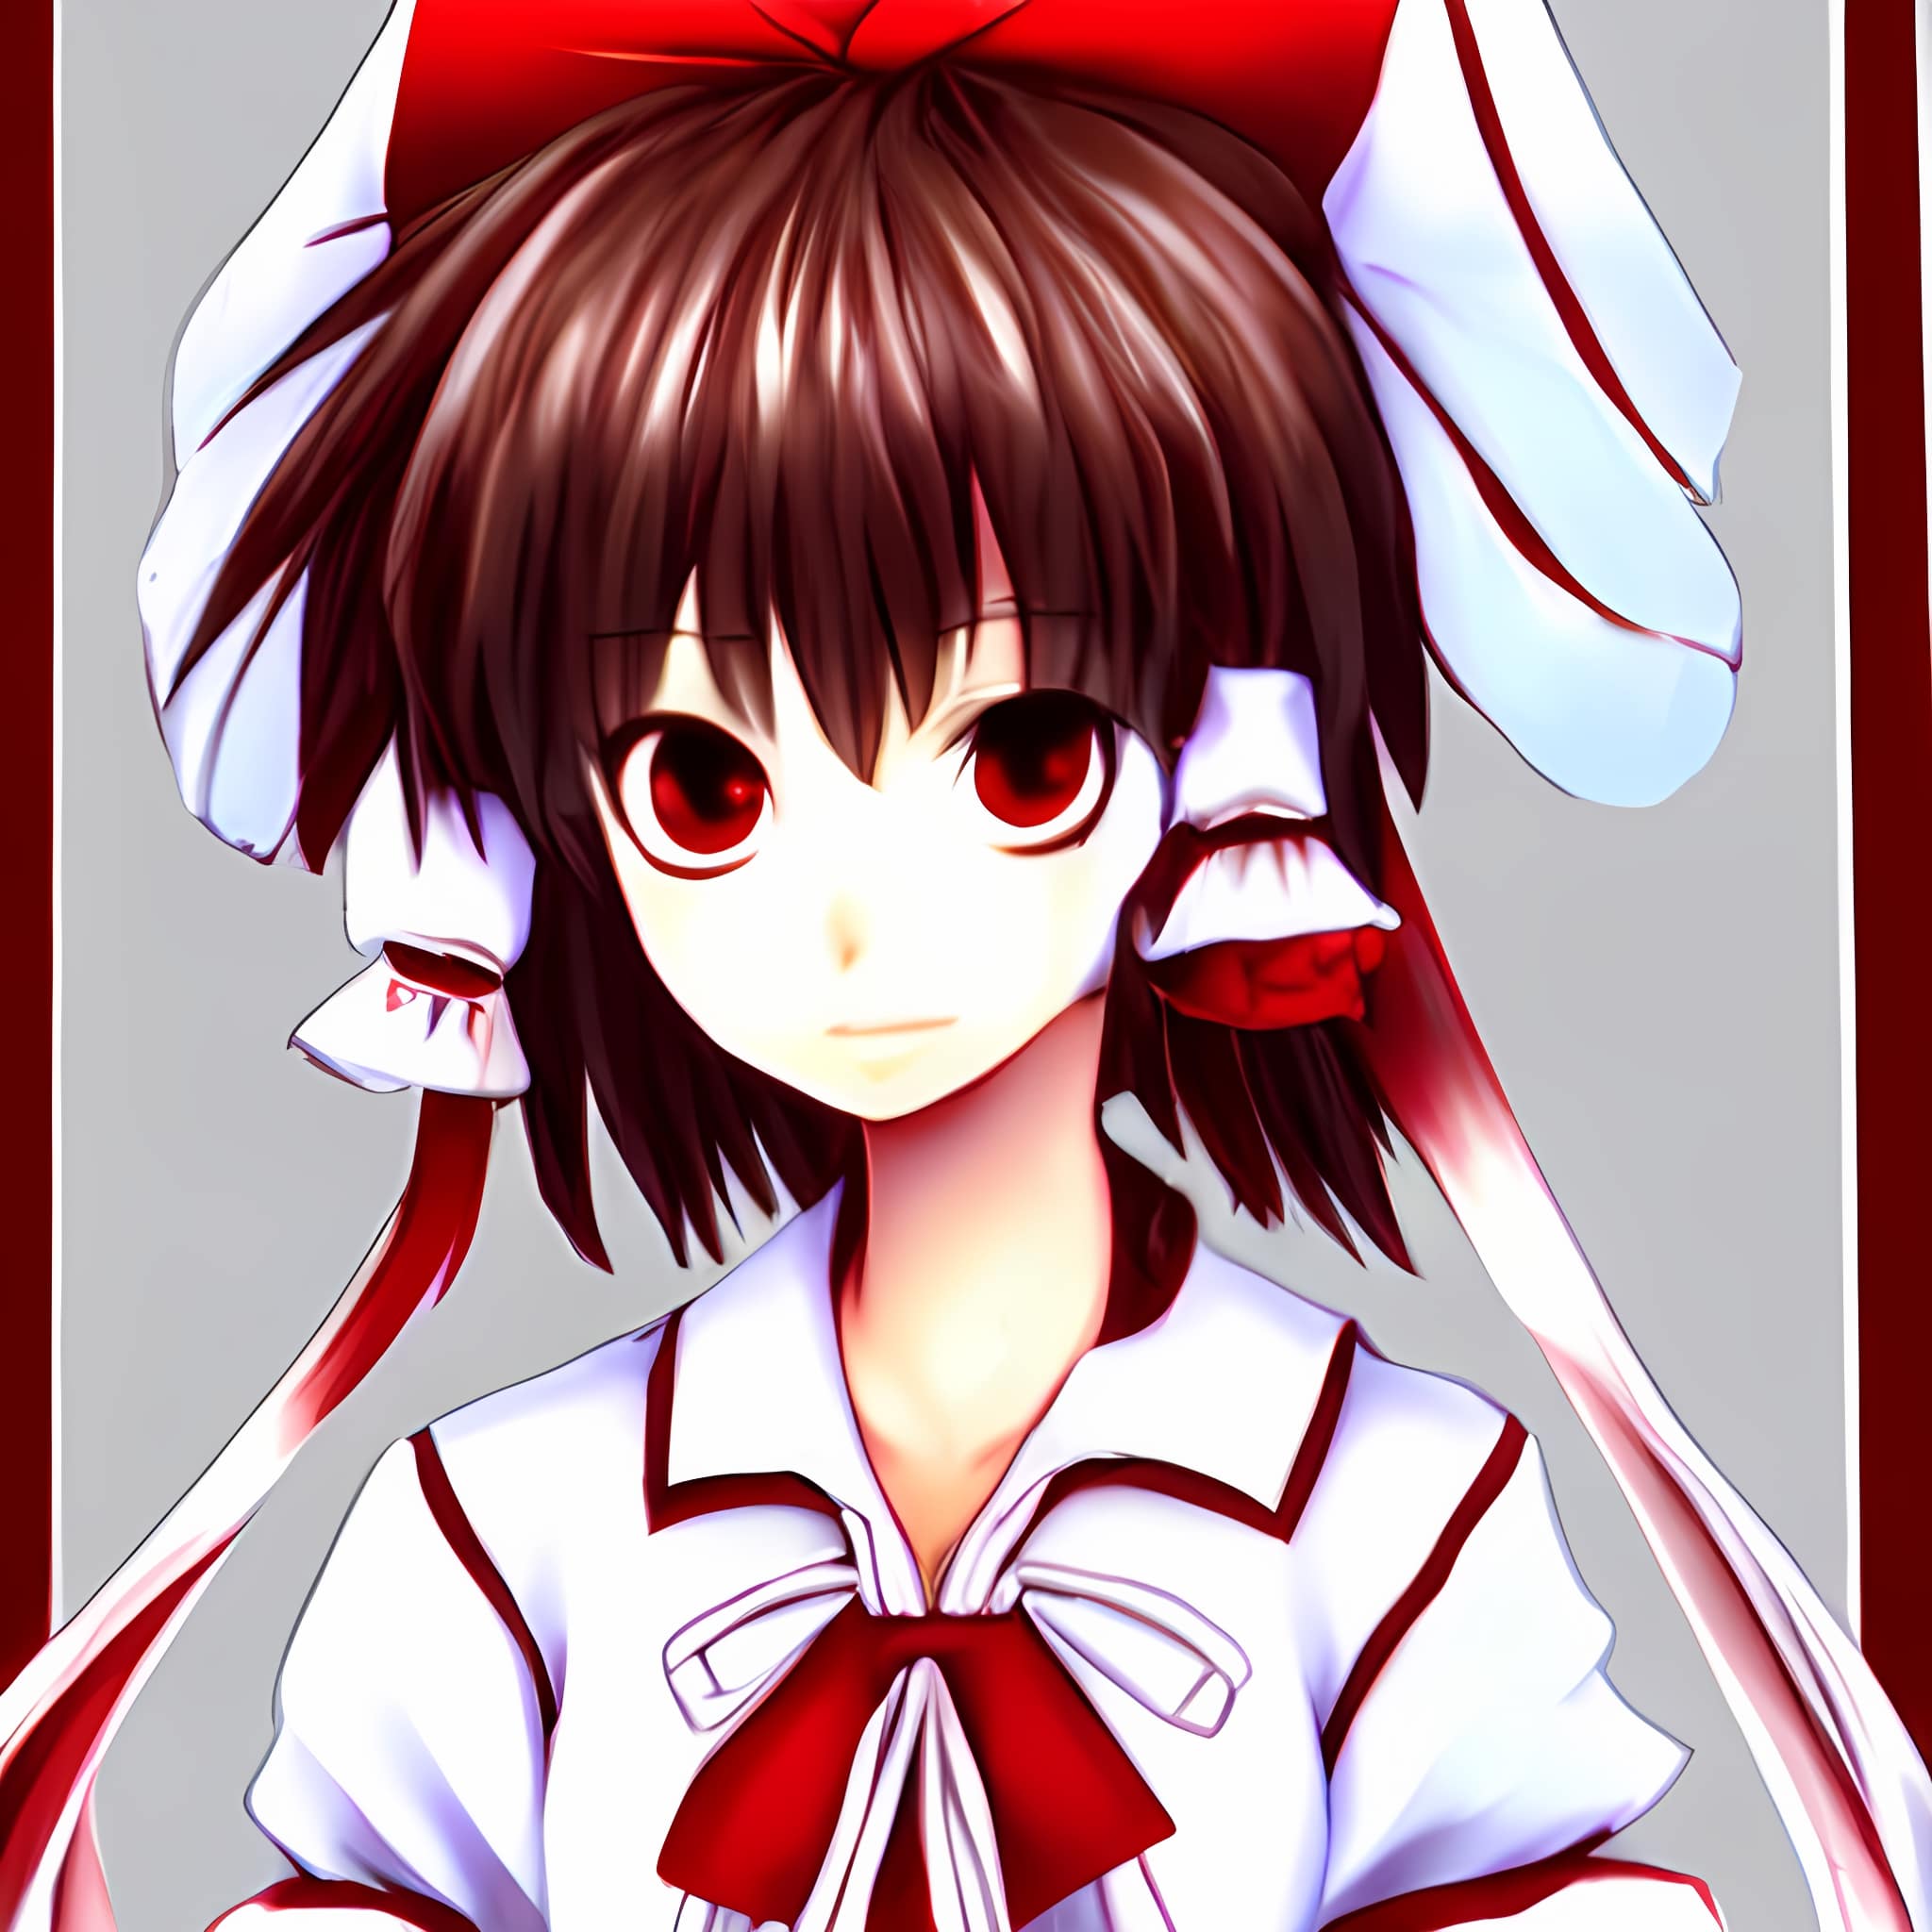
...Yes! We can apply the Super Resolution (Anime) on the inpainted image. And here's the final result:
Not perfect, but I'm pretty satisfied because what I've done is just some simple clicking 😆.
carefree-creator is built on top of carefree-learn, and requires:
- Python 3.8 / 3.9
pytorch>=1.9.0. Please refer to PyTorch's official website, and it is highly recommended to pre-install PyTorch with conda.
git clone https://github.com/carefree0910/carefree-creator.git
cd carefree-creator
pip install -e .uvicorn apis.interface:app --host 0.0.0.0 --port 8123export TAG_NAME=cfcreatordocker build -t $TAG_NAME .If your internet environment lands in China, it might be faster to build with Dockerfile.cn:
docker build -t $TAG_NAME -f Dockerfile.cn .docker run --gpus all --rm -p 8123:8123 -v /full/path/to/your/client/logs:/workplace/apis/logs $TAG_NAME:latestThey are currently stored on my poor cloud server, and I'm planning to support storing them on your local machines!
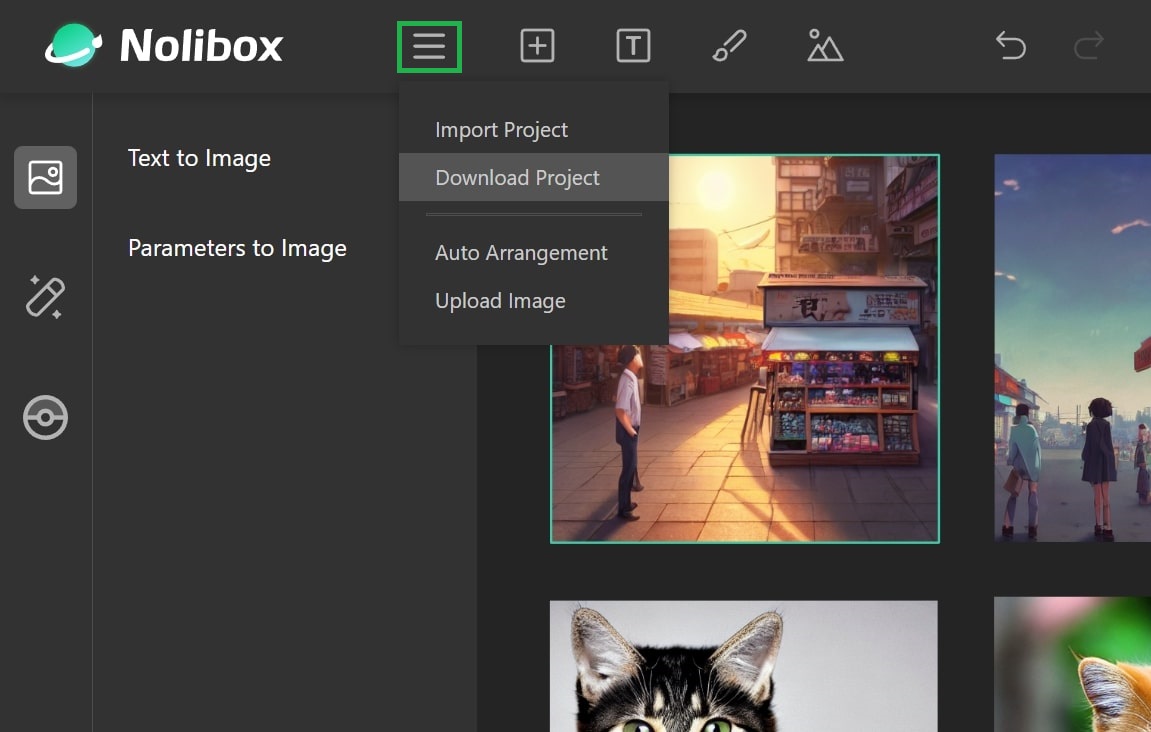
We will perform an auto-save everytime you make some modifications, and will perform a period saving every minute, to the localStorage of your browser. However, I have to admit that they are not as reliable as it should be, so you can download the whole project to your own machines:
This will download a .noli file, which contains all the information you need to fully reconstruct the current draw board. You can then import these .noli files later with the Import Project menu option (right above the Download Project option).
carefree-creator is a FastAPI-based service, and I've already made some abstractions so it should be fairly easy to implement a new Algorithm.
The development guide is on our TODO list, but here are some brief introductions that might help:
- the
cfcreator/txt2img.pyfile is a good reference. - create a new file under the
cfcreatordirectory, and in this file:- define the endpoint of your service.
registeranAlgorithm, which should contain aninitializemethod and arunmethod.
- go to
cfcreator/__init__.pyfile and import your newly implemented modules here.
As long as we open sourced the WebUI you can implement your own UIs, but for now you can contribute to this carefree-creator repo and then ask me to do the UI jobs for you (yes, you can be my boss 😆).
That's because I think generating real human faces might not be a good practice for carefree-creator, so currently I'm not going to develop tool chains around it. If you encountered some scenarios that truly need it, feel free to contact me and let me know!
It will ALWAYS be FREE if:
- You are using local deployment (Recommended!).
- You are using my own poor cloud server.
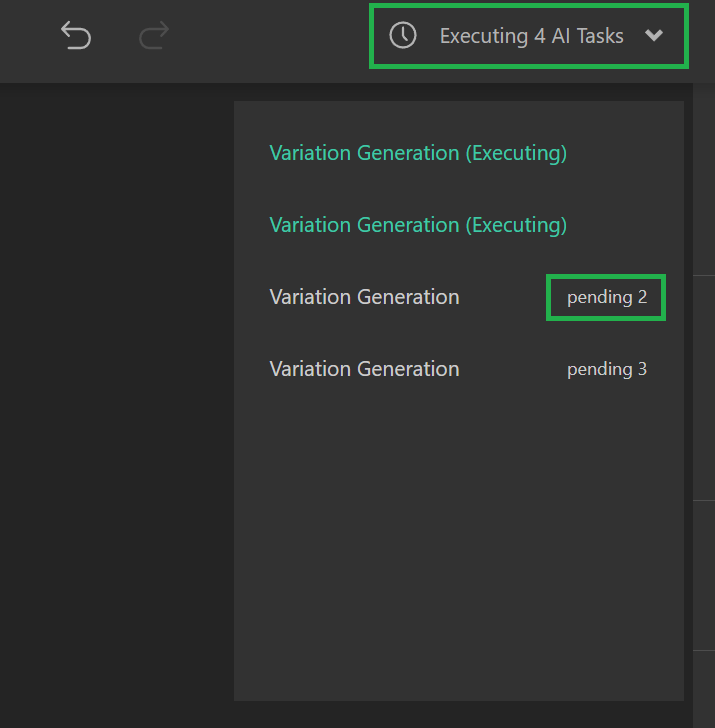
For the second situation, if more and more people are using this project, you might be waiting longer and longer. You can inspect where the positions of your tasks are in the waiting queue here:
The number after pending will be the position. If it is ridiculously large... Then you may try local deployment, or some business will go on (accounts, charges for dedicated cloud servers, etc) 🤣.
As long as this project is not as famous as those crazy websites, even my poor cloud server should be able to handle the requests, so you can consider it to be FREE in most cases (Not to mention you can always use local deployment) 😉.
I LOVE cats. They are soooooo CUTE.
Dogs are cute as well, but I got bitten when I was young so...
I've been a big fan of Touhou since 10 years ago, and one of my biggest dreams is to make an epic Touhou fan game.
It wouldn't be possible because I can hardly draw anything (🤣), but now with Stable Diffusion everything is hopeful again.
So the initial reason of building this project is simple: I want to provide a tool that can empower anyone, who is suffering from acquiring game materials, the ability to create ones on their own. That's why we put pretty much attention on the Variation Generation feature, since this is very important for creating a vivid character.
Stable Diffusion gives me some confidence, and Waifu Diffusion further convinced my determination. Many thanks to these great open source prjects!!!
And as the development goes on, I figure out that this tool has more potential: It could be the 'Operation System' of the AI generation world! The models/algorithms serve as the softwares, and your creations serve as the files. You can always review/edit your files with the softwares, as well as sharing/importing them.
In the future, the softwares should be easy to implement/publish/install/uninstall, and the files should be able to store at cloud/local machine (currently they are all on cloud, or, on my poor cloud server 🤣).
This will further break the wall between the academic world and the non-academic world. The Hugging Face Space is doing a good job now, but there are still three pain points:
- Its interaction is usable, but still quite restricted.
- The results are generated one after another, we cannot review/edit the results that are generated 5 minutes ago.
- The service is deployed at their own servers, so you have to wait if their servers are busy / not GPU accelerated.
And now, with the ability to do local deployment, along with the fantastic infinite draw board as the WebUI, these pain points will all be solved. Not to mention with some inference technique (such as the ZeRO from deepspeed), it is possible to deploy huge, huge models even on your laptop, so don't worry about the capability of this system - everything will be possible!
Unfortunately I'm not familiar with Discord, so if someone can help me build it I will be really appreciated!
Nolibox is a startup company where I'm currently working for. Although I have to put the logo everywhere, this project is rather independent and will not be restricted 😉.
- Undo / Redo in the header toolbar will be messed up when it comes to the 'brushing' mode and 'landscape' mode.
- If you opened two or more tabs of this
creator, your savings will be messed up because your data is not saved in the cloud, but in thelocalStorageof your browser. - If you delete an inpainting mask and then undo the deletion, you cannot see the preview image of the inpainting mask anymore until you set another Node as inpainting mask and then switch it back.
- User Guide
- Textual Inversion
- Better Outpainting Techniques
- Development Guide
- And much more...
- Stable Diffusion, the foundation of various generation methods.
- Waifu Diffusion, the anime-finetuned version of Stable Diffusion.
- Real ESRGAN, the adopted Super Resolution methods.
- Latent Diffusion, the adopted Inpainting & Landscape Synthesis method.
- carefree-learn, the code base that has re-implemented all the models above and provided clean and handy APIs.
- And You! Thank you for watching!
