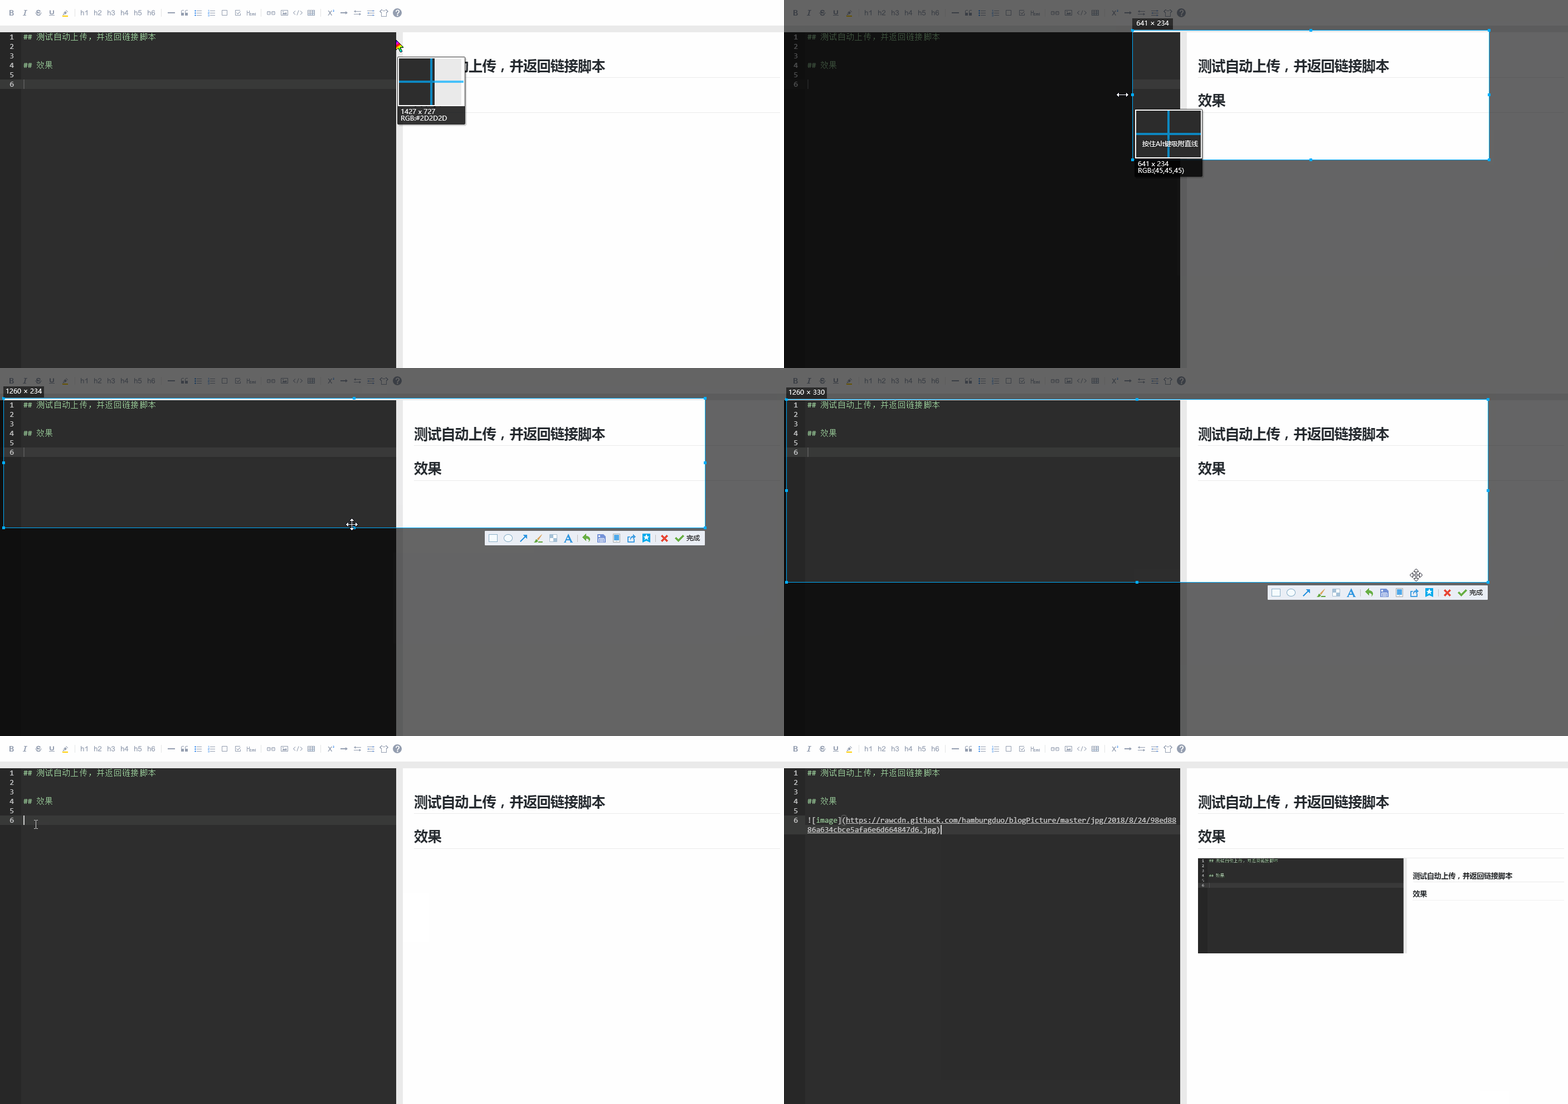
-
使用 python + ahk 简化使用 markdown 写作时插入图片的繁琐流程
-
python 完成自动化:截图后将剪贴板中的图片,上传至github中的图片仓库。同时获取图片外链,输出到剪贴板中;
-
AutoHotKey 快捷键部署:使用 ctrl+shift+v 执行 python 程序并输出剪贴板中的外链到markdown编辑器。
-
-
效果演示
-
自动为截图添加阴影
在 github.ini 中,保持默认配置
shadow = 1即可自动对截图进行阴影处理,显示时效果更加友好。若不需要进行阴影处理,更改默认配置shadow = 0即可。
pip install -r requirement.txt
- 适用环境:Windows 10 (64 bit)
-
在 github.ini 中,填写你的github账号,图片repo名称,申请的token:github_user、github_repo、github_token;
- 配置举例:
githu_token: xxxxxxxxxxxxxxxxxxxxxxxxxxxxxxxxxxxxxxxx githu_user: hamburgduo githu_repo: blogPic-
github token的申请:
个人访问token的申请地址,如果没有token, 单击"Generate new token" 并选择"repo" scope生成个人token,填写到配置文件;
-
githu_uer: 你的github账号;
-
githu_repo: 你的github已创建的空repo,自动上传的图片存放仓库;
-
若未安装 AutoHotKey,则安装 AutoHotKey;
-
将 autoUploadPicToGithub.ahk 中的 mdpicker_github.py 路径更改为你本地 mdpicker_github.py 的绝对路径后保存;
-
运行 autoUploadPicToGithub.ahk;
若已有 .ahk 脚本在运行,则将 autoUploadPicToGithub.ahk 中的内容添加到你的 .ahk 脚本中,reload 即可;
-
使用任意截图工具截图后,按下 Ctrl + shift + v,程序将剪贴板中的截图上传至github截图专用repo,并将所得外链以 markdown 图片格式输出至Markdown编辑器。
The Markdown Picker To GitHubis under the MIT License.
