We would ❤️ you to contribute to the Appwrite website and help make it better! We want contributing to Appwrite to be fun, enjoyable, and educational for anyone and everyone. This document will walk you through the steps to complete your first contribution.
Help us keep Appwrite open and inclusive. Before interacting with the Appwrite community, please read and follow our Code of Conduct.
Looking for a place to start? Have a feature request or bug report? Start with by searching through our issues.
If you're looking for a good issue to start contributing, simple issues fit for first time contributors will be labelled good first issue. More challenging issues might be labelled help wanted.
If you want to request features, improvements, or bug fixes, search for existing issues first. If you find a similar issue, comment and upvote the issue for visibility. If you cannot find a similar issues, open a new issue. If the Appwrite maintainers think the issue is an issue appropriate for contribution, we'll mark it as help wanted.
To contribute to the Appwrite website, you need to fork, clone, and run the website.
Start by forking the repository, which makes a copy of the repo on your GitHub profile. This allows you to make code changes when you don't have permissions in the main Appwrite website repo.
Then, clone the respository.
Alternatively, you can develop the website repo in your browser using Code Spaces or GitPod.
The Appwrite website uses PNPM. Start by following their installation documentation.
Once you've cloned the Appwrite website repo, running the following command to install dependencies:
pnpm iThen, run the following command to start a development server.
pnpm run devBefore commiting your code changes, make sure the website repo builds by running:
pnpm run buildThe branch naming convention is as follows
TYPE-ISSUE_ID-DESCRIPTION
example:
doc-548-submit-a-pull-request-section-to-contribution-guide
When TYPE can be:
- feat - is a new feature
- doc - documentation only changes
- cicd - changes related to CI/CD system
- fix - a bug fix
- refactor - code change that neither fixes a bug nor adds a feature
All PRs must include a commit message with a description of the changes made!
Start by forking the project and use the git clone command to download the repository to your computer. A standard procedure for working on an issue would be to:
- Before creating a new branch, pull the changes from upstream to make sure your default branch is up to date.
$ git pull
- Create a new branch from the default branch. For example
doc-548-submit-a-pull-request-section-to-contribution-guide
$ git checkout -b [name_of_your_new_branch]
- Work - commit - repeat ( be sure to be in your branch )
- Push changes to GitHub
$ git push origin [name_of_your_new_branch]
- Submit your changes for review. If you go to your repository on GitHub, you'll see a
Compare & pull requestbutton. Click on that button. - Start a Pull Request (PR) by clicking on
Create pull request. Make sure to update the PR description following the template provided. - Wait for a code review.
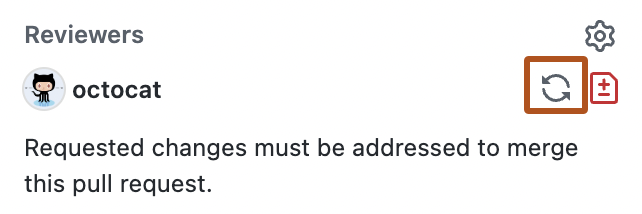
- If you need to make changes based on feedback, make sure to re-request a review from your reviewer after you've made the necessary changes.
- After approval, your PR will be merged.
For consistency the Appwrite documentation follows a strict set of style guidelines, so no matter who is writing the documentation, the tone and voice remains consistent.
- All titles, headings, buttons, and labels should be written in sentence case. If you're not sure what sentence case should look like, check APA's style guide or check with ChatGPT and other LLMs which reliably converts titles to sentence case.
- All headings in a docs page begin with
# Headingthen## Headingand### Heading. Internally, they're converted to H2 to H4 tags. - All headings should have an ID label, for example
# Cool heading {% #cool-heading %}the#cool-headingID will be used to generate the table of contents and add links to the heading. - Prefer verbs over gerunds, for example, say "Create documents" not "Creating documents".
Appwrite's documentation uses extended markdown syntax. You can find all of the available partials types in the CONTENT.md file.
- When contributing upload original screenshots. The Appwrite design team will edit the screenshot to be consistent with other screenshots in the docs.
- Screnshots should be taken in a 1400 x 900 view port on 3x DPR in browser developer tools.
- Use generic and sensible organization, project, and resource names. Avoid names like
test,demo, orsdlkfj. - All screenshot should be take from a user named Walter O'Brien. You can change the name of your current user by going to your Appwrite Console and clicking the top right profile icon > Your Account > Name.
If you're contributing a new piece of content, always follow the closest example as an outline. For example, a new web quick start should use one of the existing web quick starts as example, with the same content and pages.
If you can't find a similar piece of content as example, the Appwrite team will request an ourline from you.
It should contain all the pages and headings with in them, maintainers may request clarification on headings.
# page 1
    ## heading a
    ## heading b
    ...
# page 2
    ## heading a
    ## heading b
    ...
# page 3
    ## heading a
    ## heading b
    ...
...