-
In the Azure Management Portal, click Virtual Machines and then select the virtual machine you just created (testlinuxvm).
-
On the command bar click Attach and then click Attach Empty Disk.
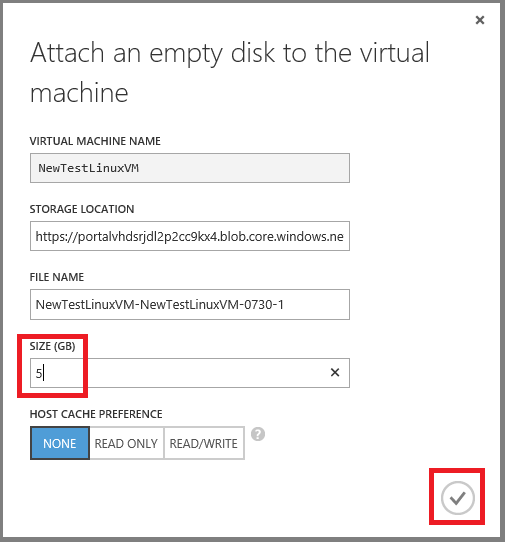
The Attach Empty Disk dialog box appears.
-
The Virtual Machine Name, Storage Location, and File Name are already defined for you. All you have to do is enter the size that you want for the disk. Type 5 in the Size field.
Note: All disks are created from a .vhd file in Azure storage. You can provide a name for the .vhd file that is added to storage, but Azure generates the name of the disk automatically.
-
Click the check mark to attach the data disk to the virtual machine.
-
Click the name of the virtual machine to display the dashboard so you can verify that the data disk was successfully attached to the virtual machine. The disk that you attached is listed in the Disks table.
When you attach a data disk, it's not ready for use until you log in to complete the setup.
##Connect to the Virtual Machine Using SSH or PuTTY and Complete Setup Log on to the virtual machine to complete setup of the disk so you can use it to store data.
-
After the virtual machine is provisioned, connect using SSH or PuTTY and login as newuser (as described in the steps above).
-
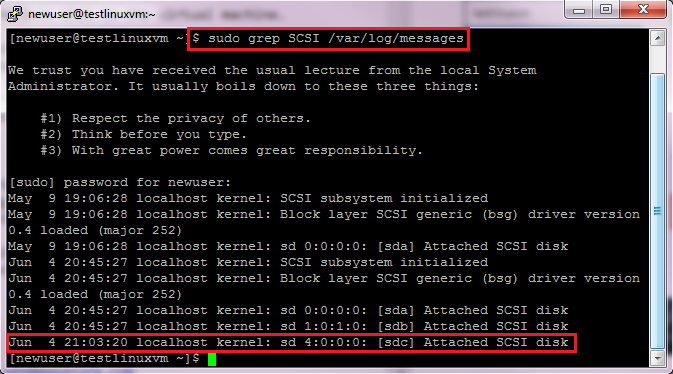
In the SSH or PuTTY window type the following command and then enter the account password:
$ sudo grep SCSI /var/log/messagesYou can find the identifier of the last data disk that was added in the messages that are displayed (sdc, in this example).
-
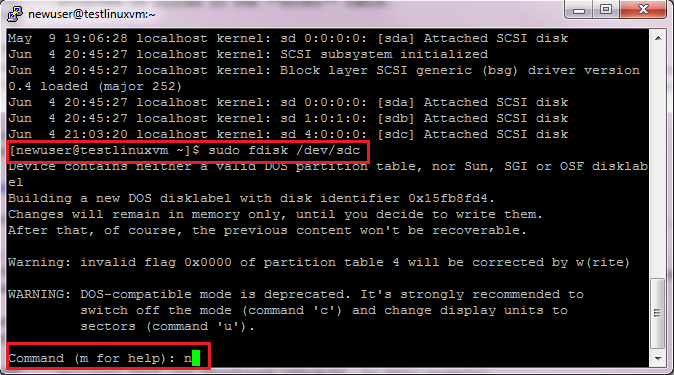
In the SSH or PuTTY window, enter the following command to partition the disk /dev/sdc:
$ sudo fdisk /dev/sdc -
Enter n to create a new partition.
-
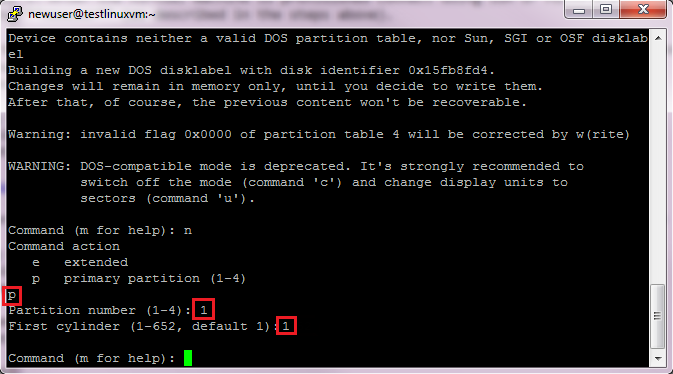
Type p to make the partition the primary partition, type 1 to make it the first partition, and then type enter to accept the default value (1) for the cylinder.
-
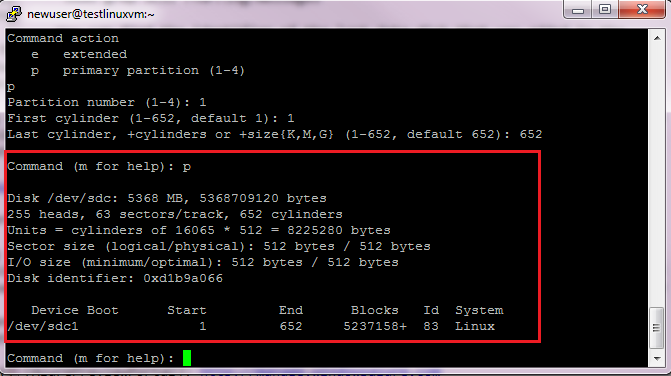
Type p to see the details about the disk that is being partitioned.
-
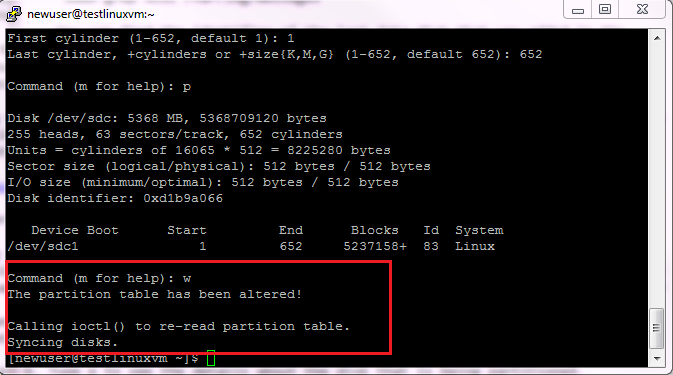
Type w to write the settings for the disk.
-
Format the new disk using the mkfs command:
$ sudo mkfs -t ext4 /dev/sdc1 -
Next you must have a directory available to mount the new file system. As an example, type the following command to make a new directory for mounting the drive, and then enter the account password:
sudo mkdir /datadrive -
Type the following command to mount the drive:
sudo mount /dev/sdc1 /datadriveThe data disk is now ready to use as /datadrive.
-
Add the new drive to /etc/fstab:
To ensure the drive is re-mounted automatically after a reboot it must be added to the /etc/fstab file. In addition, it is highly recommended that the UUID (Universally Unique IDentifier) is used in /etc/fstab to refer to the drive rather than just the device name (i.e. /dev/sdc1). To find the UUID of the new drive you can use the blkid utility:
`sudo -i blkid`The output will look similar to the following:
`/dev/sda1: UUID="11111111-1b1b-1c1c-1d1d-1e1e1e1e1e1e" TYPE="ext4"`
`/dev/sdb1: UUID="22222222-2b2b-2c2c-2d2d-2e2e2e2e2e2e" TYPE="ext4"`
`/dev/sdc1: UUID="33333333-3b3b-3c3c-3d3d-3e3e3e3e3e3e" TYPE="ext4"`
[AZURE.NOTE] blkid may not require sudo access in all cases, however, it may be easier to run with
sudo -ion some distributions if /sbin or /usr/sbin are not in your$PATH.Caution: Improperly editing the /etc/fstab file could result in an unbootable system. If unsure, please refer to the distribution's documentation for information on how to properly edit this file. It is also recommended that a backup of the /etc/fstab file is created before editing.
Using a text editor, enter the information about the new file system at the end of the /etc/fstab file. In this example we will use the UUID value for the new /dev/sdc1 device that was created in the previous steps, and the mountpoint /datadrive:
`UUID=33333333-3b3b-3c3c-3d3d-3e3e3e3e3e3e /datadrive ext4 defaults 1 2`If additional data drives or partitions are created you will need to enter them into /etc/fstab separately as well.
You can now test that the file system is mounted properly by simply unmounting and then re-mounting the file system, i.e. using the example mount point
/datadrivecreated in the earlier steps:`sudo umount /datadrive` `sudo mount /datadrive`If the second command produces an error, check the /etc/fstab file for correct syntax.
[AZURE.NOTE] Subsequently removing a data disk without editing fstab could cause the VM to fail to boot. If this is a common occurrence, then most distributions provide either the
nofailand/ornobootwaitfstab options that will allow a system to boot even if the disk is not present. Please consult your distribution's documentation for more information on these parameters.
