Cardfolio! is a only one cardfolio site framework.
If you have any experience of React, you can easily create your own cardfolio site.
Wait, what's cardfolio site?? See below.
Yes, cardfolio site is portfolio site just like buisiness card!!Cardfolio site's true worth is definitely seen when you hand over your buisiness card to someone.
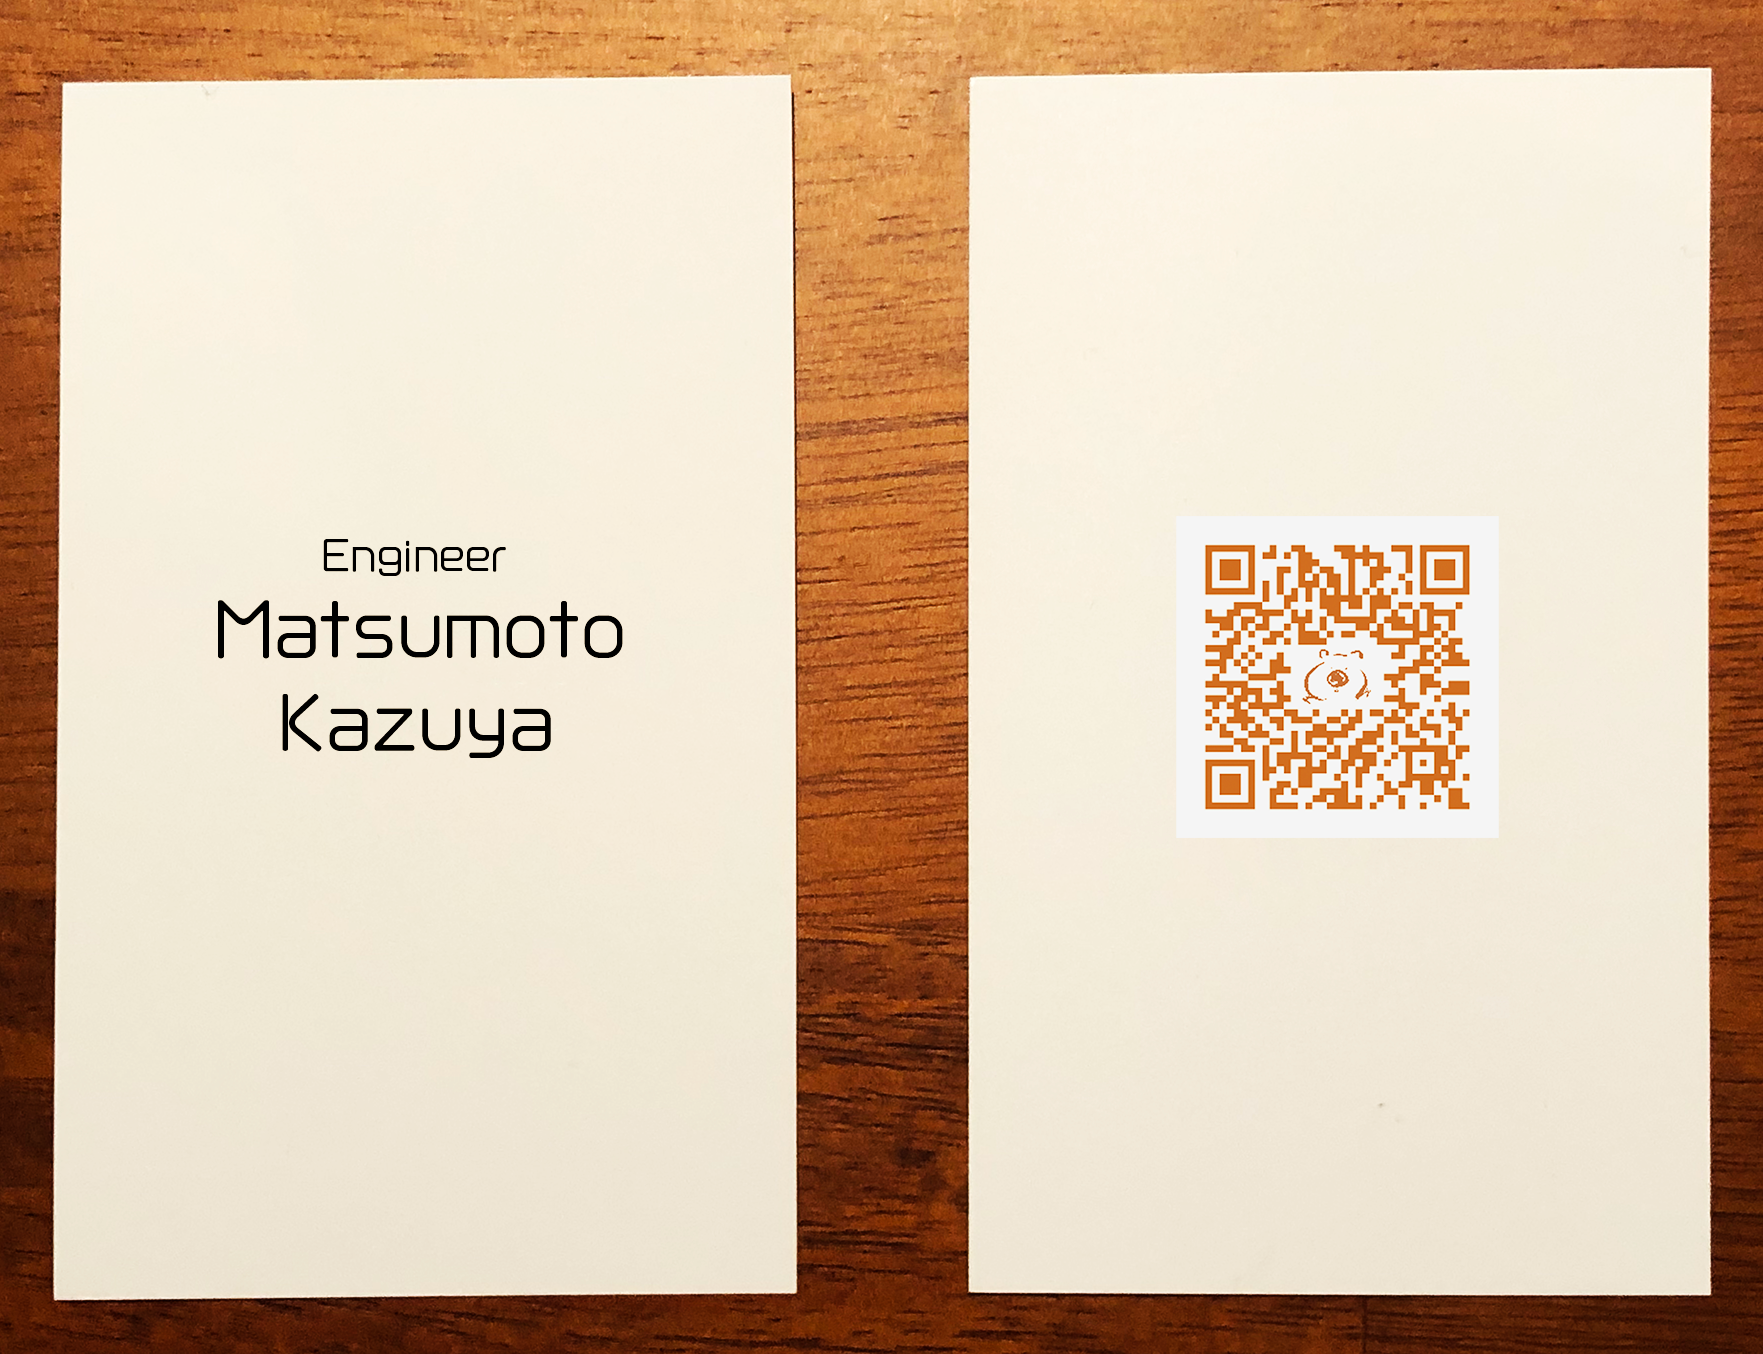
Below image is my business card, imagine you receive this card.
(If you browse this site by mobile. You can access from here)
How was that?
You can make a great impression to receiver like you just felt 😄
You can create your own cardfolio site following steps.
-
Fork this repository
-
Install dependencies and start server.
yarn
gatsby develop
Then check develop server is working by accessing localhost:8000
-
Replace src/data/en.json with your data.
Except some images, all data which are used in cardfolio are written in src/data/xx.json file.
(default locale is en.json, if you want to change default locale or apply i18n see the section below)
Let’s start from simple example, FrontSide.
Edit src/data/en.json like this.
{
  "frontSide": {
  "jobTitle": "{Your Job Title Here}",
  "name": "{Your name here}"
}
…
}
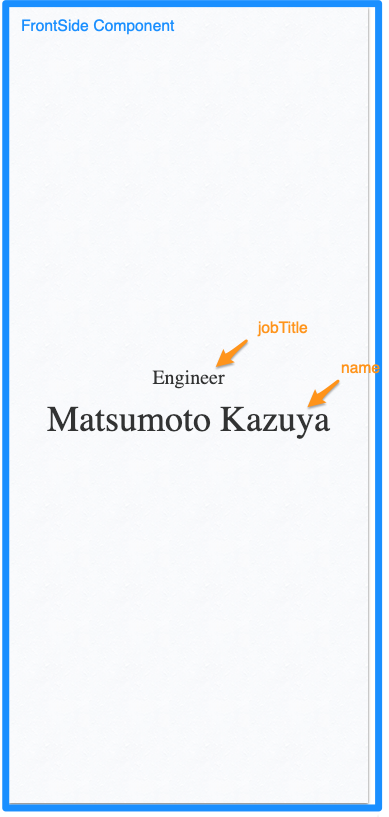
The top key name, frontSide indicates component name.
And child key value pairs indicates where the value is used for in the component.
Access to localhost:8000 to check changes are reflected like below.
You can also replace BackSide Data with the same way.
And replace profile.png with your profile image.
-
Deploy your site. Any provider is ok, but I recommend to deply by netlify. Cuz Gatsby has great compatibility with Netlify. Details see here
-
(Optional but strongly recommended) Create a your real buisiness card.
Let's create your buisiness card to make people surprise!
Make frontside of card just like cardforio site you implemented.
In backside, you need to print QRCode indicates your cardfolio site.
Create QRCode using QRCode gen service like this
The QRCode url must include params fromQR=1. The parameter is used to detect access from QRCode or not.
ex) https://yoursite.com?fromQR=1
Replace your QRCode image with qr-code.png for fadeout animation.
-
That’s all, You’ve created your original cardfolio site 🎉
At last, don't forget to let me know your site, I want to add you site [example list] (https://github.com/kazuooooo/Cardfolio#examples-)
(It’s ok to create PR to add you site to list)
Cardfolio! is created based on gatsby.js.
If you are a developer have used React before, you can easily customize your cardfolio site.
Cardfolio! have very simple components directories below.
├── components
│   ├── backSide.tsx. // backside of card
│   ├── frontSide.tsx // frontside of card
│   ├── header.tsx
│   ├── menuItems. // menu items on backside
│   │   ├── career.tsx
│   │   ├── contact.tsx
│   │   ├── index.tsx
│   │   ├── menuItems.stories.tsx
│   │   ├── selfIntroduction.tsx
│   │   ├── skillset.tsx
│   │   └── works.tsx
│   └── qrCodeBackSide.tsx // qr code back side for fade out
Just edit component you want to change.
Cardfolio! uses emotion styled component for styling.
Let's create a menu item to show some gif as a example.
- At first, define a component under menuItem directory.
import React from 'react'
import styled from '@emotion/styled'
import { graphql } from 'gatsby'

interface Props {
  data: {
    url: string,
    alt: string
  }
}

const Gif = (props: Props) => {
  const { url, alt } = props.data
  return (
    <Container>
      <img src={url} alt={alt} />
    </Container>
  )
}

export const dataQuery = graphql`
  fragment GifData on IndexJson {
    gif {
      menuItemTitle
      url
      alt
    }
  }
`

const Container = styled.div`
  padding: 24px;
`
export default Gif
The most important things is defining fragment query for this component.
export const dataQuery = graphql`
  fragment GifData on IndexJson {
    gif {
      menuItemTitle // ⭐️ this key required
      url
      alt
    }
  }
`
Every menu item components must receive these props as data props.
- To do that, add fragment to root index.tsx
export const query = graphql`
  query Index($locale: String) {
    file(name: { eq: $locale }, relativeDirectory: { eq: "index" }) {
      childIndexJson {
        ...SiteMetaData
        ...FrontSideData
        ...SelfIntroductionData
        ...WorksData
        ...ContactData
        ...CareerData
        ...SkillSetData
        ...GifData // ← ✅ add this line
      }
    }
  }
`
and add data to en.json file
{
  ...
  "gif": {
    "menuItemTitle": "Gif",
    "url": "https://media3.giphy.com/media/14miSV6VMiO7te/200.webp?cid=790b7611929de751e751f8d71de77feb138954710d6ba8b1&rid=200.webp",
    "alt": "alt"
  }
}- At last, add gif to menuitem
import selfIntroductionComponent from './selfIntroduction'
import worksComponent from './works'
import contactComponent from './contact'
import careerComponent from './career'
import skillSetComponent from './skillset'
import Gif from './gif' // ← ✅ add this line

export enum MenuItemKey {
  SelfIntroduction = 'selfIntroduction',
  Works = 'works',
  Contact = 'contact',
  Career = 'career',
  SkillSet = 'skillSet',
  Gif = 'gif' // ← add this line
}

export default {
  [MenuItemKey.SelfIntroduction]: selfIntroductionComponent,
  [MenuItemKey.Works]: worksComponent,
  [MenuItemKey.Contact]: contactComponent,
  [MenuItemKey.Career]: careerComponent,
  [MenuItemKey.SkillSet]: skillSetComponent,
  [MenuItemKey.Gif]: Gif, // ← ✅ add this line
}
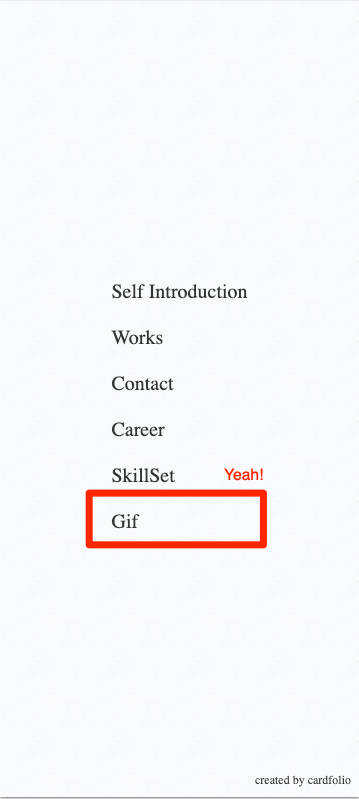
Then restart server, you will find Gif menu & see pretty wombat gif
Complete detail see this commit
Just add locale object to src/data/locales.js
module.exports = {
  // ADD ja
  ja: {
    path: 'ja',
    locale: 'Japanese',
  },
  en: {
    default: true,
    path: 'en',
    locale: 'English',
  },
}
then, make ja.json and add data for japanese
{
  "frontSide": {
    "jobTitle": "エンジニア",
    "name": "ウォンバット太郎"
  },
  ...
Restart gatsby server to rebuild page,
then check japanese pages are created
localhost:8000 (English default)
localhost:8000/ja (Japanse)
Just change default key to target language
module.exports = {
  ja: {
    default: true, // Set default ja
    path: 'ja',
    locale: 'Japanese',
  },
  en: {
    path: 'en',
    locale: 'English',
  },
}
Then check default locale is changed
localhost:8000 (Japanese default)
localhost:8000/en (English)
These are portfolio sites created by Cardfolio! (order by created day asc)
Any issues and pr is welcome :) If you find bug or some general function you want to add (for example new component, new theme design etc…), please make pull request by these step.
- Fork this repo
- Checkout master branch
- Make your change
- Create pull request
Cardfolio! is available under the MIT license.


