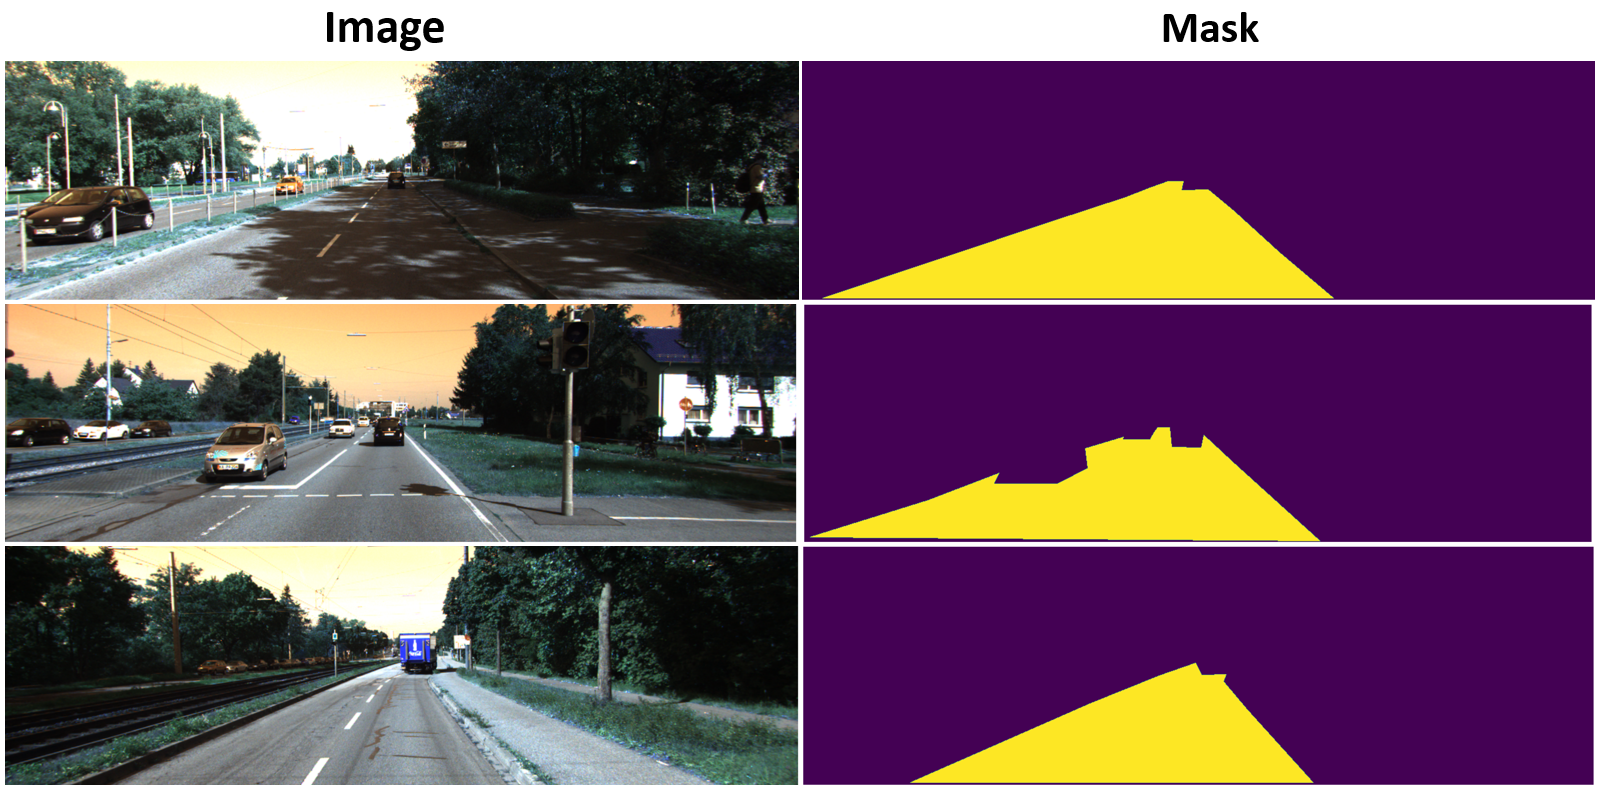
Road segmentation is crucial for autonomous driving and sophisticated driver assistance systems to comprehend the driving environment. Recent years have seen significant advancements in road segmentation thanks to the advent of deep learning. Inaccurate road boundaries and lighting fluctuations like shadows and overexposed zones are still issues. In this project, we focus on the topic of visual road classification, in which we are given a picture and asked to label each pixel as containing either a road or a non-road. We tackle this task using FAPNET, a recently suggested convolutional neural network architecture. To improve its performance, the proposed approach makes use of a NAP augmentation module. The experimental results show that the suggested method achieves higher segmentation accuracy than the state-of-the-art methods on the KITTI road detection benchmark datasets.
The KITTI Visual Benchmark Suite is a dataset that has been developed specifically for the purpose of benchmarking optical flow, odometry data, object detection, and road/lane detection. The dataset can be downloaded from here. The road dataset has a dimension of
- UU - Urban Unmarked
- UM - Urban Marked
- UMM - Urban Multiple Marked Lanes
There are
In this repository we implement UNET, U2NET, UNET++, VNET, DNCNN, and MOD-UNET using Keras-TensorFLow framework. We also add keras_unet_collection(kuc) and segmentation-models(sm) library models which is also implemented using Keras-TensorFLow. The following models are available in this repository.
| Model | Name | Reference |
|---|---|---|
dncnn |
DNCNN | Zhang et al. (2017) |
unet |
U-net | Ronneberger et al. (2015) |
vnet |
V-net (modified for 2-d inputs) | Milletari et al. (2016) |
unet++ |
U-net++ | Zhou et al. (2018) |
u2net |
U^2-Net | Qin et al. (2020) |
fapnet |
FAPNET | Samiul et al. (2022) |
| keras_unet_collection | ||
kuc_r2unet |
R2U-Net | Alom et al. (2018) |
kuc_attunet |
Attention U-net | Oktay et al. (2018) |
kuc_restunet |
ResUnet-a | Diakogiannis et al. (2020) |
kuc_unet3pp |
UNET 3+ | Huang et al. (2020) |
kuc_tensnet |
Trans-UNET | Chen et al. (2021) |
kuc_swinnet |
Swin-UNET | Hu et al. (2021) |
kuc_vnet |
V-net (modified for 2-d inputs) | Milletari et al. (2016) |
kuc_unetpp |
U-net++ | Zhou et al. (2018) |
kuc_u2net |
U^2-Net | Qin et al. (2020) |
| segmentation-models | ||
sm_unet |
U-net | Ronneberger et al. (2015) |
sm_linknet |
LINK-Net | Chaurasia et al. (2017) |
sm_fpn |
FPS-Net | Xiao et al. (2021) |
sm_fpn |
PSP-Net | Zhao et al. (2017) |
First clone the github repo in your local or server machine by following:
git clone https://github.com/samiulengineer/road_segmentation.git
Change the working directory to project root directory. Use Conda/Pip to create a new environment and install dependency from requirement.txt file. The following command will install the packages according to the configuration file requirement.txt.
pip install -r requirements.txt
Keep the above mention dataset in the data folder that give you following structure. Please do not change the directory name image and gt_image.
--data
    --image
        --um_000000.png
        --um_000001.png
            ..
    --gt_image
        --um_road_000000.png
        --um_road_000002.png
            ..
After setup the required package run the following experiment. The experiment is based on combination of parameters passing through argparse and config.yaml.
- An example is given below. Ignore gpu statement if you don't have gpu.
- During training some new directories will be created;
csv_logger,logs,modelandprediction. - You can check the prediction of validation images inside the
prediction > YOUR_MODELNAME > validation > experiment. - You must paste the dataset in the
datadirectory inside yourroot directory
python project/train.py  \
    --root_dir YOUR_ROOT_DIR \
    --dataset_dir YOUR_ROOT_DIR/data/ \
    --model_name fapnet \
    --epochs 10 \
    --batch_size 3 \
    --gpu YOUR_GPU_NUMBER \
    --experiment road_seg \
Thus, model checkpoint will be saved in the model directory. This checkpoint is required for testing purpose. Run following command to test the model on test dataset.
- You can check the prediction of test images inside the
prediction > YOUR_MODELNAME > test > experiment. - During training dataset will be divided as training (80%), validation (10%), test (10%)
python project/test.py \
    --dataset_dir YOUR_ROOT_DIR/data/ \
    --model_name fapnet \
    --load_model_name MODEL_CHECKPOINT_NAME \
    --experiment road_seg \
    --gpu YOUR_GPU_NUMBER \
    --evaluation False \
If you have the images without mask, we need to do data pre-preprocessing before passing to the model checkpoint. In that case, run the following command to evaluate the model without any mask.
- You can check the prediction of test images inside the
prediction > YOUR_MODELNAME > eval > experiment.
python project/test.py \
    --dataset_dir YOUR_IMAGE_DIR/ \
    --model_name fapnet \
    --load_model_name MODEL_CHECKPOINT_NAME \
    --experiment road_seg \
    --gpu YOUR_GPU_NUMBER \
    --evaluation True \
Our model also can predict the road from video data. Run following command for evaluate the model on a video.
python project/test.py \
    --video_path PATH_TO_YOUR_VIDEO \
    --model_name fapnet \
    --load_model_name MODEL_CHECKPOINT_NAME \
    --experiment road_seg \
    --gpu YOUR_GPU_NUMBER \
    --evaluation True \
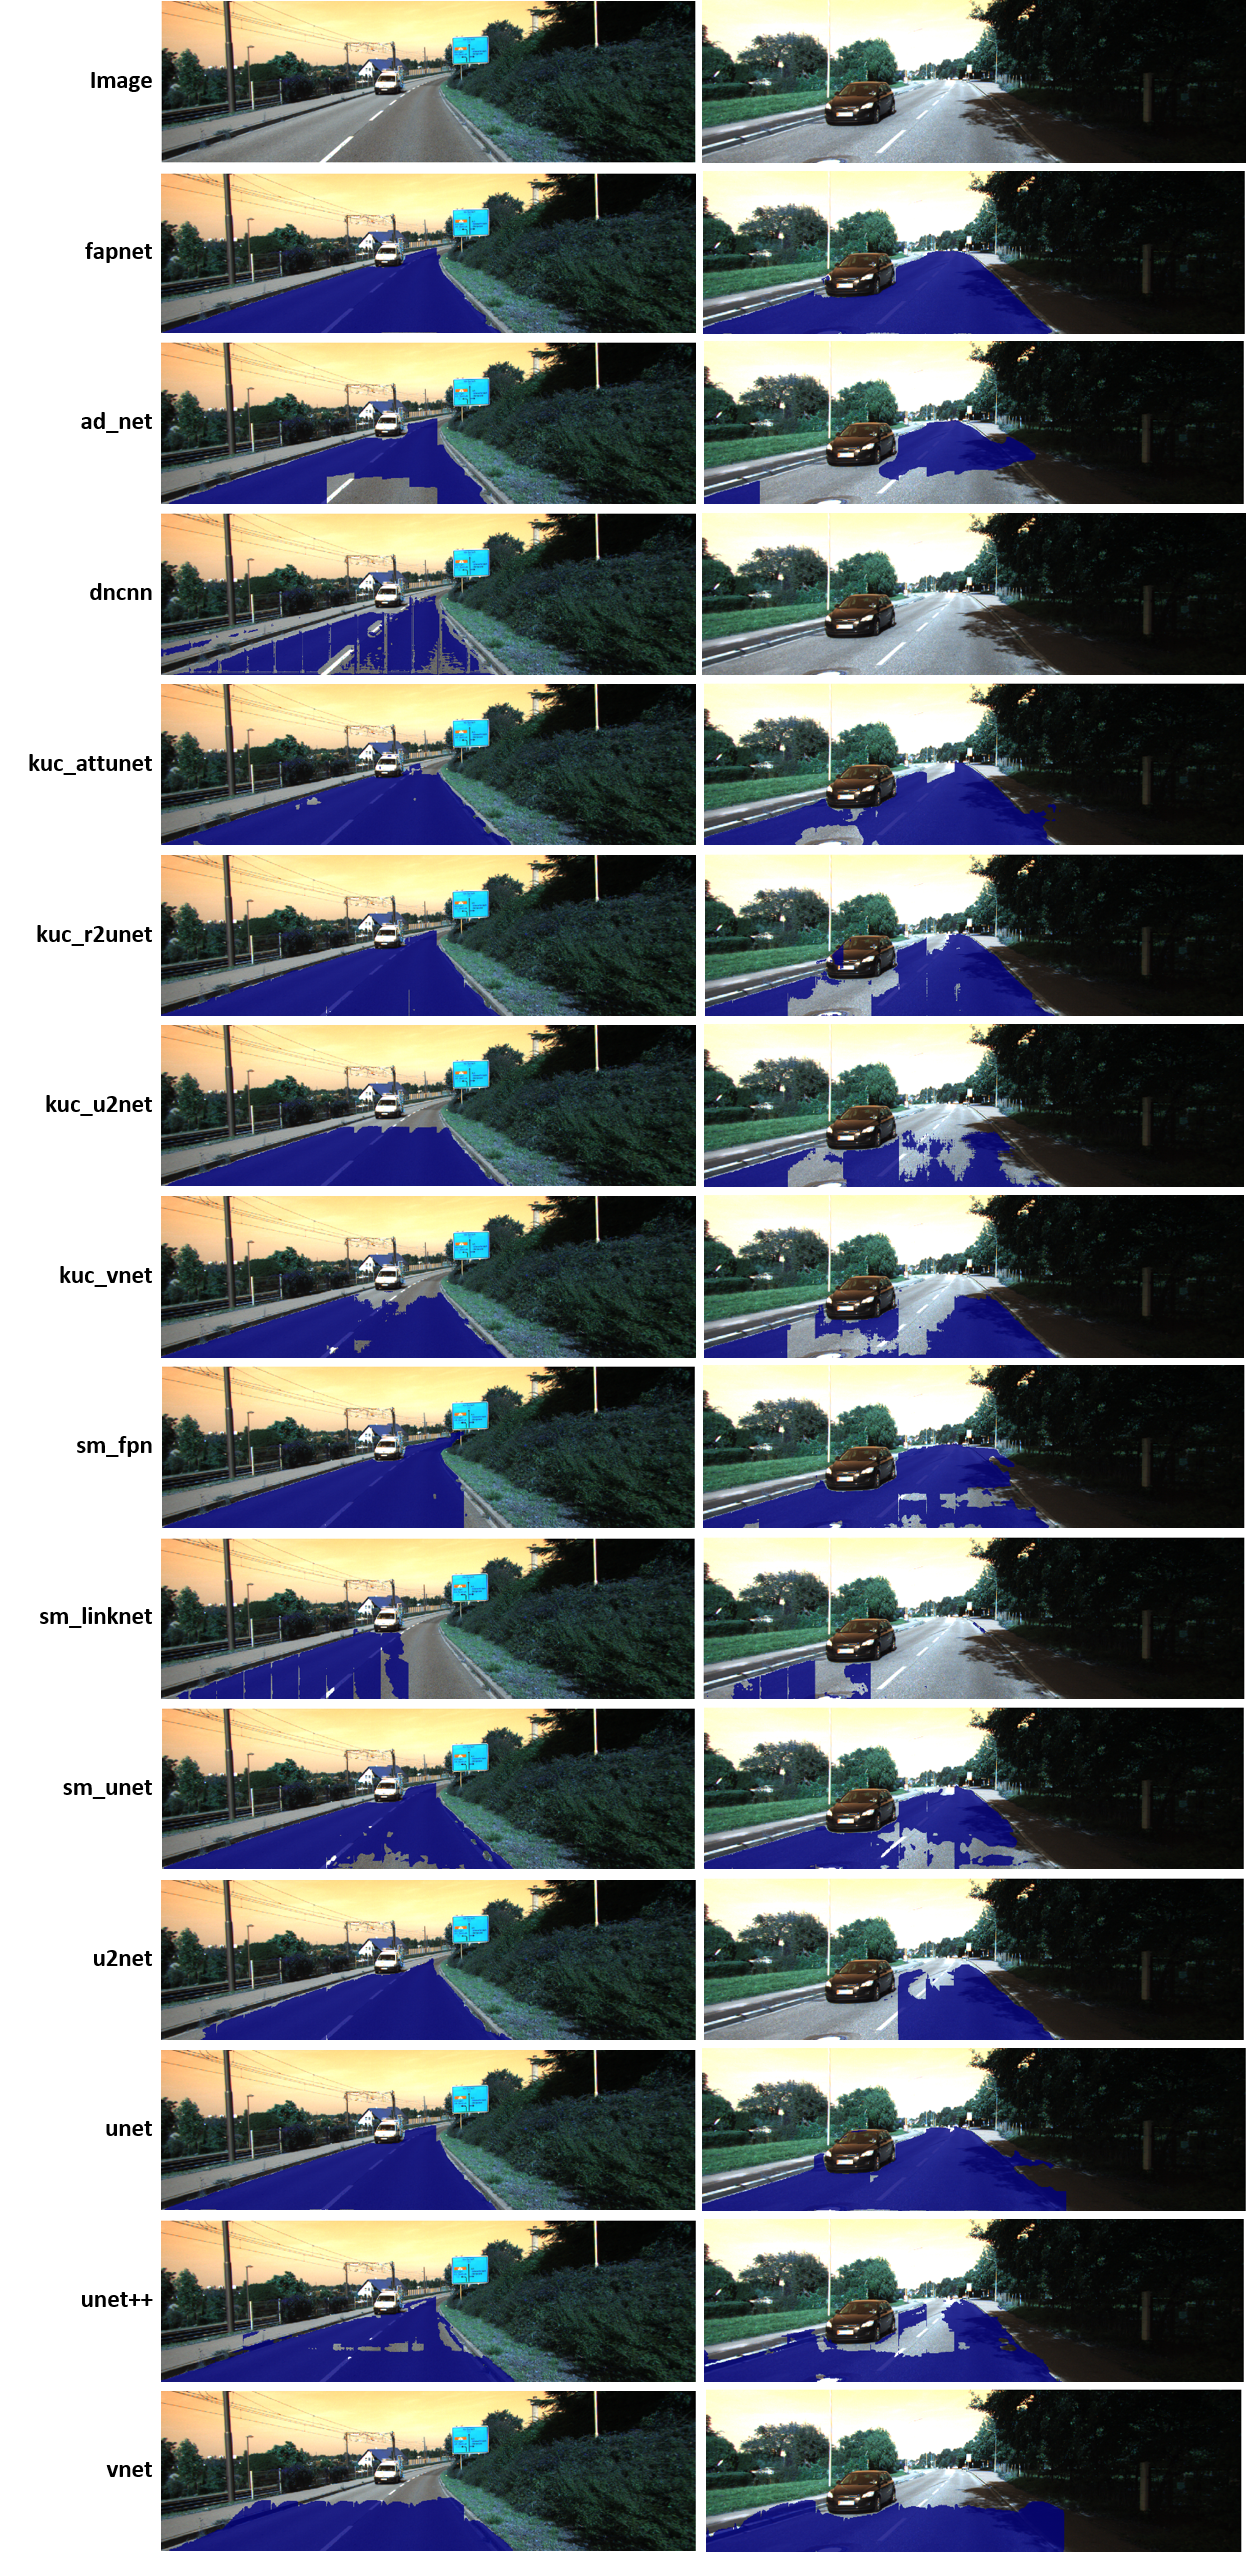
Prediction on evalution dataset.
Comparing prediction on evalution dataset.
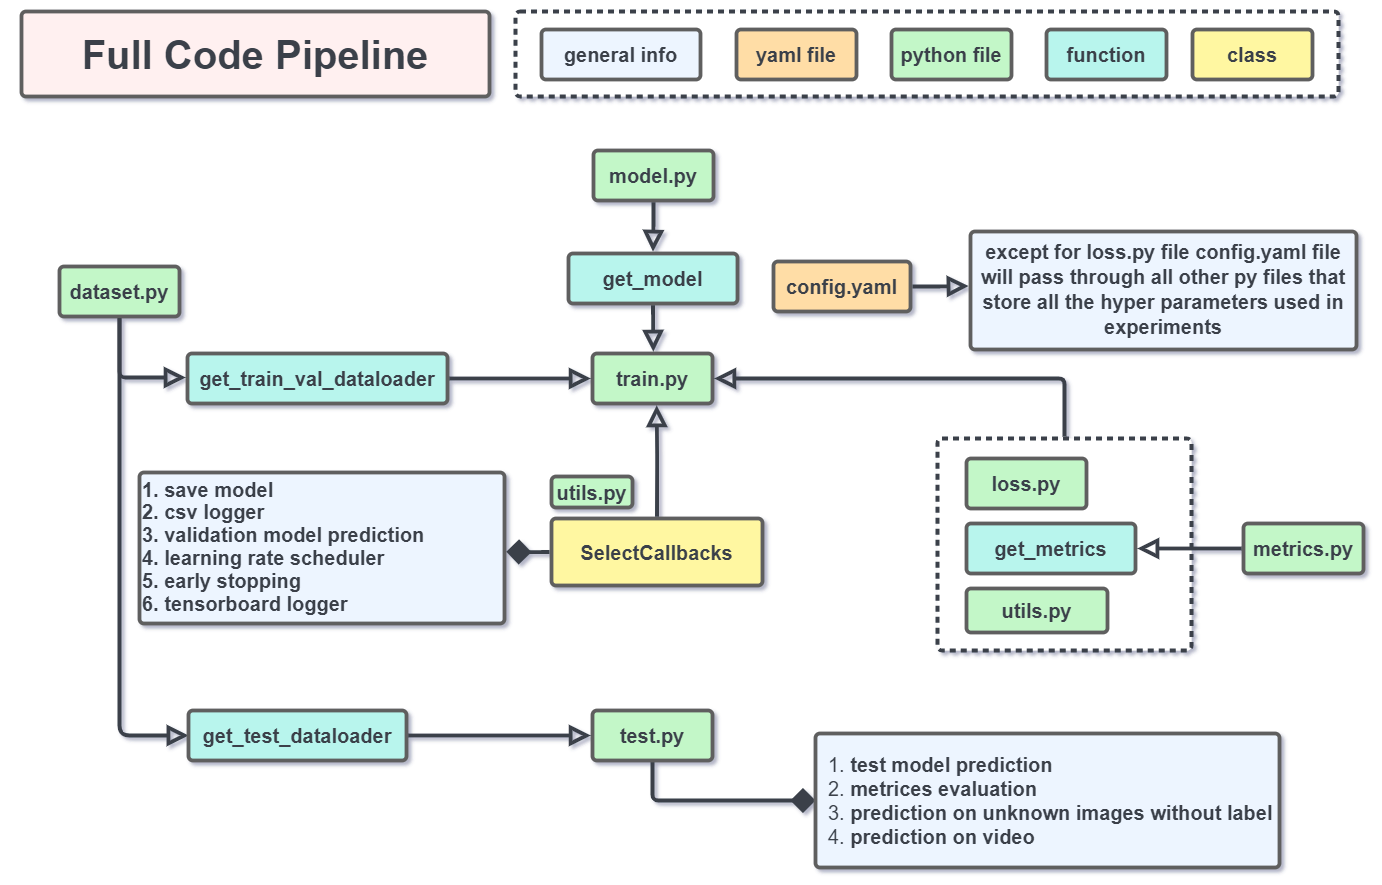
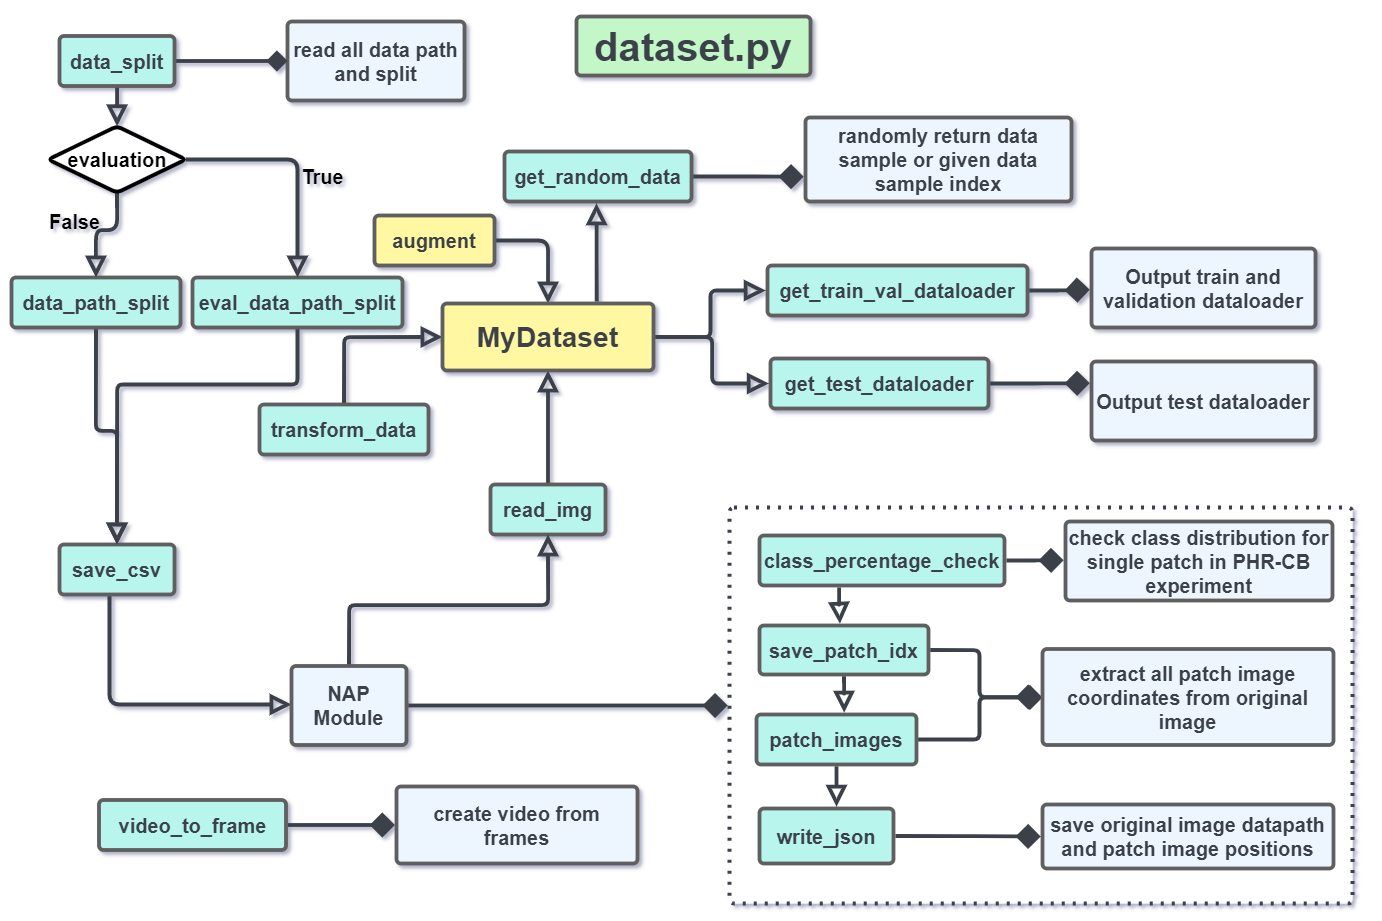
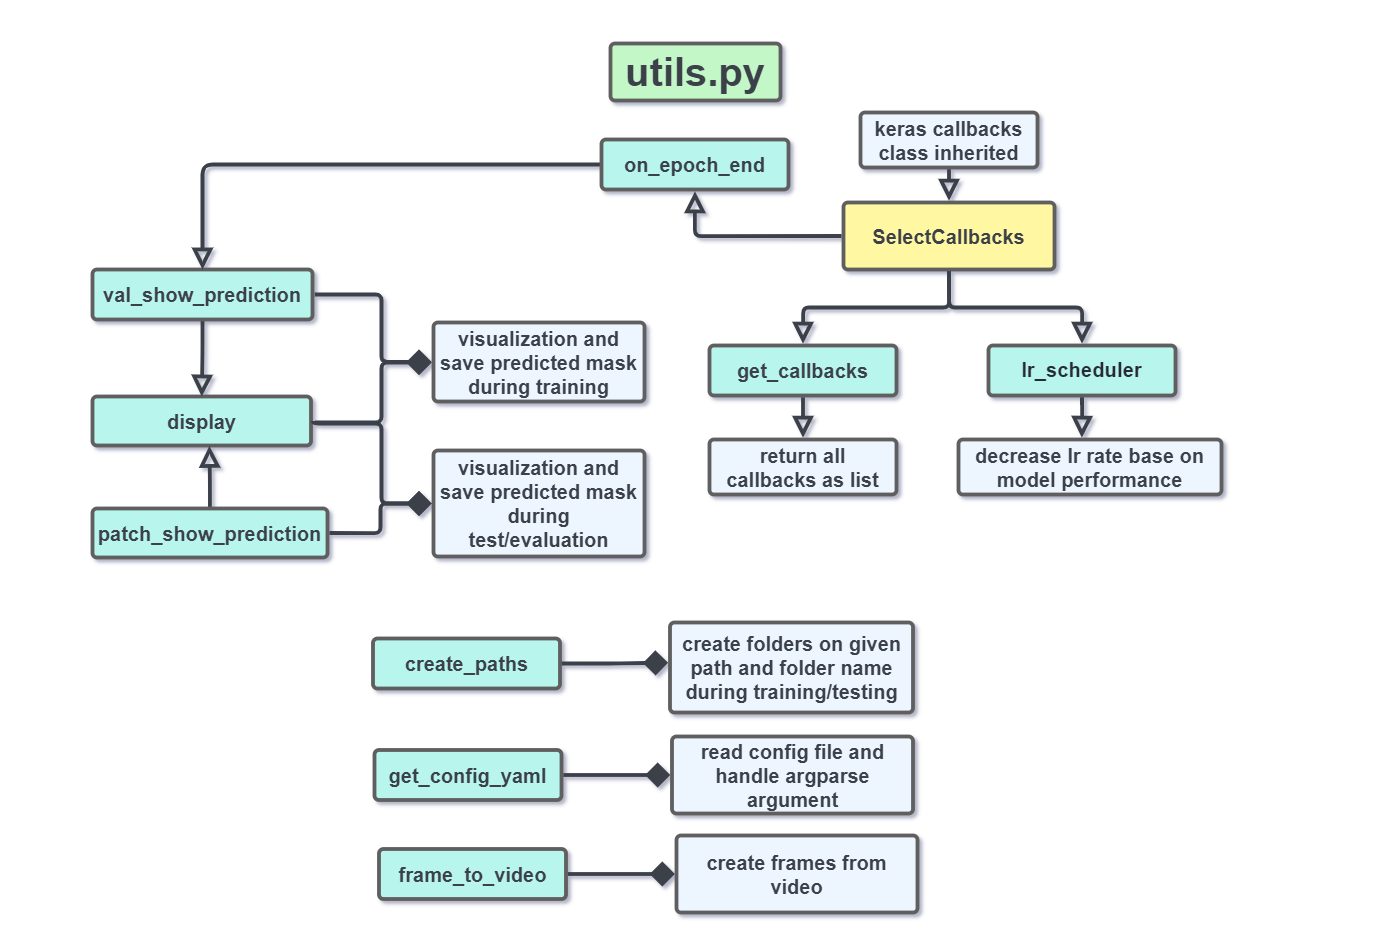
The following figures are the overview of the important .py files in this repo.
