This tutorial shows how to build a secure ASP.NET MVC 5 web app that lets users log in with credentials from Facebook or Google. The app is a simple contact list that uses the ADO.NET Entity Framework for database access. You'll deploy the app to Azure App Service.
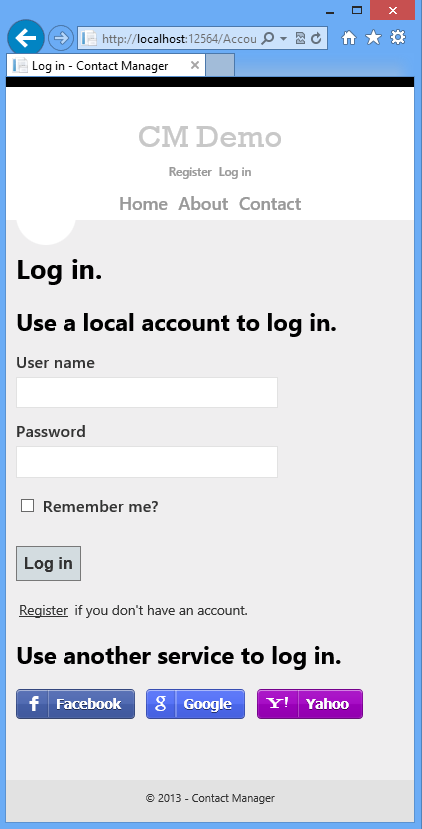
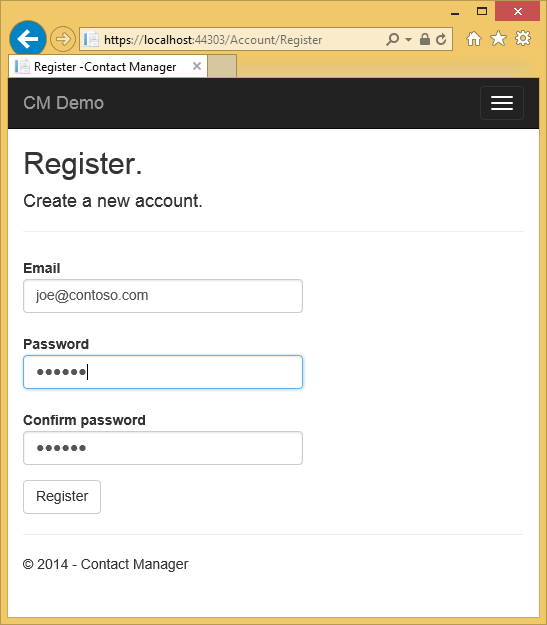
On completing the tutorial, you'll have a secure data-driven web application up and running in the cloud and using a cloud database. The following illustration shows the login page for the completed application.
You'll learn:
- How to create a secure ASP.NET MVC 5 web project in Visual Studio.
- How to authenticate and authorize users who log on with credentials from their Google or Facebook accounts (social provider authentication using OAuth 2.0).
- How to authenticate and authorize users who register in a database managed by the application (local authentication using ASP.NET Identity).
- How to use the ADO.NET Entity Framework 6 Code First to read and write data in a SQL database.
- How to use Entity Framework Code First Migrations to deploy a database.
- How to store relational data in the cloud by using Azure SQL Database.
- How to deploy a web project that uses a database to a web app in Azure App Service.
[AZURE.NOTE] This is a long tutorial. If you want a quick introduction to Azure App Service and Visual Studio web projects, see Create an ASP.NET web app in Azure App Service. For troubleshooting info, see the Troubleshooting section.
Or if you want to get started with Azure App Service before signing up for an Azure account, go to Try App Service, where you can immediately create a short-lived starter web app in App Service. No credit cards required; no commitments.
To complete this tutorial, you need a Microsoft Azure account. If you don't have an account, you can activate your Visual Studio subscriber benefits or sign up for a free trial.
To set up your development environment, you must install Visual Studio 2013 Update 5 or higher, and the latest version of the Azure SDK for .NET. This article was written for Visual Studio Update 4 and SDK 2.8.1. The same instructions work for Visual Studio 2015 with the latest Azure SDK for .NET installed, but some screens will look different from the illustrations.
-
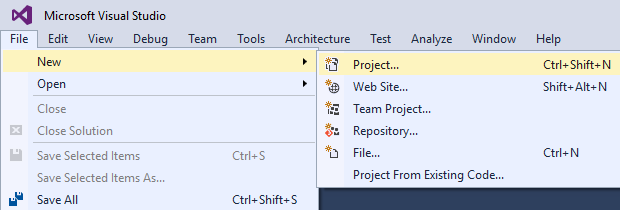
From the File menu, click New Project.
-
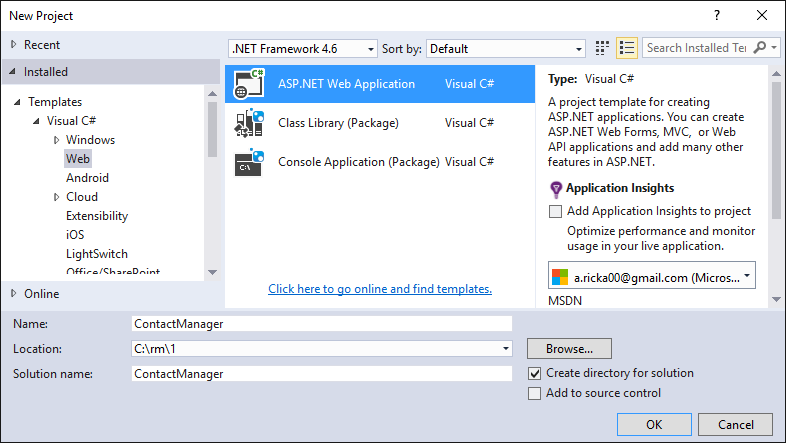
In the New Project dialog box, expand C# and select Web under Installed Templates, and then select ASP.NET Web Application. Name the application ContactManager, and then click OK.
Note: Make sure you enter "ContactManager". Code blocks that you'll be copying later assume that the project name is ContactManager.
-
In the New ASP.NET Project dialog box, select the MVC template. Verify Authentication is set to Individual User Accounts, Host in the cloud is checked, and App Service is selected.
-
Click OK.
-
The Configure Microsoft Azure Web App Settings dialog appears. You may need to sign in if you have not already done so, or reenter your credentials if your login is expired.
-
Optional - change the value in the Web App name box (see image below).
The URL of the web app will be {name}.azurewebsites.net, so the name has to be unique in the azurewebsites.net domain. The configuration wizard suggests a unique name by appending a number to the project name "ContactManager", and that's fine for this tutorial.
-
In the Resource group drop-down select an existing group or Create new resource group(see image below).
If you prefer, you can select a resource group that you already have. But if you create a new resource group and only use it for this tutorial, it will be easy to delete all Azure resources you created for the tutorial when you're done with them. For information about resource groups, see Azure Resource Manager overview.
-
In the App Service plan drop-down select select an existing plan or Create new App Service plan(see image below).
If you prefer, you can select an App Service plan that you already have. For information about App Service plans, see Azure App Service plans in-depth overview.
-
Tap Explore additional Azure services to add a SQL database.
-
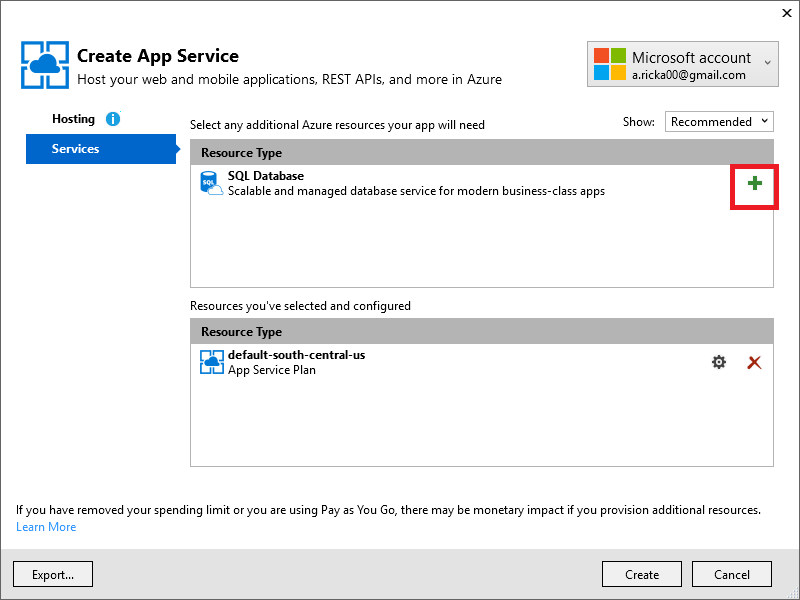
Tap the + icon to add a SQL database.
-
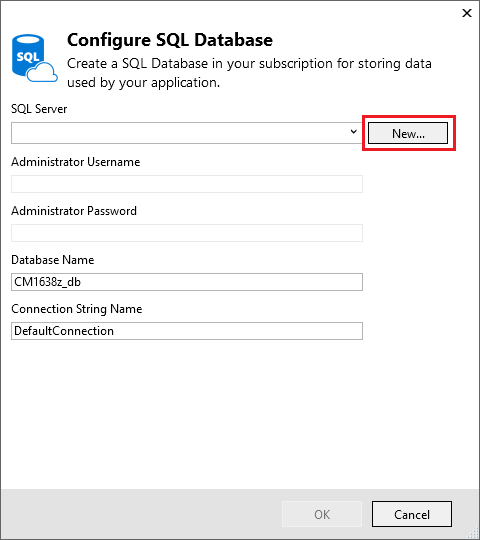
Tap New on the Configure SQL Database dialog:
-
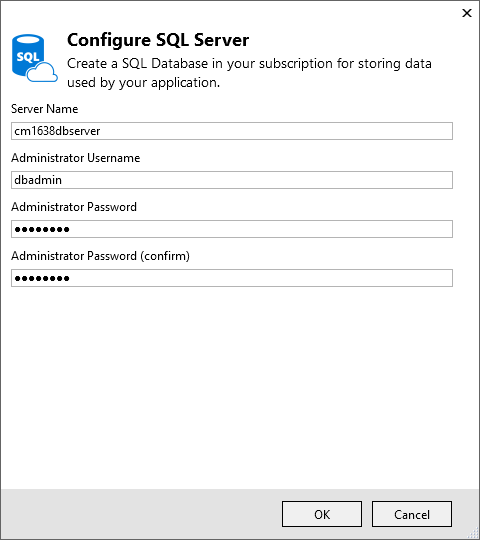
Enter a name for the administrator and a strong password.
The server name must be unique. It can contain lower-case letters, numeric digits, and hyphens. It cannot contain a trailing hyphen. The user name and password are new credentials you're creating for the new server.
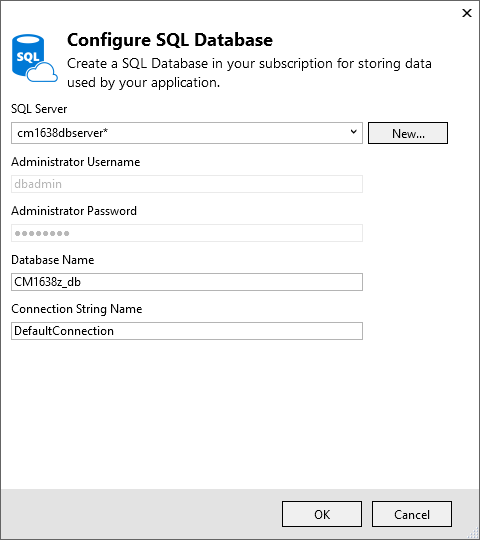
If you already have a database server, you can select that instead of creating one. Database servers are a precious resource, and you generally want to create multiple databases on the same server for testing and development rather than creating a database server per database. However, for this tutorial you only need the server temporarily, and by creating the server in the same resource group as the web site you make it easy to delete both web app and database resources by deleting the resource group when you're done with the tutorial.
If you select an existing database server, make sure your web app and database are in the same region.
-
Tap Create.
Visual Studio creates the ContactManager web project, creates the resource group and App Service plan that you specified, and creates a web app in Azure App Service with the name you specified.
-
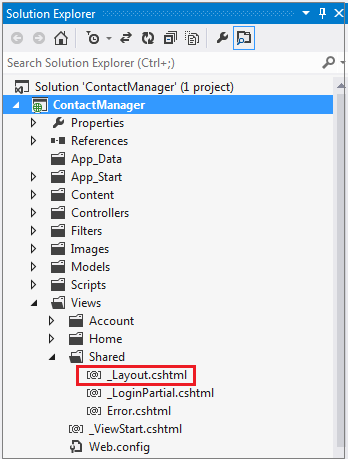
In Solution Explorer open the Layout.cshtml file in the Views\Shared folder.
-
Replace the ActionLink in the Layout.cshtml file with the following code.
@Html.ActionLink("CM Demo", "Index", "Contacts", new { area = "" }, new { @class = "navbar-brand" })
Make sure you change the third parameter from "Home" to "Contacts". The markup above will create a "Contacts" link on each page to the Index method of the Contacts controller. Change the application name in the header and the footer from "My ASP.NET Application" and "Application name" to "Contact Manager" and "CM Demo".
This is all you need to do for now to create the application that you'll deploy to Azure.
-
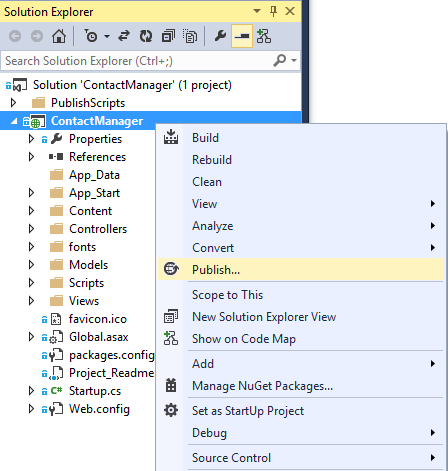
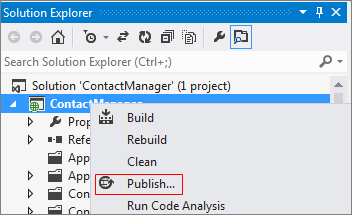
In Visual Studio, right-click the project in Solution Explorer and select Publish from the context menu.
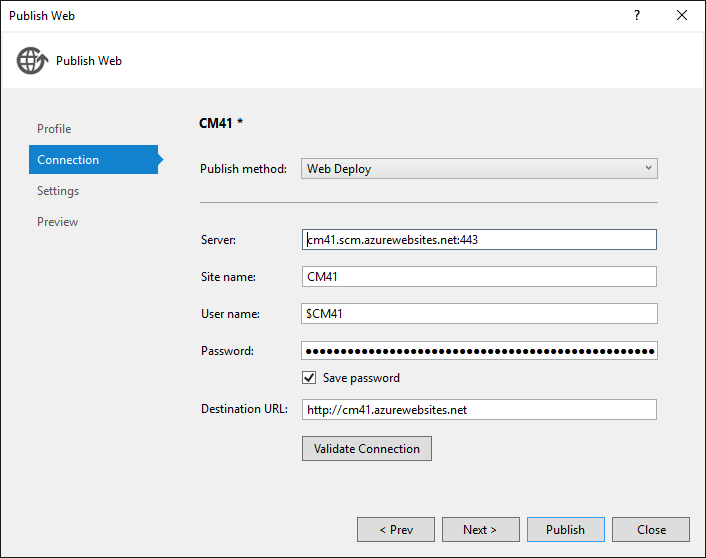
The Publish Web wizard opens.
-
In the Publish Web dialog box, click Publish.
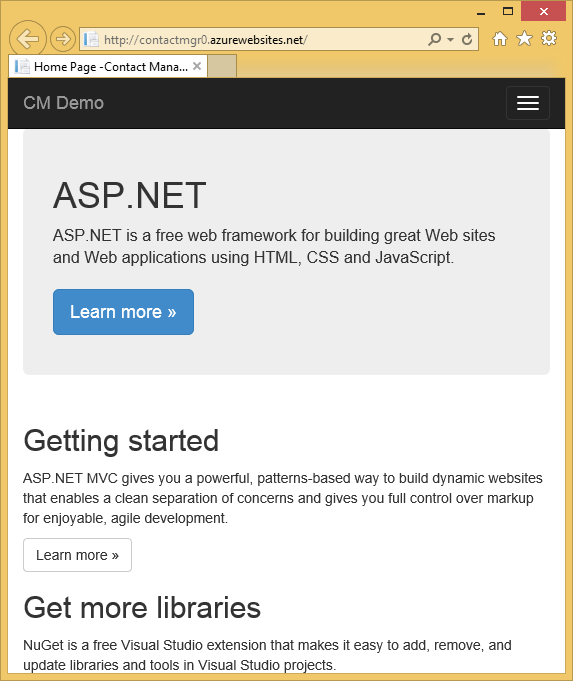
The application you created is now running in the cloud. The next time you deploy the application, only the changed (or new) files will be deployed.
-
In Solution Explorer, click the ContactManager project, then click F4 to open the Properties window.
-
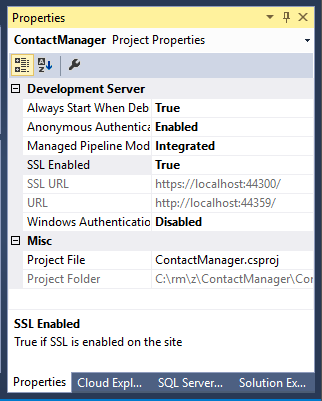
Change SSL Enabled to True.
-
Copy the SSL URL.
The SSL URL will be https://localhost:44300/ unless you've previously created SSL web apps.
-
In Solution Explorer, right click the Contact Manager project and click Properties.
-
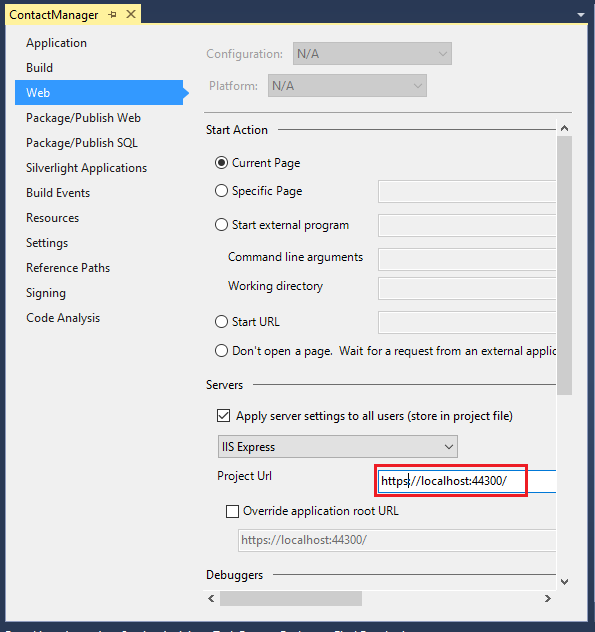
Click the Web tab.
-
Change the Project Url to use the SSL URL and save the page (Control S).
-
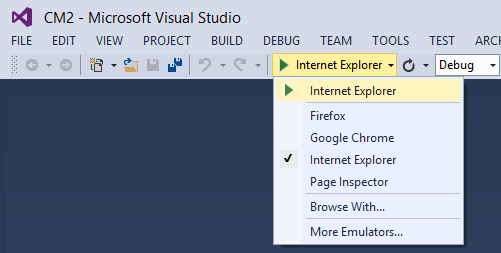
Verify that Internet Explorer is the browser that Visual Studio launches, as shown in the image below:
The browser selector lets you specify the browser Visual Studio launches. You can select multiple browsers and have Visual Studio update each browser when you make changes. For more information see Using Browser Link in Visual Studio 2013.
-
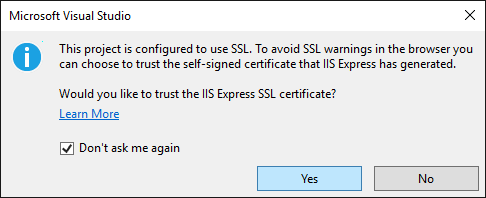
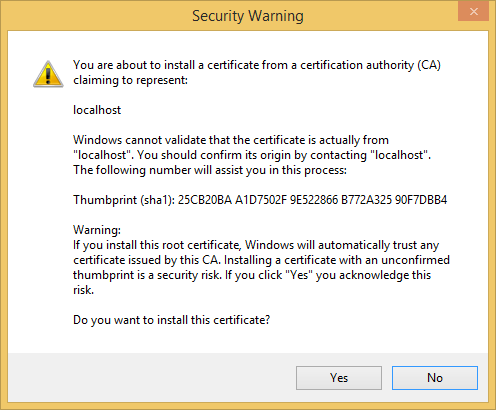
Press CTRL+F5 to run the application. Click Yes to start the process of trusting the self-signed certificate that IIS Express has generated.
-
Read the Security Warning dialog and then click Yes if you want to install the certificate representing localhost.
-
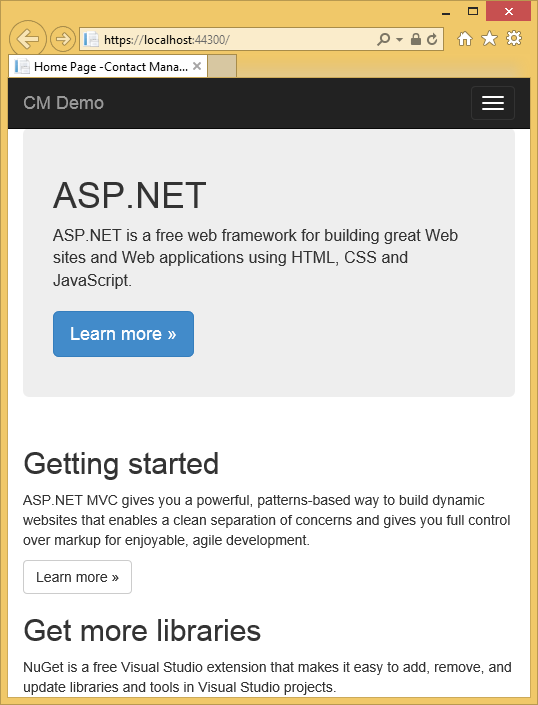
IE shows the Home page and there are no SSL warnings.
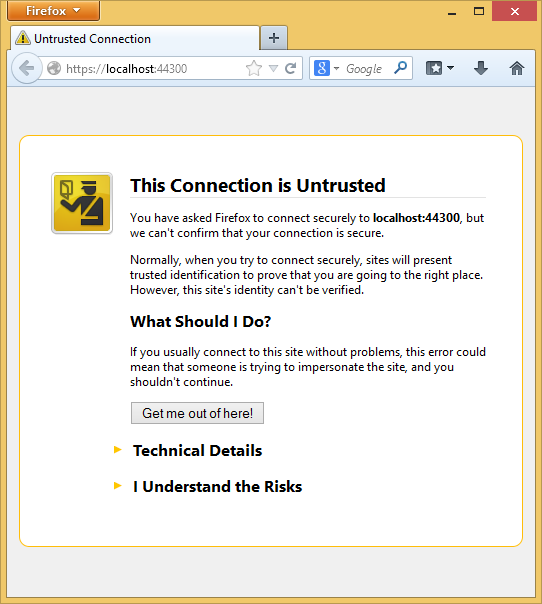
Internet Explorer is a good choice when you're using SSL because it accepts the certificate and shows HTTPS content without a warning. Microsoft Edge and Google Chrome also accept the certificate. Firefox uses its own certificate store, so it displays a warning.
Next, you'll update the app to add the ability to display and update contacts and store the data in a database. The app will use the Entity Framework (EF) to create the database and to read and update data.
You begin by creating a simple data model in code.
-
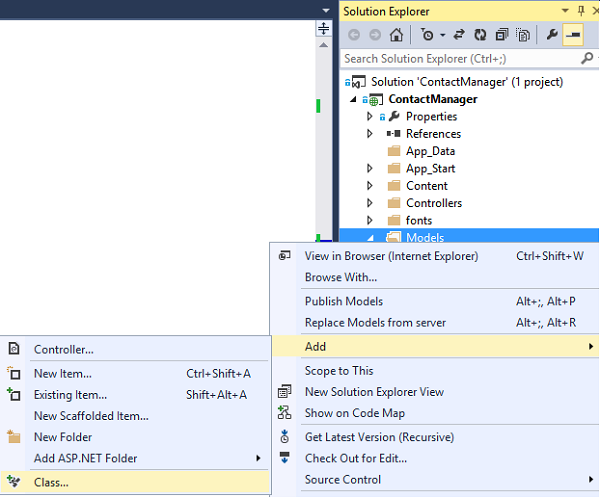
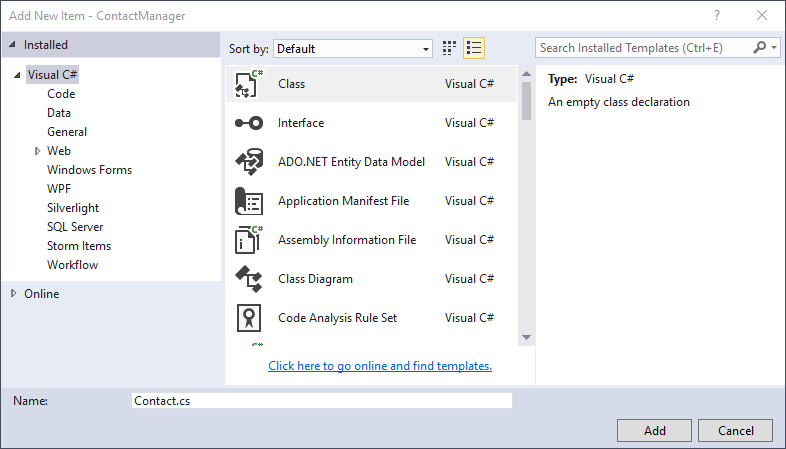
In Solution Explorer, right-click the Models folder, click Add, and then Class.
-
In the Add New Item dialog box, name the new class file Contact.cs, and then click Add.
-
Replace the contents of the Contact.cs file with the following code.
 using System.ComponentModel.DataAnnotations;
 using System.Globalization;
 namespace ContactManager.Models
 {
     public class Contact
     {
         public int ContactId { get; set; }
         public string Name { get; set; }
         public string Address { get; set; }
         public string City { get; set; }
         public string State { get; set; }
         public string Zip { get; set; }
         [DataType(DataType.EmailAddress)]
         public string Email { get; set; }
     }
 }
The Contact class defines the data that you will store for each contact, plus a primary key, ContactID, that is needed by the database.
The ASP.NET MVC scaffolding feature can automatically generate code that performs create, read, update, and delete (CRUD) actions.
-
Build the project (Ctrl+Shift+B). (You must build the project before using the scaffolding mechanism.)
-
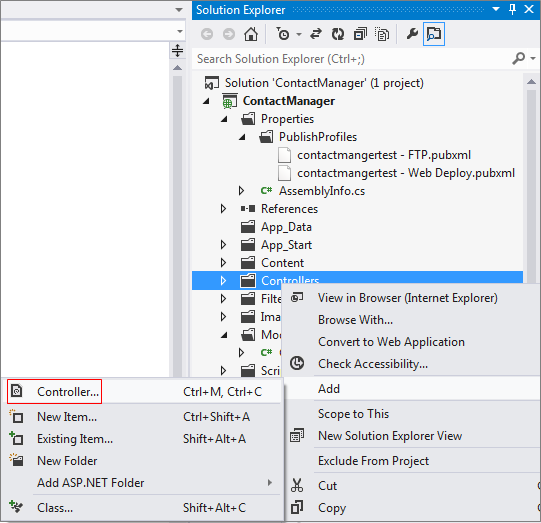
In Solution Explorer, right-click the Controllers folder and click Add, and then click Controller.
-
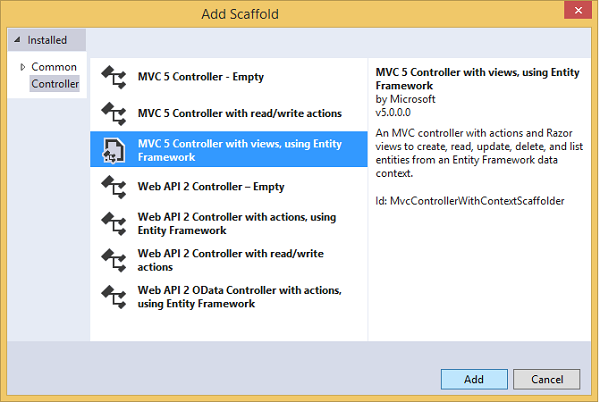
In the Add Scaffold dialog box, select MVC 5 Controller with views, using EF and then click Add.
-
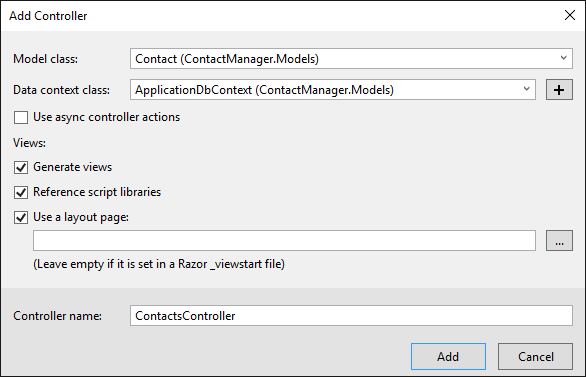
In the Model class dropdown box, select Contact (ContactManager.Models). (See the image below.)
-
In the Data context class, select ApplicationDbContext (ContactManager.Models). The ApplicationDbContext will be used for both the membership DB and our contact data.
-
Click Add.
Visual Studio creates a controller with methods and views for CRUD database operations for Contact objects.
The next task is to enable the Code First Migrations feature in order to create database tables based on the data model that you created.
-
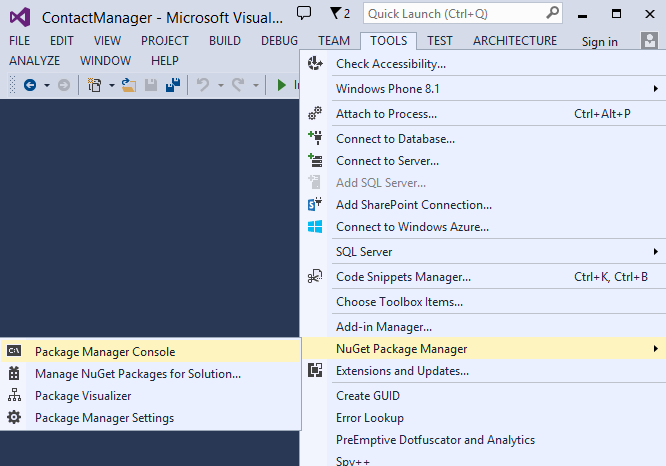
In the Tools menu, select NuGet Package Manager and then Package Manager Console.
-
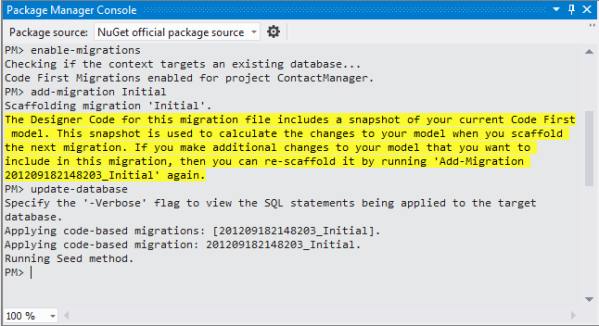
In the Package Manager Console window, enter the following command:
enable-migrationsThe enable-migrations command creates a Migrations folder, and it puts in that folder a Configuration.cs file that you can edit to seed the database and configure Migrations.
-
In the Package Manager Console window, enter the following command:
add-migration InitialThe add-migration Initial command generates a file named <date_stamp>Initial in the Migrations folder. The code in this file creates the database tables. The first parameter ( Initial ) is used to create the name of the file. You can see the new class files in Solution Explorer.
In the Initial class, the Up method creates the Contacts table, and the Down method (used when you want to return to the previous state) drops it.
-
Open the Migrations\Configuration.cs file.
-
Add the following
usingstatement.using ContactManager.Models; -
Replace the Seed method with the following code:
 protected override void Seed(ContactManager.Models.ApplicationDbContext context)
 {
     context.Contacts.AddOrUpdate(p => p.Name,
        new Contact
        {
            Name = "Debra Garcia",
            Address = "1234 Main St",
            City = "Redmond",
            State = "WA",
            Zip = "10999",
            Email = "[email protected]",
        },
         new Contact
         {
             Name = "Thorsten Weinrich",
             Address = "5678 1st Ave W",
             City = "Redmond",
             State = "WA",
             Zip = "10999",
             Email = "[email protected]",
         },
         new Contact
         {
             Name = "Yuhong Li",
             Address = "9012 State st",
             City = "Redmond",
             State = "WA",
             Zip = "10999",
             Email = "[email protected]",
         },
         new Contact
         {
             Name = "Jon Orton",
             Address = "3456 Maple St",
             City = "Redmond",
             State = "WA",
             Zip = "10999",
             Email = "[email protected]",
         },
         new Contact
         {
             Name = "Diliana Alexieva-Bosseva",
             Address = "7890 2nd Ave E",
             City = "Redmond",
             State = "WA",
             Zip = "10999",
             Email = "[email protected]",
         }
         );
 }
This code initializes (seeds) the database with contact information. For more information on seeding the database, see Seeding and Debugging Entity Framework (EF) DBs. Build the project to verify there are no compile errors.
-
In the Package Manager Console enter the command:
update-databaseThe update-database runs the first migration which creates the database. By default, the database is created as a SQL Server Express LocalDB database.
-
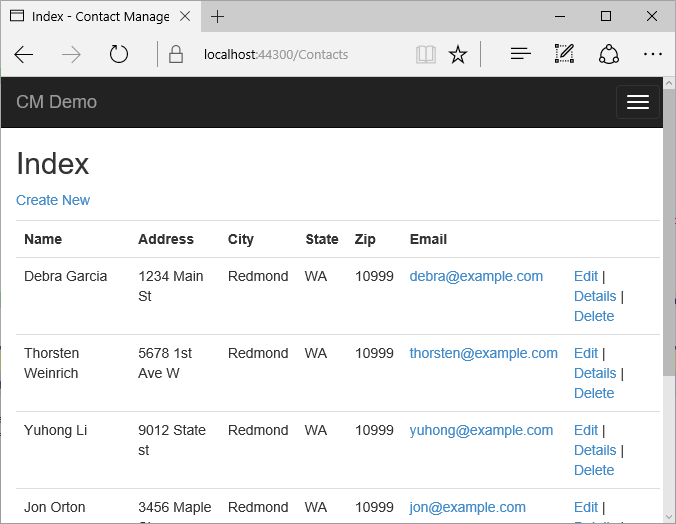
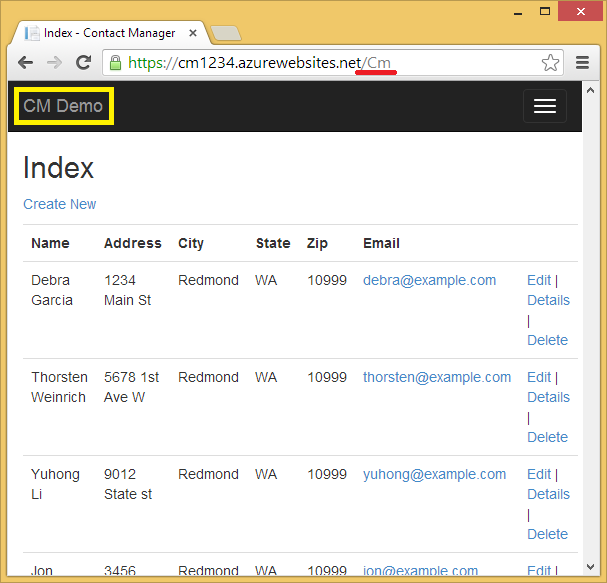
Press CTRL+F5 to run the application, and then click the CM Demo link; or navigate to https://localhost:(port#)/Cm.
The application shows the seed data and provides edit, details and delete links. You can create, edit, delete and view data.
[AZURE.NOTE] For detailed instructions on how to use the Google and Facebook developer portal sites, this tutorial links to tutorials on the ASP.NET site. However, Google and Facebook change their sites more frequently than those tutorials are updated, and they are now out of date. If you have trouble following the directions, see the featured Disqus comment at the end of this tutorial for a list of what has changed.
OAuth is an open protocol that allows secure authorization in a simple and standard method from web, mobile, and desktop applications. The ASP.NET MVC internet template uses OAuth to expose Facebook, Twitter, Google and Microsoft as authentication providers. Although this tutorial uses only Google as the authentication provider, you can easily modify the code to use any of these providers. The steps to implement other providers are very similar to the steps you see in this tutorial. To use Facebook as an authentication provider, see MVC 5 App with Facebook, Twitter, LinkedIn and Google OAuth2 Sign-on .
In addition to authentication, this tutorial uses roles to implement authorization. Only those users that you add to the canEdit role are able to change data (that is, create, edit, or delete contacts).
-
Follow the instructions in MVC 5 App with Facebook, Twitter, LinkedIn and Google OAuth2 Sign-on under Creating a Google app for OAuth 2 to set up a Google app for OAuth2.
-
Run and test the app to verify that you can log on using Google authentication.
-
If you want to create social login buttons with provider-specific icons, see Pretty social login buttons for ASP.NET MVC 5
In this section you will add a local user and the canEdit role to the membership database. Only those users in the canEdit role will be able to edit data. A best practice is to name roles by the actions they can perform, so canEdit is preferred over a role called admin. When your application evolves, you can add new roles such as canDeleteMembers rather than the less descriptive superAdmin.
-
Open the migrations\configuration.cs file and add the following
usingstatements:using Microsoft.AspNet.Identity; using Microsoft.AspNet.Identity.EntityFramework; -
Add the following AddUserAndRole method to the class:
bool AddUserAndRole(ContactManager.Models.ApplicationDbContext context) { IdentityResult ir; var rm = new RoleManager<IdentityRole> (new RoleStore<IdentityRole>(context)); ir = rm.Create(new IdentityRole("canEdit")); var um = new UserManager<ApplicationUser>( new UserStore<ApplicationUser>(context)); var user = new ApplicationUser() { UserName = "[email protected]", }; ir = um.Create(user, "P_assw0rd1"); if (ir.Succeeded == false) return ir.Succeeded; ir = um.AddToRole(user.Id, "canEdit"); return ir.Succeeded; } -
Call the new method from the Seed method:
 protected override void Seed(ContactManager.Models.ApplicationDbContext context)
 {
     AddUserAndRole(context);
     context.Contacts.AddOrUpdate(p => p.Name,
         // Code removed for brevity
 }
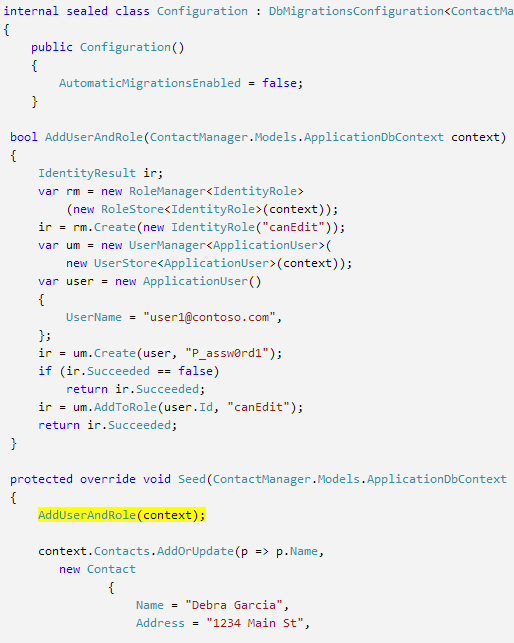
The following images shows the changes to Seed method:
This code creates a new role called canEdit, creates a new local user [email protected], and adds [email protected] to the canEdit role. For more information, see the ASP.NET Identity tutorials on the ASP.NET site.
In this section you will temporarily modify the ExternalLoginConfirmation method in the Account controller to add new users registering with an OAuth provider to the canEdit role. We hope to provide a tool similar to WSAT in the future which will allow you to create and edit user accounts and roles. Until then, you can accomplish the same function by using temporary code.
-
Open the Controllers\AccountController.cs file and navigate to the ExternalLoginConfirmation method.
-
Add the following call to AddToRoleAsync just before the SignInAsync call.
await UserManager.AddToRoleAsync(user.Id, "canEdit");The code above adds the newly registered user to the "canEdit" role, which gives them access to action methods that change (edit) data. The following snippet shows the new line of code in context.
   // POST: /Account/ExternalLoginConfirmation
   [HttpPost]
   [AllowAnonymous]
   [ValidateAntiForgeryToken]
   public async Task ExternalLoginConfirmation(ExternalLoginConfirmationViewModel model, string returnUrl)
   {
      if (User.Identity.IsAuthenticated)
      {
         return RedirectToAction("Index", "Manage");
      }
      if (ModelState.IsValid)
      {
         // Get the information about the user from the external login provider
         var info = await AuthenticationManager.GetExternalLoginInfoAsync();
         if (info == null)
         {
            return View("ExternalLoginFailure");
         }
         var user = new ApplicationUser { UserName = model.Email, Email = model.Email };
         var result = await UserManager.CreateAsync(user);
         if (result.Succeeded)
         {
            result = await UserManager.AddLoginAsync(user.Id, info.Login);
            if (result.Succeeded)
            {
               await UserManager.AddToRoleAsync(user.Id, "canEdit");
               await SignInManager.SignInAsync(user, isPersistent: false, rememberBrowser: false);
               return RedirectToLocal(returnUrl);
            }
         }
         AddErrors(result);
      }
      ViewBag.ReturnUrl = returnUrl;
      return View(model);
   }
Later in the tutorial you will deploy the application to Azure, where you will log-on with Google or another third party authentication provider. This will add your newly registered account to the canEdit role. Anyone who finds your web app's URL and has a Google ID can then register and update your database. To prevent other people from doing that, you can stop the site. You'll be able to verify who is in the canEdit role by examining the database.
In the Package Manager Console hit the up arrow key to bring up the following command:
Update-Database
The Update-Database command runs the Seed method, and that runs the AddUserAndRole method you added earlier. The AddUserAndRole method creates the user [email protected] and adds her to the canEdit role.
In this section you apply the Authorize attribute to restrict access to the action methods. Anonymous users will be able to view only the Index action method of the home controller. Registered users will be able to see contact data (The Index and Details pages of the Cm controller), the About page, and the Contact page. Only users in the canEdit role will be able to access action methods that change data.
-
Open the App_Start\FilterConfig.cs file and replace the RegisterGlobalFilters method with the following (which adds the two filters):
 public static void RegisterGlobalFilters(GlobalFilterCollection filters)
 {
     filters.Add(new HandleErrorAttribute());
     filters.Add(new System.Web.Mvc.AuthorizeAttribute());
     filters.Add(new RequireHttpsAttribute());
 }
This code adds the Authorize filter and the RequireHttps filter to the application. The Authorize filter prevents anonymous users from accessing any methods in the application. You will use the AllowAnonymous attribute to opt out of the authorization requirement in a couple methods, so anonymous users can log in and can view the home page. The RequireHttps requires that all access to the web app be through HTTPS.
An alternative approach is to add the Authorize attribute and the RequireHttps attribute to each controller, but it's considered a security best practice to apply them to the entire application. By adding them globally, every new controller and action method you add is automatically protected -- you don't need to remember to apply them. For more information see Securing your ASP.NET MVC App and the new AllowAnonymous Attribute.
-
Add the AllowAnonymous attribute to the Index method of the Home controller. The AllowAnonymous attribute enables you to white-list the methods you want to opt out of authorization.
 public class HomeController : Controller
 {
   [AllowAnonymous]
   public ActionResult Index()
   {
      return View();
   }
If you do a global search for AllowAnonymous, you'll see that it is used in the login and registration methods of the Account controller.
-
In CmController.cs, add
[Authorize(Roles = "canEdit")]to the HttpGet and HttpPost methods that change data (Create, Edit, Delete, every action method except Index and Details) in the Cm controller. A portion of the completed code is shown below:// GET: Cm/Create [Authorize(Roles = "canEdit")] public ActionResult Create() { return View(new Contact { Address = "123 N 456 W", City="Great Falls", Email = "[email protected]", Name="Joe Smith", State="MT", Zip = "59405"}); } // POST: Cm/Create // To protect from overposting attacks, please enable the specific properties you want to bind to, for // more details see http://go.microsoft.com/fwlink/?LinkId=317598. [HttpPost] [ValidateAntiForgeryToken] [Authorize(Roles = "canEdit")] public ActionResult Create([Bind(Include = "ContactId,Name,Address,City,State,Zip,Email")] Contact contact) { if (ModelState.IsValid) { db.Contacts.Add(contact); db.SaveChanges(); return RedirectToAction("Index"); } return View(contact); } // GET: Cm/Edit/5 [Authorize(Roles = "canEdit")] public ActionResult Edit(int? id) { if (id == null) { return new HttpStatusCodeResult(HttpStatusCode.BadRequest); } Contact contact = db.Contacts.Find(id); if (contact == null) { return HttpNotFound(); } return View(contact); } -
Press CTRL+F5 to run the application.
-
If you are still logged in from a previous session, hit the Log out link.
-
Click on the About or Contact links. You are redirected to the login page because anonymous users cannot view those pages.
-
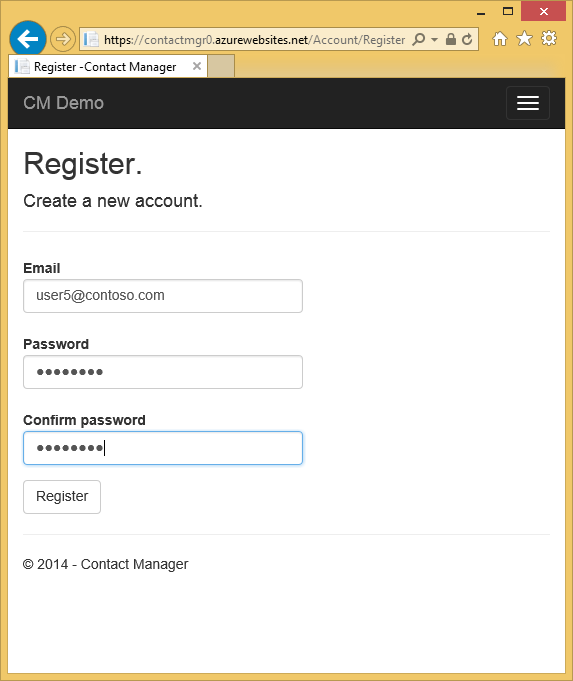
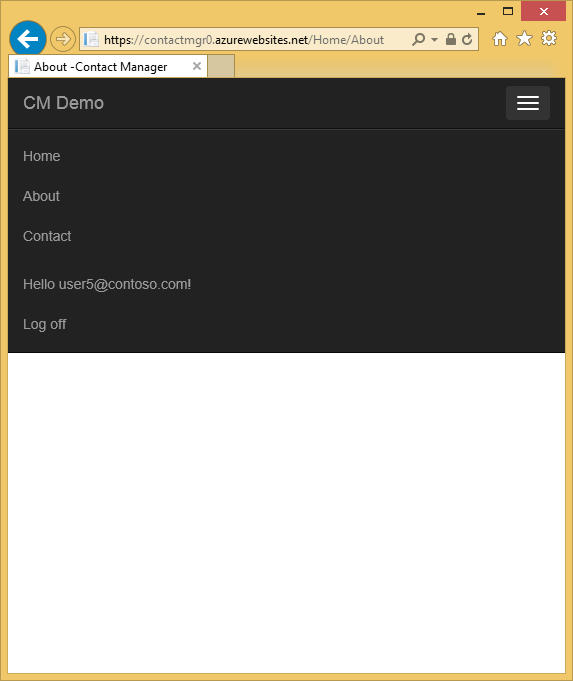
Click the Register as a new user link and add a local user with email [email protected]. Verify Joe can view the Home, About and Contact pages.
-
Click the CM Demo link and verify that you see the data.
-
Click an edit link on the page, you will be redirected to the login page (because a new local user is not added to the canEdit role).
-
Log in as [email protected] with password of "P_assw0rd1" (the "0" in "word" is a zero). You are redirected to the edit page you previously selected.
If you can't log in with that account and password, try copying the password from the source code and pasting it. If you still can't log in, check the **UserName** column of the **AspNetUsers** table to verify *[email protected]* was added.
- Verify you can make data changes.
-
In Visual Studio, right-click the project in Solution Explorer and select Publish from the context menu.
The Publish Web wizard opens.
-
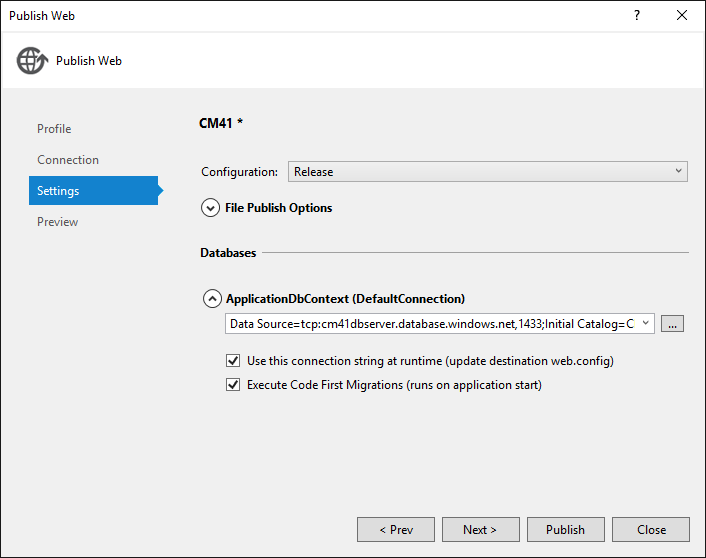
Click the Settings tab on the left side of the Publish Web dialog box.
-
Under ApplicationDbContext select the database that you created when you created the project.
-
Under ContactManagerContext, select Execute Code First Migrations.
-
Click Publish.
-
Log in as [email protected] (with password of "P_assw0rd1") and verify you can edit data.
-
Log out.
-
Go to the Google Developers Console and on the Credentials tab update the redirect URIS and JavaScript Orgins to use the Azure URL.
-
Log in using Google or Facebook. That will add the Google or Facebook account to the canEdit role. If you get an HTTP 400 error with the message The redirect URI in the request: https://contactmanager{my version}.azurewebsites.net/signin-google did not match a registered redirect URI., you'll have to wait until the changes you made are propagated. If you get this error after more than a few minutes, verify the URIs are correct.
-
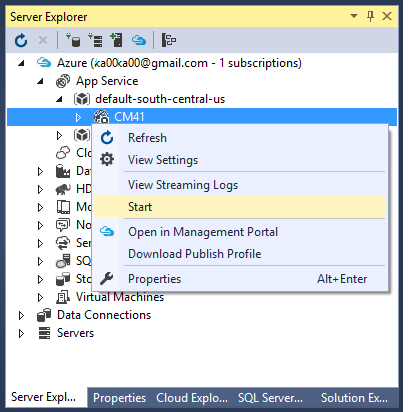
In Server Explorer, navigate to Azure > App Service > {your resource group} > {your web app}.
-
Right-click the web app and select Stop.
Alternatively, from the Azure Portal, you can go to the web app's blade, then click the Stop icon at the top of the blade.
-
Comment out or remove the following code from the ExternalLoginConfirmation method in the Account controller:
await UserManager.AddToRoleAsync(user.Id, "canEdit"); -
Build the project (which saves the file changes and verifies you don't have any compile errors).
-
Right-click the project in Solution Explorer and select Publish.
 -
Click the Start Preview button. Only the files that need to be updated are deployed.
-
Start the web app from Visual Studio or from the Portal. You won't be able to publish while the web app is stopped.
-
Go back to Visual Studio and click Publish.
-
Your Azure App opens up in your default browser. If you are logged in, log out so you can view the home page as an anonymous user.
-
Click the About link. You'll be redirected to the Log in page.
-
Click the Register link on the Log in page and create local account. We will use this local account to verify you can access the read only pages but you cannot access pages that change data (which are protected by the canEdit role). Later on in the tutorial you will remove local account access.
-
Verify that you can navigate to the About and Contact pages.
-
Click the CM Demo link to navigate to the Cm controller. Alternatively, you can append Cm to the URL.
-
Click an Edit link.
You are redirected to the login page.
-
Under Use another service to log in, Click Google or Facebook and log in with the account you previously registered. (If you're working quickly and your session cookie has not timed out, you will be automatically logged in with the Google or Facebook account you previously used.)
-
Verify that you can edit data while logged into that account.
Note: You cannot log out of Google from this app and log into a different google account with the same browser. If you are using one browser, you will have to navigate to Google and log out. You can log on with another account from the same third party authenticator (such as Google) by using a different browser.
If you have not filled out the first and last name of your Google account information, a NullReferenceException will occur.
-
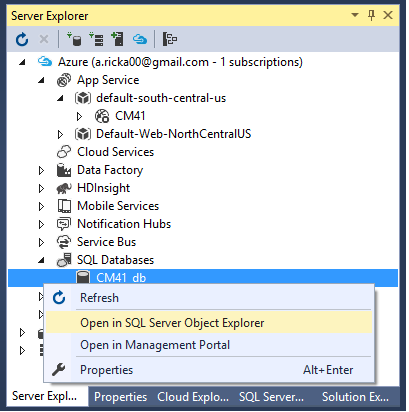
In Server Explorer, navigate to Azure > SQL Databases > {your database}
-
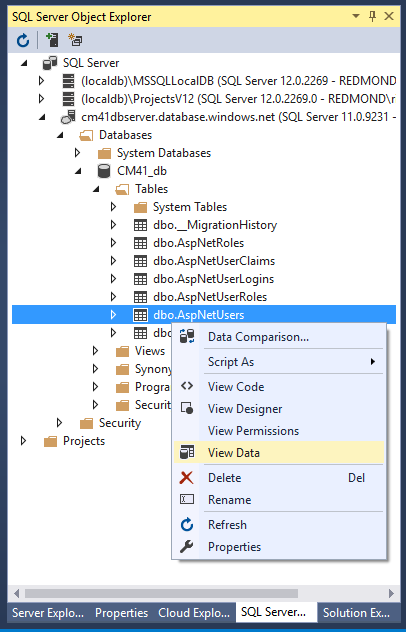
Right click your database, and then select Open in SQL Server Object Explorer.
-
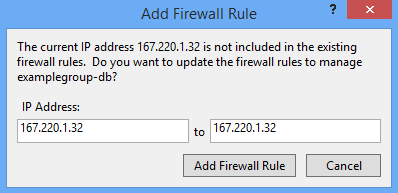
If you haven't connected to this database previously, you may be prompted to add a firewall rule to enable access for your current IP address. The IP address will be pre-filled. Simply click Add Firewall Rule to enable access.
-
Log in to the database with the user name and password that you specified when you created the database server.
-
Right click the AspNetUsers table and select View Data.
-
Note the Id from the Google account you registered with to be in the canEdit role, and the Id of [email protected]. These should be the only users in the canEdit role. (You'll verify that in the next step.)
-
In SQL Server Object Explorer, right click on AspNetUserRoles and select View Data.
-
Verify that the UserId is from [email protected] and the Google account you registered.
If you run into problems, here are some suggestions for what to try.
- Errors provisioning SQL Database - Make sure you have the current SDK installed. Versions before 2.8.1 have a bug that in some scenarios causes errors when VS tries to create the database server or the database.
- Error message "operation is not supported for your subscription offer type" when creating Azure resources - Same as above.
- Errors when deploying - Consider going through the basic ASP.NET deployment article. That deployment scenario is simpler and if you have the same problem there it may be easier to isolate. For example, in some enterprise environments a corporate firewall may prevent Web Deploy from making the kinds of connections to Azure that it requires.
- No option to select connection string in the Publish Web wizard when you deploy - If you used a different method to create your Azure resources (for example, you are trying to deploy to a web app and a SQL database created in the Portal), the SQL database may not be associated with the web app. The easiest solution is to create a new web app and database by using VS as shown in the tutorial. You don't have to start the tutorial over -- in the Publish Web wizard you can opt to create a new web app and you get the same Azure resource creation dialog that you get when you create the project.
- Directions for Google or Facebook developer portal are out of date - See the featured Disqus comment at the end of this tutorial.
You've created a basic ASP.NET MVC web application that authenticates users. For more information about common authentication tasks and how to keep sensitive data secure, see the following tutorials.
- Create a secure ASP.NET MVC 5 web app with log in, email confirmation and password reset
- ASP.NET MVC 5 app with SMS and email Two-Factor Authentication
- Best practices for deploying passwords and other sensitive data to ASP.NET and Azure
- Create an ASP.NET MVC 5 App with Facebook and Google OAuth2 This includes instructions on how to add profile data to the user registration DB and for detailed instructions on using Facebook as an authentication provider.
- Getting Started with ASP.NET MVC 5
For a more advanced tutorial about how to use the Entity Framework, see Getting Started with EF and MVC.
This tutorial was written by Rick Anderson (Twitter @RickAndMSFT) with assistance from Tom Dykstra and Barry Dorrans (Twitter @blowdart).
Please leave feedback on what you liked or what you would like to see improved, not only about the tutorial itself but also about the products that it demonstrates. Your feedback will help us prioritize improvements. You can also request and vote on new topics at Show Me How With Code.
- For a guide to the change from Websites to App Service see: Azure App Service and Its Impact on Existing Azure Services
