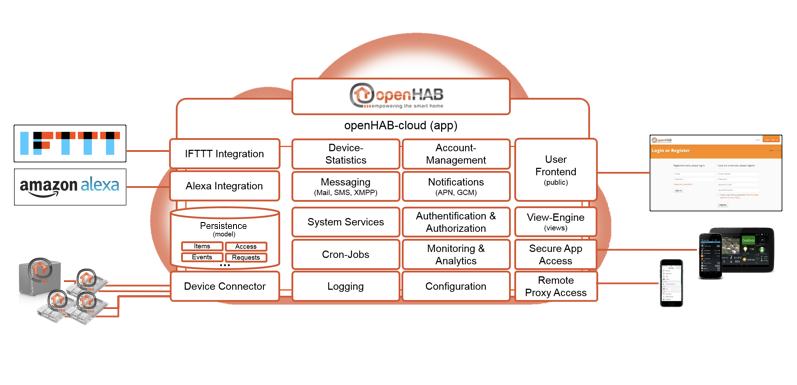
openHAB Cloud is a companion cloud service and backend for the openHAB open-source home automation software. The openHAB Cloud backend provides secure remote access and enables openHAB users to remotely monitor, control and steer their homes through the internet, collect device statistics of their openHABs, receive notifications on their mobile devices or collect and visualize data etc. The main core features of openHAB Cloud are an user-management frontend, secure remote access, remote proxy-access, device registry & management, messaging services and data management & persistence. The openHAB Cloud also serves as core backend integration point for cloud-based features (e.g. IFTTT) and provides an OAuth2 application enablement.
openHAB Cloud is mainly based on the following frameworks and technologies:
- Node.js - Server-side Javascript-framework
- Express.js - Web application framework for Node.js
- Nginx - Web server & reverse proxy
- MongoDB - NoSQL database
- redis - Session Manager & data structure server
- Socket.IO - Bi-directional communication between web clients and servers
Installing openHAB Cloud on Linux (ubuntu).
First, we need to make sure that the list of packages and dependencies from all repositories are up-to-date:
sudo apt-get update
sudo apt-get upgrade
We need to install redis, mongoDB, Nginx and Python:
sudo apt-get install build-essential redis-server mongodb nginx python
Now you need install git and clone the openHAB Cloud repository to your preferred directory (here: ubuntu) with the following commands:
apt-get install git
cd /home/YOUR-DIR/
git clone https://github.com/openhab/openhab-cloud.git
Clone the openhab-cloud repository and after the completed checkout you should have the directory in your chosen folder:
ls -al
total 32
drwxr-xr-x  5 ubuntu ubuntu 4096 Jun  4 17:06 .
drwxr-xr-x  3 root   root   4096 Jun  4 12:34 ..
-rw-r--r--  1 ubuntu ubuntu  220 Apr  9  2014 .bash_logout
-rw-r--r--  1 ubuntu ubuntu 3637 Apr  9  2014 .bashrc
drwx------  2 ubuntu ubuntu 4096 Jun  4 16:30 .cache
drwxr-xr-x 13 root   root   4096 Jun  4 17:06 openhab-cloud
-rw-r--r--  1 ubuntu ubuntu  675 Apr  9  2014 .profile
drwx------  2 ubuntu ubuntu 4096 Jun  4 12:34 .ssh
Now we need to change into the openhab-cloud directory and check if node is installed:
node --version
If you see the node version, you are fine to continue (Note: openHAB Cloud is based on Node.js version 14).
To run openHAB Cloud you need to install the required software bundles/stacks:
cd openhab-cloud
npm install
and all the module dependencies from package.json will be resolved and needed packages installed.
openHAB Cloud uses redis for session management. To learn more about redis please read here.
To check if redis is installed correctly and running we run this command:
redis-cli ping
Redis will answer with PONG if all is fine.
In the next step you have to rename the system configuration file:
config-production.json -> config.json
Adjust the config parameters according your setup (Note: MongoDB username and password fields should be deleted, if there is no authentication activated).
Now you can run openHAB Cloud by the following command:
sudo node app.js
Point your webbrowser to:
http://localhost:3000
You should be ready with your openHAB Cloud installation!
Optionally you can also setup Nginx as webserver:
For this we have to configure nginx as webserver and copy the openHAB Cloud nginx config, overriding the default config:
sudo cp /home/ubuntu/openhabcloud/etc/nginx_openhabcloud.conf /etc/nginx/sites-available/default
Change the following lines to match your installation.
Point server_name to your IP/DNS.
cd /etc/nginx/sites-enabled
sudo vi default
server {
#listen *:443;
listen *:80;
#ssl on;
# ssl_certificate /etc/nginx/ssl/YOUR-KEY.crt;
# ssl_certificate_key /etc/nginx/ssl/YOUR-KEY.key;
#ssl_certificate /etc/nginx/ssl/YOUR-CER.crt;
#ssl_certificate_key /etc/nginx/ssl/YOUR-KEY.key;

server_name YOUR-DNS-NAME;

#if ( $scheme = "http" ) {
#    rewrite ^/(.*)$    https://$host/$1 permanent;
#}

charset utf-8;

access_log /var/log/nginx/openhabcloud.org-access.log;
error_log /var/log/nginx/openhabcloud-error.log;
client_max_body_size 300m;

location /css {
    alias  /home/ubuntu/openhabcloud/public/css;
    }
location /js {
    alias /home/ubuntu/openhabcloud/public/js;
    }
location /img {
    alias /home/ubuntu/openhabcloud/public/img;
    }
location /bootstrap {
    alias /home/ubuntu/openhabcloud/public/bootstrap;
    }
location /font-icons {
    alias /home/ubuntu/openhabcloud/public/font-icons;
    }
location /fonts {
    alias /home/ubuntu/openhabcloud/public/fonts;
    }
location /js-plugin {
    alias /home/ubuntu/openhabcloud/public/js-plugin;
    }
location /staff/js-plugin {
    alias /home/ubuntu/openhabcloud/public/js-plugin;
    }
location /downloads {
    alias /home/ubuntu/openhabcloud/public/downloads;
    }
location / {
    proxy_pass http://localhost:3000;
    proxy_redirect off;
    proxy_http_version 1.1;
    proxy_set_header Host $host;
    proxy_set_header Upgrade $http_upgrade;
    proxy_set_header Connection "upgrade";
    proxy_set_header X-Real-IP $remote_addr ;
    proxy_set_header X-Forwarded-For $proxy_add_x_forwarded_for ;
        proxy_set_header X-Forwarded-Proto https;
}

#error_page 404 /404.html;

# redirect server error pages to the static page /50x.html
#
error_page 500 502 503 504 /50x.html;
location = /50x.html {
root html;
}
}
You need to restart nginx:
sudo service nginx restart
See docker-compose README.md for instructions on how to run openhab-cloud using docker-compose.
To install openHAB Cloud in the AWS cloud, you first need to create an account at Amazon Web Services. Sign up for an AWS account here.
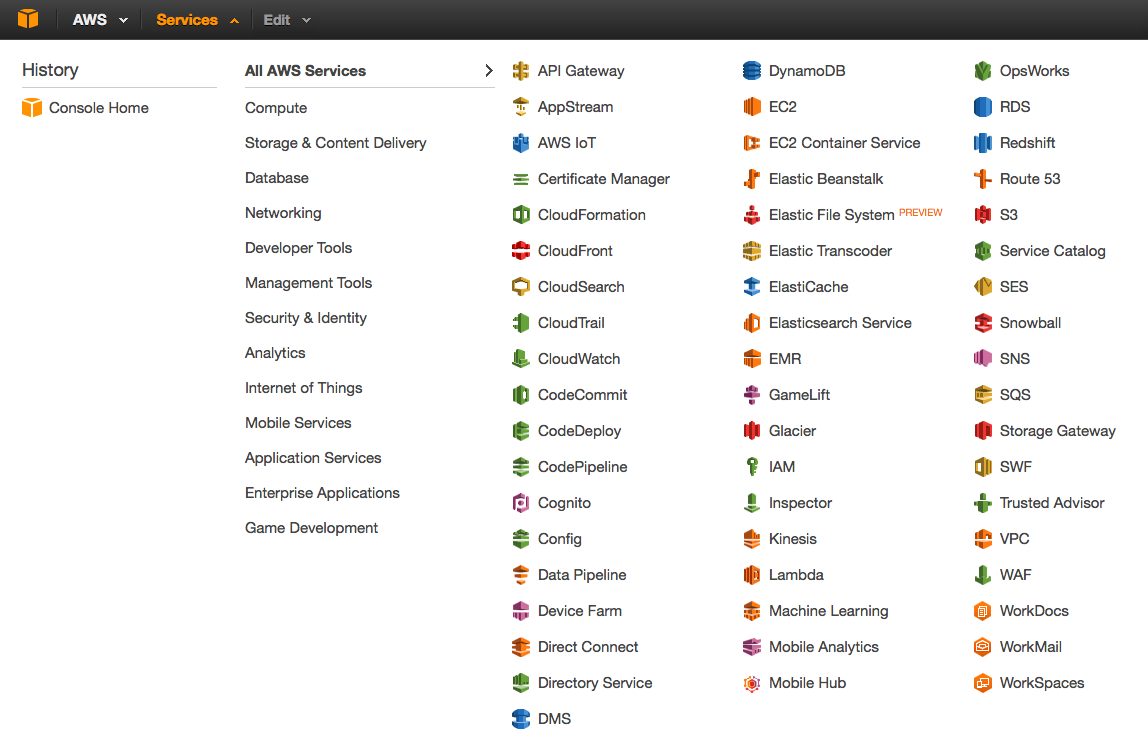
When you have created an account, you should be able to navigate to the the AWS Management Console which is a simple web interface for managing your virtual server instances.
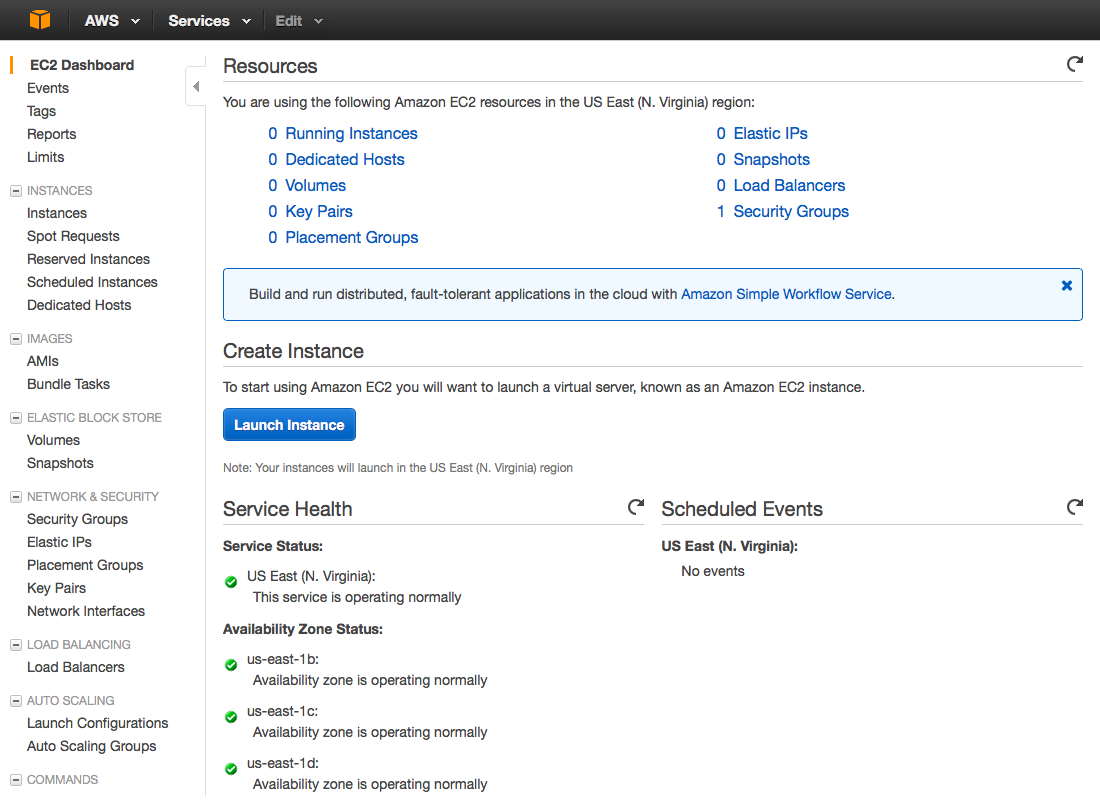
Make sure that your account has access to EC2 and click on Services -> EC2 link to open the EC2 dashboard.
The EC2 dashboard will look something like the image below:
We now need to setup a virtual server to install and run the openHAB Cloud application on the node. Amazon calls the virtual servers instances. The EC2 instance is similar to a regular unmanaged web-server.
-
As mentioned before select EC2 (Amazon’s Elastic Compute Cloud) from the list of services:
-
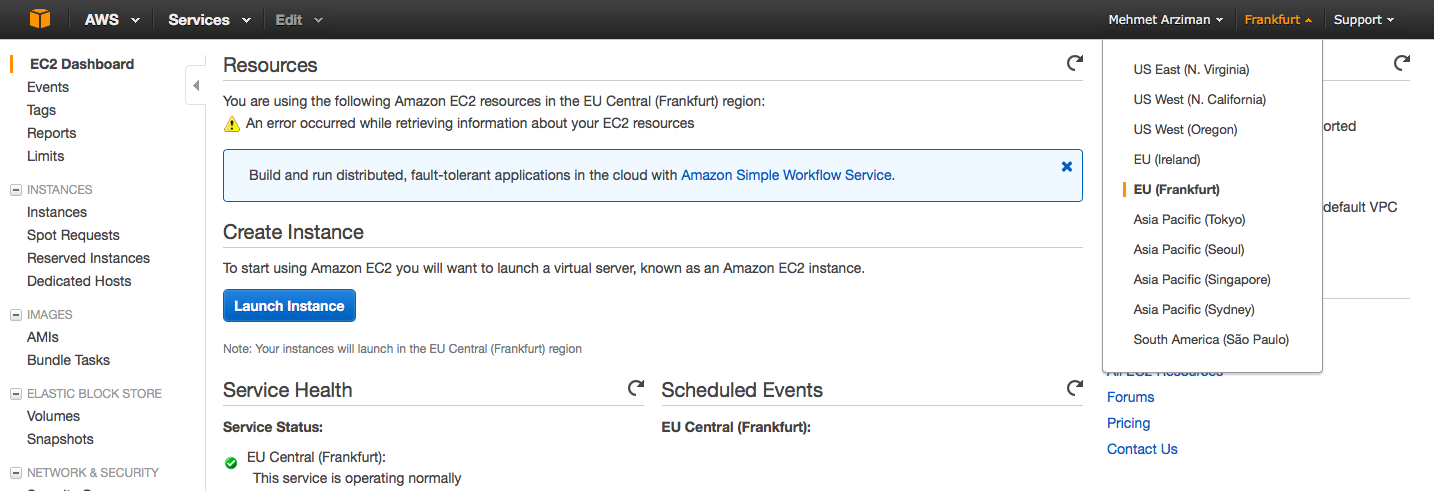
In the menu bar, on the right corner you will find an item labelled “Region”: Click to select your nearest region or chose a preferred region where you want to locate your virtual server. We will use the AWS Free Tier, which includes services with a free tier available for 12 months following your AWS sign-up date. AWS cost varies between regions (be aware that is only free for the first year).
-
After choosing your region click the blue “Launch Instance” button:
-
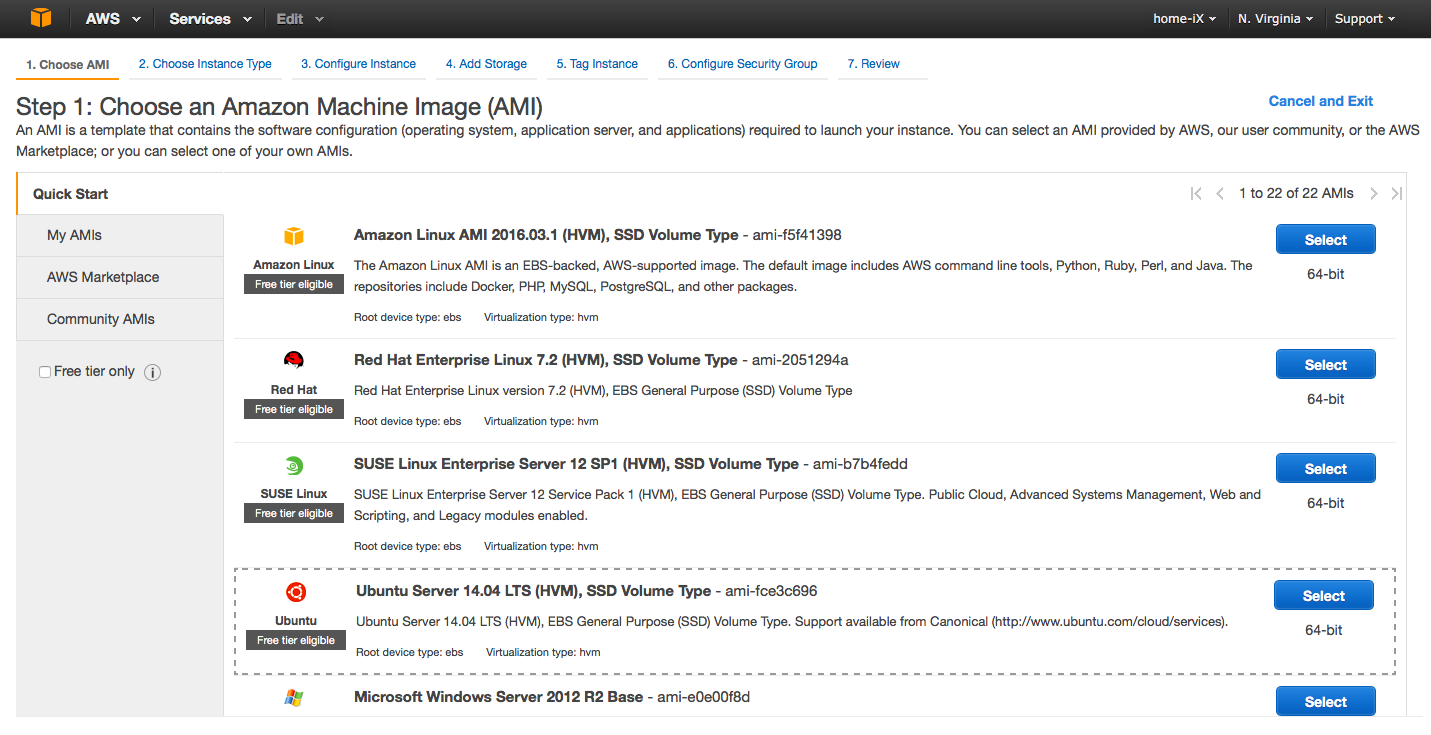
Select an Amazon Machine Image (AMI) as base for openHAB Cloud node: The AMI is a template that contains the virtual server software configuration (operating system, application server, and applications) required to launch your instance. You can select an Amazon AMI, from the user community or you can select one of your own AMIs.
We are going to use a free tier and therefor select the Ubuntu Server, 64-bit by clicking on the blue "Select" button:
You will see under the Ubuntu logo that there is a free tier eligible, what we want to use. In our guide, we are using the following AMI: Ubuntu Server 14.04 LTS (HVM), SSD Volume Type - AMI ID: ami-fce3c696
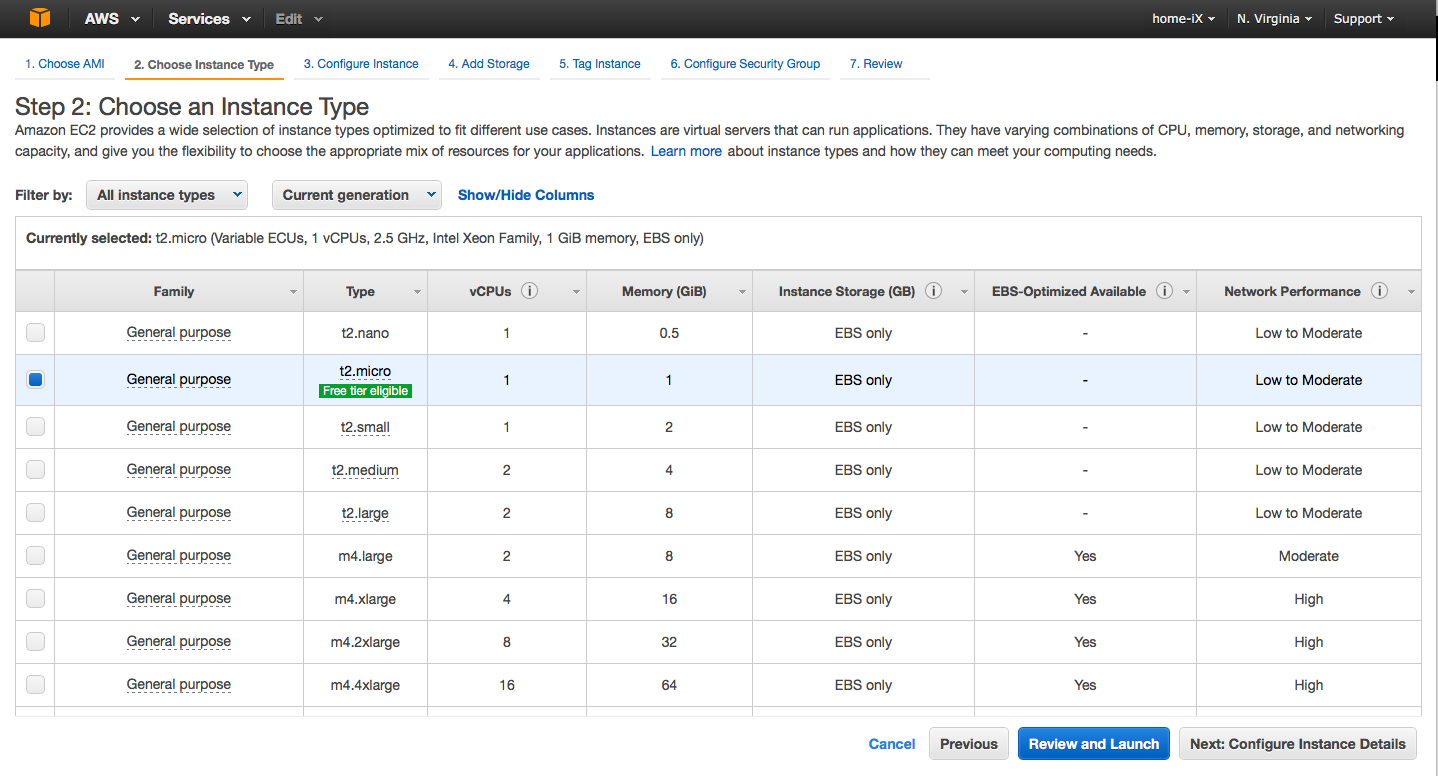
Leave the default selection with t2.micro where the green label says "Free tier eligible" and click on "Next: Configure Instance Details" to open the instance details page.
Just go ahead since we will use the default values on the "Configure Instance Details" page. Click on the button "Next: Add Storage".
On the following page, you see the storage device settings for your instance. Just continue by clicking "Next: Tag Instance", since the default storage will be fine for us.
We don't need to Tag our Instance and we continue by clicking on "Next: Configure Security Group"
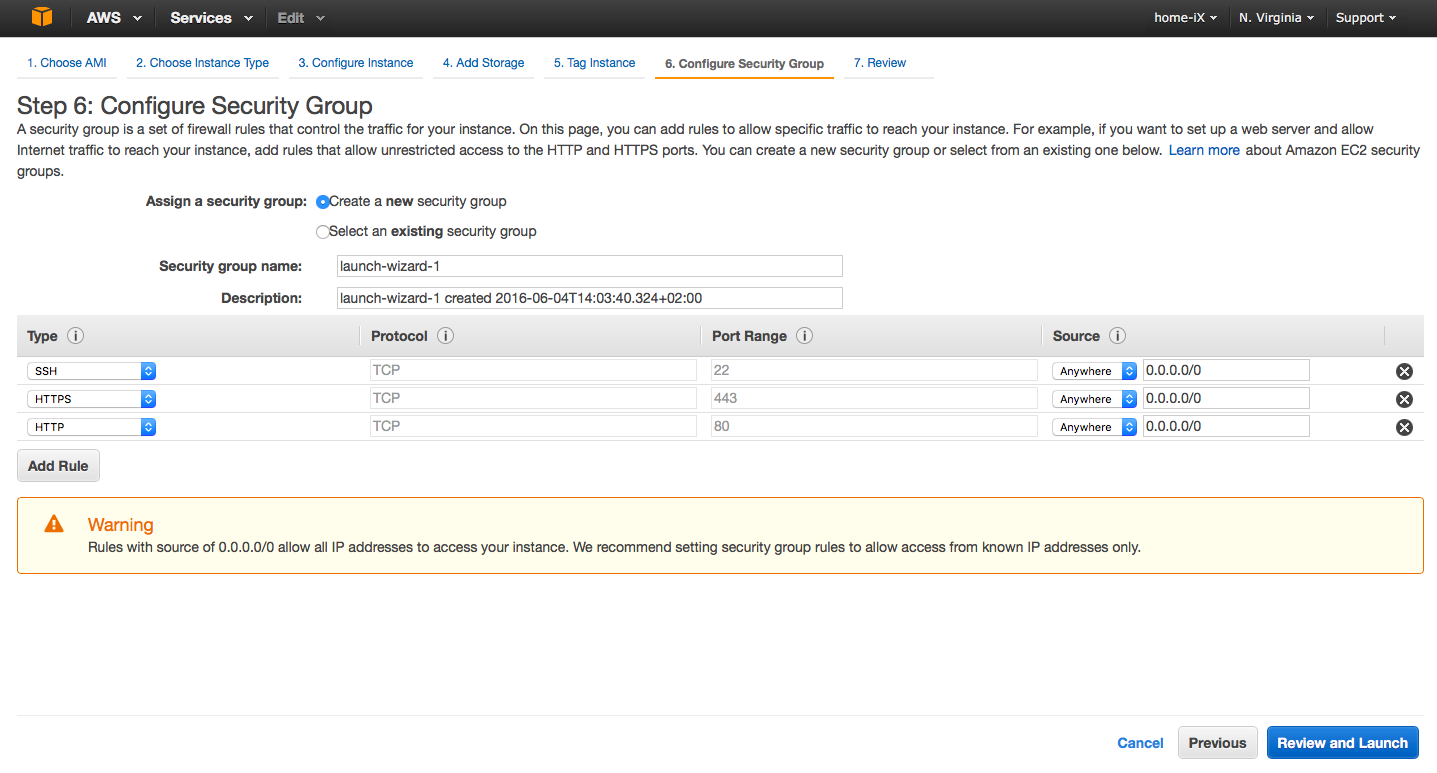
In the Configure Security Group page, leave the selected option for "Create a new security group" and add rules for protocols and ports by clicking "Add Rule" like in the image below:
We will add SSH to access and admin the instance (virtual server) by your console. The next two rules a pretty straight forward and depends how you want to run openHAB Cloud on your node. We recommend to use only HTTPS for Security reason. In this example, you also see that we added HTTP.
After setting up the Security Group, go ahead by clicking the blue "Review and Launch" button.
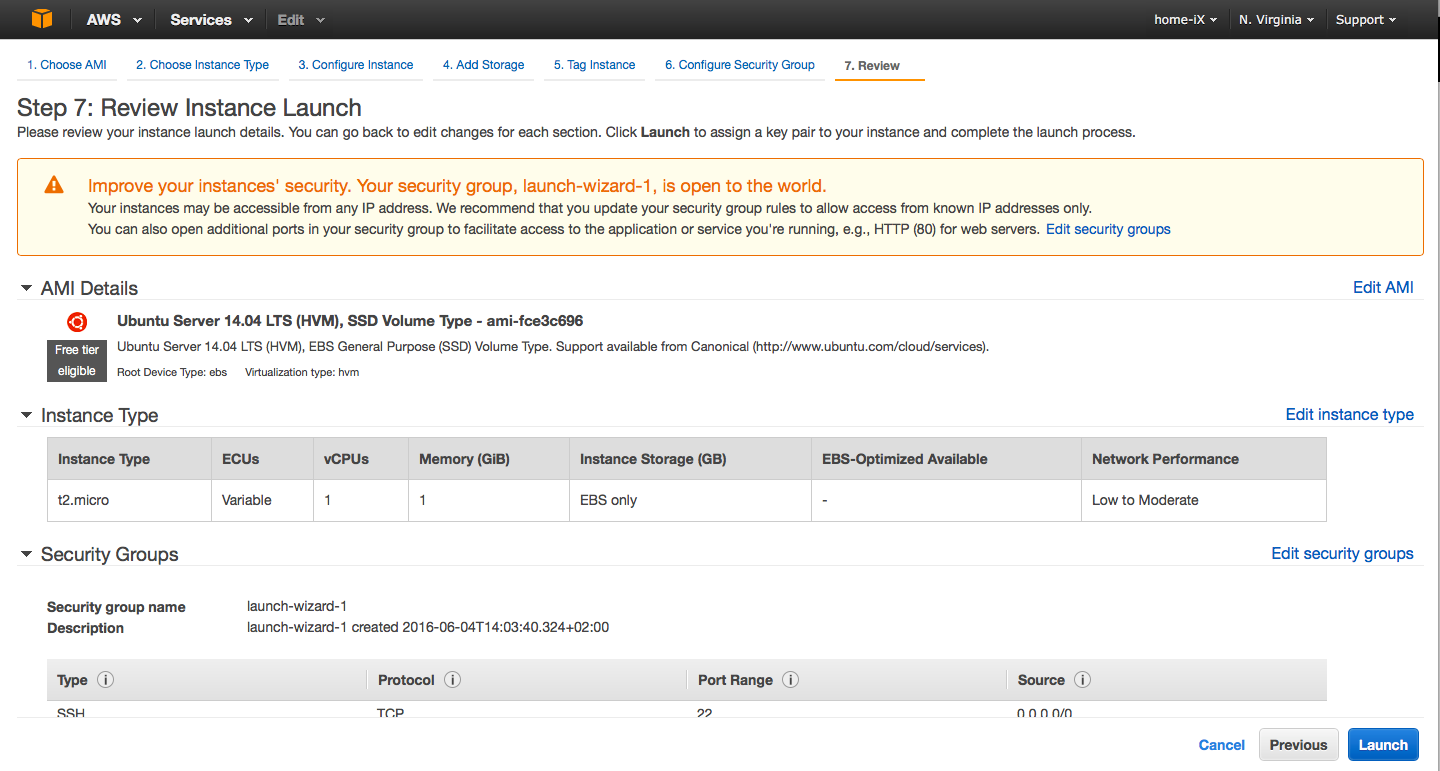
You will see a summary of your Instance Launch, which will look like this image:
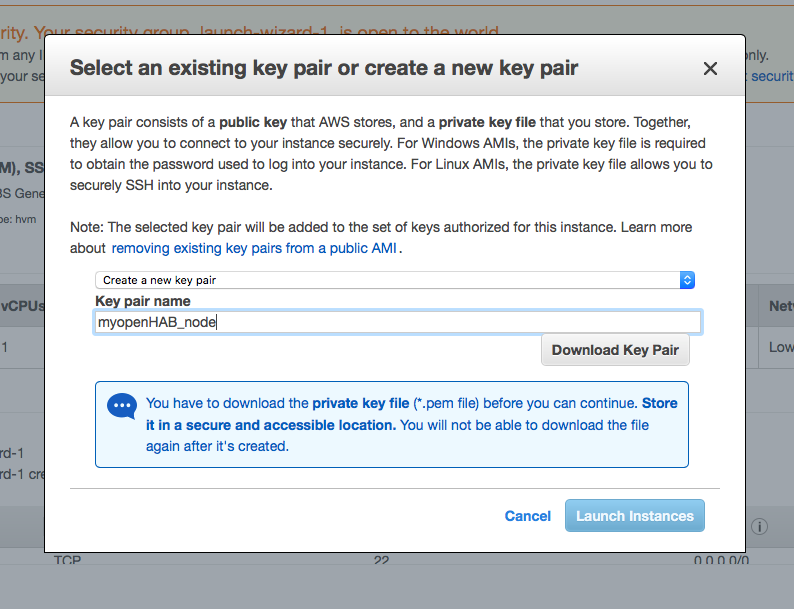
Just hit the blue "Launch" button and you will be prompted to select or create a key pair to connect securely to your instance.
Select the "Create a new key pair" option from the dropdown menu and enter a name for your key pair (public and private key) and download your .pem file. Warning: Don't loose this file, you will not be able to download it again!
The key file must not be publicly viewable for SSH to work. Open a terminal window and use this command to restrict access rights to the .pem file:
chmod 400 YOUR-PEM-FILENAME.pem
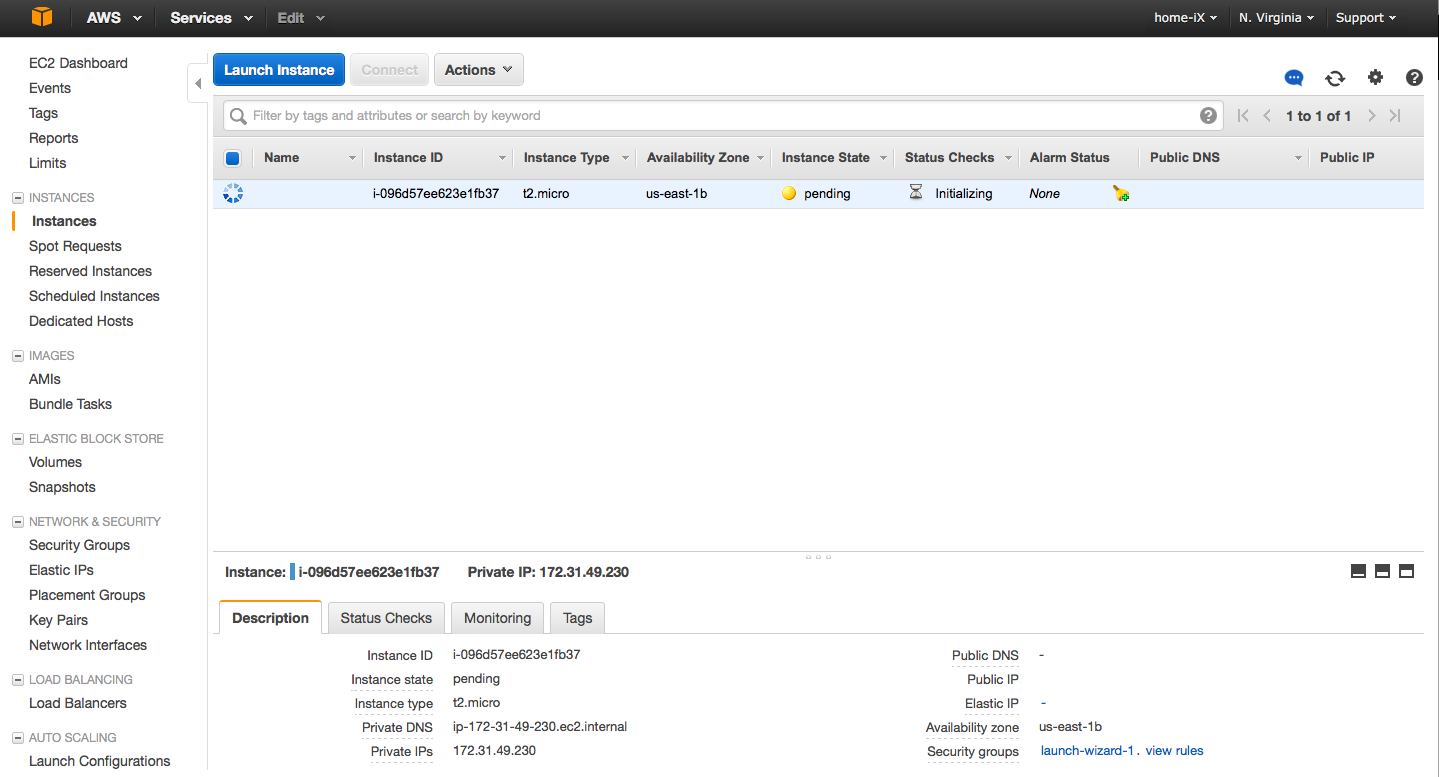
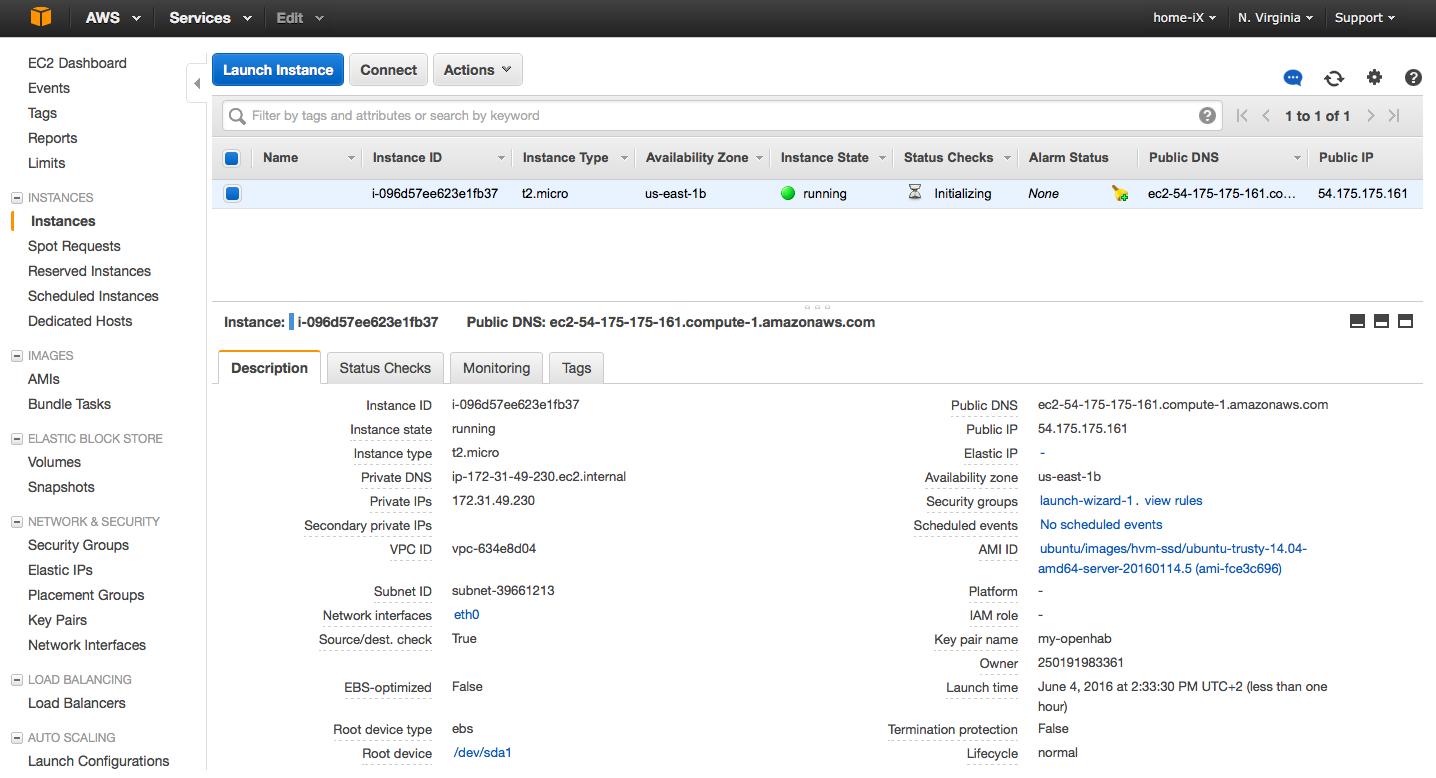
Finally, under Instance you can see your instance starting up and running.
There you will find all the needed info to ssh into your node. The important info is your Public DNS / Public IP address.
You can ssh to your instance with the user "ubuntu", see here for more info on user accounts on linux instances. In terminal window run this command with your instance infos:
ssh -l ubuntu -i YOUR-PEM-FILENAME.pem YOUR-AWS-EC2-PUBLIC-DNS
Now you should be ready with your instance and see the welcome information of ubuntu.
As next step go to back to the Quickstart and follow the installation steps. You should jump to the Setting up Nginx section and follow the instructions.
You are ready to start the openHAB Cloud service.
You can run openHAB Cloud as background service:
sudo nohup node app.js &
You can also use the systemd startup script under:
/etc/openhabcloud.service
You should now point your webbrowser to:
http://YOUR-AWS-EC2-IP
or
http://YOUR-AWS-EC2-PUBLIC-DNS
You should be ready with your openHAB Cloud installation!
- When upgrading from older versions, please run the
./scripts/deleteDuplicateUserDevices.jsscript, start openhab-cloud once (and shut it down again) and then execute the following statement in your MongoDB collection:This is necessary to ensure a unique index on the collection.use <YOUR_DB> db.userdevices.reIndex()
