#How to Create a MySQL Database in Azure
This guide will show you how to use ClearDB to create a MySQL database from the Azure Store and how to create a MySQL database as a linked resource when you create a Azure Web Site . ClearDB is a fault-tolerant database-as-a-service provider that allows you to run and manage MySQL databases in Azure datacenters and connect to them from any application.
##Table of Contents
- How to: Create a MySQL database from the Azure Store
- How to: Create a MySQL database as a linked resource for Azure Web Site
[AZURE.NOTE] When you create a MySQL database as part of the Website creation process, you can only create a free database. Creating a MySQL database from the Azure Store allows you to create a free database or choose from paid options.
To create a MySQL database from the Azure Store, do the following:
-
Log in to the Azure Management Portal.
-
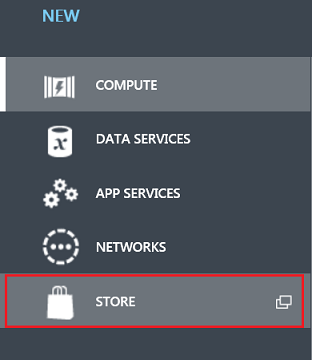
Click +NEW at the bottom of the page, then select MARKETPLACE.
-
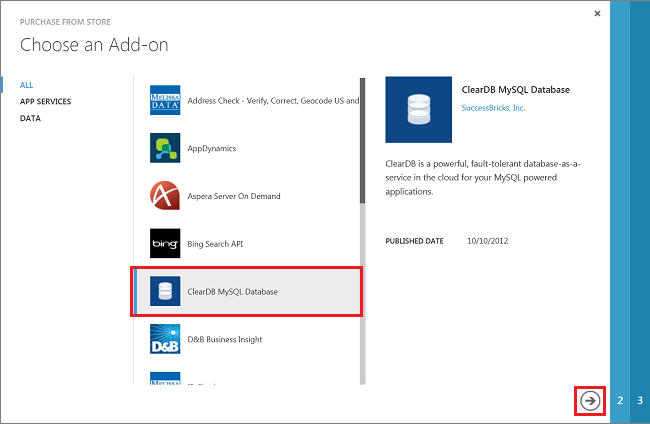
Select ClearDB MySQL Database, then click the arrow at the bottom of the frame.
-
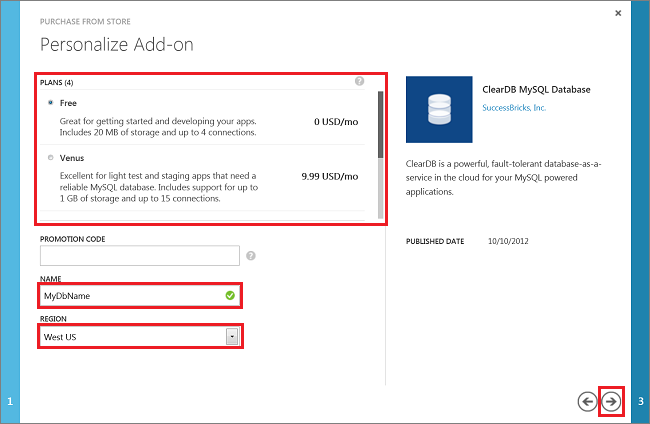
Select a plan, enter a database name, and select a region, then click the arrow at the bottom of the frame.
-
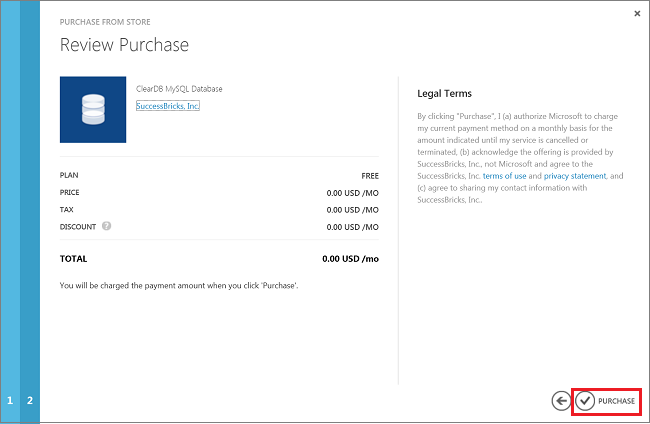
Click the checkmark to complete your purchase.
-
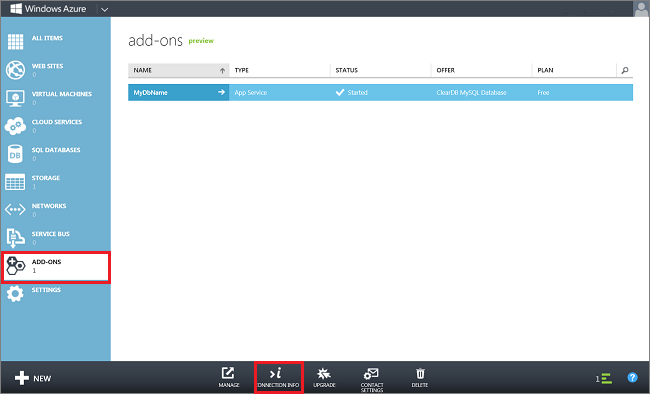
After your database has been created, you can manage it from the ADD-ONS tab in the management portal.
-
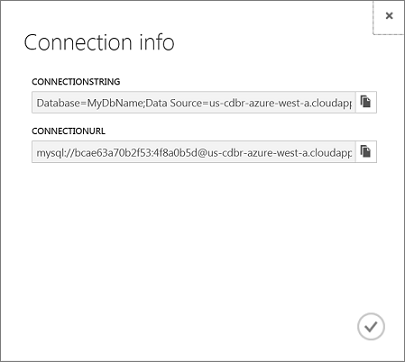
You can get the database connection information by clicking on CONNECTION INFO at the bottom of the page (shown above).
To create a MySQL database as a linked resource when you create a Azure Web Site, do the following:
-
Log in to the Azure Management Portal.
-
Click +NEW at the bottom of the page, then select COMPUTE, WEBSITE, and CREATE WITH DATABASE.
-
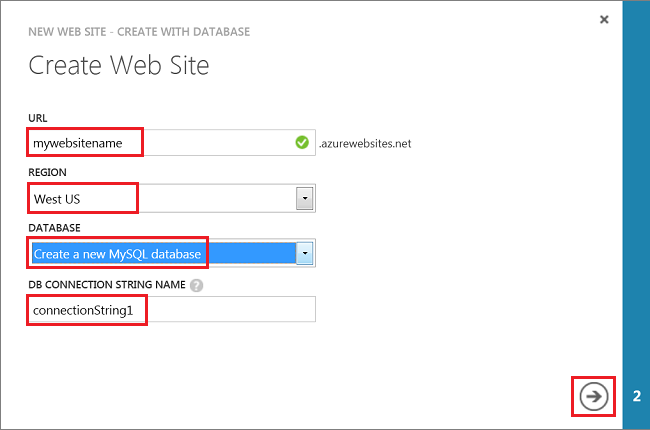
Provide a URL for your website, select the REGION for your site, and choose Create a new MySQL database from the DATABASE dropdown. Optionally, you can replace the default name for the connection string. Click the arrow at the bottom of the page.
-
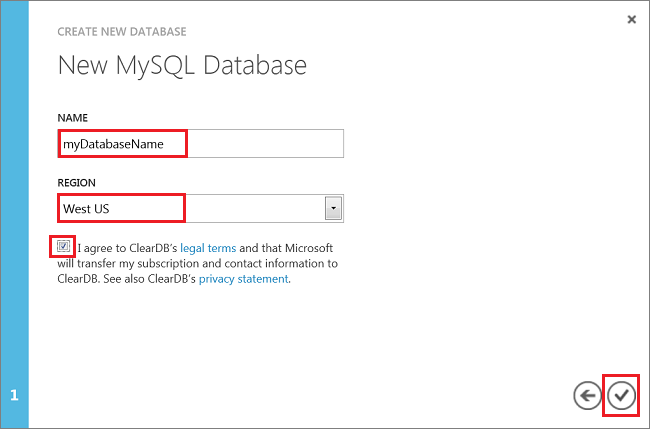
Provide a database NAME, select the REGION for your database (this should be same as the region for your website), agree to ClearDB's legal terms, and click the checkmark at the bottom of the frame.
-
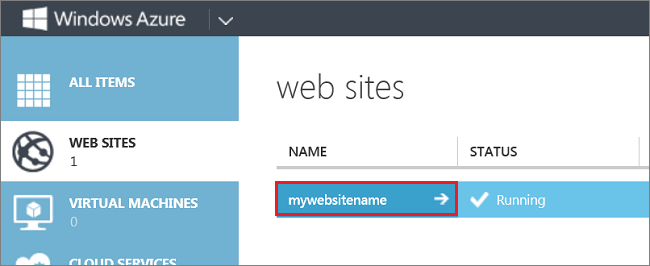
After your website has been created, click on the name of your site to go to your site's dashboard.
-
Click on CONFIGURE.
-
Scroll down to the connection strings section and click Show Connection Strings.
-
Copy the connection string for use in your application.
[AZURE.NOTE] Connection strings are accessible to your website application by connection string name. In .NET applications, connection strings are availble in the connectionStrings object. In other programming languages, connection strings are accessible as environment variables. For more information, see How to Configure Web Sites.
