An implementation of the popular game "1010!" in JavaScript (fully ECMAScript 2015) controlled by Arduino.
It's really simple. Arduino and Server are connected via Web Sckets. Any interaction of a user with the device is forwarded to the Server via a socket. Server after receiving the socket processes the request and make something in the game.
When the user is able to do something in the game, green LED will be blinking. In the other case two, red LEDs will be blink alternately.
Requirements
- Arduino Leonardo,
- NodeJS (tested on 6.1),
- Google Chrome (higher than 47.0),
- Arduino IDE (needs for load Arduino StandardFirmata),
- Basic knowledge about Command Line Interface.
Follow step by step an instruction below:
- Prepare:
- 6x LEDs,
- 10x resistors 330 Ω,
- 4x buttons (prefered "Tactical Switch"),
- Thumb Joystick
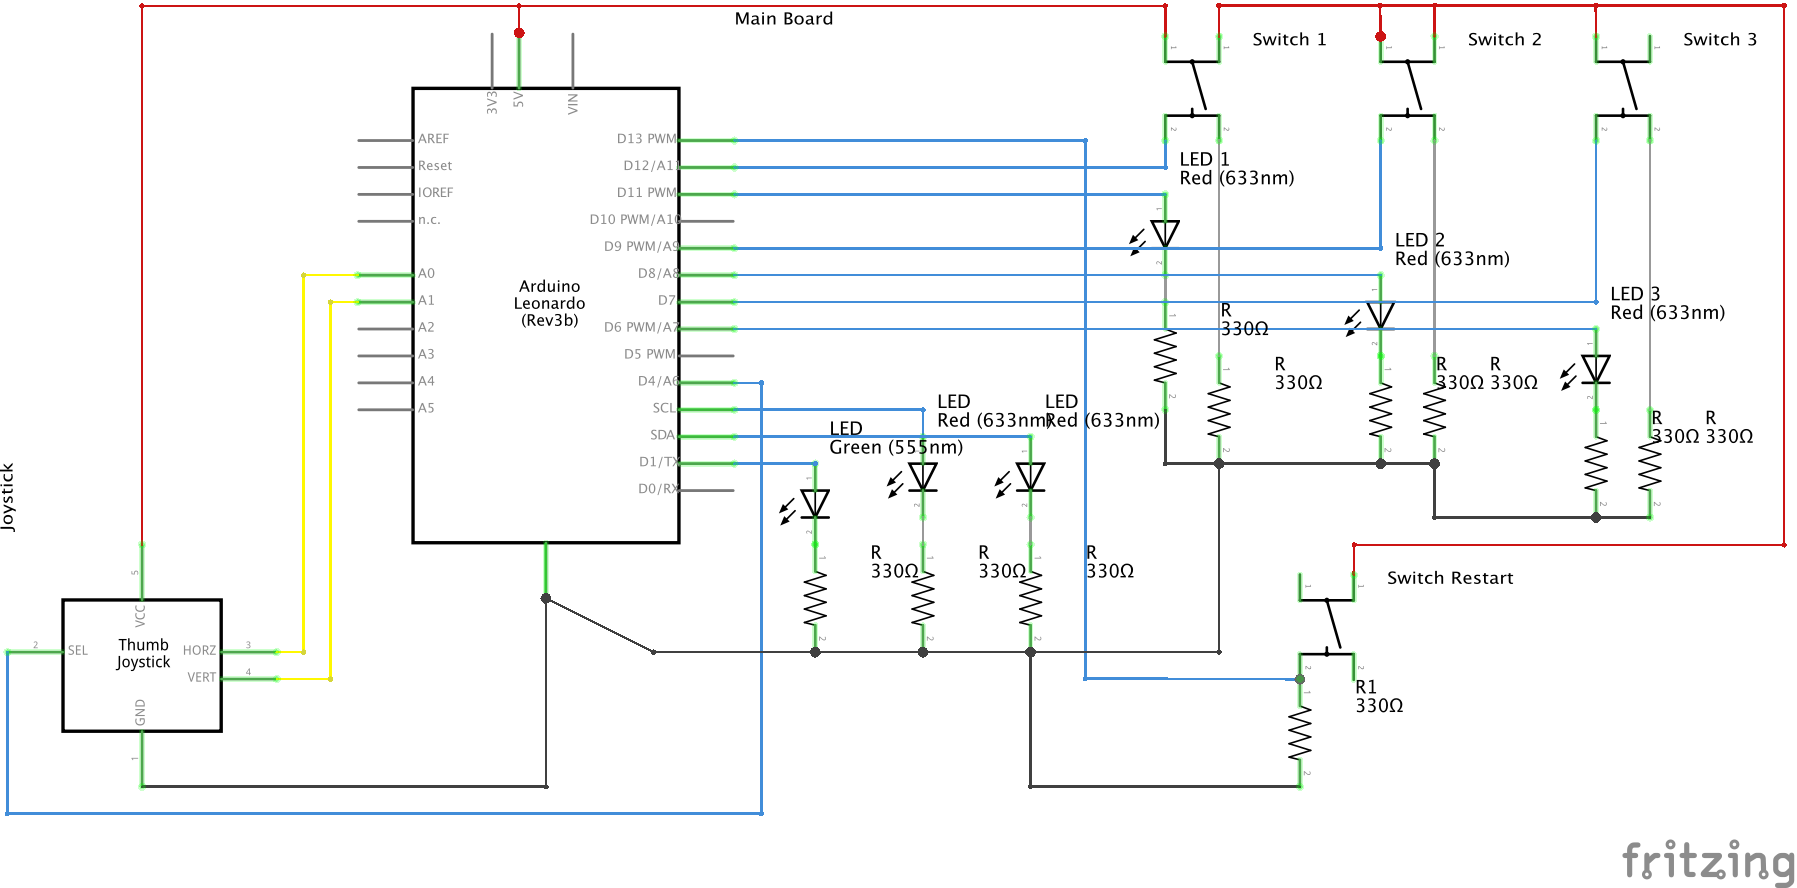
- Check out the Circuit diagram
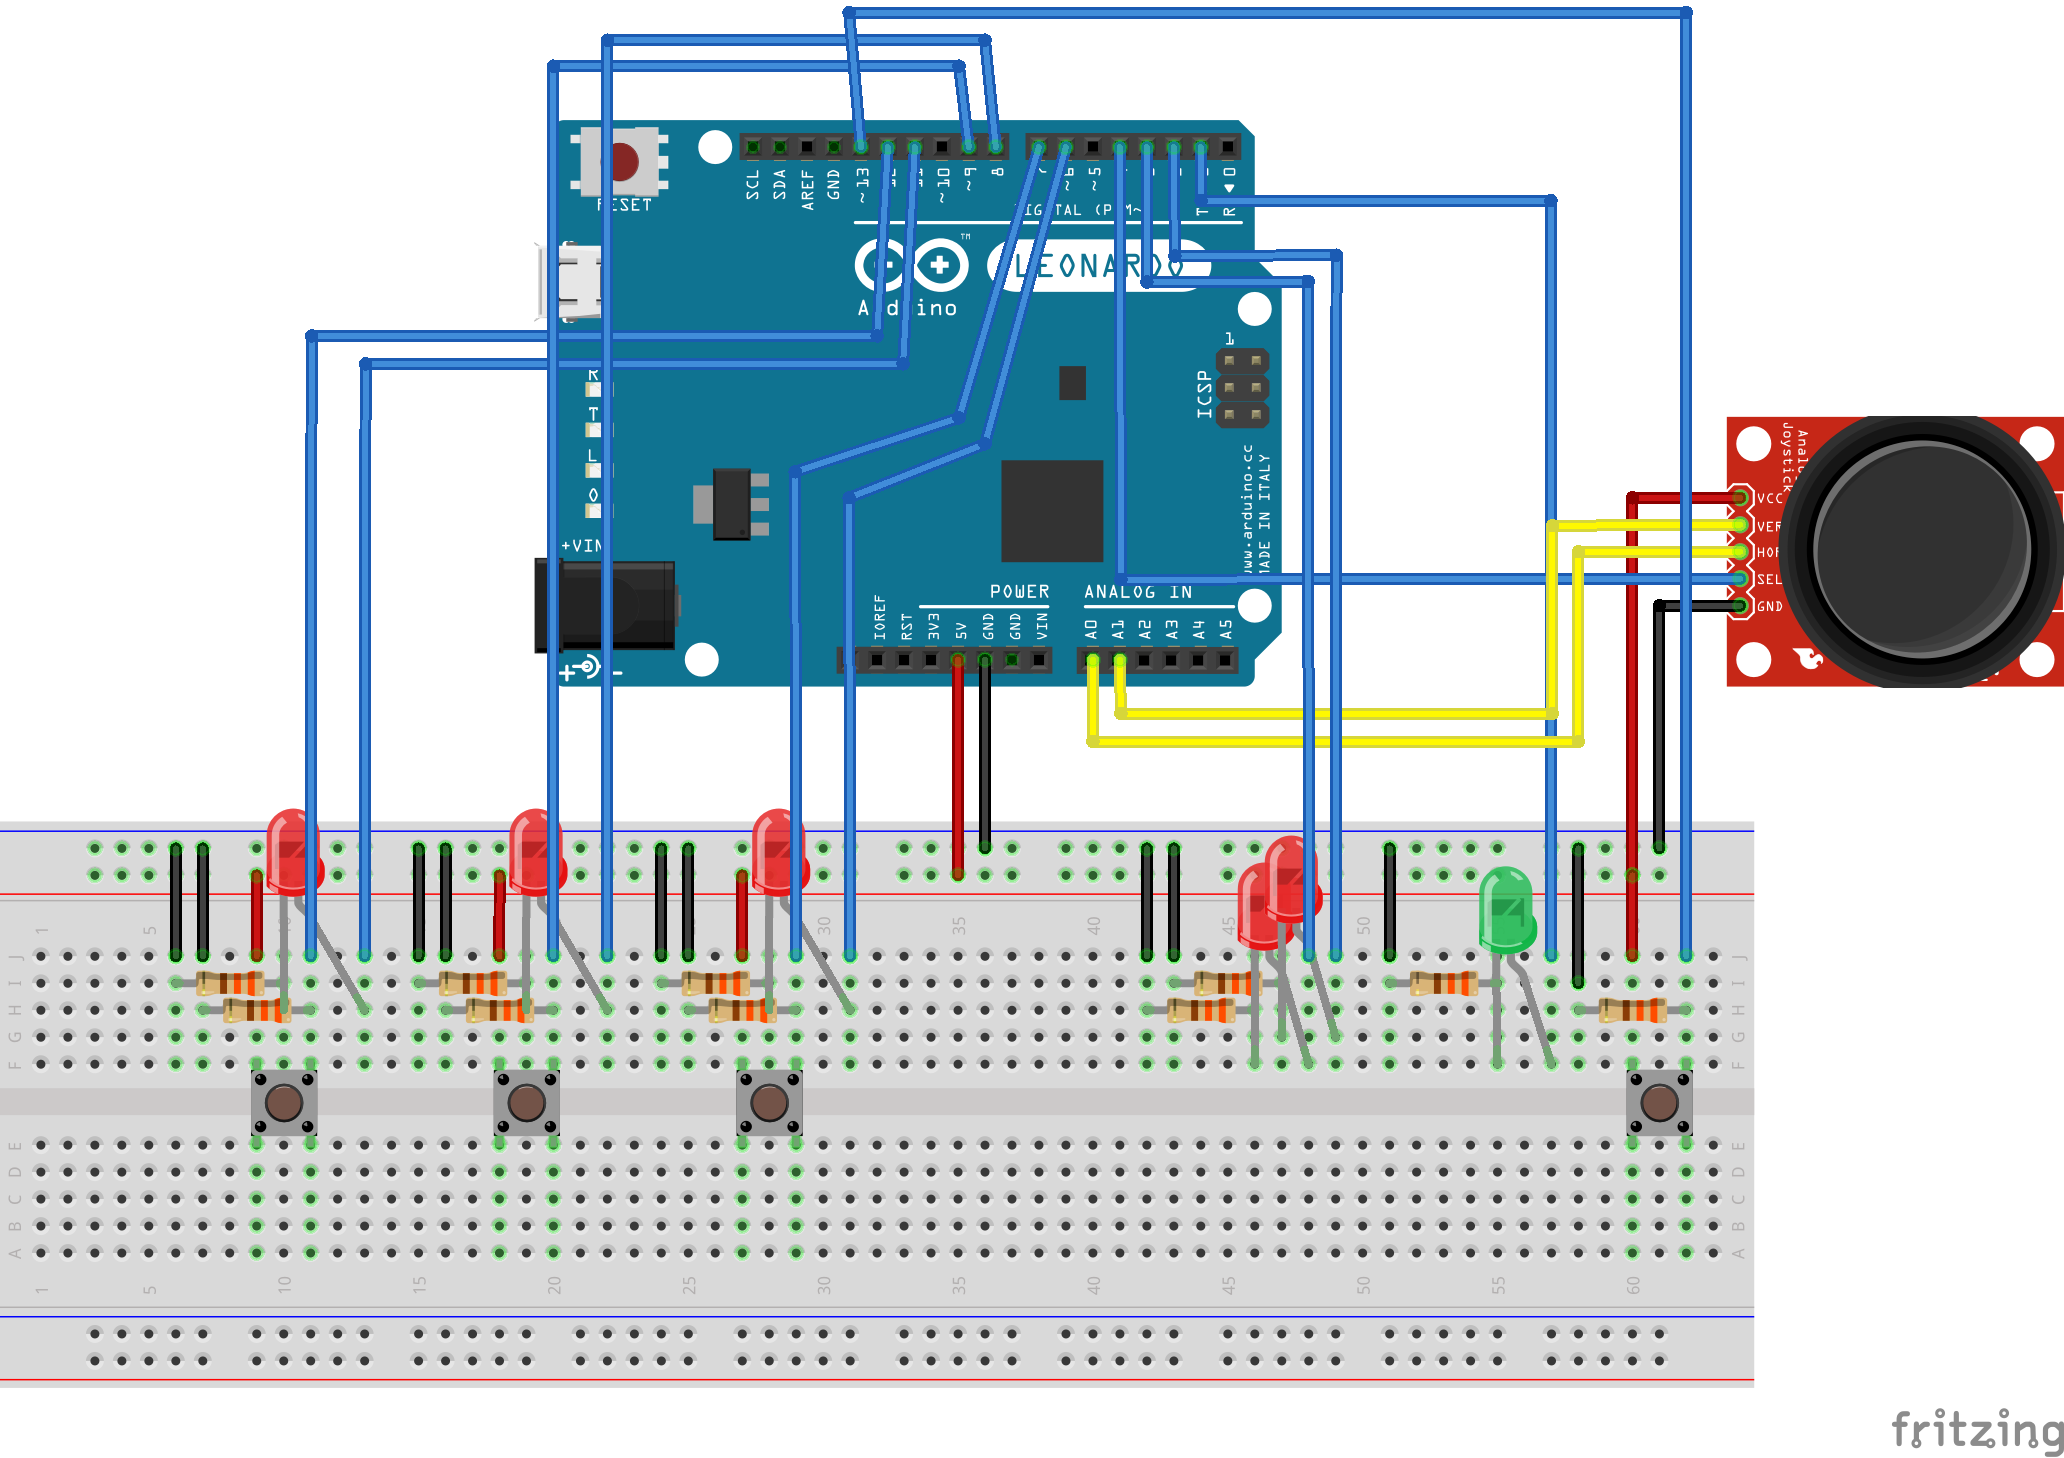
- Based on Breadboard preview - build Game Controller
Please follow an instruction.
- Clone this repository (
git clone [email protected]:pomek/Arduino1010.git), - Install dependencies (
npm install), - Connect the Arduino with a computer,
- Run the game (
npm run gulp).
Based on the breadboard above:
- Buttons (from left to right) mean which shape will be active (after pressed),
- A LED above a button means which shape is active now,
- If you press the same button two times - shape will be indeterminate,
- After paste a shape, a LED will switch off,
- If game is over - two LEDs will be blink alternately, otherwise - a green LED will be blinking,
- After choose a shape - you can choose a place to paste (use the joystick)
- If you want to paste the shape - press down the joystick,
- If you want to restart game - press button at right side.
I'm open for any improvements of the game. If you have any idea, but you don't want or you cannot do this, please leave me an issue.
My road map contains following points:
- Add display LCD HD44780,
- Easy way to add custom shapes,
- Try to optimize used pins,
- In the future: build a device (the computer won't be needed).
If you want to do anything with the game, please follow the terms below:
- Each change breadboard or circuit diagram should be updated (use Fritzing),
- Each change of code should be tested (unit tests),
- Each change should be written down in Changelog,
- Build status on Circle should be success.
For development you can use Gulp tasks below:
clean- removes directory with temp. files,clean:test- removes directory with compiled tests,sass- builds stylesheets,sass:watch- builds stylesheets and waiting for changes,scripts- builds scripts,scripts:watch- builds scripts and waiting for changes,scripts:test- builds unit tests,inject- adds styles and scripts into view file,inject:watch- the same asinject, but waits for changes,arduino- runs Arduino script,server- runs web server,lint- checks code styles,test- runs unit tests,units- runs sequence of tasks:scripts:test,clean:test,test,default- runs sequence of tasks:clean,sass,scripts,inject,server.

