- Install Eclipse IDE for C/C++ Developers.
- Install the OpenOCD Eclipse plugin.
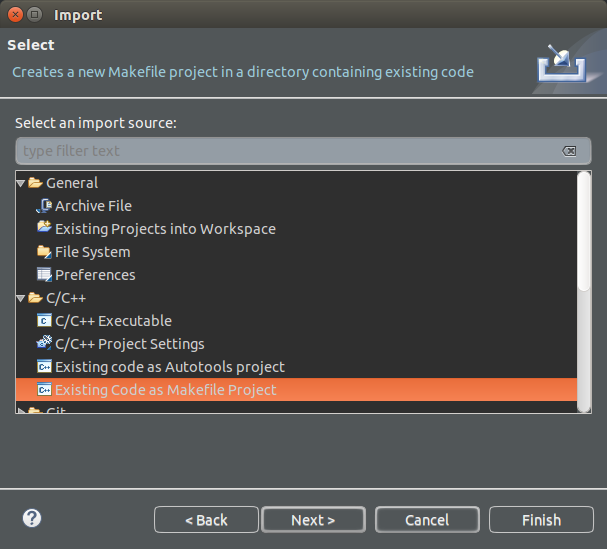
- File -> Import -> C/C++ -> Existing Code as Makefile Project
- Browse for existing code location, find the OdriveFirmware root.
- In the Toolchain options, select Cross GCC
- Hit Finish
- Build the project (press ctrl-B)
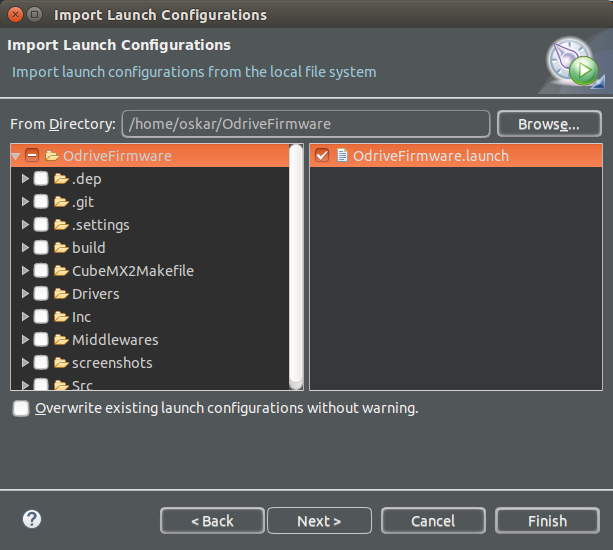
- File -> Import -> Run/Debug -> Launch Configurations -> Next
- Highlight (don't tick) the OdriveFirmare folder in the left column
- Tick OdriveFirmware.launch in the right column
- Hit Finish
- Make sure the programmer is connected to the board as per :ref:`Flashing the firmware <build-and-flash>`.
- Press the down-arrow of the debug symbol in the toolbar, and hit Debug Configurations
- You can also hit Run -> Debug Configurations
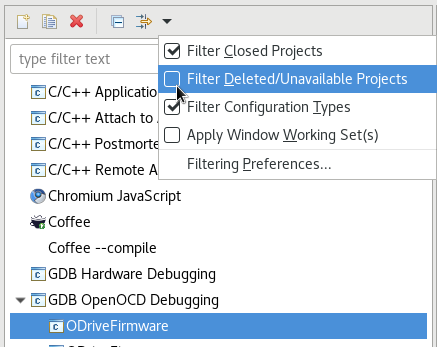
- Highlight the debug configuration you imported, called OdriveFirmware. If you do not see the imported launch configuration rename your project to ODriveFirmware or edit the launch configuration to match your project name by unfiltering unavailable projects:
- Hit Debug
- Eclipse should flash the board for you and the program should start halted on the first instruction in Main
- Set beakpoints, step, hit Resume, etc.
- Make some cool features! ;D


