Questions? Just message us on Discord ![]() or create an issue in GitHub. We're happy to help live!
or create an issue in GitHub. We're happy to help live!
Table of Contents:
- SambaNova scribe
- Overview
- Before you begin
- Deploy the starter kit GUI
- Use the starter kit
- Customizing the starter kit
- Third-party tools and data sources
This AI Starter Kit is a simple example of a audio transcription and processing workflow. You send your audio file or a youtube link to app and the audio will be send to the SambaNova platform, and get the transcription and the bullet point summary of the PROVIDED audio.
This sample is ready-to-use. We provide:
- Instructions for setup with SambaNova Cloud.
- Instructions for running the application as is.
- Instructions for customizing the application.
You have to set up your environment before you can run or customize the starter kit.
Clone the starter kit repo.
git clone https://github.com/sambanova/ai-starter-kit.gitthis kit requires you to have installed in your system ffmpeg:
- On macOS, you can manually install them using Homebrew:
brew install ffmpeg- On Linux (Ubuntu/Debian), you can install them manually:
sudo apt-get update && sudo apt-get install -y ffmpeg- On Windows, you may need to install these dependencies manually from the ffmpeg site and ensure they are in your system PATH.
The next step is to set up your environment variables to use one of the transcription models available from SambaNova. You can obtain a free API key through SambaNova Cloud.
- SambaNova Cloud: To set up your environment variables.
For more information and to obtain your API key, visit the SambaNova Cloud webpage.
To integrate SambaNova Cloud Transcription models with this AI starter kit, update the API information by configuring the environment variables in the ai-starter-kit/.env file:
- Create the
.envfile atai-starter-kit/.envif the file does not exist. - Enter the transcription SambaNova Cloud API url and key in the
.envfile, for example:
TRANSCRIPTION_BASE_URL = "https://api.sambanova.ai/v1"
TRANSCRIPTION_API_KEY = "456789abcdef0123456789abcdef0123"The next step is to set up your environment variables to use one of the inference models available from SambaNova. You can obtain a free API key through SambaNova Cloud. Alternatively, if you are a current SambaNova customer, you can deploy your models using SambaStudio.
- SambaNova Cloud (Option 1): Follow the instructions here to set up your environment variables.
Then, in the config file, set the llm
typevariable to"sncloud"and set theselect_expertconfig depending on the model you want to use.
We recommend that you run the starter kit in a virtual environment or use a container. We also recommend using Python >= 3.10 and < 3.12.
- Install and update pip.
    cd ai-starter-kit/sambanova_scribe
    python3 -m venv sambanova_scribe_env
    source sambanova_scribe_env/bin/activate
pip install -r requirements.txt- Run the following command:
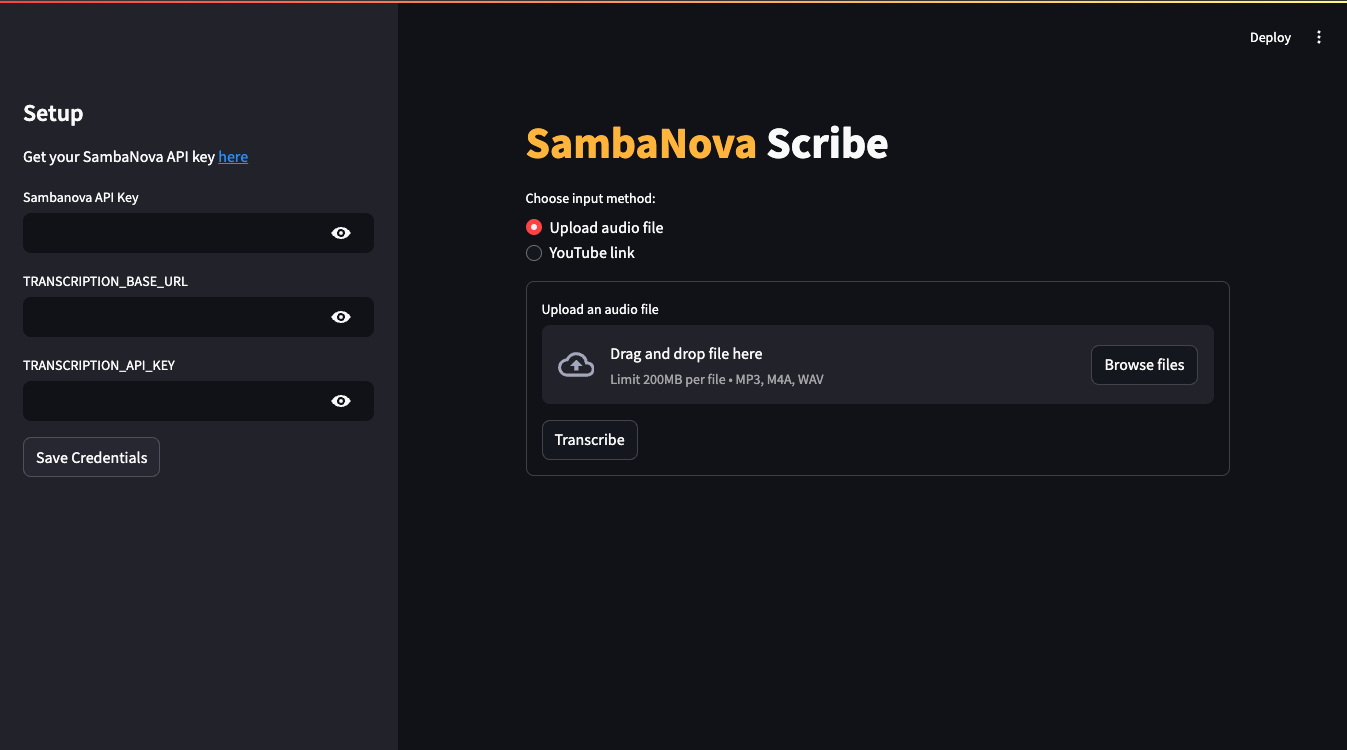
streamlit run streamlit/app.py --browser.gatherUsageStats false After deploying the starter kit you see the following user interface:
After you've deployed the GUI, you can use the starter kit. Follow these steps:
-
Depending if you have set your env variables you will be prompted or not to set them in the set up bar.
-
In the main panel select the input method either a youtube link or a file.
Audios should be mp3, mp4 or wav format Either from youtube download or audio file can not exceed 25MB
-
Click on the Transcribe button this will download the youtube audio or upload your file and generate the transcription of the audio
-
Click on the create summary button to get a bullet point summary of the recording
You can further customize the starter kit based on the use case.
The transcription parameters can be customized in the config.yaml file, the the audio_model section you can change the model you want to use to transcribe, the temperature and the language.
The llm parameters can be customized in the config.yaml file, the the llm section you can change the model you want to use in select_expert parameter, also parameters like temperature or max_tokens_to_generate
Prompting has a significant effect on the quality of LLM responses. Prompts can be further customized to improve the overall quality of the responses from the LLMs. For example, in this starter kit, the following prompt template was used to generate a bullet point summary from the LLM, where text is the transcription of the audio, and num the number of bullet points to generate.
template: |
    <|begin_of_text|><|start_header_id|>system<|end_header_id|> You are a helpful assistant powered by Sambanova's AI chip accelerator, designed to assist users to optimize their workflow.
    Use the following transcription of an audio ang generate {num} bullet points that summarize what is covered in the audio.
    Maintain a professional yet conversational tone. Do not use images or emojis in your answer.
    Prioritize accuracy and only provide information directly supported by the text transcription. <|eot_id|><|start_header_id|>user<|end_header_id|>
    Transcription: {text}
    \n ------- \n
    Answer: <|eot_id|><|start_header_id|>assistant<|end_header_id|>
You can make modifications to the prompt template in the following file:
file: prompts/summary.yaml
All the packages/tools are listed in the requirements.txt file in the project directory.
