- Prompt Engineering Starter Kit
- Before you begin
- Deploy the starter kit GUI
- Use the starterkit GUI
- Customize the starter kit
- Examples, third-party tools, and data sources
Add prompt templates / use cases
You have to set up your environment before you can run the starter kit.
Clone the starter kit repo.
git clone https://github.com/sambanova/ai-starter-kit.git
The next step is to set up your environment variables to use one of the models available from SambaNova. If you're a current SambaNova customer, you can deploy your models with SambaStudio. If you are not a SambaNova customer, you can self-service provision API endpoints using SambaNova Cloud API.
-
If using SambaNova Cloud Please follow the instructions here for setting up your environment variables. Then in the config file set the llm
apivariable to"sncloud"and set theselect_expertconfig depending on the model you want to use. -
If using SambaStudio Please follow the instructions here for setting up endpoint and your environment variables. Then in the config file set the llm
apivariable to"sambastudio", set thebundleandselect_expertconfigs if using a bundle endpoint.
We recommend that you run the the starter kit in a virtual environment or use a container.
If you want to use virtualenv or conda environment
-
Install and update pip.
cd ai-starter-kit/prompt-engineering
python3 -m venv prompt_engineering_env
source prompt_engineering_env/bin/activate
pip install -r requirements.txt
-
Run the following command:
streamlit run streamlit/app.py --browser.gatherUsageStats false
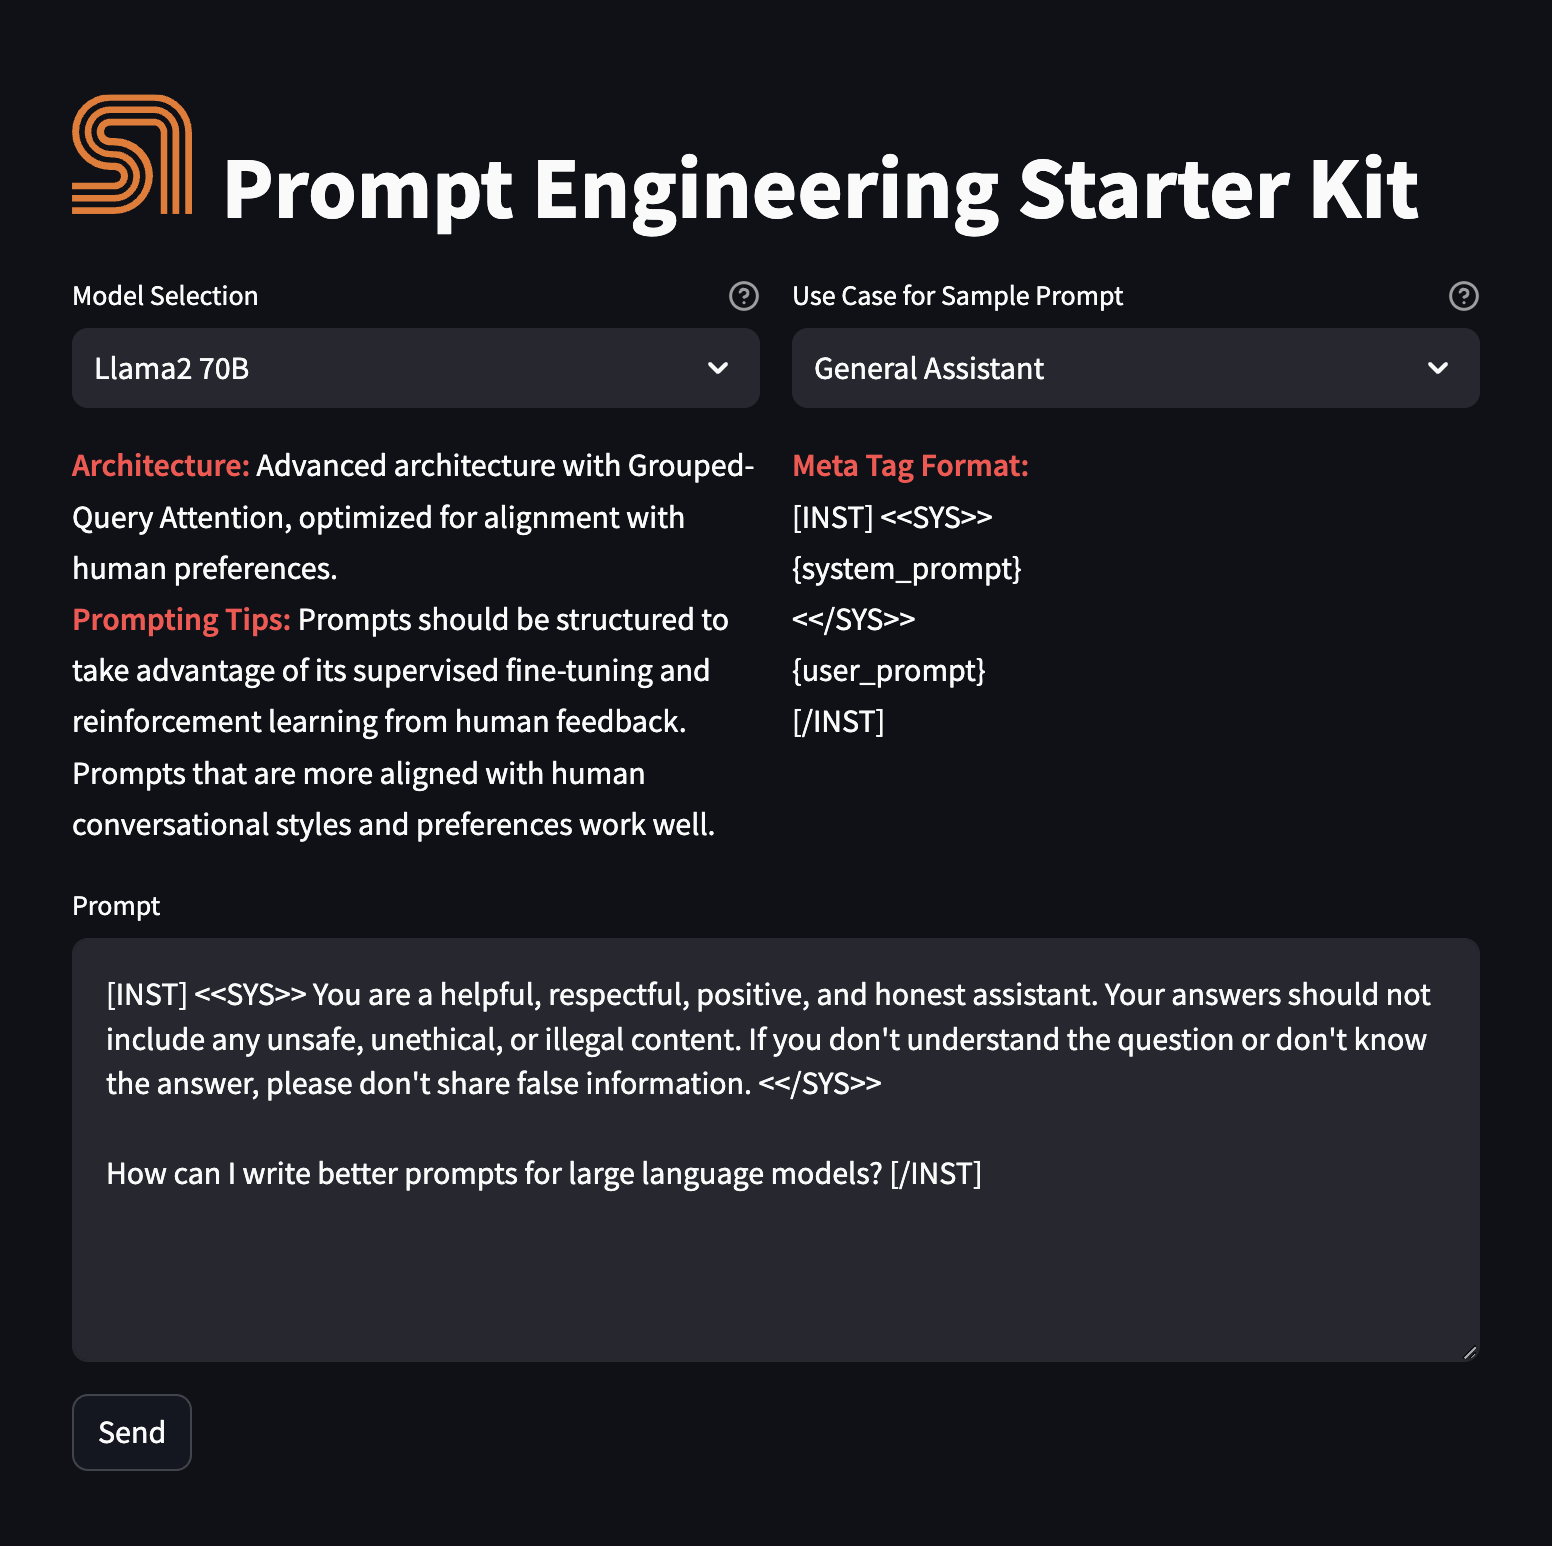
You should see the following user interface:
If you want to use Docker:
-
Update the
SAMBASTUDIO_KEY,SNAPI,SNSDKargs in docker-compose.yaml file -
Run the command:
docker-compose up --build
You will be prompted to go to the link (http://localhost:8501/) in your browser where you will be greeted with the streamlit page as above.
To use the starter kit, follow these steps:
-
Confirm the LLM to use from the text under Model display (Currently, only Llama2 and Llama3 models are available). You'll see a description of the architecture, prompting tips, and the metatag format required to optimize the model's performance.
-
In Use Case for Sample Prompt, select a template. You have the following choices:
-
General Assistant: Provides comprehensive assistance on a wide range of topics, including answering questions, offering explanations, and giving advice. It's ideal for general knowledge, trivia, educational support, and everyday inquiries.
-
Document Search: Specializes in locating and briefing relevant information from large documents or databases. Useful for research, data analysis, and extracting key points from extensive text sources.
-
Product Selection: Assists in choosing products by comparing features, prices, and reviews. Ideal for shopping decisions, product comparisons, and understanding the pros and cons of different items.
-
Code Generation: Helps in writing, debugging, and explaining code. Useful for software development, learning programming languages, and automating simple tasks through scripting.
-
Summarization: Outputs a summary based on a given context. Essential for condensing large volumes of text
-
-
In the Prompt field, review and edit the input to the model, or use directly the default prompt.
-
Click the Send button to submit the prompt. The model will generate and display the response.
You have several options for customizing this starter kit.
You can include more models with the kit. They will then show up in the Model display in the GUI according to the name of the select_expert value in the config file.
If you're using a SambaNova Cloud endpoint, follow these steps:
- In the
config.jsonfile, add theselect_expertname. Then, include the model description in themodelssection, like the ones already there. Ensure that both names are compatible. Example:select_expertvalue:Mistral-7B-Instruct-v0.2- model name under
models:Mistral
- Populate the API key provided for SambaNova Cloud.
- Use
create_prompt_yamlsas a tool to create the prompts needed for your new model. These prompts will have a similar structure as the ones already existing inprompt_engineering/promptsfolder, but will follow the metatags needed for the LLM model we want to add.
If you're using a SambaStudio endpoint, follow these steps:
- Create a SambaStudio endpoint for inference.
- In the
config.jsonfile, add theselect_expertname. Then, include the model description in themodelssection, like the ones already there. Ensure that both names are compatible. Example:select_expertvalue:Mistral-7B-Instruct-v0.2- model name under
models:Mistral
- Populate key variables on your env file.
- Use
create_prompt_yamlsas a tool to create the prompts needed for your new model. These prompts will have a similar structure as the ones already existing inprompt_engineering/promptsfolder, but will follow the metatags needed for the LLM model we want to add.
To change a template:
- Edit the
create_prompt_yamls()method insrc/llm_management.py. - Execute the method to modify the prompt yaml file in the
promptsfolder.
To add a prompt template:
- Follow the instructions in Edit a template.
- Include the template use case in the
use_caseslist ofconfig.yamlfile.
For further examples, we encourage you to visit any of the following resources:
All the packages/tools are listed in the requirements.txt file in the project directory.
