- Download and install Kublr Control Plane documentation
- Create new Kubernetes cluster using Kublr Control Plane.
When the cluster is up and running,
- Download the kubeconfig file.
- Set the
KUBECONFIGenvironment variableexport KUBECONFIG=$(pwd)/kubeconfig.
The Kublr Demo/Installer is a simple and convenient demo version of Kublr running in Docker that allows you deploy Kubernetes clusters. You can also install a non-production licensed version of the full Kublr Platform from the Kublr Demo/Installer.
By downloading and using the Kublr Demo/Installer and Kublr, you agree to the Terms of Use and Privacy Policy.
Linux:
sudo docker run --name kublr -d --restart=unless-stopped -p 9080:9080 kublr/kublr:1.26.0
Windows:
docker run --name kublr -d --restart=unless-stopped -p 9080:9080 kublr/kublr:1.26.0
The Kublr Demo/Installer is a lightweight platform that allows you to run a demo or limited functionality, dockerized Kublr version. You can use it to:
- Manage a standalone Kubernetes cluster;
- Manage the full feature Kublr Platform;
The Kublr Demo/Installer stores all data about the clusters inside the Docker container. Therefore, if you delete the Docker container, you will lose all cluster and Kublr platform related data — though you won't lose the cluster and platform itself. The Kublr team recommends using the Kublr Demo/Installer to verify that a Kubernetes cluster can be created in your environment. So, test it before deploying a full and more permanent Kublr Platform in the cloud or on-premise.
- Download and install Docker
- 64-bit operating system to run the Kublr Demo/Installer
- To deploy a Kubernetes cluster or the full Kublr Platform, you’ll need an AWS, Azure, GCP account or an on-premise environment.
Open a terminal and launch following command:
sudo docker run --name kublr -d --restart=unless-stopped -p HOST_PORT:9080 -e KUBLR_HOST=HOST_IP:HOST_PORT kublr/kublr:1.26.0
Note Hereinafter, "sudo" is Linux specific - omit it to get command for Windows.
- HOST_PORT is a port available both on you workstation for the browser and available outside, from the network;
Here's a Kublr Demo/Installer launch command example:
sudo docker run --name kublr -d --restart=unless-stopped -p 9080:9080 kublr/kublr:1.26.0
The Kublr UI will be available on https://localhost:9080 (admin/kublrbox)
Note There can be a different address depending on your environment. Read carefully for the Kublr in Docker start notification text, as it may contain information about the access adress.
If you are going to set up a bare metal cluster on the Kublr platform, please add this additional parameter KUBLR_HOST, where the HOST_IP is available for cluster nodes:
sudo docker run --name kublr -d --restart=unless-stopped -p HOST_PORT:9080 -e KUBLR_HOST=HOST_IP:HOST_PORT kublr/kublr:1.26.0
If you have already started the Kublr Demo/Installer without the option KUBLR_HOST or your IP address has been changed (for example to switch networks), please use this command to correct the KUBLR_HOST:
docker exec -i kublr /bin/bash -c 'echo "KUBLR_HOST=HOST_IP:HOST_PORT" > /ip.external'; docker restart kublr
In order to run the Kublr Demo/Installer in an air-gapped environment, please request the launch command via [email](mailto:[email protected]?subject=AirGap Kublr Demo/Installer running command request) or use this contact us form.
By default, the Kublr UI, Keycloak UI, and API will be available on the exposed port 9080. After downloading the Docker image, it will take less than a minute for Kublr to start and be viewable.
- The Kublr UI is available on HTTP: https://localhost:9080, use admin/kublrbox for login to Kublr UI;
- Keycloak is available on HTTP: https://localhost:9080/auth, use admin/admin to manage Keycloack;
If you use KUBLR_HOST to define the public IP address and public port number of the host running Kublr (e.g. 192.168.99.234:9981), run this command:
sudo docker run --name kublr -d --restart=unless-stopped -p HOST_PORT:9080 -e KUBLR_HOST=HOST_IP:HOST_PORT kublr/kublr:1.26.0
Navigate to the following URLs:
- https://HOST_IP:HOST_PORT - Kublr UI (admin/kublrbox);
- https://HOST_IP:HOST_PORT/auth - Keycloack (admin/admin);
On first logon into Kublr, you will be prompted to complete your profile. Set your first and last names and valid business email address.

The "valid business email address" means that your email at most public domains (like "[email protected]", "...@ÿahoo.com" etc.) will not be accepted - instead you should use your organization or other private domain.
For instructions on deploying cluster on other supported cloud platforms or baremetal, see Documentation.
MICROSOFT - OFFICIAL PARTNERSHIP On Jun 29 2021, Microsoft's Azure Arc officially declared Kublr one of its technology partners.
Steps below describe how to use Kublr to create a cluster in Microsoft Azure infrastructure and deploy a simple application (WordPress). The following steps are described:
- Connecting Azure and Kublr.
- Creating Kubernetes cluster in Azure with Kublr.
- Installing and configuring kubectl.
- Application example: deploying WordPress to cluster using Helm.
-
Log into Kublr using your credentials.
-
On the left menu, click Credentials.
-
Click Add Credentials.
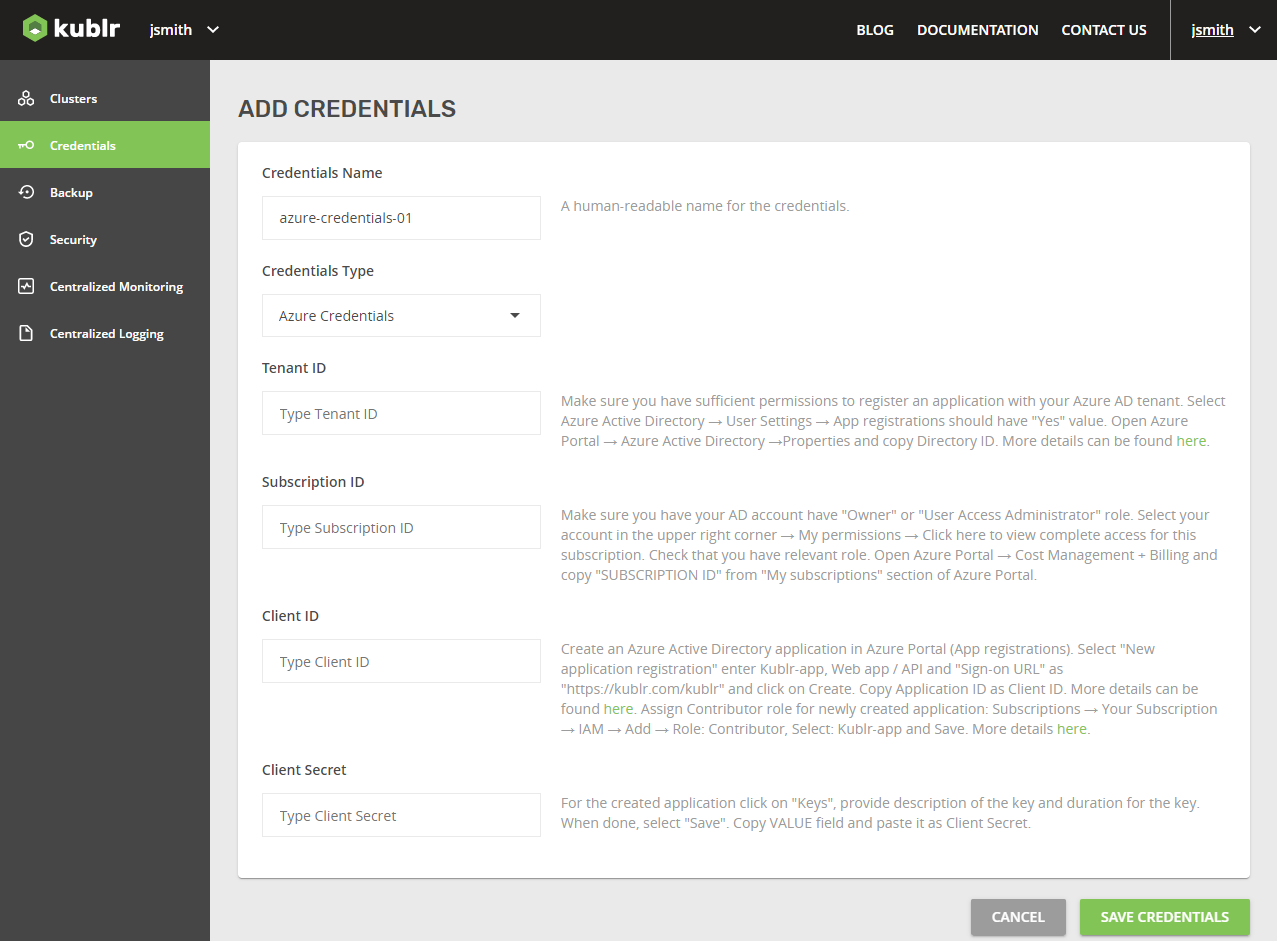
The ADD CREDENTIALS dialog is displayed.
-
In the ADD CREDENTIALS dialog, set Credentials Type to "Azure Credentials". The dialog is updated to display the Azure credentials specific fields.
-
Enter Credentials Name.
-
Set:
- Tenant ID
- Subscription ID
- Client ID
- Client Secret
-
Click Save Credentials. The "Credentials have been successfully created." popup will be displayed.
-
To verify if credentials are valid and ready to be used, mouse over the created credentials and click the displayed Test button.
Verification success popup will be displayed.
-
Click Ok.

To add a new cluster:
-
On the left menu, click Clusters.
-
Click Add Cluster.
The Select Installation Type dialog is displayed.
-
In the Select Installation Type dialog, select Platform or Cluster.
-
Click Continue Setup.
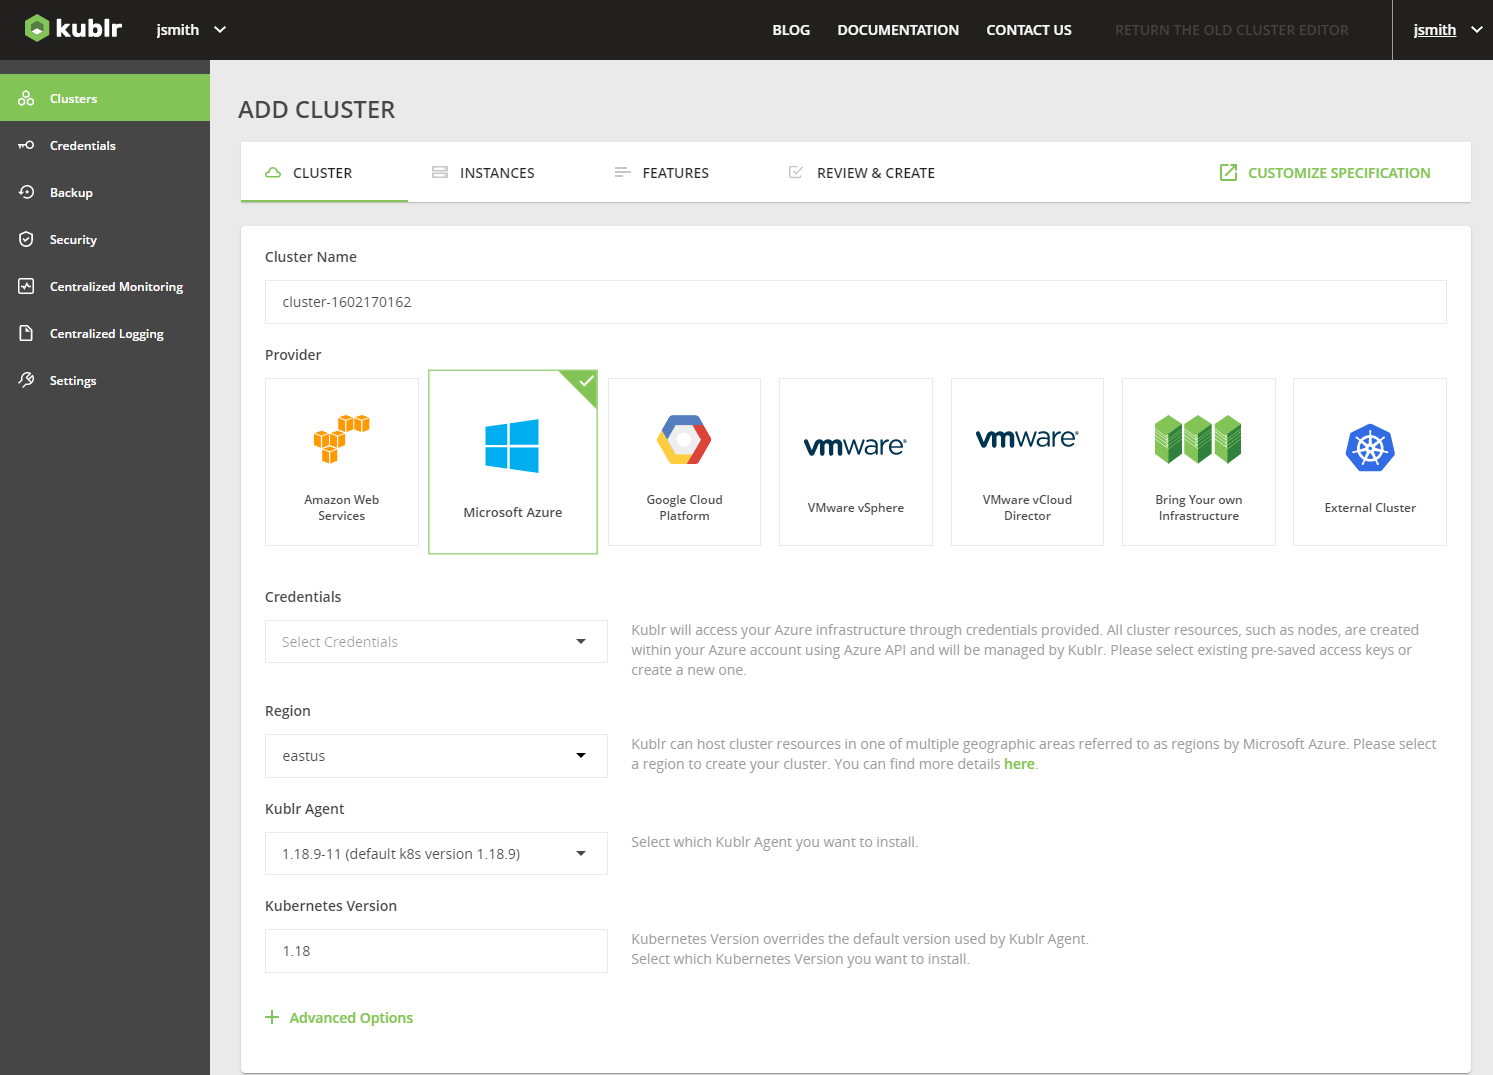
The add cluster/platform dialog is displayed.
-
Set Provider to "Microsoft Azure".
-
From the Credentials list, select previosly created Azure credentials.
If credentials were not created previously, use Add New Credentials.
-
Specify Cluster Name.
-
Set:
- Region
- Kublr Agent
- Kubernetes Version
-
Optionally, set Advanced Options.
-
Use the
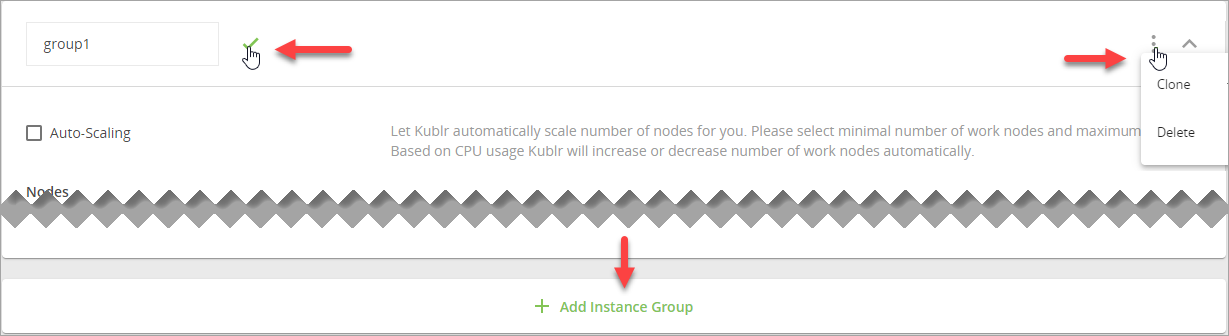
INSTANCEStab to set:- Basic parameters for you master and working nodes.
- Public SSH key (required) for logging to master or worker nodes via SSH.
- Optionally, Advanced Options for them.
Note For your working nodes, you can have as many intance groups as you need (clone or delete the current instance group, or add another one). If necessary, give specific name to each group.
-
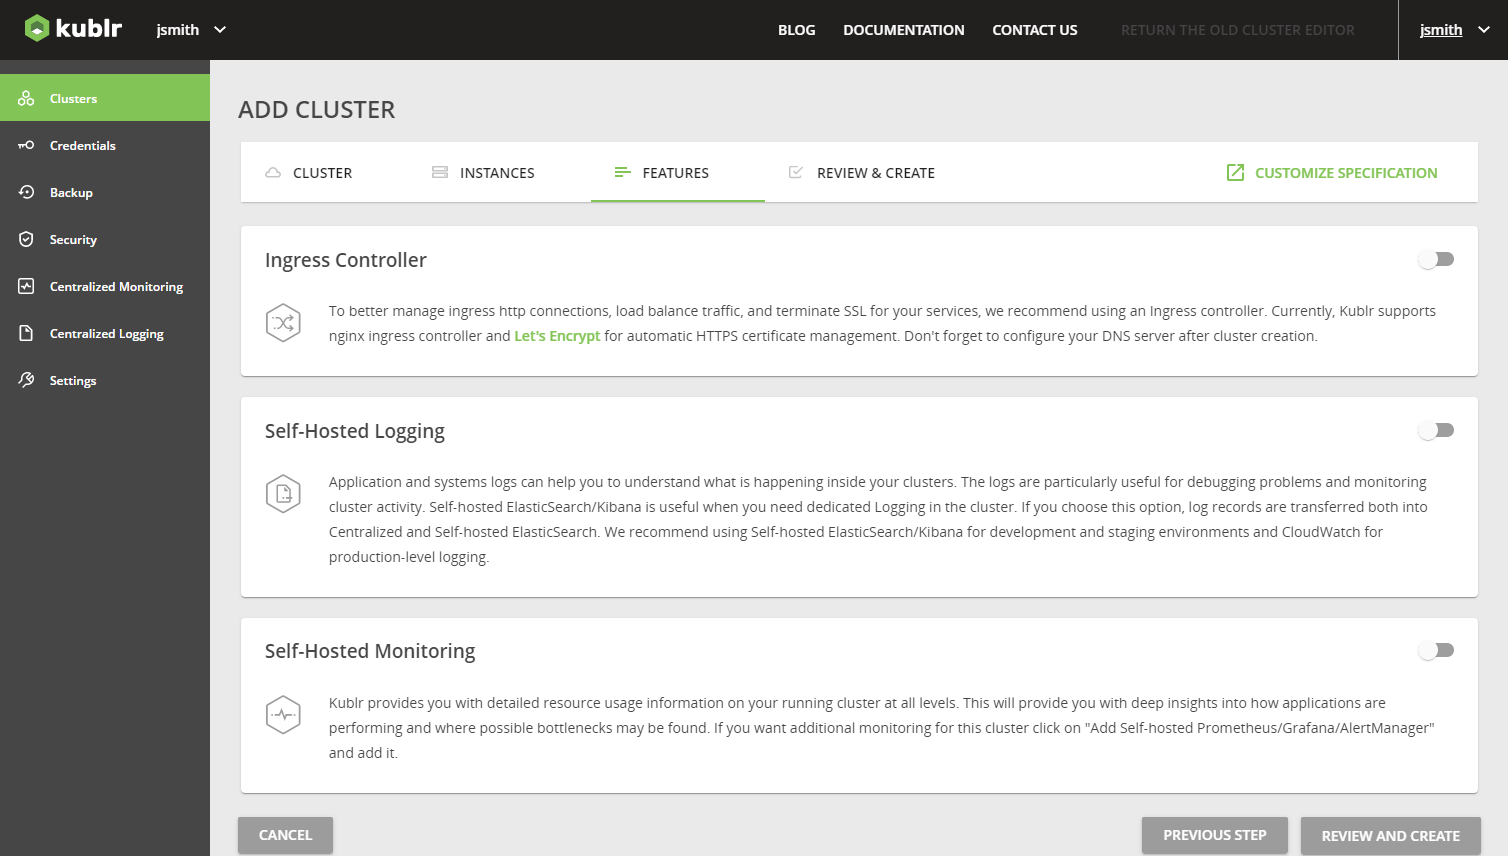
Use the
FEATUREStab to select and configure FEATURES that you want to include into your cluster. -
Click the
REVIEW & CREATEtab. -
Review your cluster parameters.
-
At the bottom of the dialog, click CONFIRM AND INSTALL.
A notification is displayed "Your cluster is being created. It might take a few minutes."
-
In the notification window, click OK.
Your new cluster page is displayed on the Events tab showing the cluster creation progress.


After the cluster becomes ready, use Download Kube Config File link on Overview tab. This will download admin kubeconfig file which you can supply to sonobuoy, kubectl, helm and other tools to test and manage your cluster.
Download a sonobuoy binary release of the CLI, or build it yourself by running:
$ go get -u -v github.com/heptio/sonobuoy

$ sonobuoy run --mode=certified-conformance
Then the status commands $ sonobuoy status indicate that the execution is completed, you can download the results.
$ outfile=$(sonobuoy retrieve)untar the tarball, then add plugins/e2e/results/{e2e.log,junit_01.xml}
$ mkdir ./results; tar xzf $outfile -C ./results