Vertex AI Pipelines is a serverless ML workflow tool running on the Google Cloud Platform. It is an easy way to quickly run your code in a production-ready, repeatable cloud orchestrator that requires minimal setup without provisioning and paying for standby compute.
In order to run on Vertex AI you will need to do a bit of configuration within GCP to create all the required resources. In total, you will need to have:
Additionally, the Vertex AI API needs to be enabled.
On top of having these resources, you will also need to do some permission tuning.
First, you will need to authenticate yourself using the gcloud cli:
gcloud auth loginThen you will need to authorize your local Docker client to have access the GCP container registry.
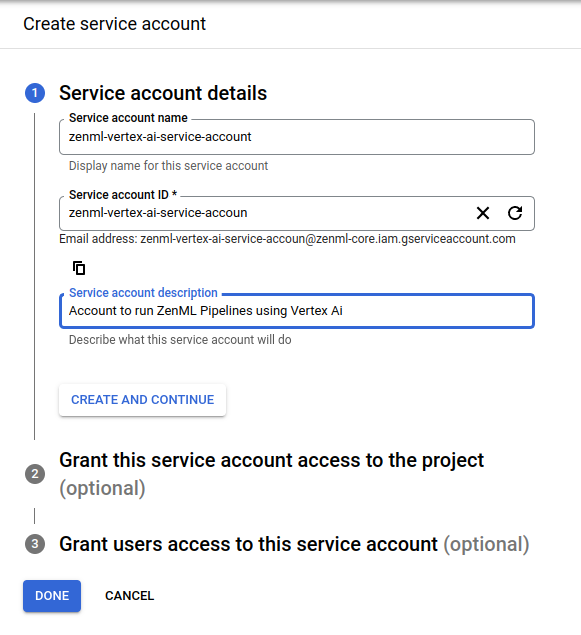
gcloud auth configure-dockerYou will also need to create a service account.
This service account will need permissions to run Vertex AI jobs. Additionally, your user account will need to have permissions to use the service account.
Before registering the stack, you need to deploy a remote ZenML server on GCP. See the deployment guide for more information.
Once everything is done on the GCP side, we will need to configure a stack with all of these components.
- The artifact store to store step outputs in a GCP Bucket.
- The Docker images that are created to run your pipeline are stored in GCP container registry.
- The Vertex orchestrator is responsible for running your ZenML pipeline in Vertex AI.
- An Image Builder which will be used to build the Docker image that will be used to run the training step.
When running the upcoming commands, make sure to replace all the with the correct values from your GCP project.
# install CLI
pip install "zenml[server]"

# install ZenML integrations
zenml integration install gcp

# pull example
zenml example pull vertex_ai_orchestration
cd zenml_examples/vertex_ai_orchestration

# Create a zenml repository
zenml init

# In order to create the GCP stack components, we'll need to install one
# additional ZenML integration:
zenml integration install gcp

# The CONTAINER_REGISTRY_URI will have a format like this: eu.gcr.io/xxx/xxx
zenml container-registry register gcp_registry --flavor=gcp --uri=<CONTAINER_REGISTRY_URI>

# The PATH_TO_YOUR_GCP_BUCKET is the path to your GCP bucket: gs://xxx
zenml artifact-store register gcp_artifact_store --flavor=gcp --path=<PATH_TO_YOUR_GCP_BUCKET>

# The orchestrator needs the PROJECT_ID and the GCP_LOCATION in which to
#  run the Vertex AI pipeline. Additionally you might need to set the
#  WORKLOAD_SERVICE_ACCOUNT to the service account you created with secret
#  manager access, it will be in the format: [email protected]
zenml orchestrator register vertex_orch --flavor=vertex --project=<PROJECT_ID> --location=<GCP_LOCATION>

# Register the local image builder
zenml image-builder register local_builder --flavor=local

# Now we're ready to assemble our stack
zenml stack register gcp_vertex_stack -a gcp_artifact_store -o vertex_orch -c gcp_registry -i local_builder --set
Your stack should look something like this when you're done:
Once your stack is fully set up, you should be good to go.
python run.pyThat's it! If everything went as planned this pipeline should now be running in the cloud! You should be able to access the Vertex AI Pipelines UI with the link returned to the run logs. It will look something like this:
If you're using the Vertex orchestrator and some of your pipelines steps have certain hardware requirements, you can specify them using the step decorator as follows:
from zenml.steps import step, ResourceSettings

@step(settings={"resources": ResourceSettings(cpu_count=8, memory="16GB")})
def my_step(...) -> ...:
...Once you're done experimenting, you can stop the port forwarding and delete the example files by calling:
zenml stack down --force
rm -rf zenml_examples
Additionally, you might have to clean up your cloud resources to avoid running costs for storage of artifacts, containers or metadata.
Our docs regarding the VertexAI integration can be found here.
If you want to learn more about orchestrators in general or about how to build your own orchestrators in ZenML check out our docs.


