English | 中文
- Required
- Run sx1302_hal on the Raspberry Pi
- Create a gateway on TTN
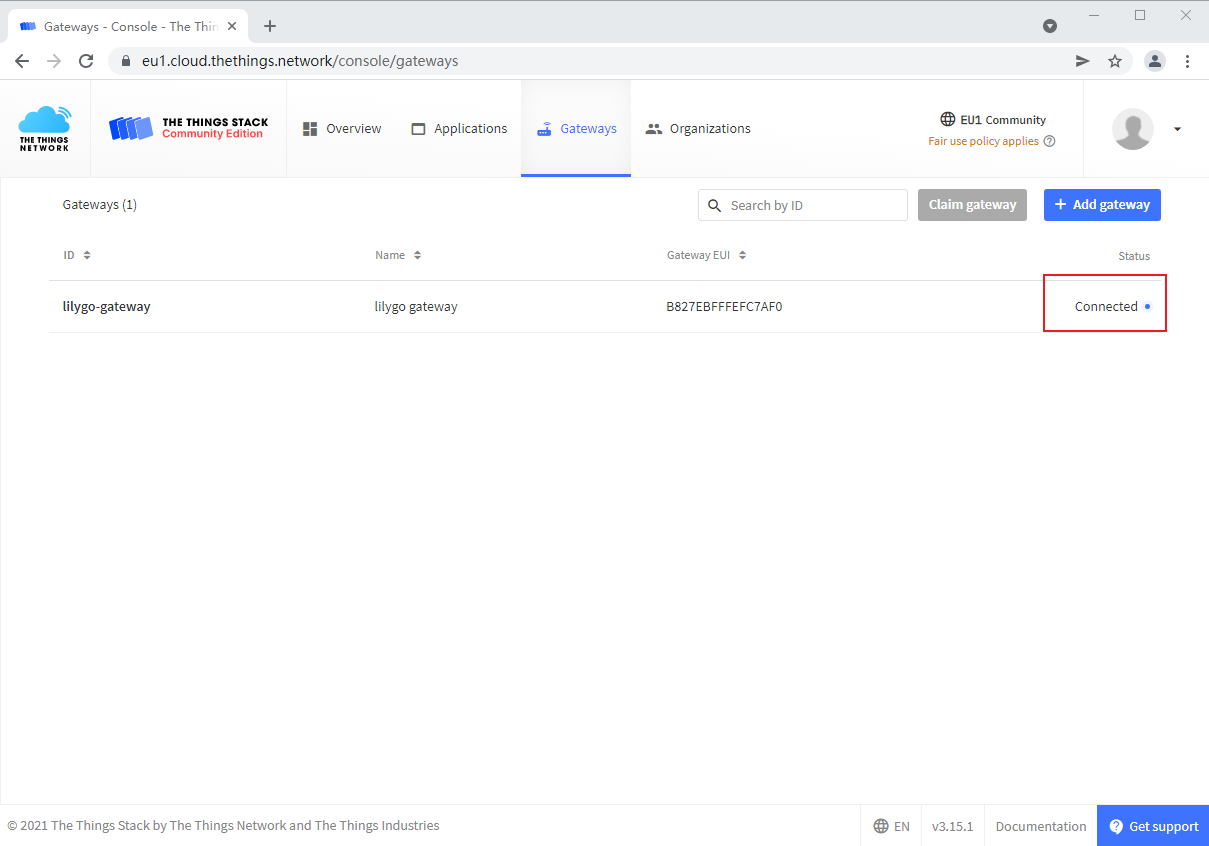
- Check gateway connection status
- Create end device model on TTN
- LoRaWAN End Device
- Q&A
- Version History
LoRaWAN End Device: T-Motion S76G
LoRaWAN Gateway: Raspberrypi Model 3B + T-SX1302
raspios: raspios_lite_arm64-2022-01-28
TTN Version: v3.15.1
NOTE
The LoRaWAN gateway that has been connected to TTN, you can ignore this section
Execute sx1302_hal.sh on Raspberry Pi to automatically deploy sx1302_hal.
sudo ./sx1302_hal.sh -f eu868
sudo rebootpi@raspberrypi:~ $ cat .sx1302_hal/.output
Gateway EUI: B827EBFFFEFC7AF0
Gateway Server address: eu1.cloud.thethings.network
Gateway Server port: 1700-
Log in to https://console.cloud.thethings.network/
-
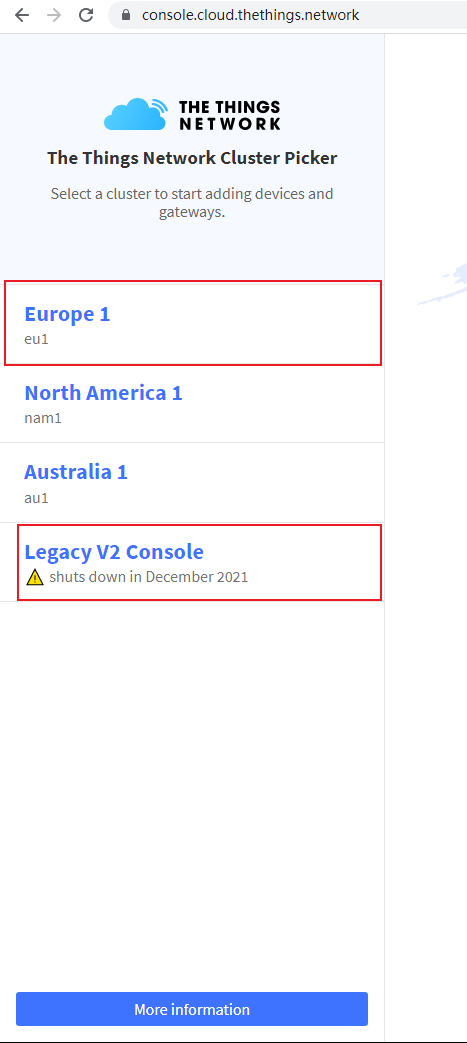
Select the cluster according to the frequency band supported by the gateway. The frequency band supported by
T-SX1302is868MHZ, here you need to select theEurope1cluster! Warning
Legacy V2 Consoleis a server of TTN V2 version, it will be closed in December 2021, it is not recommended to use -
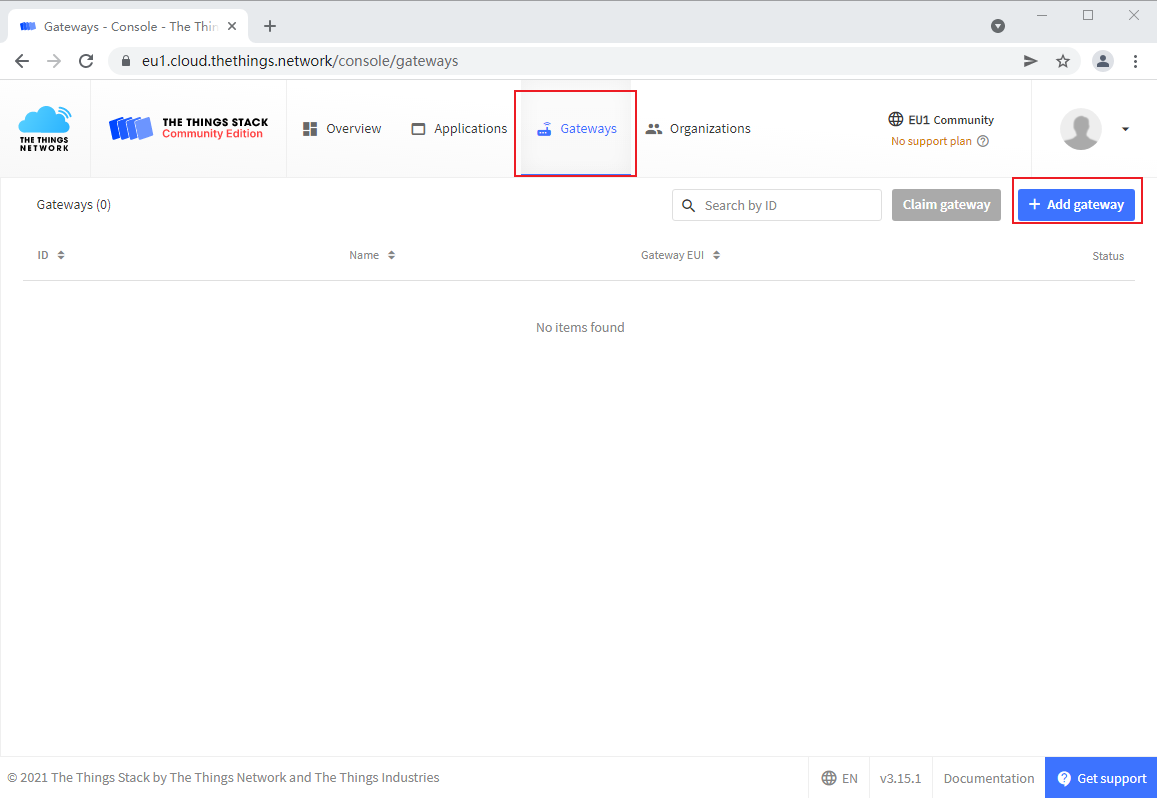
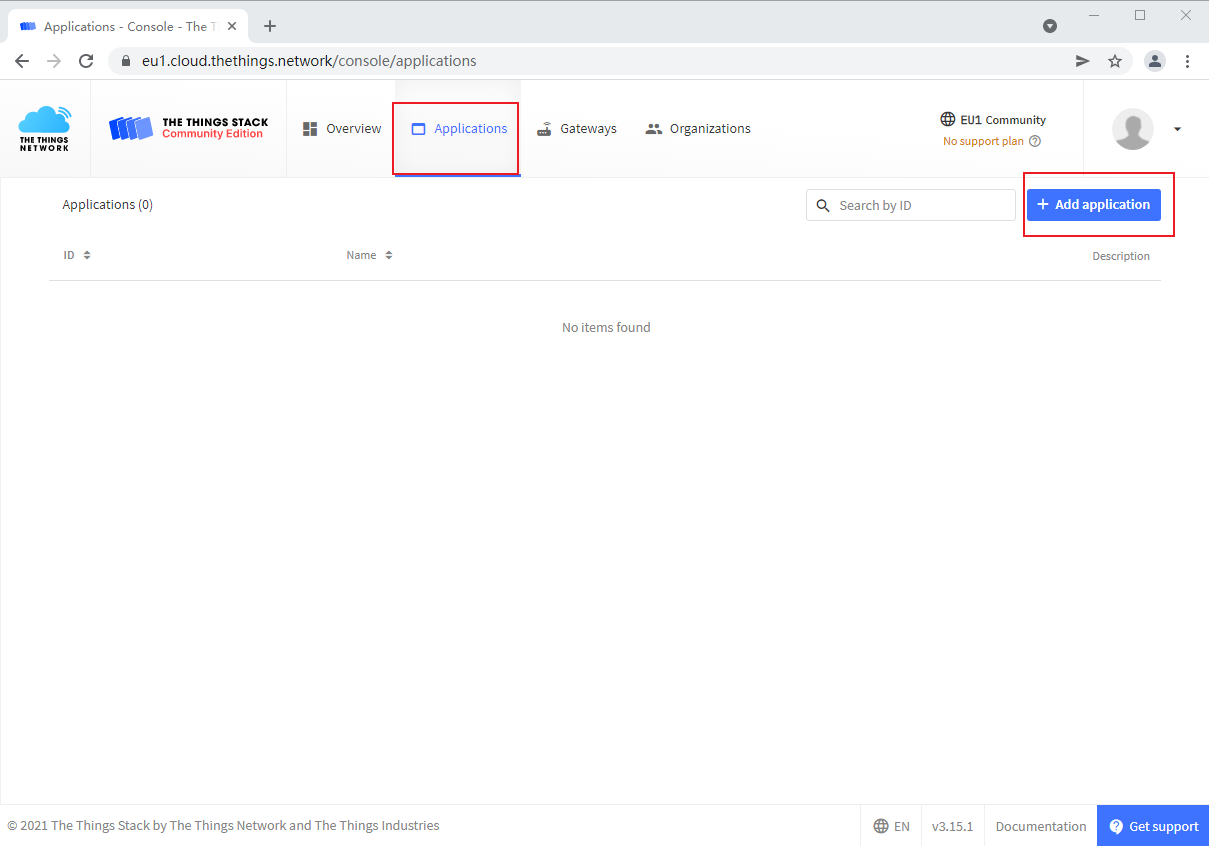
Create a gateway
-
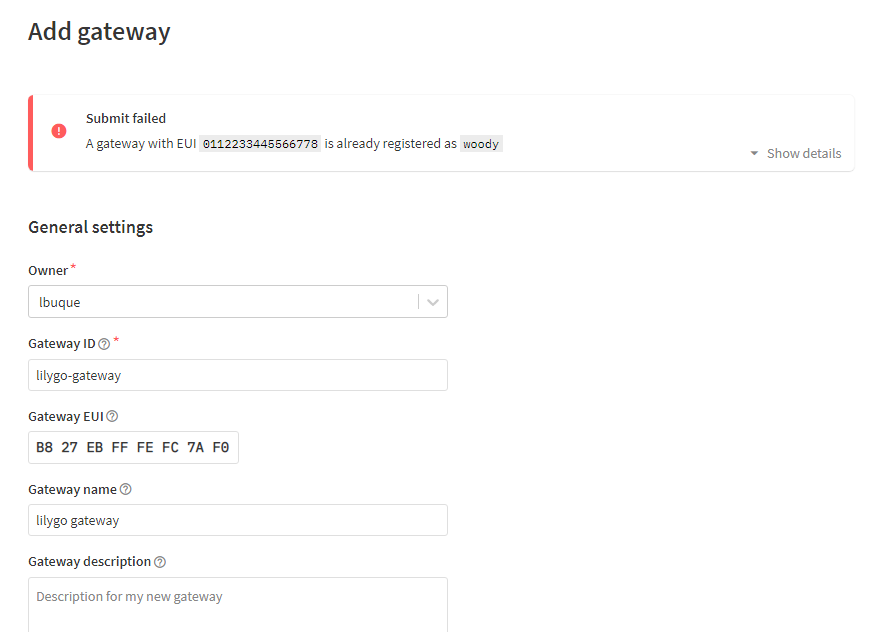
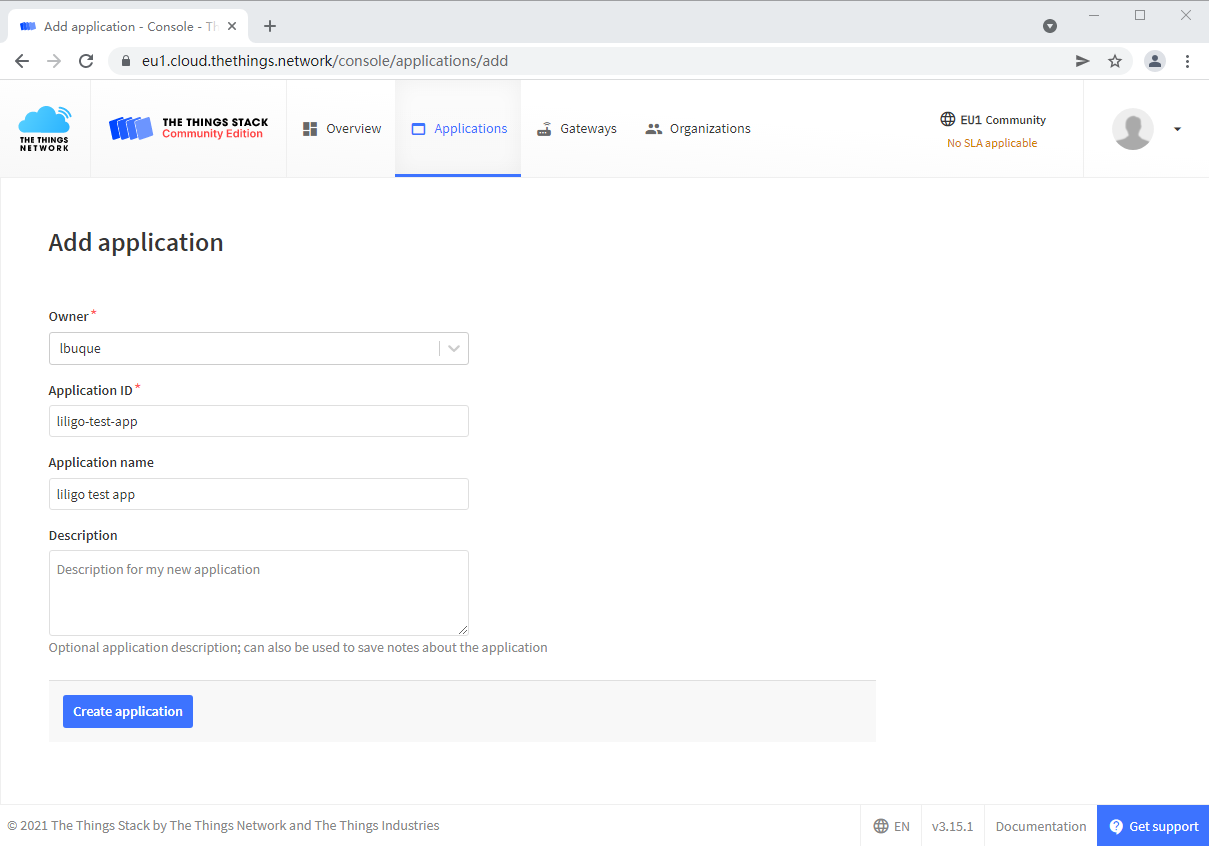
Configure gateway information
Fill in the [Gateway EUI] obtained after deploying sx1302_hal (#get related information)
-
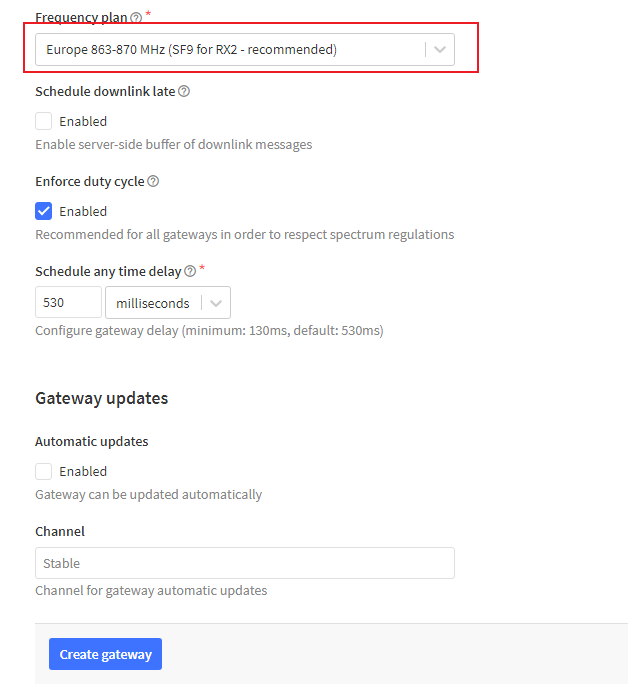
Select frequency,Need to be consistent with the frequency band parameters of sx1302_hal.sh
Check if the gateway is successfully connected on TTN
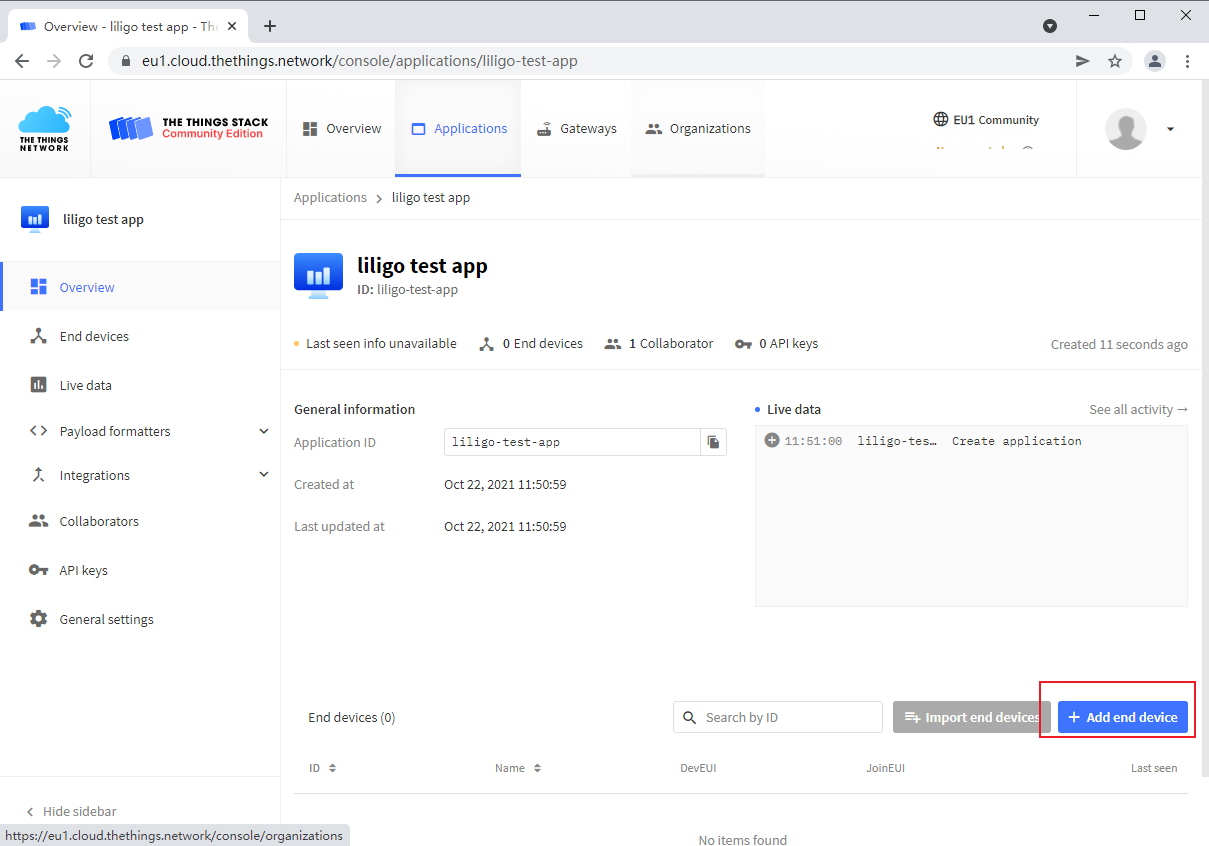
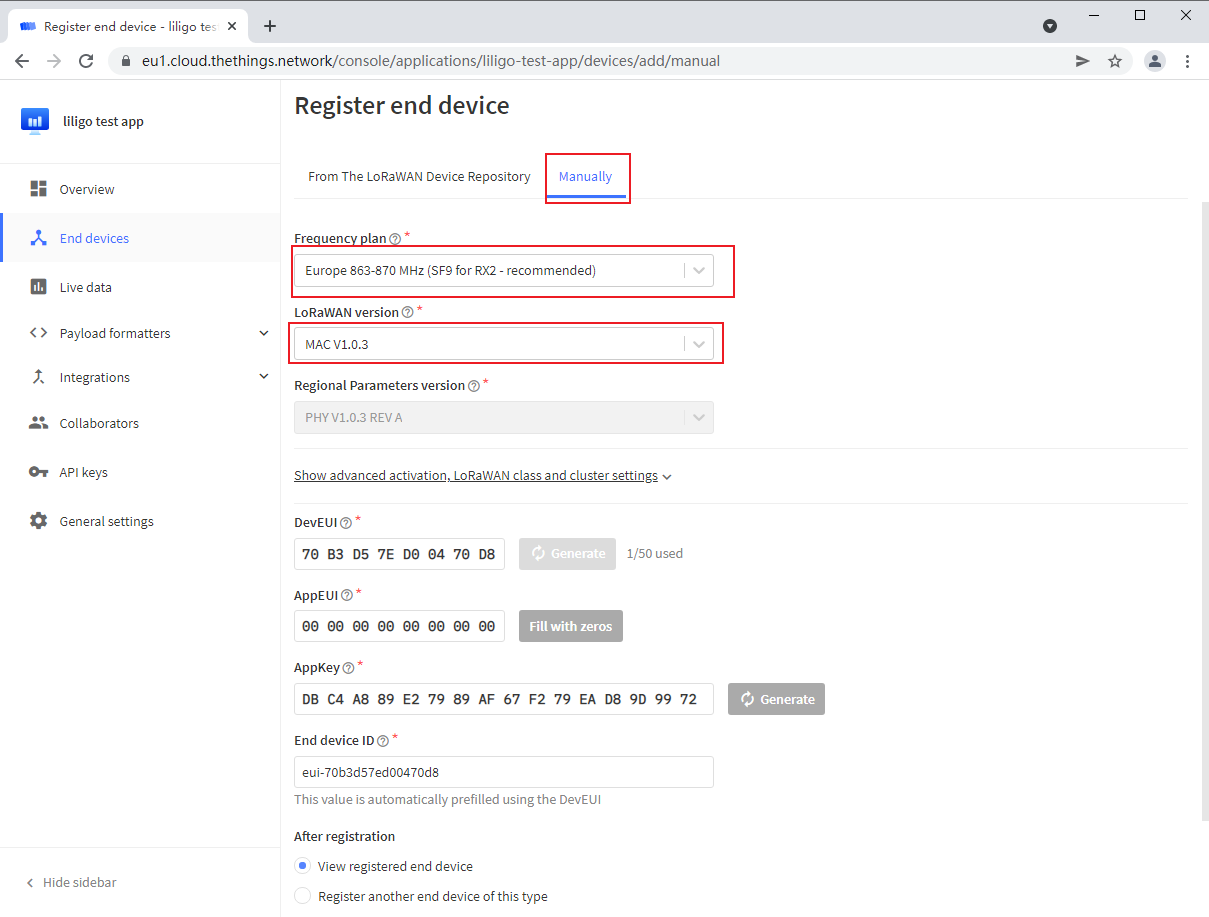
Create a lorawan device, use OTAA to access the network by default
NOTE
DevEUI,AppEUI,AppKeycan be selected to generate
- Download Example code
git clone https://github.com/Xinyuan-LilyGO/LilyGo-LoRa-Series.git- Create Arduino project
Go to the LilyGo-LoRa-Series\examples\TTN\TTN_OTTA directory and modify the TTN_OTTA.cpp file to TTN_OTTA.ino
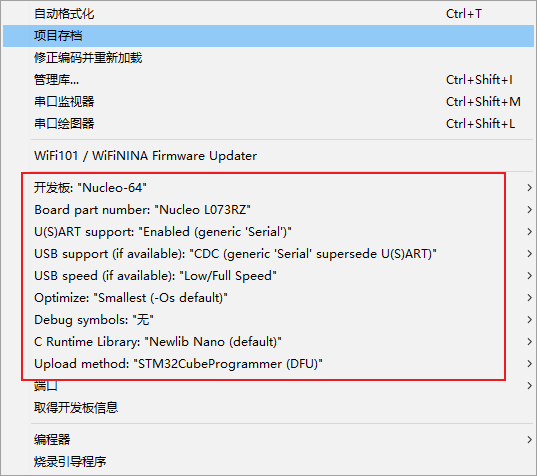
Open TTN_OTTA.ino and configure the project as follows:
- Modify board information
Make the following changes to utilities.h·:
diff --git a/examples/TTN/TTN_OTTA/utilities.h b/examples/TTN/TTN_OTTA/utilities.h
index 2874773..9b8aade 100644
--- a/examples/TTN/TTN_OTTA/utilities.h
+++ b/examples/TTN/TTN_OTTA/utilities.h
@@ -7,7 +7,7 @@
 // #define LILYGO_T3_V1_0
 // #define LILYGO_T3_V1_6
 // #define LILYGO_T3_V2_0
-// #define LILYGO_T_MOTION_S76G
+#define LILYGO_T_MOTION_S76G

 // #define LILYGO_T_MOTION_S78G         //Not support
 /*
@@ -171,12 +171,3 @@
 #else
 #error "For the first use, please define the board version and model in <utilities. h>"
#endif- Modify LoRaWAN network access information
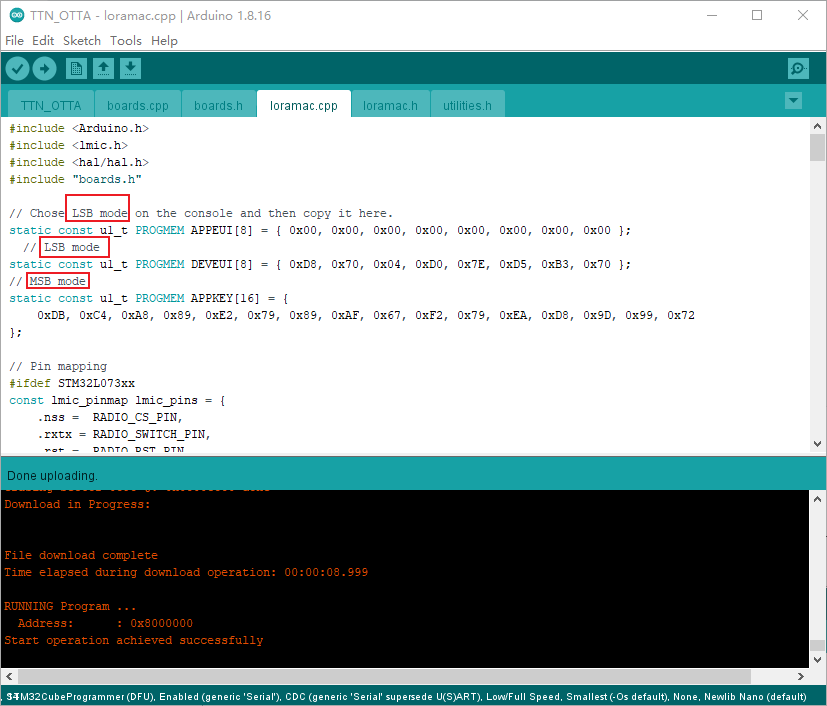
Fill the DevEUI, AppEUI, AppKey generated on TTN into the loramac.cpp file according to the corresponding byte order:
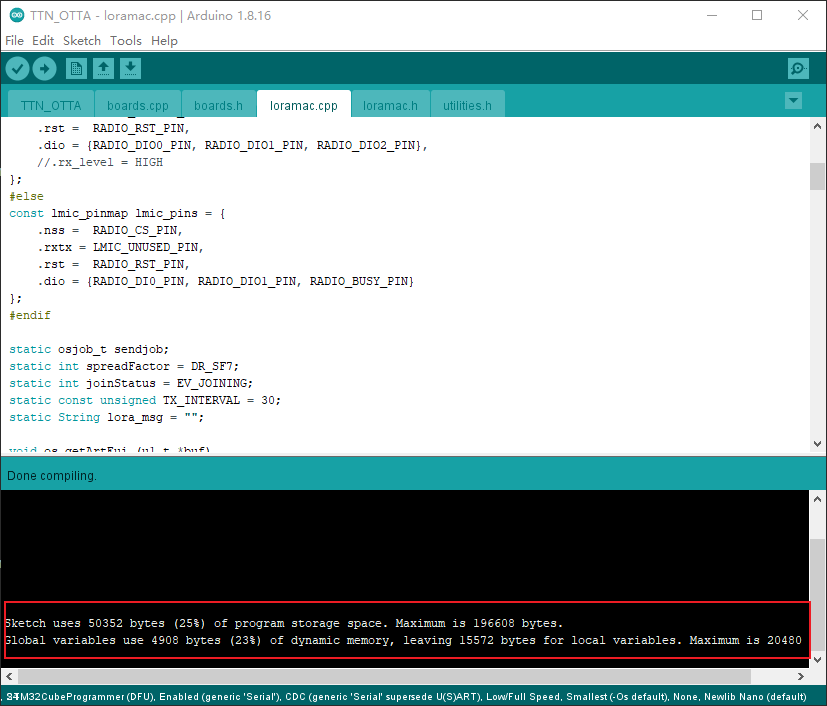
Compiled successfully:
-
Insert
T-Motion S76Ginto the USB port of the PC -
Press and hold the
BOOTbutton, then press theRESETbutton, and click theuploadbutton in the Arduino IDE -
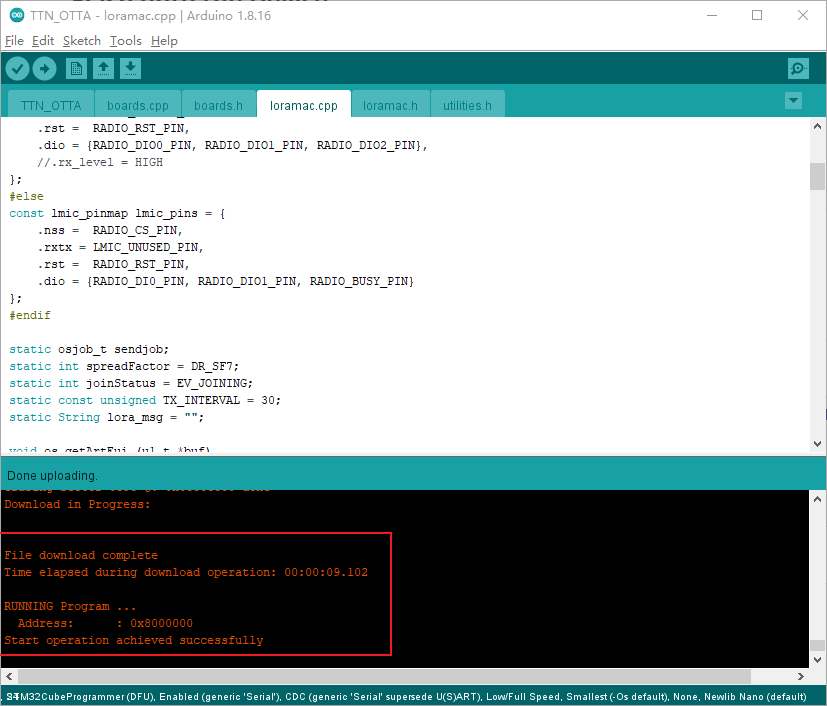
The firmware is successfully burned as follows
-
Reconnect
T-Motion S76Gto the USB port of the PC
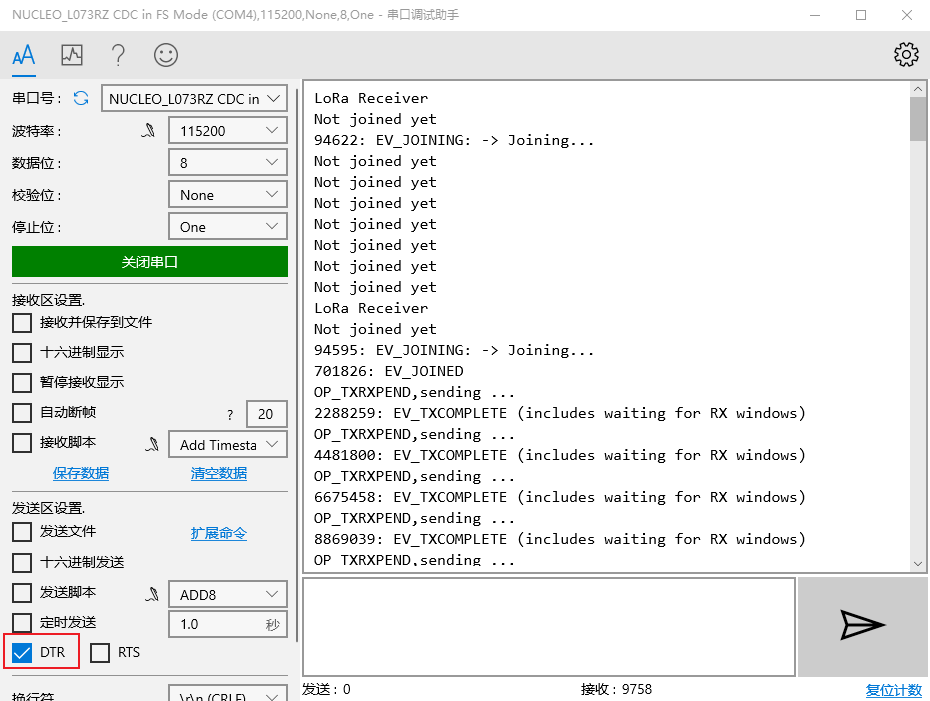
Use the serial port debugging tool, select the DTR check box, plug the T-Motion S76G into the USB interface of the PC and quickly open the serial port, you can see the debugging information output
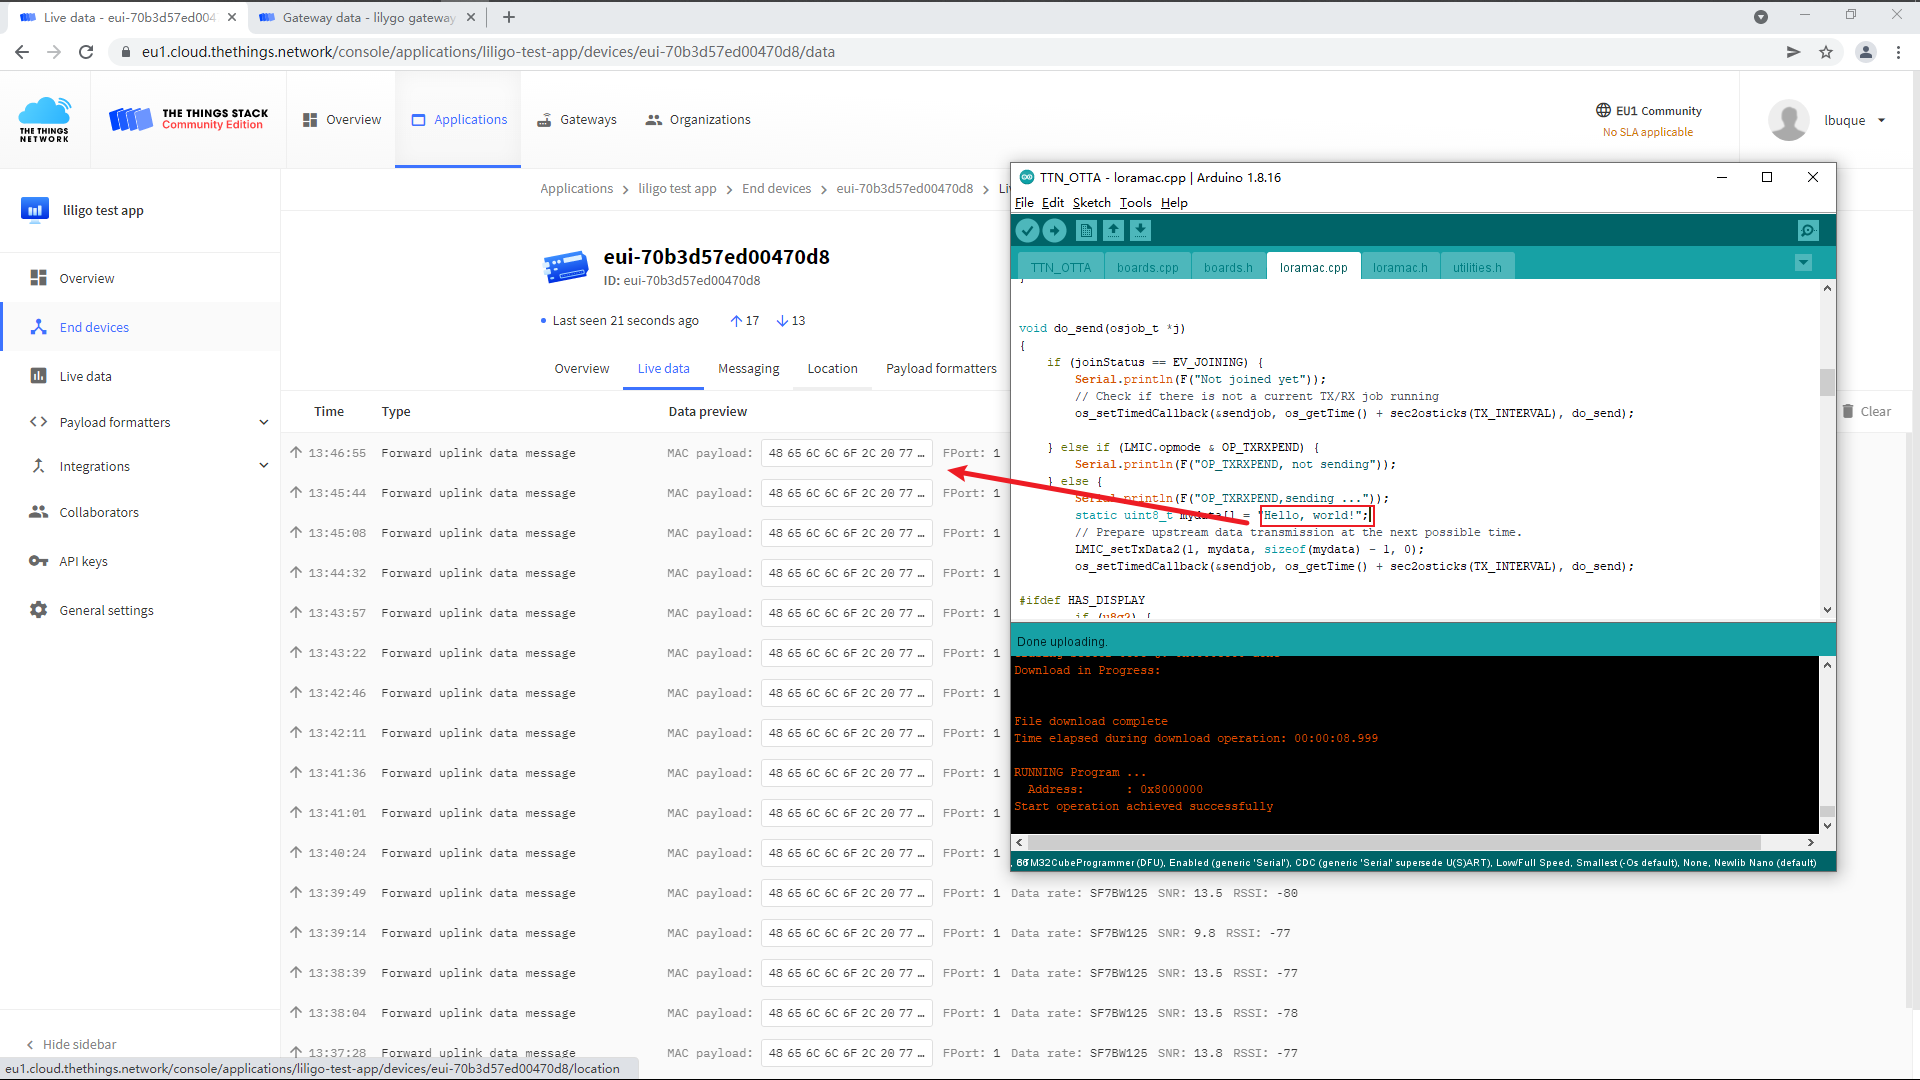
On TTN, you can see that the data in the MAC payload field is consistent with the data sent in loramac.cpp
The following problems occur because of the incompatibility of the LMIC library version:
loramac.cpp:25:1: error: 'const lmic_pinmap' has no non-static data member named 'rx_level'
   25 | };
      | ^
exit status 1
'const lmic_pinmap' has no non-static data member named 'rx_level'
Make the following modifications to the loramac.cpp file:
diff --git a/examples/TTN/TTN_OTTA/loramac.cpp b/examples/TTN/TTN_OTTA/loramac.cpp
index 896be89..6b39f54 100644
--- a/examples/TTN/TTN_OTTA/loramac.cpp
+++ b/examples/TTN/TTN_OTTA/loramac.cpp
@@ -21,7 +21,7 @@ const lmic_pinmap lmic_pins = {
     .rxtx = RADIO_SWITCH_PIN,
     .rst =  RADIO_RST_PIN,
     .dio = {RADIO_DIO0_PIN, RADIO_DIO1_PIN, RADIO_DIO2_PIN},
-    .rx_level = HIGH
+    //.rx_level = HIGH
 };
 #else
 const lmic_pinmap lmic_pins = {
@@ -217,5 +217,3 @@ void loopLMIC(void)
 {
     os_runloop_once();
}| Version | Major changes | Date | Author |
|---|---|---|---|
| 1.0.0 | Initial release | 2021/10/22 | liangyy |
