This repository contains scripts and helpers to convert your Proxmox VM's to containers - with a special emphasis on DietPi VMs, but the tweaks for DietPi are ignored on non-DietPi distributions.
Clone the repository with git, mark the script as executable and you're on your way!
git clone https://github.com/thushan/proxmox-vm-to-ct.git
cd proxmox-vm-to-ct
chmod +x ./proxmox-vm-to-ct.sh
No git? No problemo, just wget it.
wget https://raw.githubusercontent.com/thushan/proxmox-vm-to-ct/main/proxmox-vm-to-ct.sh
chmod +x ./proxmox-vm-to-ct.sh
Once downloaded, to create an container for the vm with the hostname the-matrix named matrix-reloaded with the default CT configuration on your pve storage local-zfs:
./proxmox-vm-to-ct.sh --source the-matrix \
                      --target matrix-reloaded \
                      --storage local-zfs \
                      --default-config
If your VM has docker, podman or containerd installed, use the --default-config-containerd that sets up default containerd configuration:
./proxmox-vm-to-ct.sh --source the-matrix \
                      --target matrix-reloaded \
                      --storage local-zfs \
                      --default-config-containerd
You can use the fully qualified host name (Eg. the-matrix or the-matrix.fritz.box) or the IP (Eg. 192.168.0.101) of the source VM you want to convert. Make sure the source VM is running as we SSH in.
See further examples below.
Tip
If you want to retain the files for later, you can use the --source-output argument with a path to save it elsewhere.
Eg. --source-output ~/dietpi-first-attempt.tar.gz
Otherwise it will be created in your /tmp/proxmox-vm-to-ct folder.
Next time you can reuse the above to create more containers by passing in the filename as the source.
See examples below.
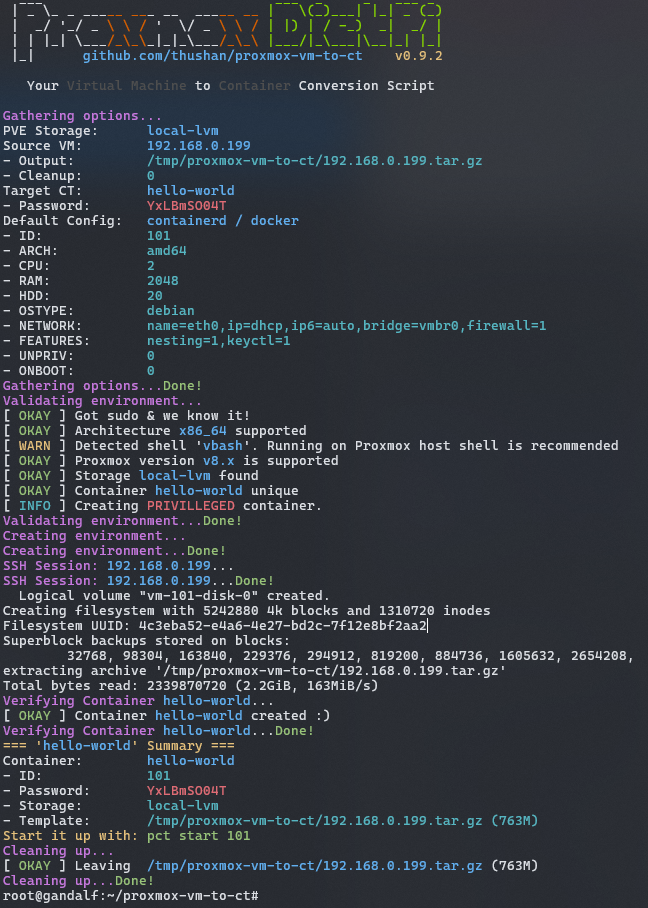
Creating a container named hello-world from a dockerised VM 192.168.0.199, with an auto-generated password & default containerd options that's stored in local-lvm:
Now, you can start it up via $ pct start 101 & login with the password above - ssh don't tell anyone!
-
Install your 'base' image as a VM (be it DietPi or Debian etc.) on Proxmox as normal.
You could opt to use @dazeb/proxmox-dietpi-installer to automate it.
- Configure the VM with the core tools you'd like.
- Eg. Tools
vim,tmuxetc. - Eg. Settings region, network, wifi etc.
- Eg. Configuration
.bashrc,.tmux.confetc.
- Eg. Tools
- Configure the VM with the core tools you'd like.
-
Run the
proxmox-vm-to-ct.shscript (described below) to create a Container image from the VM. -
Start your fancy new containerised VM!
Create a Proxmox VM with any VM configuration you like for your base VM - so 2-cores, 1GB RAM, 8GB disk for example, but your real container may be 16-core, 32GB RAM, 320GB Disk. Ensure that you install all the basic tools you need (for example, install tmux and update the ~/.bashrc to start tmux) as well as any operating system configuration changes (Eg. locale).
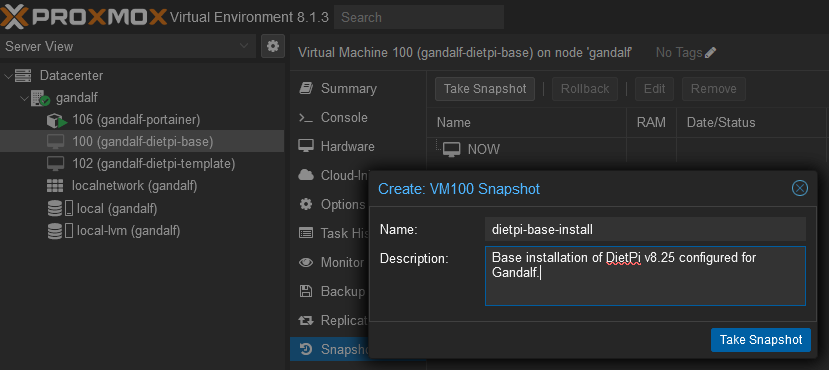
Next, create a Proxmox Snapshot of your base VM - in case you want to change it later.
Now you're ready to create your Container. Remember, if you find anything goes wrong, you can revert to this clean snapshot and try again :-)
The proxmox-vm-to-ct.sh script takes a few arguments to create a container from your VM.
Important
The VM you're trying to convert must be running, so ensure it's started.
Tip
You can use the hostname (eg. the-matrix.local) or the IP itself for the source VM (192.168.0.101), either way
you're going to have to SSH into the box!
You can specify your own Proxmox CT Configuration by creating a configuration file like below - eg. hexa-core.config:
CT_CPUS=8
CT_RAM=10240
Important
Configuration files MUST have a blank empty line at the end.
You can comment lines with a # this is a comment
Then pass that to the script:
./proxmox-vm-to-ct.sh --storage local-lvm \
                      --source 192.168.0.152 \
                      --target the-matrix-reloaded \
                      --target-config hexa-core.config
Other configuration items will be loaded from the default configuration, however if you want to overide with say, the docker/containerd configuration, you can pass in a default config switch:
./proxmox-vm-to-ct.sh --storage local-lvm \
                      --source 192.168.0.152 \
                      --target the-matrix-reloaded \
                      --target-config hexa-core.config \
                      --default-config-containerd
For all the configuration options, see default.config.
For a running VM named the-matrix-sql (with ID: 100; IP: 192.168.0.152), to create a (default) container named the-matrix-reloaded on a Proxmox Server where the storage container is named local-lvm but store the created image for future use in you home folder:
./proxmox-vm-to-ct.sh --source 192.168.0.152 \
                      --target the-matrix-reloaded \
                      --storage local-lvm \
                      --default-config \
                      -o ~/proxmox-dietpi.tar.gz
Once you save a snapshot of a VM, you can reuse that to create more containers by using the --source switch and passing in the *.tar.gz file.
Step 1 - create your image
./proxmox-vm-to-ct.sh --source 192.168.0.152 \
                      --target the-matrix-reloaded \
                      --storage local-lvm \
                      --default-config \
                      -o ~/proxmox-dietpi.tar.gz
Step 2 - reuse your image
./proxmox-vm-to-ct.sh --source ~/proxmox-dietpi.tar.gz \
                      --target the-matrix-revolutions \
                      --storage local-lvm \
                      --default-config
This is supported in v1.0+ only and all archives will be verified before being used.
All source images used to create CT's are verified, but you can skip with --ignore-source-verify.
./proxmox-vm-to-ct.sh --source ~/proxmox-dietpi.tar.gz \
                      --target the-matrix-revolutions \
                      --storage local-lvm \
                      --default-config \
                      --ignore-source-verify
This isn't recommended unless you intend to reuse the same image over multiple CT's being created (Eg. in a script) but doing so will speed up execution for times you know your *.tar.gz is fine.
Tip
From v1.1.1+, if you have sshpass installed (via apt install sshpass), you will be prompted
for your SSH password, after which it'll use sshpass to authenticate. If sshpass is not found
you will still be prompted by the ssh client for your password when it gets to that stage :-)
If you want to set a password but be prompted for it, append the --prompt-password switch that will request your password securely, avoiding the auto-generated password.
./proxmox-vm-to-ct.sh --source 192.168.0.152 \
                      --target the-matrix-reloaded \
                      --storage local-lvm \
                      --default-config \
                      --prompt-password
If you want to avoid changes to the vm by the script, use the --ignore-prep switch.
./proxmox-vm-to-ct.sh --source 192.168.0.152 \
                      --target the-matrix-reloaded \
                      --storage local-lvm \
                      --default-config \
                      --ignore-prep
The default CT configuration is not designed for VMs that have a containerd (Docker/Podman) engine installed. If your VM has Docker or Podman installed, converting to a CT will generate errors as described in ISSUE: Failed to Create CT.
You can create a privilleged container with additional features required by using the --default-config-containerd (or --default-config-docker):
./proxmox-vm-to-ct.sh --source 192.168.0.152 \
                      --target the-matrix-reloaded \
                      --storage local-lvm \
                      --default-config-docker
See what's included with default containerd for more information.
Usage: proxmox-vm-to-ct.sh --storage <name> --source <hostname|file> --target <name> [options]

Options:
  --storage <name>
      Name of the Proxmox Storage container (Eg. local-zfs, local-lvm, etc)
  --source <hostname> | <file: *.tar.gz>
      Source VM to convert to CT (Eg. postgres-vm.fritz.box or 192.168.0.10, source-vm.tar.gz file locally)
  --source-user <username>
      Source VM's SSH username to connect with. (Eg. root)
  --source-port <port>
      Source VM's SSH port to connect to. (Eg. 22)
  --source-output <path>, --output <path>, -o <path>
      Location of the source VM output (default: /tmp/proxmox-vm-to-ct/<hostname>.tar.gz)
  --target <name>
      Name of the container to create (Eg. postgres-ct)
  --target-config <path>
      Path to target configuration, for an example see default-config.env
  --default-config
      Default configuration for container (2 CPU, 2GB RAM, 20GB Disk)
  --default-config-containerd, --default-config-docker
      Default configuration for containerd containers (default + privileged, features: nesting, keyctl)
  --ignore-prep
      Ignore modifying the VM before snapshotting
  --ignore-dietpi
      Ignore DietPi specific modifications on the VM before snapshotting. (ignored with --ignore-prep)
  --prompt-password
      Prompt for a password for the container, temporary one generated & displayed otherwise
  --help
      Display this help message
Switch: --default-config
The default Container settings (stored in CT_DEFAULT_* vars) that are activated with the switch --default-config are:
| CPU | 2 Cores |
|---|---|
| RAM | 2048MB |
| HDD | 20GB |
| NET | name=eth0,ip=dhcp,ip6=auto,bridge=vmbr0,firewall=1 |
| ARCH | amd64 |
| OSTYPE | debian |
| ONBOOT | false |
| FEATURES | nesting |
| UNPRIVILEGED | true |
At this time, you'll have to modify the file to change that configuration - but will be implemented soon via commandline.
Switch: --default-config-containerd, --default-config-docker
For VM's that have a containerd instance (or Docker, Podman etc) we need a few more defaults. So in addition to the default configuration, this switch enables:
| FEATURES | nesting, keyctl |
|---|---|
| UNPRIVILEGED | false |
Note
Changes are only made if we detect a DietPi installation by checking for
/boot/dietpi/.version file.
The script prep's a DietPi (6.x | 7.x | 8.x or 9.x release) by making the following changes:
- Sets the
.dietpi_hw_model_identifierfrom21(x86_64) to75(container) as per documentation - Sets up first-login install sequence (even if you've done it already) so each container gets updates and updating of passwords instead of any randomly generated ones from the script by modifying
/boot/dietpi/.install_stage. - Stops DietPi-CloudShell which is CloudHell when you reboot as a container in Proxmox otherwise.
- Adds the purging of
grub-pc tiny-initramfs linux-image-amd64packages which aren't required as a container - see Michalng's comment.
The changes are found in the vm_ct_prep function (a snapshot can be found here.)
You can skip these for non-DietPi images with --ignore-dietpi or overall --ignore-prep switches, but are ignored if no DietPi image is detected (say it's a stock debian VM).
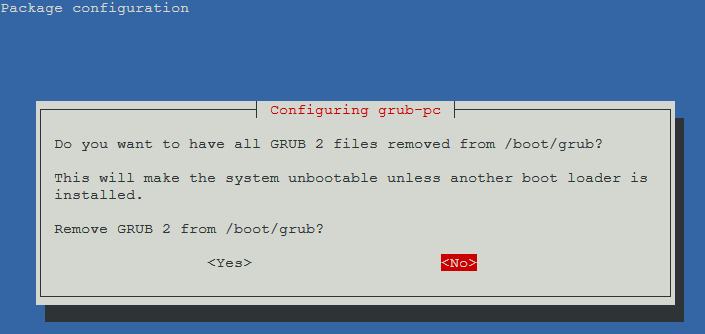
OMG, what the heck is this?
Don't worry, your DietPi image doesn't need grub-pc,m tiny-initramfs & linux-image-amd64 packages, so they were removed and it's asking whether to remove them from Grub. You can say YES - see Michalng's comment.
Always welcome contributions, feedback or revisions! Fork the repository and PR back :-)
This script was created with the help of the following folks:
- @y5t3ry/machine-to-proxmox-lxc-ct-converter by Sascha Basts
- DietPi Blog: DietPi LXC containers in Proxmox by StephenStS
And references:


