In this tutorial you will learn how to handle interruptions to the conversation flow. Composer enables you to add help topics to your bot and enable users to exit out of any process at any time.
In this tutorial, you learn how to:
[!div class="checklist"]
- Create help topics that can be accessed from any flow at any time.
- Interrupt your bots flow to enable your users to exit out of any process before it is completed.
- Completion of the tutorial Adding actions to you dialog.
With even a simple bot, it is a good practice to provide help. You'll also want to provide a way for users to exit at any point in the flow.
-
You first need to create a new dialog. Select + New Dialog in the Navigation pane.
-
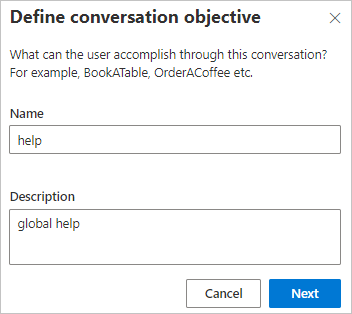
Enter help in the Name field and global help in the Description field of the Define conversation objective form, then select Next.
Composer will create the new help dialog with one BeginDialog trigger pre-configured.
-
Select the BeginDialog trigger in the Navigation pane.
-
Create a new action at the bottom of the flow by selecting the plus (+) icon in the Authoring canvas, then select Send a response from the list of actions.
-
Enter the following text into the Properties panel on the right side of the Composer screen:
I am a weather bot! I can tell you the current weather conditions. Just say WEATHER.
The next step is to connect this new help dialog with the bot's main dialog.
-
Select weatherBot.Main at the top of the Navigation pane.
Next you will create a new intent so that when the user enters 'help', the bots recognizer will identify that as a user intent and the bot will know what to do.
-
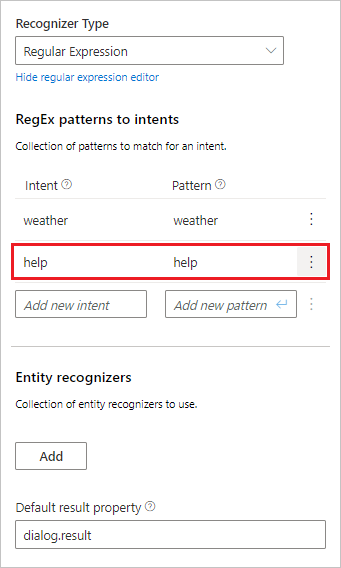
Create a new intent in the RegEx patterns to intents section of the Properties panel by entering help in both the Intent and Pattern fields, then press the enter key on your keyboard to ensure the new values are saved.
[!IMPORTANT] You need to enter values into both the Intent and Pattern fields then press enter or the new intent will not be saved correctly.
-
Now you will need to create a new trigger in the main dialog to handle the new intent. You do this by selecting + New Trigger in the Navigation pane.
-
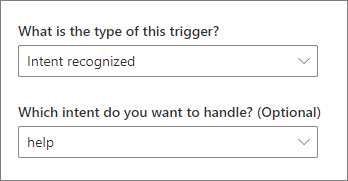
The Create a trigger form will appear. Select Intent recognized as the trigger type and help from the list of intents, then select the Submit button.
-
Next select the + button in the Authoring Canvas to create a new action, then select Begin a new dialog from the Dialog management menu.
-
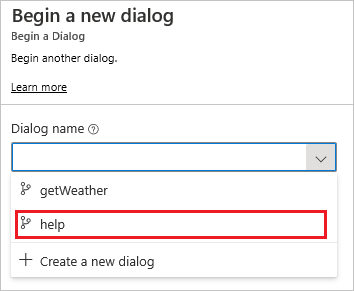
Next you need to specify the dialog to call when the help intent is recognized. You do this by selecting help from the Dialog name drop-down list in the Properties panel.
Now, in addition to giving you the current weather, your bot should now also offer help. You can verify this using the Emulator.
-
Select Restart Bot and open it in the Emulator to verify you are able to call your new help dialog.
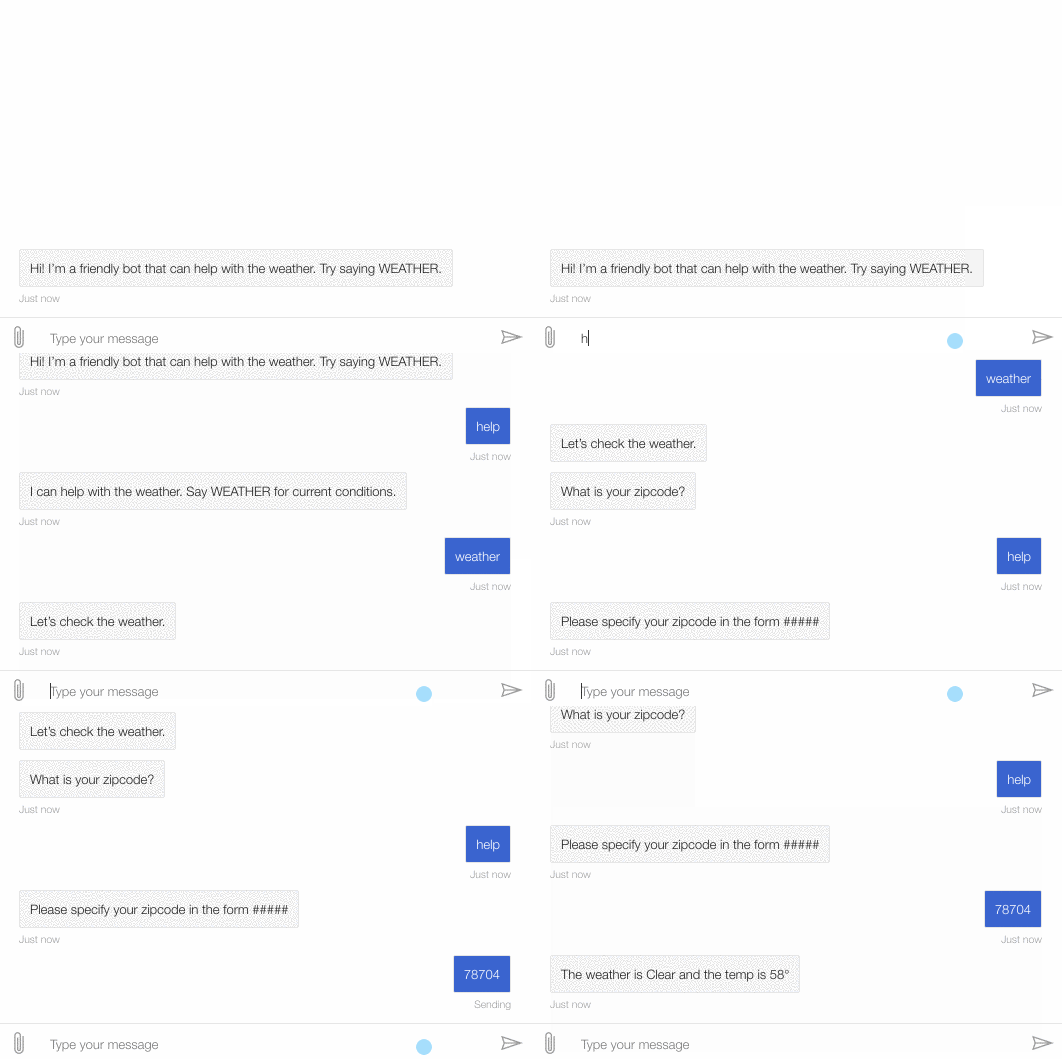
However, notice that once you start the weather dialog by saying weather, your bot doesn't know how to provide help, it is still trying to resolve the zip code. You need to configure your bot to allow interruptions to the dialogs flow before this will work.
The getWeather dialog handles getting the weather forecast, so you will need to configure its flow to enable it to handle interruptions, which will enable the new help functionality to work. The following steps demonstrate how to do this.
-
Select the BeginDialog trigger in the getWeather dialog.
-
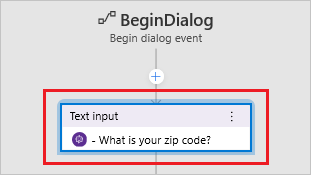
Select the Text input action in the Authoring canvas.
-
Select the Bot Asks tab in the Properties panel. In the Prompt settings section set the Allow interruptions field to
true.This tells Bot Framework to consult the parent dialog's recognizer, which will allow the bot to respond to help at the prompt as well.
-
Select Restart Bot and open it in the Emulator to verify you are able to call your new help dialog.
-
Say weather to your bot. It will ask for a zip code.
-
Now say help. It will now provide the global help response, even though that intent and trigger are defined in another dialog. Interruptions are a powerful way to make complex bots - more on that later.
You have learned how to interrupt a flow to include help functionality to your bot. Next you will learn how to add another useful global function, the ability to exit out of a flow without completing it - a cancel command.
-
You first need to create a new dialog. Select + New Dialog in the Navigation pane.
-
Enter cancel in the Name field of the Define conversation objective form, then select Next.
-
Select + at the bottom of the flow in the Authoring canvas and select Send a response from the list of actions.
-
In the Properties panel on the right side of the Composer screen, enter Canceling!
-
Add another action by selecting + at the bottom of the flow in the Authoring canvas then select Cancel all dialogs from the Dialog management menu.
[!NOTE] When Cancel all dialogs is triggered, the bot will cancel all active dialogs, and send the user back to the main dialog.
Next you will add a cancel intent, the same way you added the help intent in the previous section.
-
Select weatherBot.Main at the top of the Navigation pane.
-
Create a new intent in the RegEx patterns to intents section of the Properties panel by entering cancel in both the Intent and Pattern fields, then press the enter key on your keyboard to ensure the new values are saved.
-
Now you will need to create a new trigger in the main dialog to handle the new intent. You do this by selecting + New Trigger in the Navigation pane.
-
The Create a trigger form will appear. Select Intent recognized as the trigger type and cancel from the list of intents, then select the Submit button.
-
Next select the + button in the Authoring Canvas to create a new action, then select Begin a new dialog from the Dialog management menu.
-
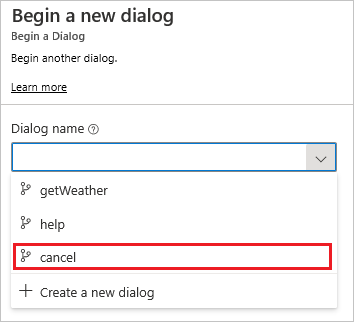
Next you need to specify the dialog to call when the cancel intent is recognized. You do this by selecting cancel from the Dialog name drop-down list in the Properties panel.
Now, your users will be able to cancel out of the weather dialog at any point in the flow. You can verify this using the Emulator.
-
Select Restart Bot and open it in the Emulator to verify you are able to cancel.
-
Say weather to your bot. It will ask for a zip code.
-
Now say help. It'll provide the global help response.
-
Now, say cancel. Notice that the bot doesn't resume the weather dialog but instead, it confirms that you want to cancel, then waits for your next message.
- Add Language Generation to power your bot's responses.
