This lab is part of a Drop In Lab during World of Watson 2015 at NYC. The labs cover several Watson Services that are available on IBM Bluemix to build a simple travel advisor application. Throughout the workshop, we will navigate through Bluemix, Github, and the source code of our application in order to demonstrate how apps can be created quickly and easily using the IBM Bluemix platform and the value of Watson Services and Cognitive capabilities through APIs.
So let’s get started. The first thing to do is to build out the shell of our application in Bluemix.
Creating a IBM Bluemix Account
- Go to https://ace.ng.bluemix.net/
- Create a Bluemix account if required.
- Log in with your IBM ID (the ID used to create your Bluemix account)
Note: The confirmation email from Bluemix mail take up to 1 hour.
- Click the button below to fork the project into IBM DevOps Services and deploy your own instance of this application on IBM Bluemix.
- From here you will be taken to a Bluemix page, where you will be prompted to name your app. A sample name is provided for you, but feel free to give your application any name you like (if the name is taken by another user you will be prompted to try another name).
Note: Use the default settings for Region / Organization / Space on the Bluemix landing page.
-
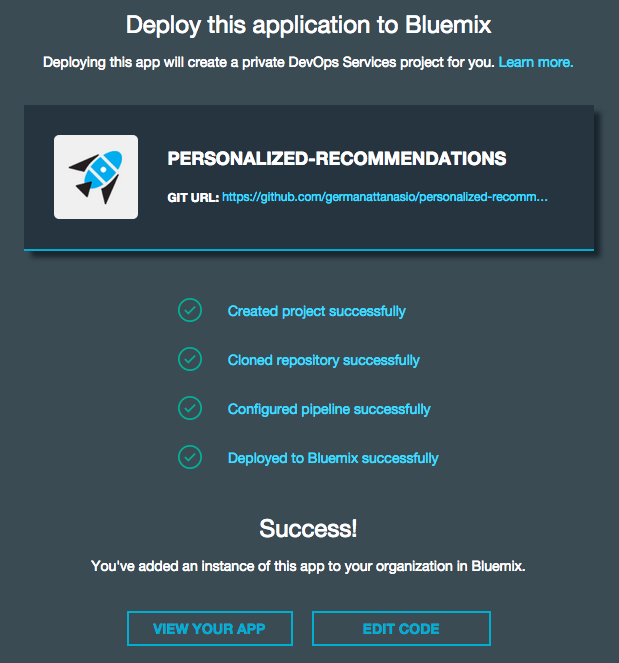
Once you have named your application, click the deploy button to begin the deploy process to Bluemix. During this process, Bluemix will automatically build and deploy our starter application based on the Github repository that we accessed at the start of the lab.
-
Once the application has finished deploying, you will see a "Success!" message. At this point, scroll to the top of the page and select "Dashboard" from the header bar.
- Test Out the new app. Now that we have deployed our application to Bluemix, the next step is to test out the application in its current state. Afterwards we will build out more functionality into the application. IMAGE APP ROUTE + EDIT CODE
-
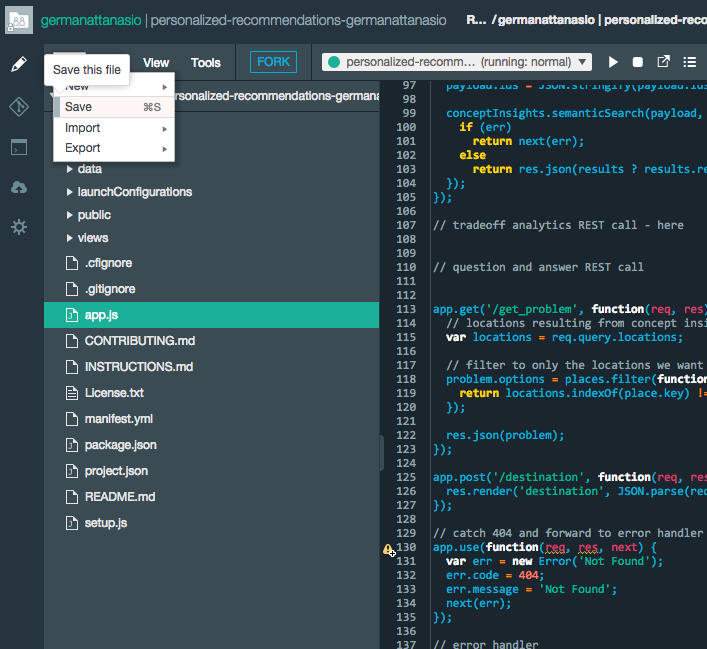
Let’s edit our source code. Back on the application home page in Bluemix, you will see a link to the Jazz Hub repository, and a button to Edit Code. Click on Edit Code.
-
Within the repository, navigate to
app.jsand open that file to view the application source code. -
Locate the comment starting in line 113:
// tradeoff analytics REST call - here.
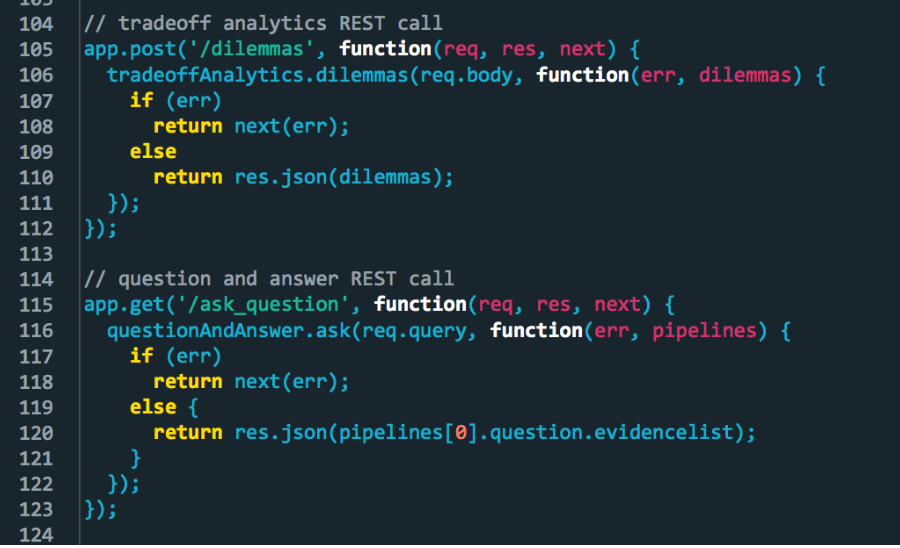
Copy the code below under that line:
app.post('/dilemmas', function(req, res, next) {
  tradeoffAnalytics.dilemmas(req.body, function(err, dilemmas) {
    if (err)
      return next(err);
    else
      return res.json(dilemmas);
  });
});
The code above will connect the app to the Tradeoff Analytics service.
4. Locate the comment starting in line 116: // question and answer REST call - here.
Copy the code below under that line:
app.get('/ask_question', function(req, res, next) {
  questionAndAnswer.ask(req.query, function(err, pipelines) {
    if (err)
      return next(err);
    else {
      return res.json(pipelines[0].question.evidencelist);
    }
  });
});
The code above will connect the app to the Question and Answer service.
Note: For the Watson Question & Answer service to work, Watson is trained on a cor- pus of information in order to become more proficient at answering questions about that corpus. For this workshop, we have provided a pre-trained corpus based on general travel for you.
- Click on File -> Save or press Crt+S.
- The last step in order to complete our application is to deploy our changes to Bluemix. To do this, we need to push our new code to the application. In the code editor screen, switch to the Git view, the 2nd icon in the left navigation bar.
- Locate your change to app.js file. Check it (select it), add a commit message, and click Commit.
- Click Sync to send your changes from this workspace to the main repository and trigger a deploy of your app.
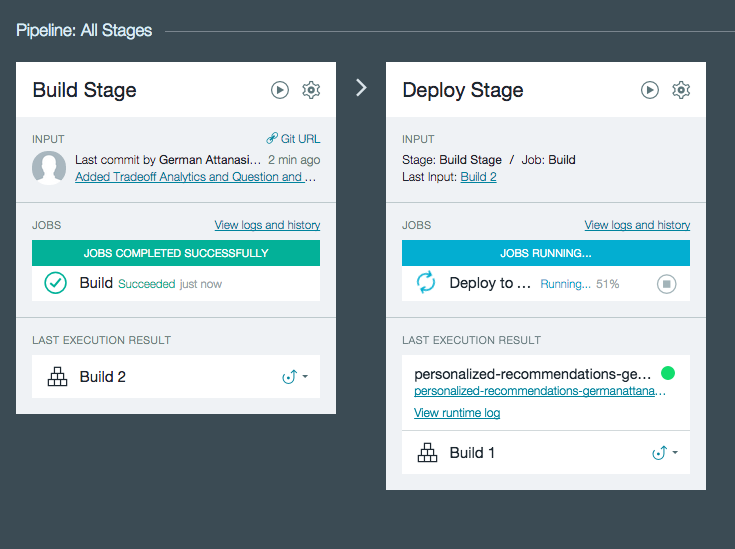
- Finally, Click on Build and Deploy to see the deploy process.
Note: While this may show as overly complicated, we show it here to illustrate you can have exactly the same source management practices you could have your local environment connected to a Git repository, in the Bluemix DevOps environment.
To test out our application, navigate back to your application homepage on Bluemix. Select the URL next to Route in the same way that we launched our previously unfinished application before.
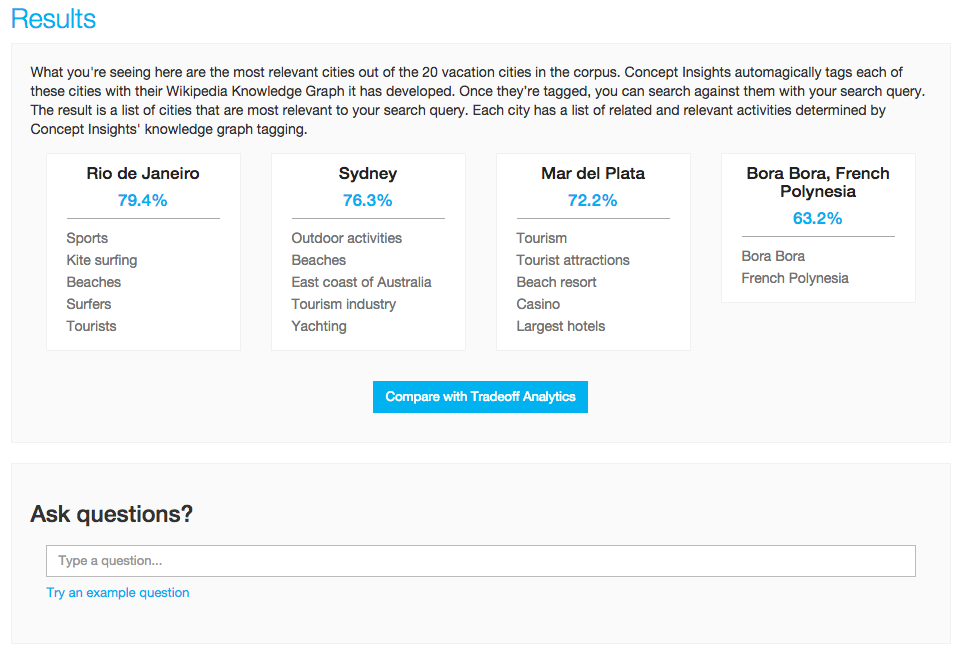
You will see the finished application, which utilizes the Concept In- sights, Tradeoff Analytics, and Question & Answer capabilities to pro- vide a useful tool for users researching travel options. Let’s try testing the application out. In the "Text Input" section, we can search for places that you can go to "snorkel". Enter "snorkel" into the text bar, and select "Snorkel" from the list of activities in the drop down menu.
In the "Results" section, we see a list of possible locations that give us the opportunity for snorkeling. We can add additional criteria by click- ing on the activities listed under any of the locations. Try clicking on one of these now, to narrow down our criteria. In our example, we clicked on "beaches” under "Rio de Janeiro".
Within the “Results” section, there is a button to "Compare with Trade- off Analytics". Based on our current criteria, let’s select that now.
The app will navigate to the Tradeoff Analytics section, where you will be able to see how the different travel options compare to each other based on flight cost, population density, and distance. In the grid that is visualized, our travel options are represented as lines that map to each of the values for cost, population density, and distance. By adjusting the slides on the left hand side, different options will be greyed out once they fall outside of the range set up by the slides. This allows users to quickly filter out options based on the parameters that matter to them when looking for a travel location
By clicking on one of the lines in the grid, we are able to see details about this option, and are able to select one of them as our decision.
For our example, we decided to make our decision between Rio de Janiero and Mar del Plata based on flight cost. Try moving the right slider on the flight cost to the left. Eventually you will see Mar del Plata disappear, as it has been filtered out based on our criteria.
Click on the line representing Rio and select "This is my decision". In the top right of the Tradeoff Analytics box you will see Rio loaded as our decision. Click the "Done" button, and then close the tradeoff analytics window with the "x" in the top right corner of the Tradeoff Anlaytics screen.
Back on the main app view at the bottom, we are able to ask questions about our decision. For our example with Rio, we asked Watson "How do I get to Rio?". Watson returns answers ranked by how confident it is, and we are able to quickly get the information we are looking for.
Enter in "How do I get to Rio?" in the chat box and press Enter.
Note: We have built a pre-trained corpus for demo purposes only. The amount of information that Watson was trained on for this example was limited, so certain questions outside of the corpus or outside of the travel domain will return less confident answers.
You have completed the Personalized Recommendations Lab! ![]()


