The gallery makes available a wide range of popular web applications developed by Microsoft, third party companies, and open source software initiatives. Web applications created from the gallery do not require installation of any software other than the browser used to connect to the Windows Azure Management Portal.
In this tutorial, you'll learn:
-
How to create a new site through the gallery.
-
How to deploy the site through the Windows Azure Portal.
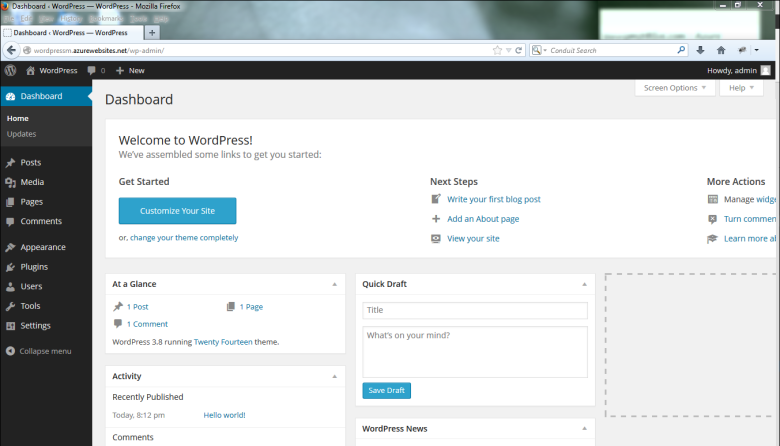
You'll build a WordPress blog that uses a default template. The following illustration shows the completed application:

To complete this tutorial, you need a Windows Azure account. You can create a free trial account in just a couple of minutes. For details, see Create a Windows Azure account.
-
Login to the Windows Azure Management Portal.
-
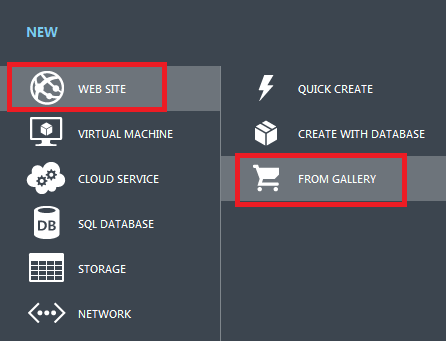
Click the New icon on the bottom left of the dashboard.

-
Click the Web Site icon, and click From Gallery.
-
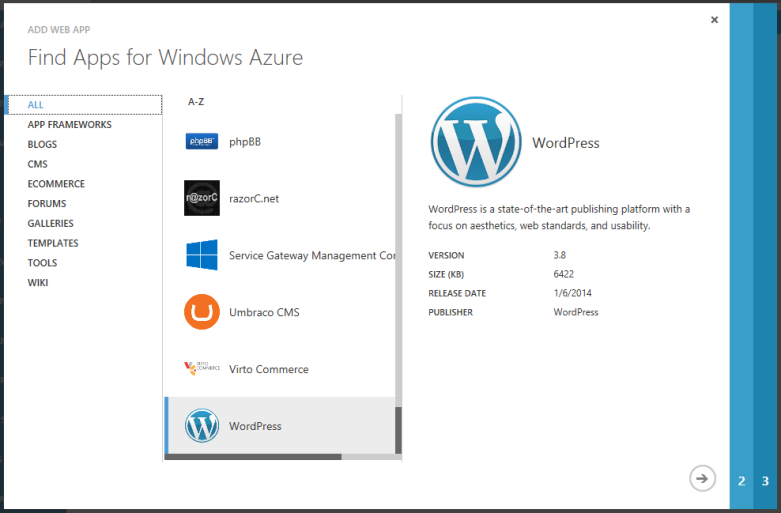
Locate and click the WordPress icon in list, and then click Next.
-
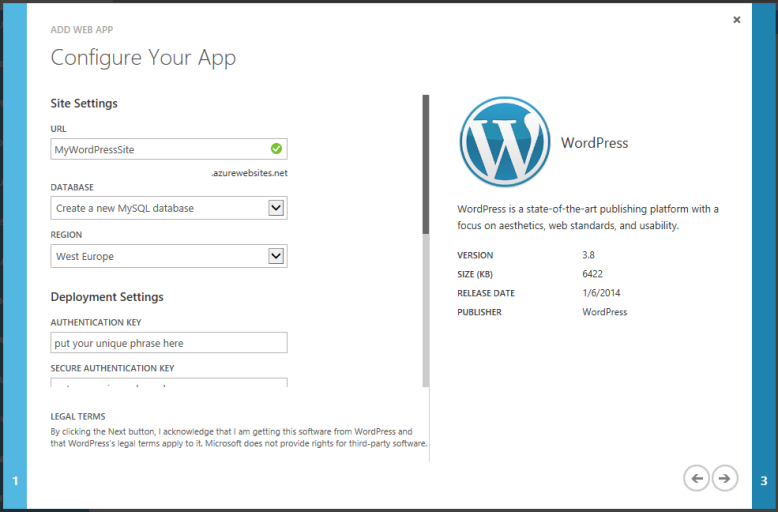
On the Configure Your App page, enter or select values for all fields:


-
Enter a URL name of your choice
-
Leave Create a new MySQL database selected in the Database field
-
Select the region closest to you

-
Then click Next.
-
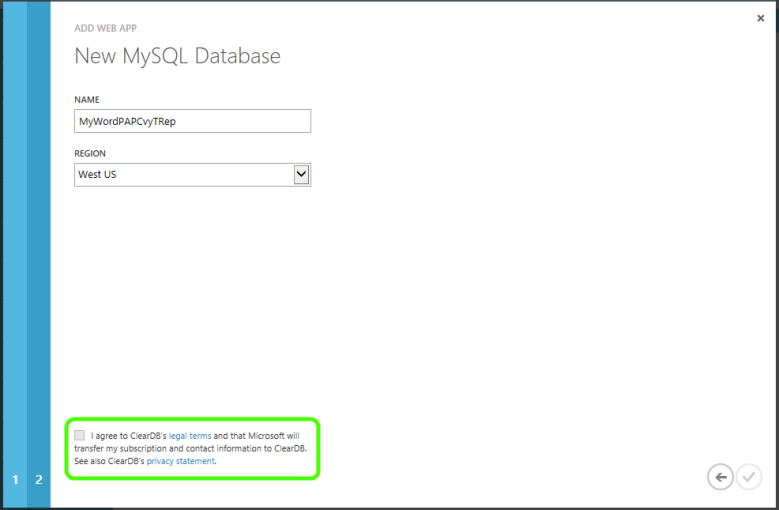
On the Create New Database page, you can specify a name for your new MySQL database or use the default name. Select the region closest to you as the hosting location. Select the box at the bottom of the screen to agree to ClearDB's usage terms for your hosted MySQL database. Then click the check to complete the site creation.

After you click Complete Windows Azure will initiate build and deploy operations. While the web site is being built and deployed the status of these operations is displayed at the bottom of the Web Sites page. After all operations are performed, A final status message when the site has been successfully deployed.
-
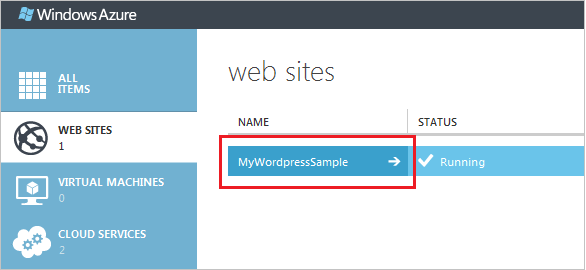
Click on your new site from the Web Sites page to open the dashboard for the site.
-
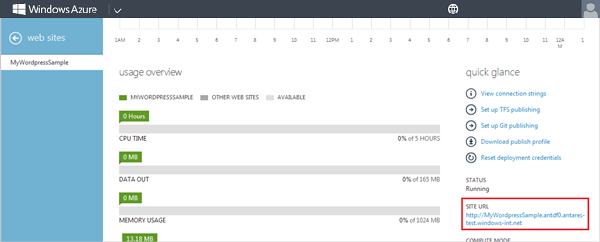
On the Dashboard management page, scroll down and click the link on the left under Site Url to open the site's welcome page.
-
Enter appropriate configuration information required by WordPress and click Install WordPress to finalize configuration and open the web site's login page.

-
Login to the new WordPress web site by entering the username and password that you specified on the Welcome page.
-
You'll have a new WordPress site that looks similar to the site below.