| title | intro | product | redirect_from | versions | type | topics | ||||||||||||
|---|---|---|---|---|---|---|---|---|---|---|---|---|---|---|---|---|---|---|
Creating a JavaScript action |
In this guide, you'll learn how to build a JavaScript action using the actions toolkit. |
{% data reusables.gated-features.actions %} |
|
|
tutorial |
|
{% data reusables.actions.enterprise-beta %} {% data reusables.actions.enterprise-github-hosted-runners %} {% data reusables.actions.ae-beta %}
In this guide, you'll learn about the basic components needed to create and use a packaged JavaScript action. To focus this guide on the components needed to package the action, the functionality of the action's code is minimal. The action prints "Hello World" in the logs or "Hello [who-to-greet]" if you provide a custom name.
This guide uses the {% data variables.product.prodname_actions %} Toolkit Node.js module to speed up development. For more information, see the actions/toolkit repository.
Once you complete this project, you should understand how to build your own JavaScript action and test it in a workflow.
{% data reusables.github-actions.pure-javascript %}
{% data reusables.github-actions.context-injection-warning %}
Before you begin, you'll need to download Node.js and create a GitHub repository.
- Download and install Node.js 12.x, which includes npm.
https://nodejs.org/en/download/current/
-
Create a new repository on {% data variables.product.product_location %}. You can choose any repository name or use "hello-world-javascript-action" like this example. You can add these files after your project has been pushed to {% data variables.product.product_name %}. For more information, see "Create a new repository."
-
Clone your repository to your computer. For more information, see "Cloning a repository."
-
From your terminal, change directories into your new repository.
cd hello-world-javascript-action- From your terminal, initialize the directory with a
package.jsonfile.
npm init -yCreate a new file action.yml in the hello-world-javascript-action directory with the following example code. For more information, see "Metadata syntax for {% data variables.product.prodname_actions %}."
action.yml
name: 'Hello World'
description: 'Greet someone and record the time'
inputs:
  who-to-greet:  # id of input
    description: 'Who to greet'
    required: true
    default: 'World'
outputs:
  time: # id of output
    description: 'The time we greeted you'
runs:
  using: 'node12'
  main: 'index.js'
This file defines the who-to-greet input and time output. It also tells the action runner how to start running this JavaScript action.
The actions toolkit is a collection of Node.js packages that allow you to quickly build JavaScript actions with more consistency.
The toolkit @actions/core package provides an interface to the workflow commands, input and output variables, exit statuses, and debug messages.
The toolkit also offers a @actions/github package that returns an authenticated Octokit REST client and access to GitHub Actions contexts.
The toolkit offers more than the core and github packages. For more information, see the actions/toolkit repository.
At your terminal, install the actions toolkit core and github packages.
npm install @actions/core
npm install @actions/github
Now you should see a node_modules directory with the modules you just installed and a package-lock.json file with the installed module dependencies and the versions of each installed module.
This action uses the toolkit to get the who-to-greet input variable required in the action's metadata file and prints "Hello [who-to-greet]" in a debug message in the log. Next, the script gets the current time and sets it as an output variable that actions running later in a job can use.
GitHub Actions provide context information about the webhook event, Git refs, workflow, action, and the person who triggered the workflow. To access the context information, you can use the github package. The action you'll write will print the webhook event payload to the log.
Add a new file called index.js, with the following code.
index.js
const core = require('@actions/core');
const github = require('@actions/github');

try {
  // `who-to-greet` input defined in action metadata file
  const nameToGreet = core.getInput('who-to-greet');
  console.log(`Hello ${nameToGreet}!`);
  const time = (new Date()).toTimeString();
  core.setOutput("time", time);
  // Get the JSON webhook payload for the event that triggered the workflow
  const payload = JSON.stringify(github.context.payload, undefined, 2)
  console.log(`The event payload: ${payload}`);
} catch (error) {
  core.setFailed(error.message);
}
If an error is thrown in the above index.js example, core.setFailed(error.message); uses the actions toolkit @actions/core package to log a message and set a failing exit code. For more information, see "Setting exit codes for actions."
To let people know how to use your action, you can create a README file. A README is most helpful when you plan to share your action publicly, but is also a great way to remind you or your team how to use the action.
In your hello-world-javascript-action directory, create a README.md file that specifies the following information:
- A detailed description of what the action does.
- Required input and output arguments.
- Optional input and output arguments.
- Secrets the action uses.
- Environment variables the action uses.
- An example of how to use your action in a workflow.
README.md
# Hello world javascript action

This action prints "Hello World" or "Hello" + the name of a person to greet to the log.

## Inputs

### `who-to-greet`

**Required** The name of the person to greet. Default `"World"`.

## Outputs

### `time`

The time we greeted you.

## Example usage

uses: actions/[email protected]
with:
who-to-greet: 'Mona the Octocat'{% data variables.product.product_name %} downloads each action run in a workflow during runtime and executes it as a complete package of code before you can use workflow commands like run to interact with the runner machine. This means you must include any package dependencies required to run the JavaScript code. You'll need to check in the toolkit core and github packages to your action's repository.
From your terminal, commit your action.yml, index.js, node_modules, package.json, package-lock.json, and README.md files. If you added a .gitignore file that lists node_modules, you'll need to remove that line to commit the node_modules directory.
It's best practice to also add a version tag for releases of your action. For more information on versioning your action, see "About actions."
git add action.yml index.js node_modules/* package.json package-lock.json README.md
git commit -m "My first action is ready"
git tag -a -m "My first action release" v1
git push --follow-tags
Checking in your node_modules directory can cause problems. As an alternative, you can use a tool called @vercel/ncc to compile your code and modules into one file used for distribution.
-
Install
vercel/nccby running this command in your terminal.npm i -g @vercel/ncc -
Compile your
index.jsfile.ncc build index.js --license licenses.txt
You'll see a new dist/index.js file with your code and the compiled modules.
You will also see an accompanying dist/licenses.txt file containing all the licenses of the node_modules you are using.
-
Change the
mainkeyword in youraction.ymlfile to use the newdist/index.jsfile.main: 'dist/index.js' -
If you already checked in your
node_modulesdirectory, remove it.rm -rf node_modules/* -
From your terminal, commit the updates to your
action.yml,dist/index.js, andnode_modulesfiles.
git add action.yml dist/index.js node_modules/*
git commit -m "Use vercel/ncc"
git tag -a -m "My first action release" v1
git push --follow-tagsNow you're ready to test your action out in a workflow. When an action is in a private repository, the action can only be used in workflows in the same repository. Public actions can be used by workflows in any repository.
{% data reusables.actions.enterprise-marketplace-actions %}
The following workflow code uses the completed hello world action in the actions/hello-world-javascript-action repository. Copy the workflow code into a .github/workflows/main.yml file, but replace the actions/hello-world-javascript-action repository with the repository you created. You can also replace the who-to-greet input with your name.
{% raw %} .github/workflows/main.yml
on: [push]

jobs:
  hello_world_job:
    runs-on: ubuntu-latest
    name: A job to say hello
    steps:
      - name: Hello world action step
        id: hello
        uses: actions/[email protected]
        with:
          who-to-greet: 'Mona the Octocat'
      # Use the output from the `hello` step
      - name: Get the output time
        run: echo "The time was ${{ steps.hello.outputs.time }}"
{% endraw %}
Copy the workflow code into a .github/workflows/main.yml file in your action's repository. You can also replace the who-to-greet input with your name.
{% raw %} .github/workflows/main.yml
on: [push]

jobs:
  hello_world_job:
    runs-on: ubuntu-latest
    name: A job to say hello
    steps:
      # To use this repository's private action,
      # you must check out the repository
      - name: Checkout
        uses: actions/checkout@v2
      - name: Hello world action step
        uses: ./ # Uses an action in the root directory
        id: hello
        with:
          who-to-greet: 'Mona the Octocat'
      # Use the output from the `hello` step
      - name: Get the output time
        run: echo "The time was ${{ steps.hello.outputs.time }}"
{% endraw %}
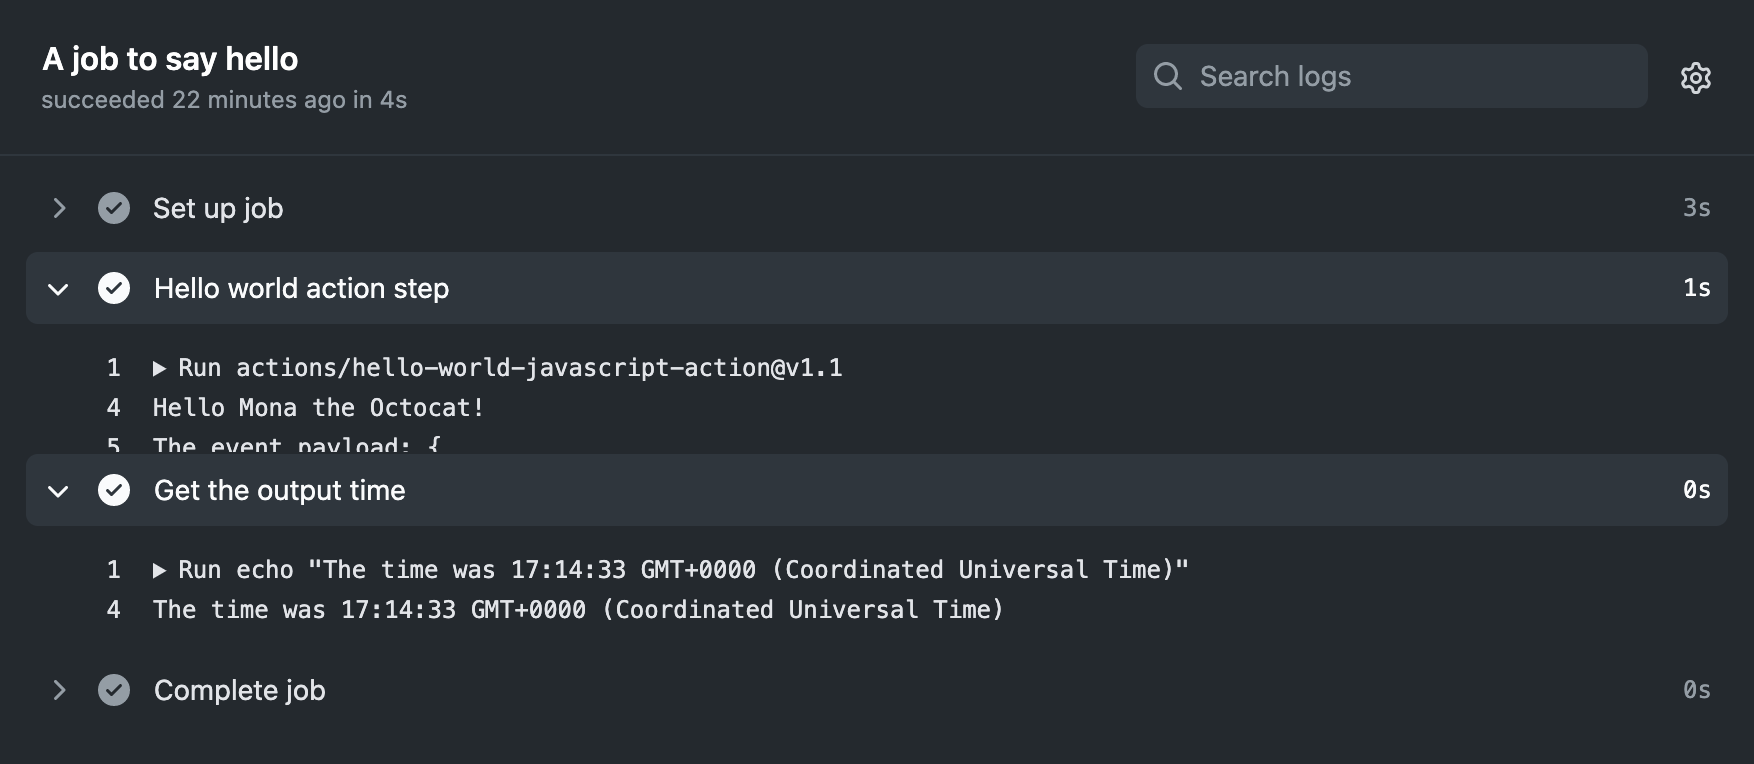
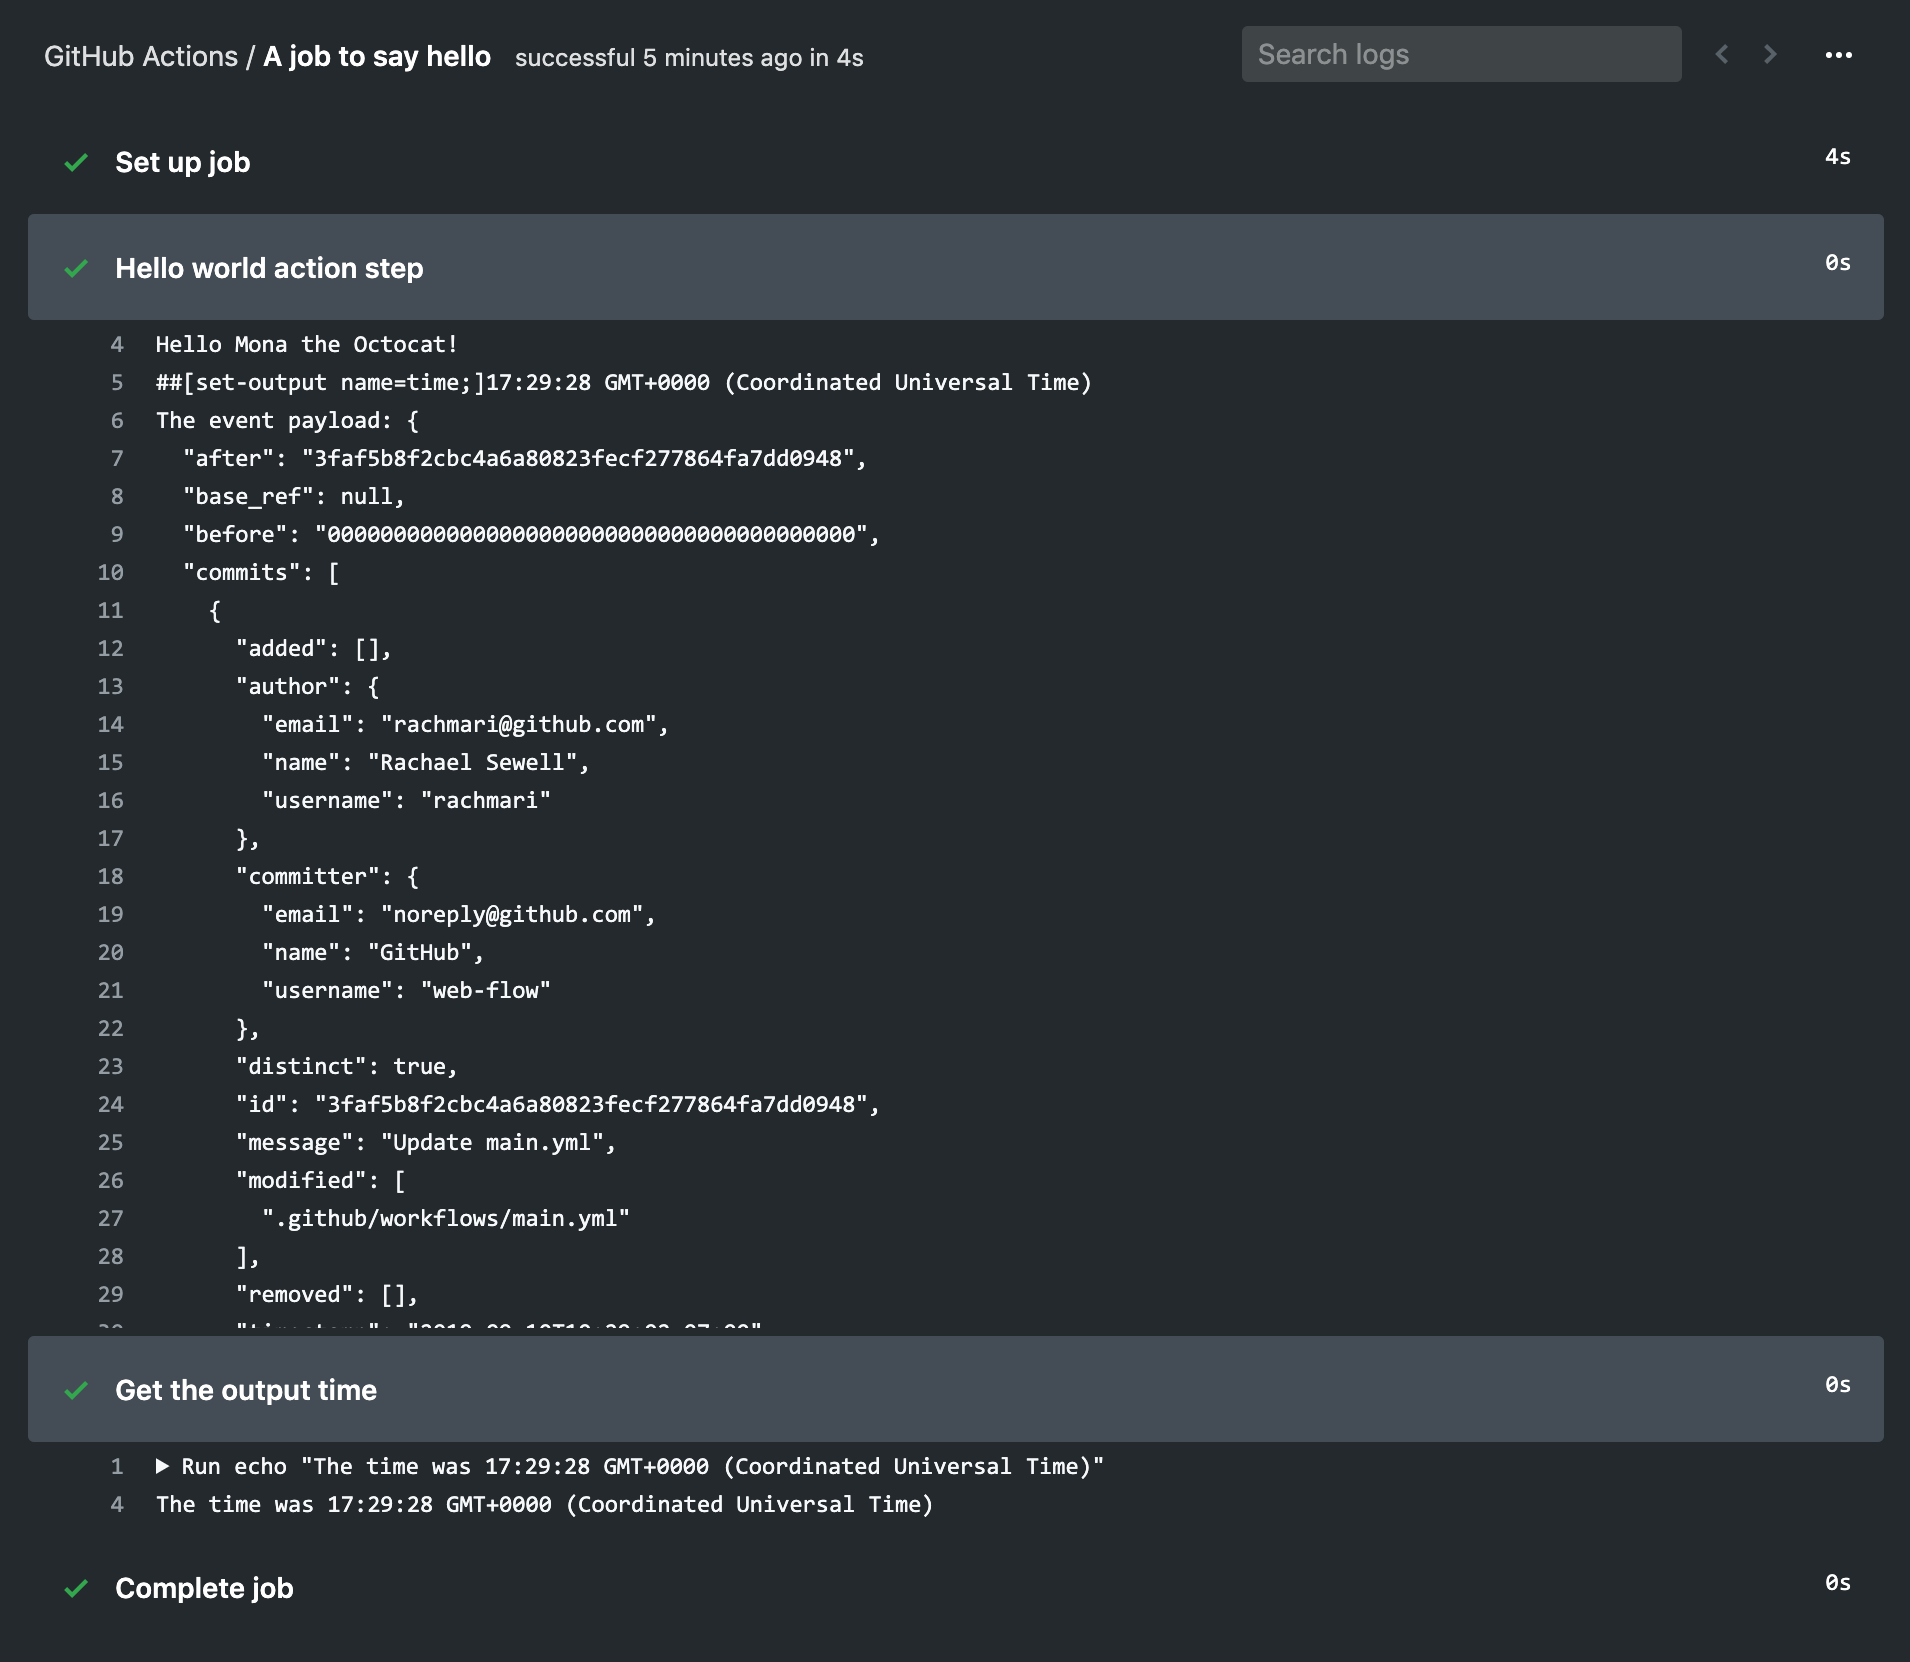
From your repository, click the Actions tab, and select the latest workflow run. {% if currentVersion == "free-pro-team@latest" or currentVersion ver_gt "[email protected]" or currentVersion == "github-ae@latest" %}Under Jobs or in the visualization graph, click A job to say hello. {% endif %}You should see "Hello Mona the Octocat" or the name you used for the who-to-greet input and the timestamp printed in the log.
{% if currentVersion == "free-pro-team@latest" or currentVersion ver_gt "[email protected]" or currentVersion == "github-ae@latest" %}
 {% elsif currentVersion ver_gt "[email protected]" %}
 {% else %}
 {% endif %}