In the following steps you add code for a simple HTTP Get method that returns a hard-coded list of contacts.
-
In Solution Explorer, right-click the Models folder and select Add > Class.
-
Name the new file Contact.cs.
-
Click Add.
-
Once the Contact.cs file has been created, replace the entire contents of the file with the following code.
namespace ContactsList.Models { public class Contact { public int Id { get; set; } public string Name { get; set; } public string EmailAddress { get; set; } } } -
Right-click the Controllers folder, and select Add > Controller.
-
In the Add Scaffold dialog, select the Web API 2 Controller - Empty option, and click Add.
-
Name the controller ContactsController, and click Add.
-
Once the ContactsController.cs file has been created, replace the entire contents of the file with the following code.
 using ContactsList.Models;
 using System;
 using System.Collections.Generic;
 using System.Linq;
 using System.Net;
 using System.Net.Http;
 using System.Threading.Tasks;
 using System.Web.Http;

 namespace ContactsList.Controllers
 {
     public class ContactsController : ApiController
     {
         [HttpGet]
         public IEnumerable<Contact> Get()
         {
             return new Contact[]{
 				new Contact { Id = 1, EmailAddress = "[email protected]", Name = "Barney Poland"},
 				new Contact { Id = 2, EmailAddress = "[email protected]", Name = "Lacy Barrera"},
             	new Contact { Id = 3, EmailAddress = "[email protected]", Name = "Lora Riggs"}
             };
         }
     }
 }
By default, API App projects are enabled with automatic Swagger metadata generation, and when you use the Add API App SDK menu entry to convert a Web API project, an API test page is also enabled by default.
However, the Azure API App new-project template disables the API test page. When you create your API app project by using the API app project template, do the following steps to enable the test page.
Note: If you deploy the API app as public anonymous and with the Swagger UI enabled, anyone will be able to use the Swagger UI to discover and call your APIs.
-
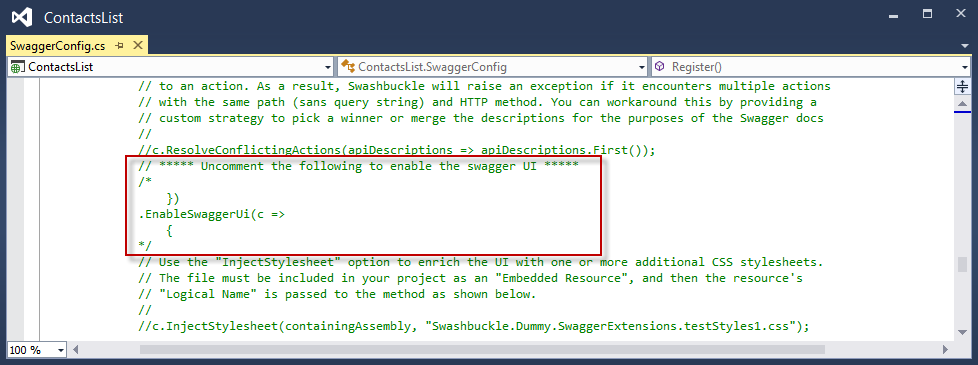
Open the App_Start/SwaggerConfig.cs file, and search for EnableSwaggerUI:
-
Uncomment the following lines of code:
}) .EnableSwaggerUi(c => { -
When you're done, the file should look like this:
To view the API test page, perform the following steps.
-
Run the app locally (CTRL+F5).
The browser opens and displays an HTTP 403 error because the base URL is not a valid web page or API method URL for this project.
-
Navigate to the Swagger page by adding
/swaggerto the end of the base URL. -
Click Contacts > Get > Try it out, and you see that the API is functioning and returns the expected result.
-
In Visual Studio click Debug > Stop Debugging.


