Valheim Server in a Docker Container
The name of the Docker image is lloesche/valheim-server.
Volume mount the server config directory to /config within the Docker container.
If you have an existing world on a Windows system you can copy it from e.g.
C:\Users\Lukas\AppData\LocalLow\IronGate\Valheim\worlds
to e.g.
$HOME/valheim-server-config/worlds
and run the image with $HOME/valheim-server-config volume mounted to /config inside the container.
$ mkdir -p $HOME/valheim-server-config/worlds
# copy existing world
$ docker run -d \
    --name valheim-server \
    -p 2456-2458:2456-2458/udp \
    -v $HOME/valheim-server-config:/config \
    -e SERVER_NAME="My Server" \
    -e WORLD_NAME="Neotopia" \
    -e SERVER_PASS="secret" \
    lloesche/valheim-server
Warning: SERVER_PASS must be at least 5 characters long. Otherwise valheim_server.x86_64 will refuse to start!
A fresh start will take several minutes depending on your Internet connection speed as the container will download the Valheim dedicated server from Steam (~1 GB).
Do not forget to modify WORLD_NAME to reflect the name of your world! For existing worlds that is the filename in the worlds/ folder without the .db/.fwl extension.
If you want to play with friends over the Internet and are behind NAT make sure that UDP ports 2456-2458 are forwarded to the container host. Also ensure they are publicly accessible in any firewall.
If your server name does not show up in the server list a couple of minutes after startup you likely have a firewall issue.
There is more info in section Finding Your Server.
For LAN-only play see section Steam Server Favorites & LAN Play
For more deployment options see the Deployment section.
| Name | Default | Purpose |
|---|---|---|
SERVER_NAME |
My Server |
Name that will be shown in the server browser |
SERVER_PORT |
2456 |
UDP start port that the server will listen on |
WORLD_NAME |
Dedicated |
Name of the world without .db/.fwl file extension |
SERVER_PASS |
secret |
Password for logging into the server - min. 5 characters! |
SERVER_PUBLIC |
1 |
Whether the server should be listed in the server browser (1) or not (0) |
UPDATE_INTERVAL |
900 |
How often we check Steam for an updated server version in seconds |
BACKUPS |
true |
Whether the server should create periodic backups (true or false) |
BACKUPS_INTERVAL |
3600 |
Interval in seconds between backup runs |
BACKUPS_DIRECTORY |
/config/backups |
Path to the backups directory |
BACKUPS_MAX_AGE |
3 |
Age in days after which old backups are flushed |
BACKUPS_DIRECTORY_PERMISSIONS |
755 |
Unix permissions for the backup directory |
BACKUPS_FILE_PERMISSIONS |
644 |
Unix permissions for the backup zip files |
CONFIG_DIRECTORY_PERMISSIONS |
755 |
Unix permissions for the /config directory |
WORLDS_DIRECTORY_PERMISSIONS |
755 |
Unix permissions for the /config/worlds directory |
WORLDS_FILE_PERMISSIONS |
644 |
Unix permissions for the files in /config/worlds |
STEAMCMD_ARGS |
validate |
Additional steamcmd CLI arguments |
DNS_1 |
8.8.8.8 |
First DNS server to use for the container to resolve hostnames (systemd only) |
DNS_2 |
8.8.4.4 |
Second DNS server to use for the container to resolve hostnames (systemd only) |
Create an optional config file /etc/sysconfig/valheim-server
SERVER_NAME="My Server"
SERVER_PORT=2456
WORLD_NAME=Dedicated
SERVER_PASS=secret
SERVER_PUBLIC=1
DNS_1=8.8.8.8
DNS_2=8.8.4.4
Then enable the Docker container on system boot
$ sudo mkdir /etc/valheim
$ sudo curl -o /etc/systemd/system/valheim-server.service https://raw.githubusercontent.com/lloesche/valheim-server-docker/master/valheim-server.service
$ sudo systemctl daemon-reload
$ sudo systemctl enable valheim-server.service
$ sudo systemctl start valheim-server.service
The container will check for Valheim server updates every 15 minutes. If an update is found it is downloaded and the server restarted.
The container will on startup and periodically create a backup of the worlds/ directory.
The default is once per hour but can be changed using the BACKUPS_INTERVAL environment variable.
The number is in seconds. Meaning for hourly backups set BACKUPS_INTERVAL=3600.
Default backup directory is /config/backups/ within the container. A different directory can be set using the BACKUPS_DIRECTORY environment variable.
It makes sense to have this directory be a volume mount from the host.
Warning: do not make the backup directory a subfolder of /config/worlds/. Otherwise each backup will backup all previous backups.
By default 3 days worth of backups will be kept. A different number can be configured using BACKUPS_MAX_AGE. The value is in days.
Beware that backups are performed while the server is running. As such files might be in an open state when the backup runs.
However the worlds/ directory also contains a .db.old file for each world which should always be closed and in a consistent state.
Once the server is up and running and the log says something like
02/09/2021 10:42:24: Game server connected
it can still be challenging to actually find the server.
There are three ways of getting to your server. Either using the Steam server browser, adding the IP manually or using the in-game Community server list.
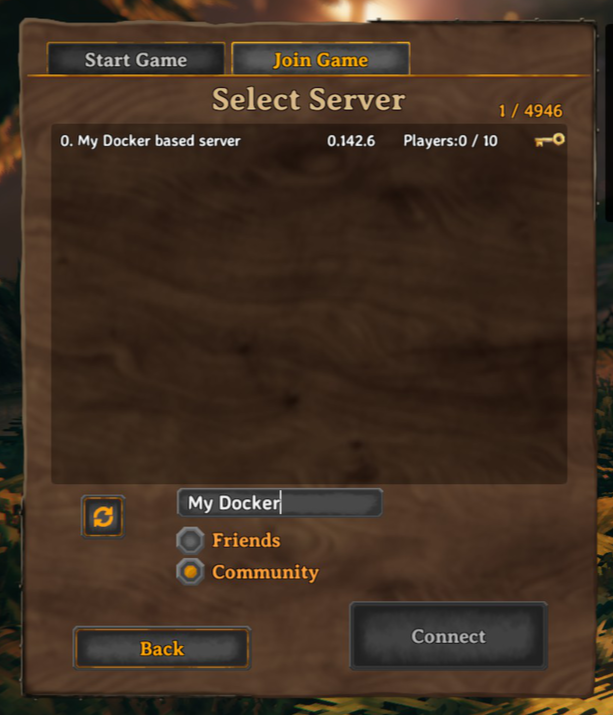
When in-game, click on Join Game and select Community. Wait for the game to load the list of all 4000+ servers.
Only 200 servers will be shown at a time so we will have to enter part of our server name to filter the view.
When using the Steam server browser, in Steam go to View -> Servers. Click on CHANGE FILTERS and select Game Valheim.
Wait for Steam to load all 4000+ Servers then sort the SERVERS column by clicking on its title. Scroll down until you find your server.
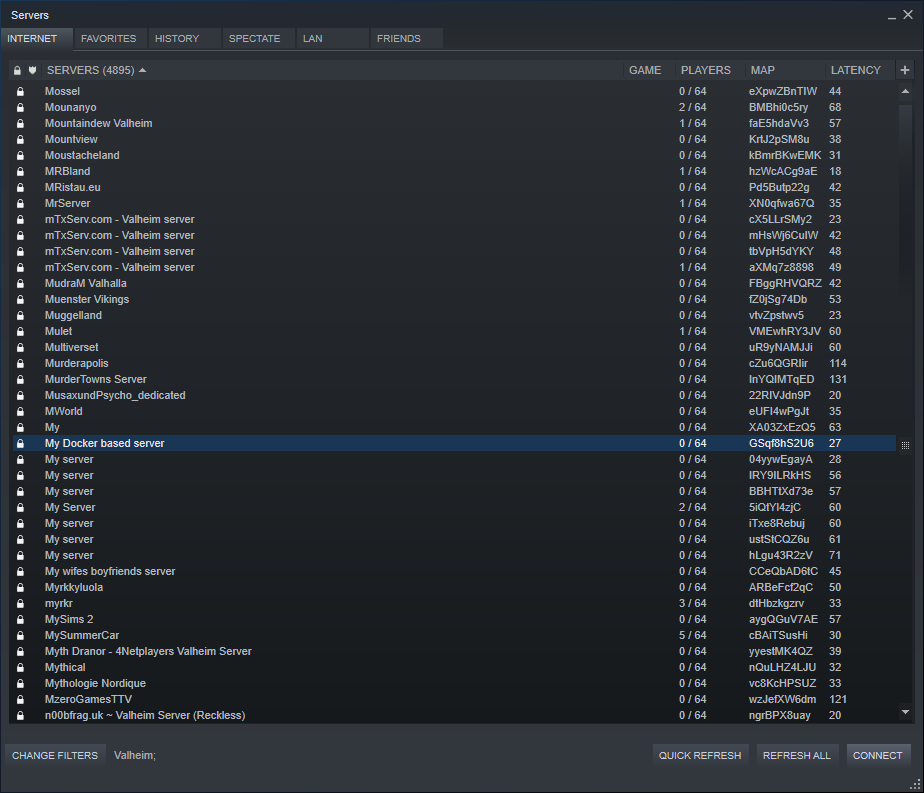 From there you can right-click it and add as a favourite.
Note that in my tests when connecting to the server via the Steam server browser I had to enter the server password twice. Once in Steam and once in-game.
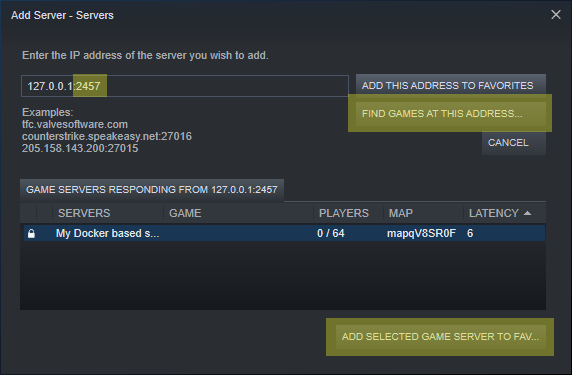
A third option within Steam is to add the server manually by IP. This also allows for LAN play without the need to open or forward any firewall ports.
Steps:
- Within Steam click on
View -> Servers FAVORITESADD SERVER- Enter Server IP and port+1. So if the server is running on UDP port
2456enterip:2457 FIND GAMES AT THIS ADDRESS...ADD SELECTED GAME SERVER TO FAV...
Do not use the ADD THIS ADDRESS TO FAVORITES button at this point.
NOTE: Sometimes I will get the following error when trying to connect to a LAN server:
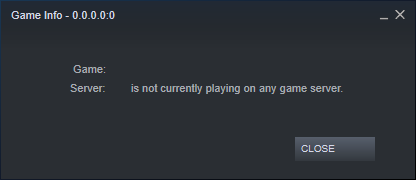
In those cases it sometimes helped to add the server again, but this time using port 2456 and now pressing the ADD THIS ADDRESS TO FAVORITES button.
It will not generate a new entry in the favourites list but seemingly just update the existing one that was originally discovered on port 2457.
Sometimes it also helps to press the REFRESH button and then immediately double click on the Server.
Overall LAN play via the Steam Server Browser has been a bit hit and miss for me while online play using the in-game search has resulted in the most consistent success.
Upon startup the server will create a file /config/adminlist.txt. In it you can list the IDs of all administrator users.
The ID of a user can be gotten either in-game by pressing F2
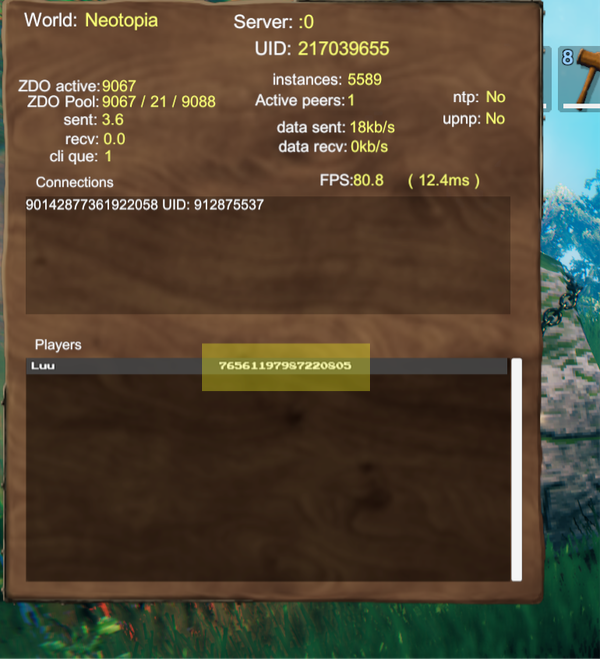
or in the server logs when a user connects.
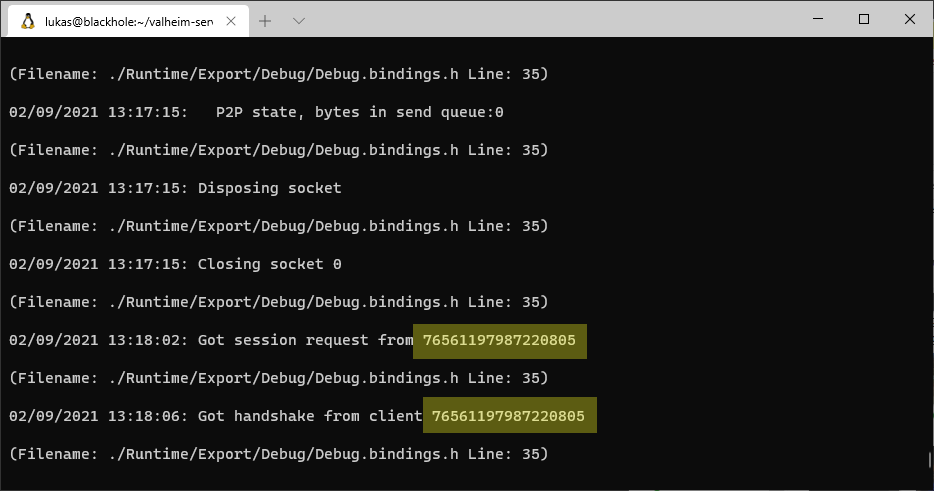
Administrators can press F5 to open the in-game console and use commands like ban and kick.
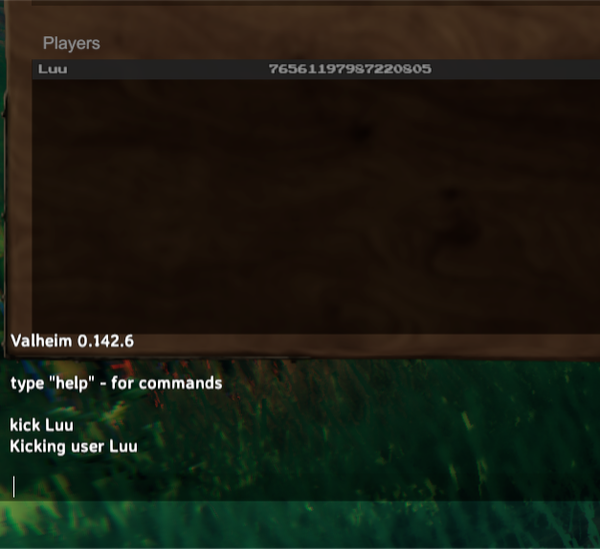
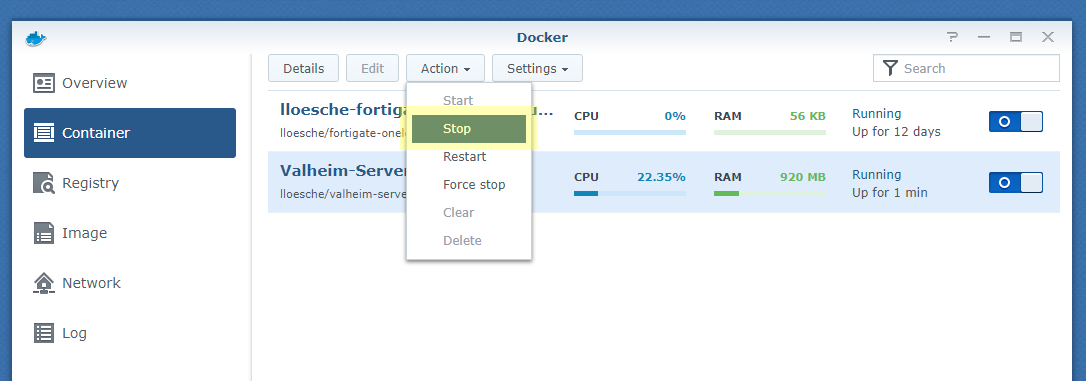
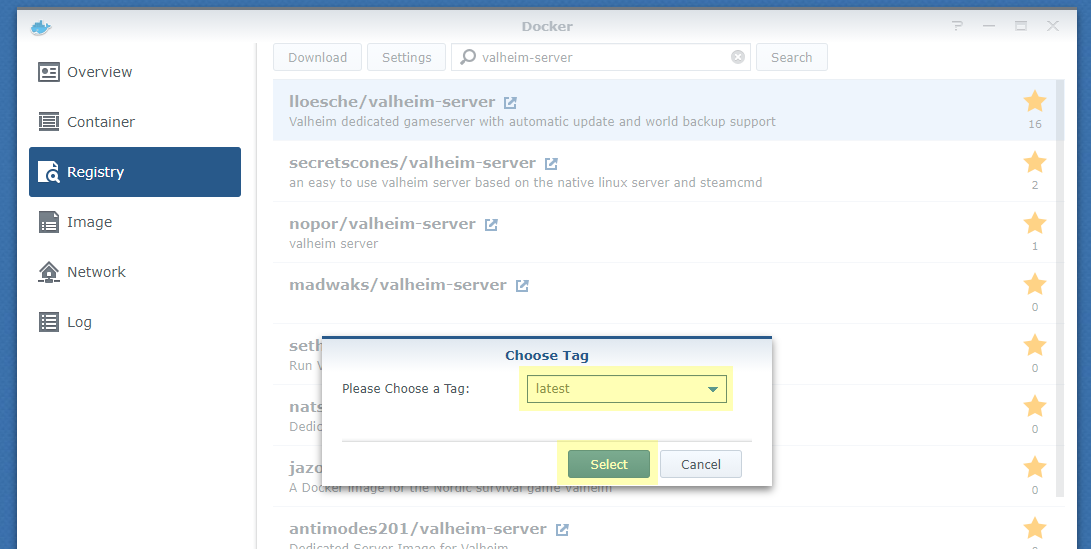
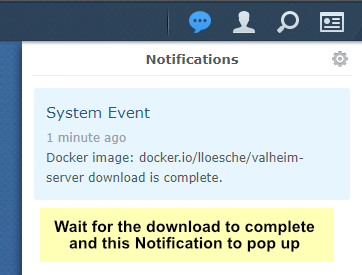
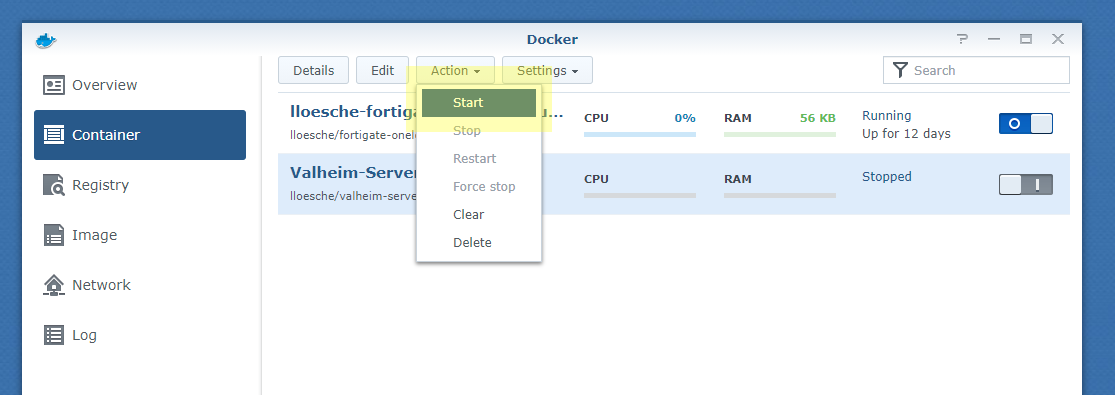
This is not an extensive tutorial, but I hope these screenshots can be helpful. Beware that the server can use multiple GB of RAM and produces a lot of CPU load.
The process of updating the image clears all data stored inside the container. So before doing a container image upgrade, make absolutely sure that /config, which contains your world, is an external volume stored on your NAS (Step 4 of the First install process). It is also a good idea to copy the latest version of the world backup to another location, like your PC.


Kubernetes manifests using this container image, along with a helm chart, are available from the following repository: https://github.com/Addyvan/valheim-k8s
The chart is also available directly using:
helm repo add valheim-k8s https://addyvan.github.io/valheim-k8s/
helm repo update
helm install valheim-server valheim-k8s/valheim-k8s # see repo for full configCDK Project for spinning up a Valheim game server on AWS Using ECS Fargate and Amazon EFS is available here: https://github.com/rileydakota/valheim-ecs-fargate-cdk
