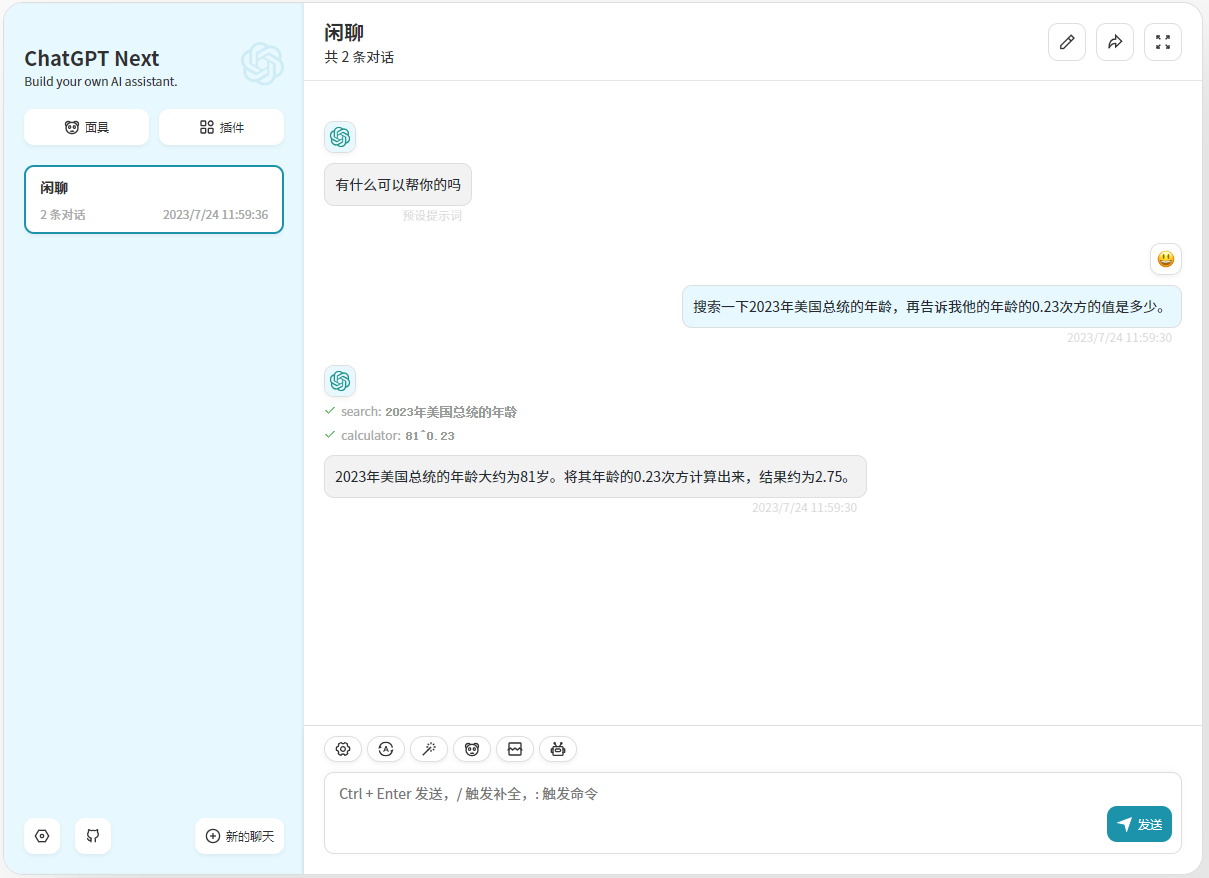
- 除插件工具外,与原项目保持一致 ChatGPT-Next-Web 主要功能
- 基于 LangChain 实现的插件功能,目前支持以下插件,未来会添加更多
- SerpAPI
- Calculator
- DuckDuckGo
- HttpGet
-
支持使用 DuckDuckGo 作为默认搜索引擎
当前配置
SERPAPI_API_KEY时优先使用serpapi作为搜索插件,不配置时默认使用duckduckgo作为搜索插件。 -
插件列表页面开发
-
支持开关指定插件
-
支持添加自定义插件
-
支持 Agent 参数配置( agentType, maxIterations, returnIntermediateSteps 等)
-
支持 ChatSession 级别插件功能开关
- 使用插件时需将模型切换为
0613版本模型,如:gpt-3.5-turbo-0613 -
SERPAPI_API_KEY目前为必填,后续会支持使用 DuckDuckGo 替换搜索插件 - Agent 不支持自定义接口地址
- 部分场景下插件会调用失败
- 插件调用失败后无反馈
- 🚀 v2.9.1-plugin-preview 预览版发布。
- 准备好你的 OpenAI API Key;
- 点击右侧按钮开始部署:
,直接使用 Github 账号登录即可,记得在环境变量页填入 API Key 和页面访问密码 CODE;
- 部署完毕后,即可开始使用;
- (可选)绑定自定义域名:Vercel 分配的域名 DNS 在某些区域被污染了,绑定自定义域名即可直连。
If you have deployed your own project with just one click following the steps above, you may encounter the issue of "Updates Available" constantly showing up. This is because Vercel will create a new project for you by default instead of forking this project, resulting in the inability to detect updates correctly.
We recommend that you follow the steps below to re-deploy:
- Delete the original repository;
- Use the fork button in the upper right corner of the page to fork this project;
- Choose and deploy in Vercel again, please see the detailed tutorial.
If you encounter a failure of Upstream Sync execution, please manually sync fork once.
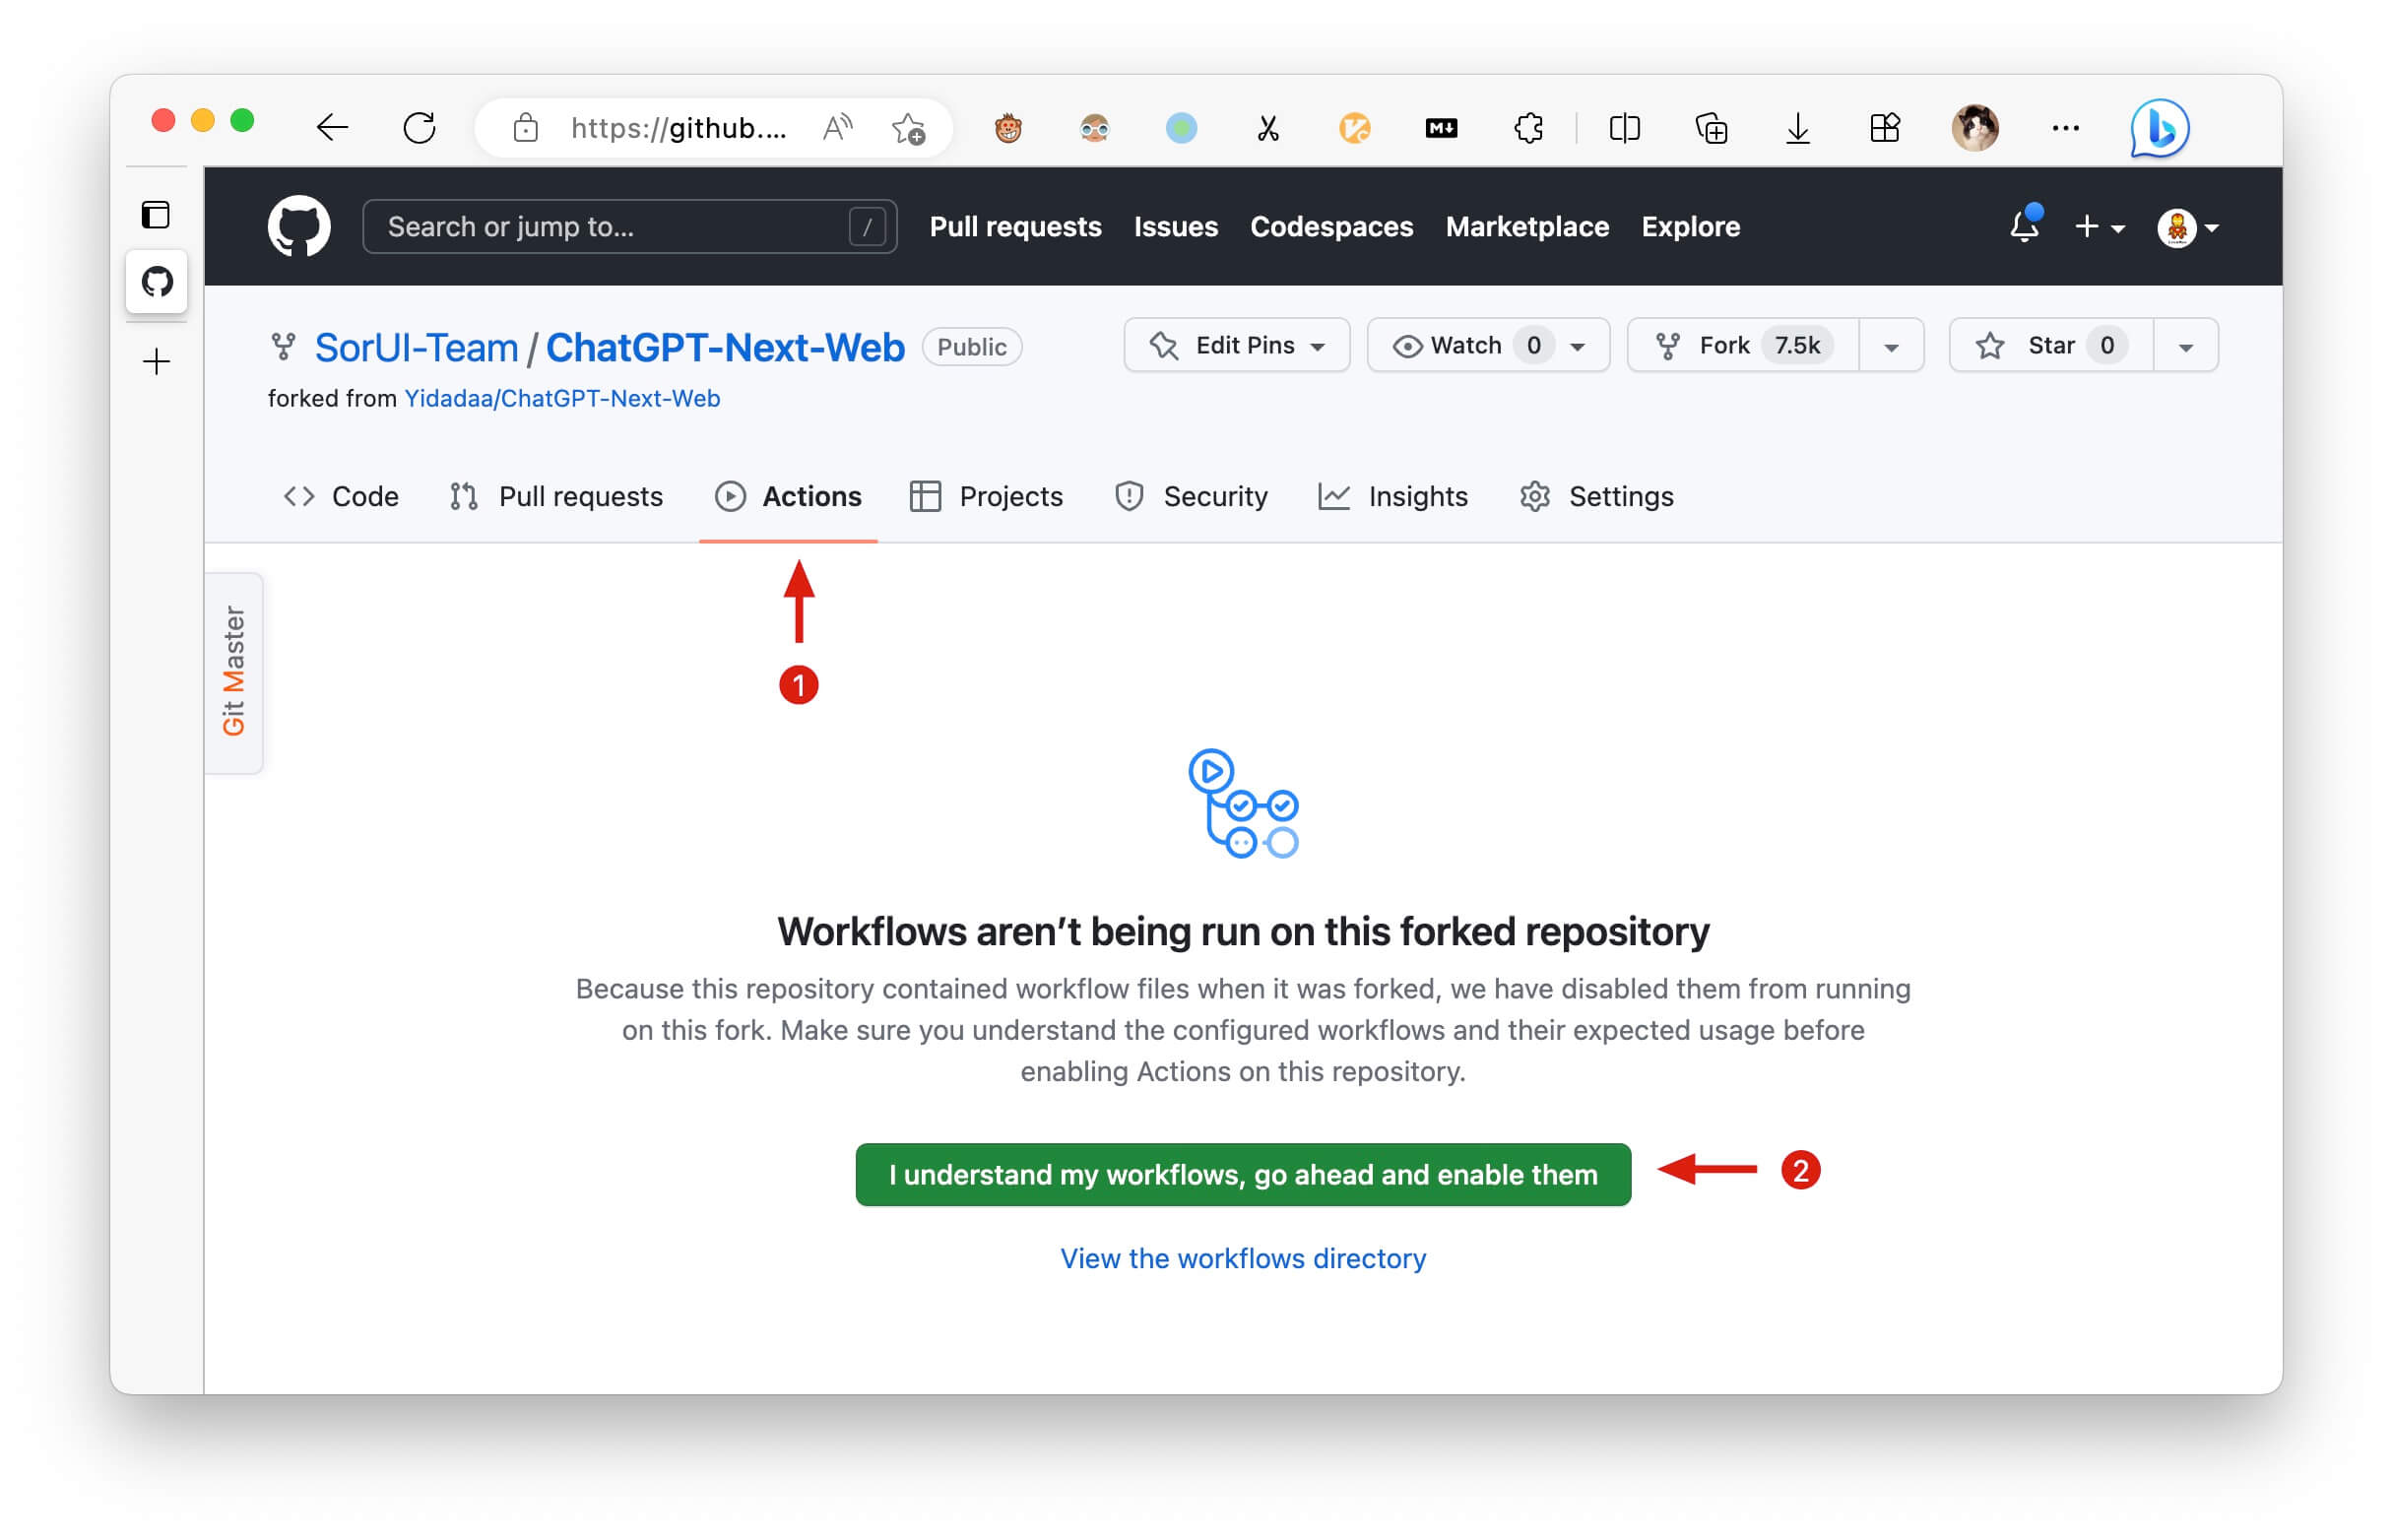
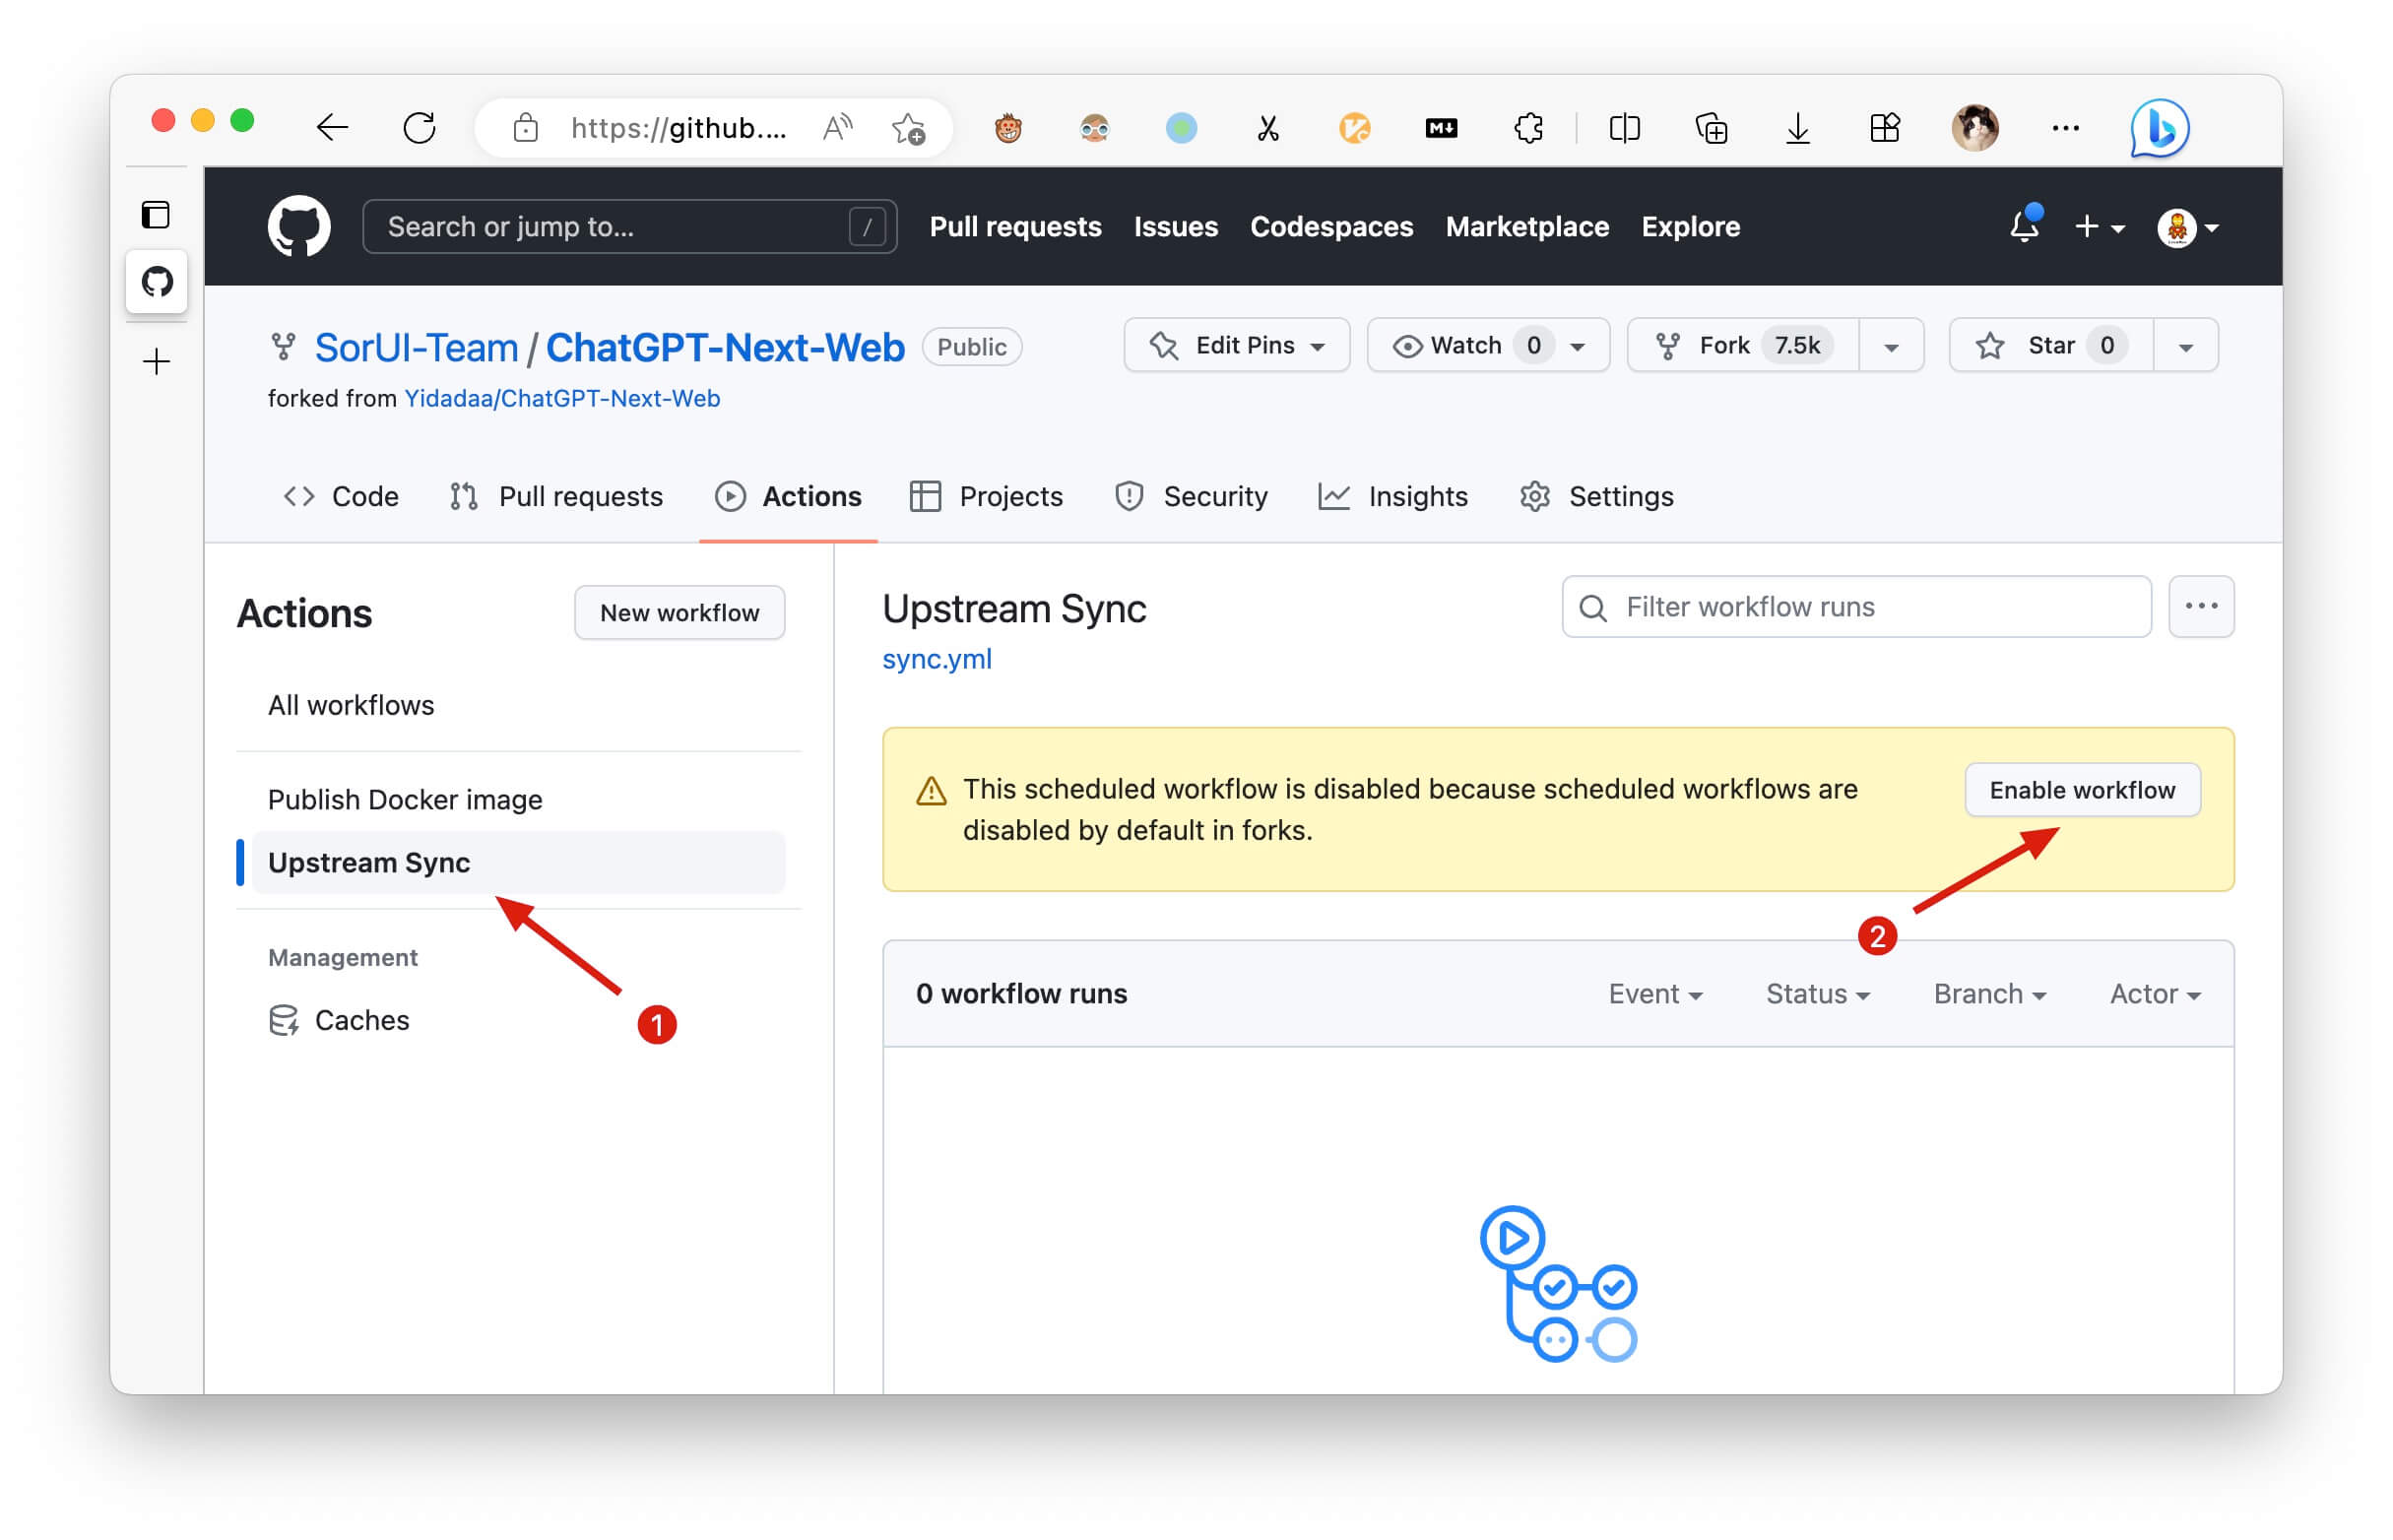
After forking the project, due to the limitations imposed by GitHub, you need to manually enable Workflows and Upstream Sync Action on the Actions page of the forked project. Once enabled, automatic updates will be scheduled every hour:
If you want to update instantly, you can check out the GitHub documentation to learn how to synchronize a forked project with upstream code.
You can star or watch this project or follow author to get release notifictions in time.
This project provides limited access control. Please add an environment variable named CODE on the vercel environment variables page. The value should be passwords separated by comma like this:
code1,code2,code3
After adding or modifying this environment variable, please redeploy the project for the changes to take effect.
Your openai api key.
Access passsword, separated by comma.
Default:
https://api.openai.com
Examples:
http://your-openai-proxy.com
Override openai api request base url.
Specify OpenAI organization ID.
Default: Empty
If you do not want users to input their own API key, set this value to 1.
Default: Empty
If you do not want users to use GPT-4, set this value to 1.
Default: Empty
If you do not want users to query balance, set this value to 1.
NodeJS >= 18, Docker >= 20
Before starting development, you must create a new .env.local file at project root, and place your api key into it:
OPENAI_API_KEY=<your api key here>

# if you are not able to access openai service, use this BASE_URL
BASE_URL=https://chatgpt1.nextweb.fun/api/proxy
# 1. install nodejs and yarn first
# 2. config local env vars in `.env.local`
# 3. run
yarn install
yarn devdocker pull gosuto/chatgpt-next-web-langchain
docker run -d -p 3000:3000 \
-e OPENAI_API_KEY="sk-xxxx" \
-e CODE="your-password" \
gosuto/chatgpt-next-web-langchainYou can start service behind a proxy:
docker run -d -p 3000:3000 \
   -e OPENAI_API_KEY="sk-xxxx" \
   -e CODE="your-password" \
   -e PROXY_URL="http://localhost:7890" \
   gosuto/chatgpt-next-web-langchain
If your proxy needs password, use:
-e PROXY_URL="http://127.0.0.1:7890 user pass"If you want to add a new translation, read this document.


