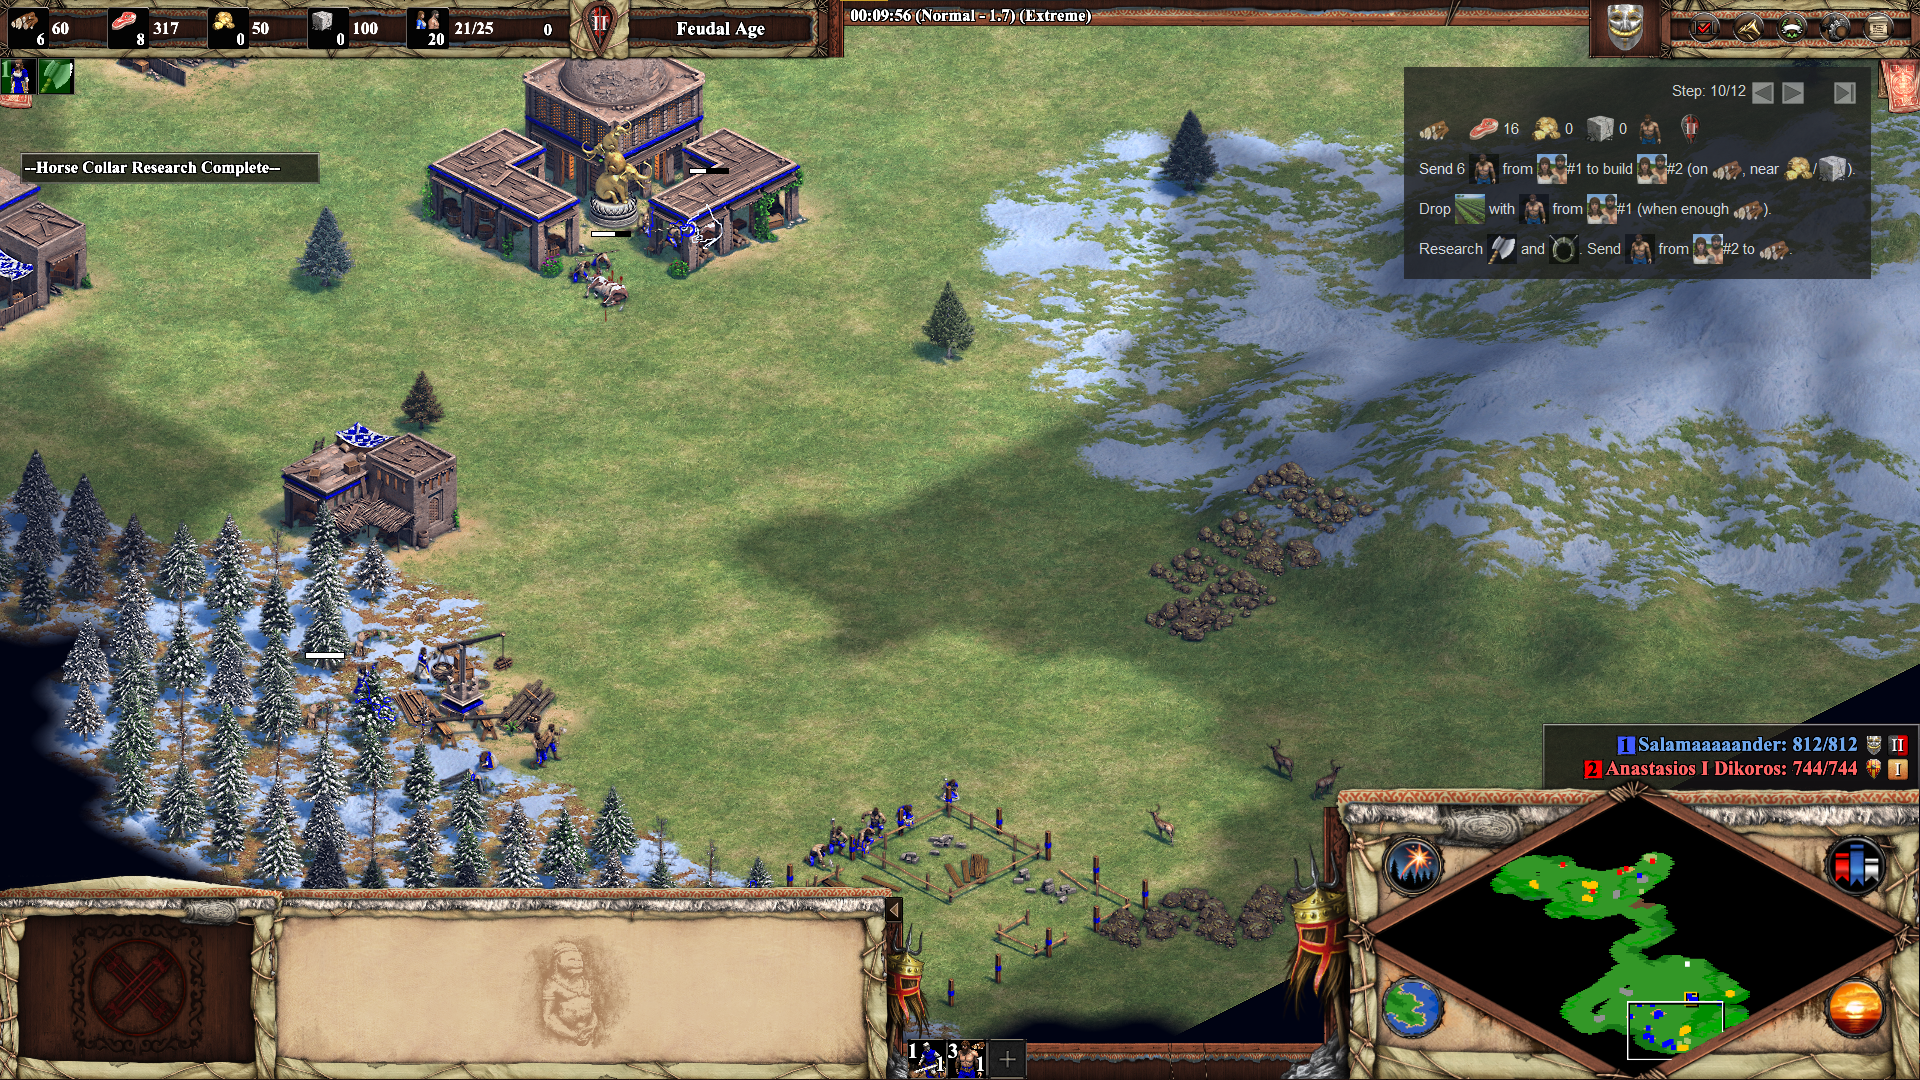
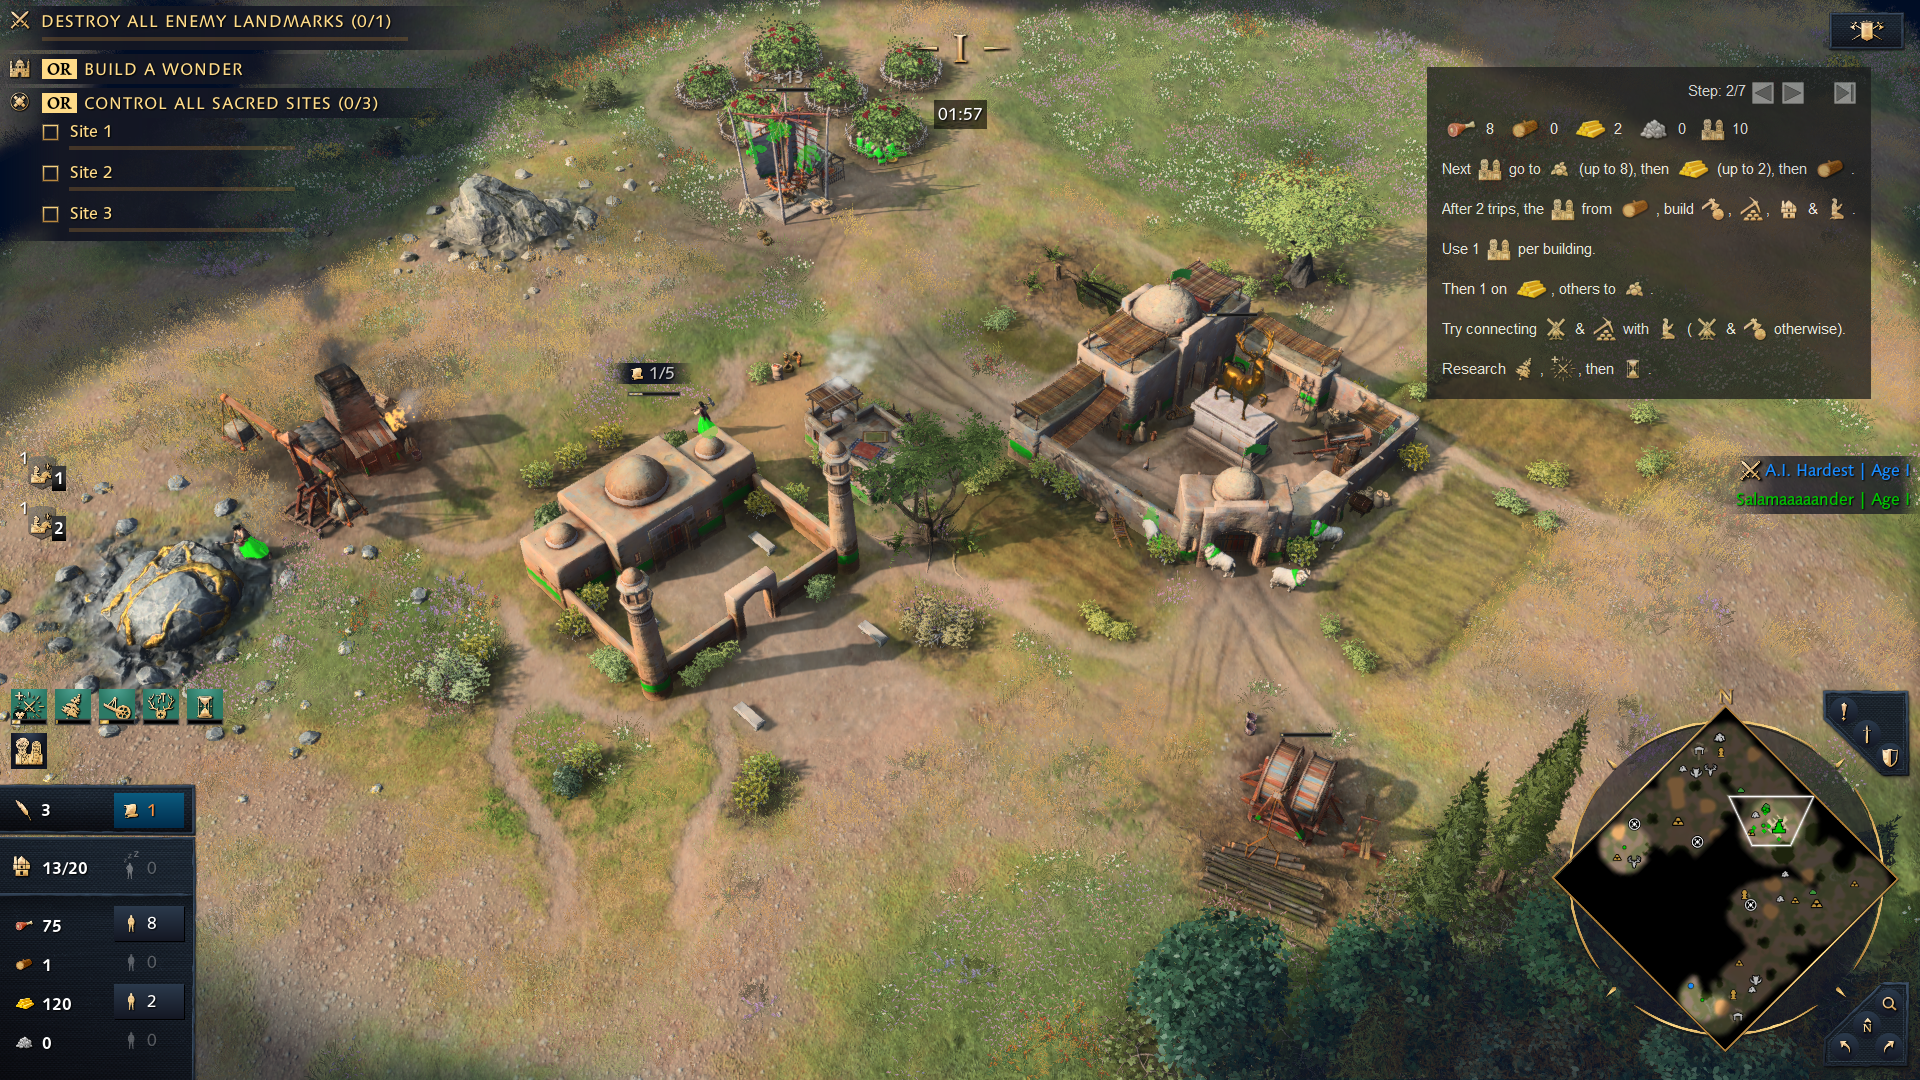
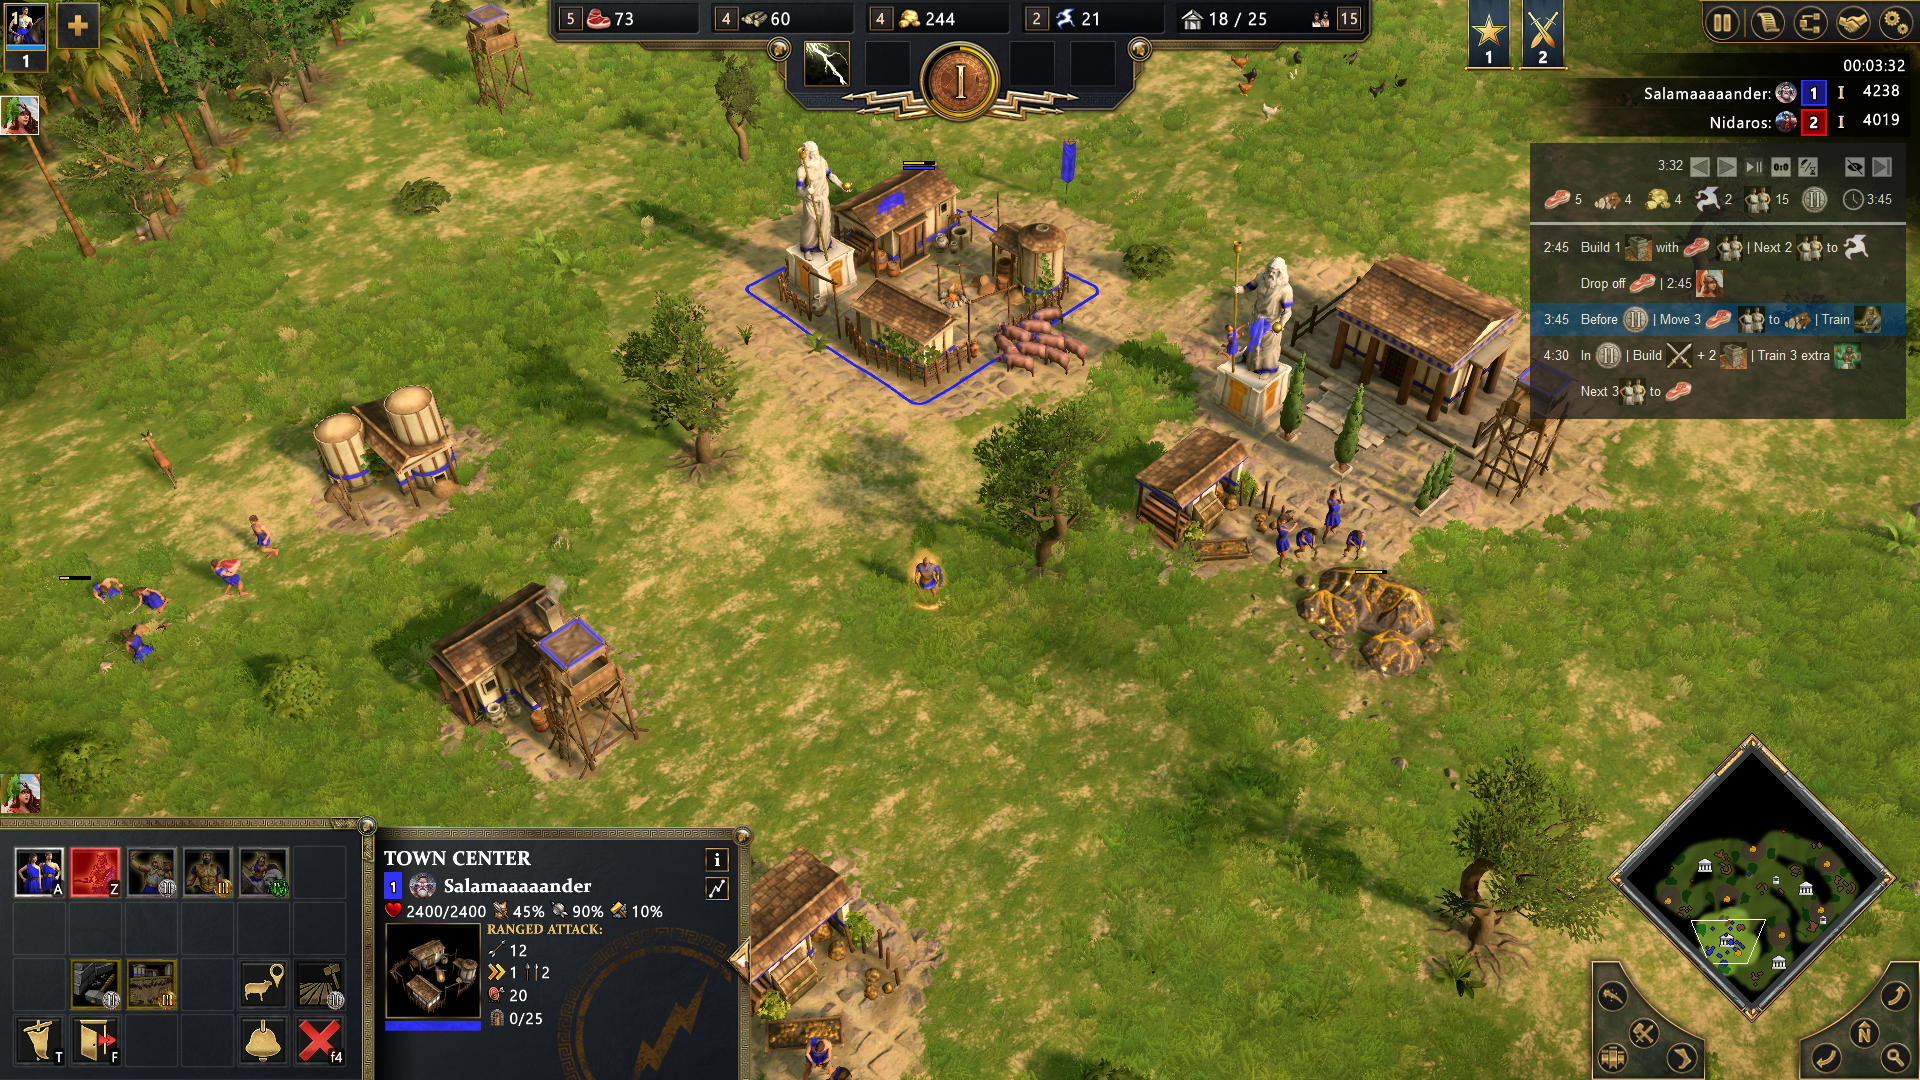
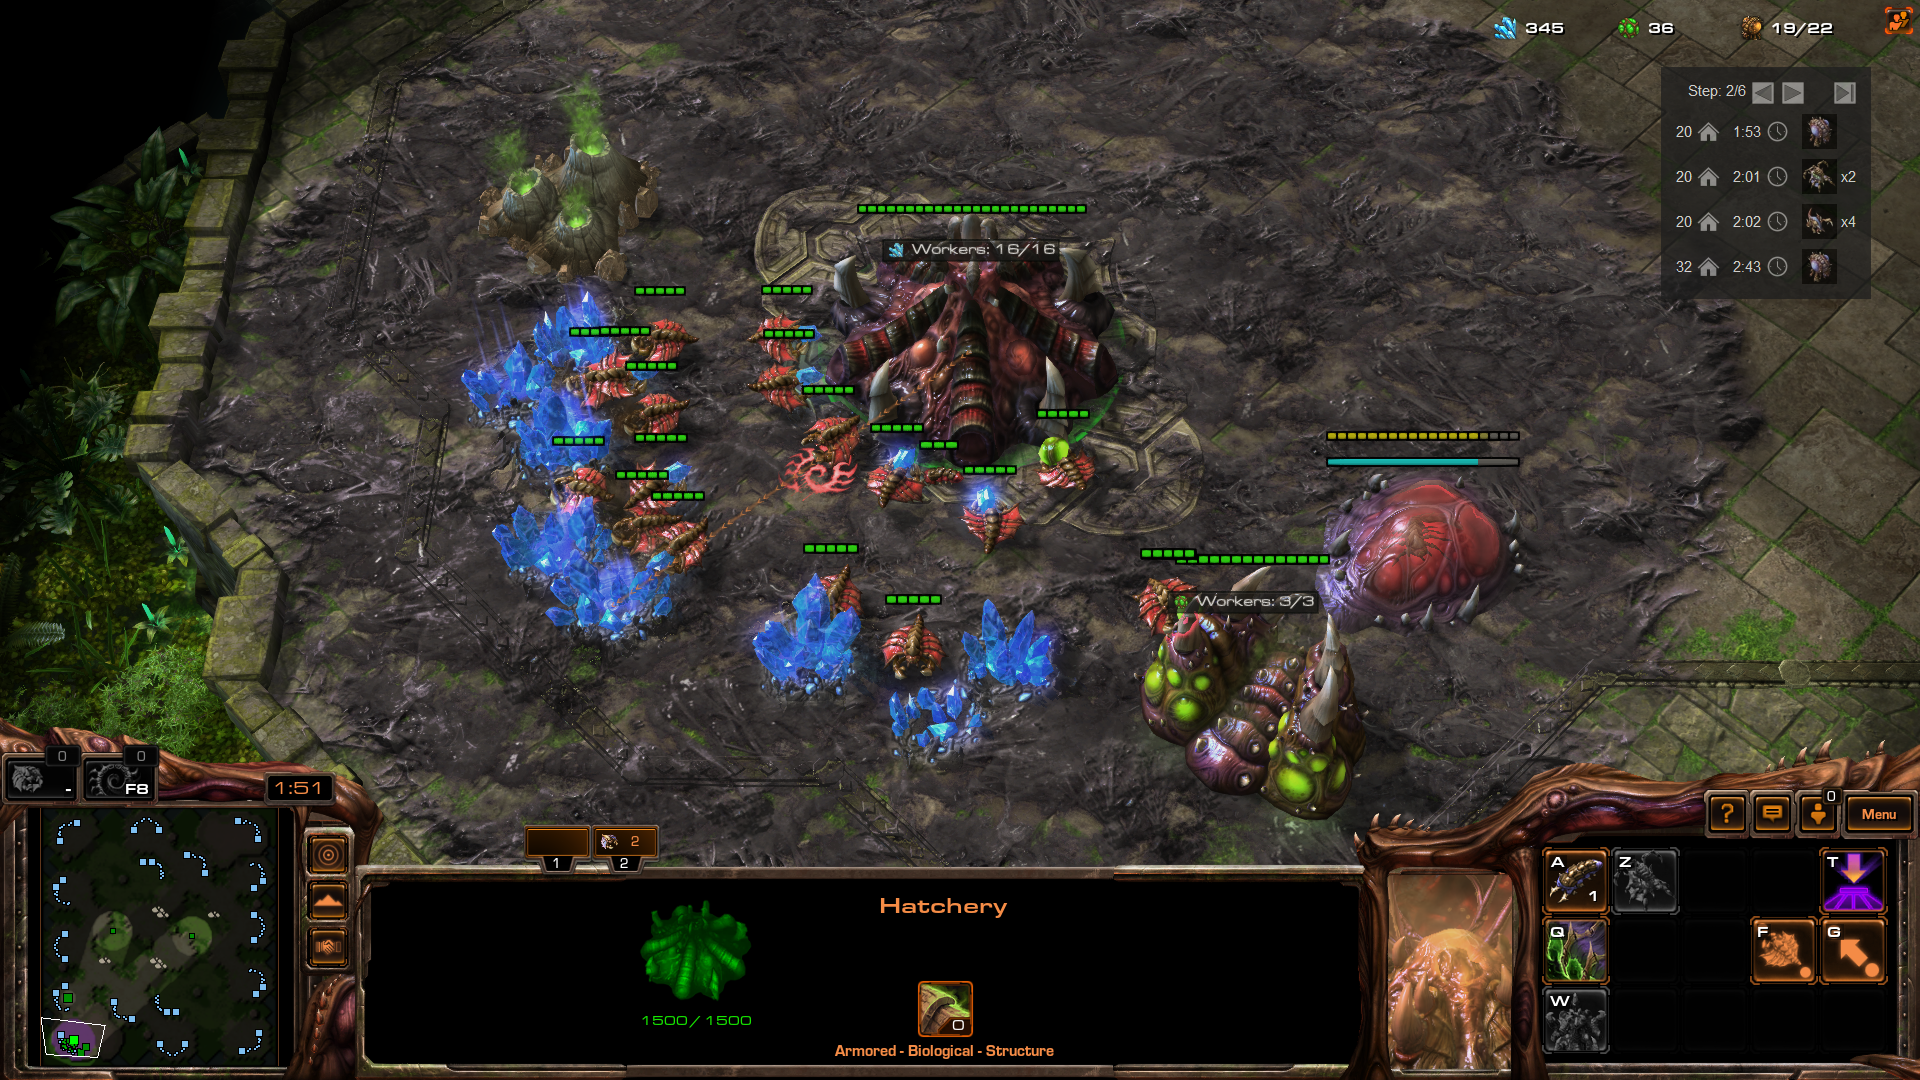
RTS Overlay is a tool used to design or import build orders for Real-Time Strategy (RTS) games. The build orders can then be displayed on top of the game, and thus can be used with a single monitor.
Updating the build order step in-game is done manually via buttons/hotkeys/timer. RTS Overlay does not interact with the game (no screen analysis, no controller interaction).
Read the main instructions here to use the overlay.
- Main instructions and download
- Using the overlay through a web browser or with an EXE
- Supported games
- Web solution
- EXE/Python solution
- Common to Web and EXE/Python solutions
- Game-specific instructions
- Troubleshooting
- Additional notes
As explained in the next section, there are two methods to use the overlay:
- Through a web browser
- YouTube demo
- Go to rts-overlay.github.io and follow the instructions.
- Using an EXE (or running from its Python source code)
- YouTube demo
- Download the EXE (only for Windows) using these links:
- Alternatively, run from Python source code, by following the instructions in the Python configuration section.
RTS Overlay is available either through a web browser or as an EXE/Python solution (the EXE solution can be used by downloading the pre-compiled EXE here or running from Python source code).
The web-based solution is easier to use and is a good first step when trying RTS Overlay. The Exe/Python solution (from source or pre-compiled) offers some additional functionalities:
- Less intrusive: No header, semi-transparent (opacity) and does not interfere with mouse clicks.
- Global hotkeys: Both versions support hotkeys, but the web-based version only accepts hotkeys when the focus is on the overlay. The EXE/Python solution listens to hotkeys, even when the focus is on the game.
How to run:
- Web solution: Go to rts-overlay.github.io and follow the instructions.
- To keep it on top of your game while playing, use an Always On Top application. For Windows, PowerToys is a good solution. It is free, developed by Microsoft and available on the Microsoft Store.
- After testing the web overlay, it is highly recommended to download the local version to improve the speed, work offline and customize the experience. Click here, unzip and open docs/index.html with any web browser. Alternatively, you can click on the installation button in the URL bar (for Chrome and Edge) to install it locally.
- The development (non-stable) version is available here.
- EXE/Python solution: Download the EXE here or follow the Python instructions here.
- The EXE is a pre-compiled version (obtained from Python source code) in a zip package. No need to install the python environment, only unzip and click on the game EXE (in the overlay sub-folder). Note that some antivirus softwares do not like EXE in zip files downloaded from the internet (and you might need to ask an exception if you decide to use this solution).
At the moment, the following games are supported:
- Age of Empires II Definitive Edition
- Download any build order from buildorderguide.com (click on Copy to clipboard for RTS Overlay).
- See YouTube demo here (Web solution) or here (EXE/Python solution).
- Age of Empires IV
- Download any build order from aoe4guides.com (click on Overlay Tool) or from age4builder.com (click on the salamander icon).
- See YouTube demo here.
- Age of Mythology
- See YouTube demo here.
- StarCraft II
- Download build orders from Spawning Tool (only for EXE/Python solution, instructions in RTS Overlay tool).
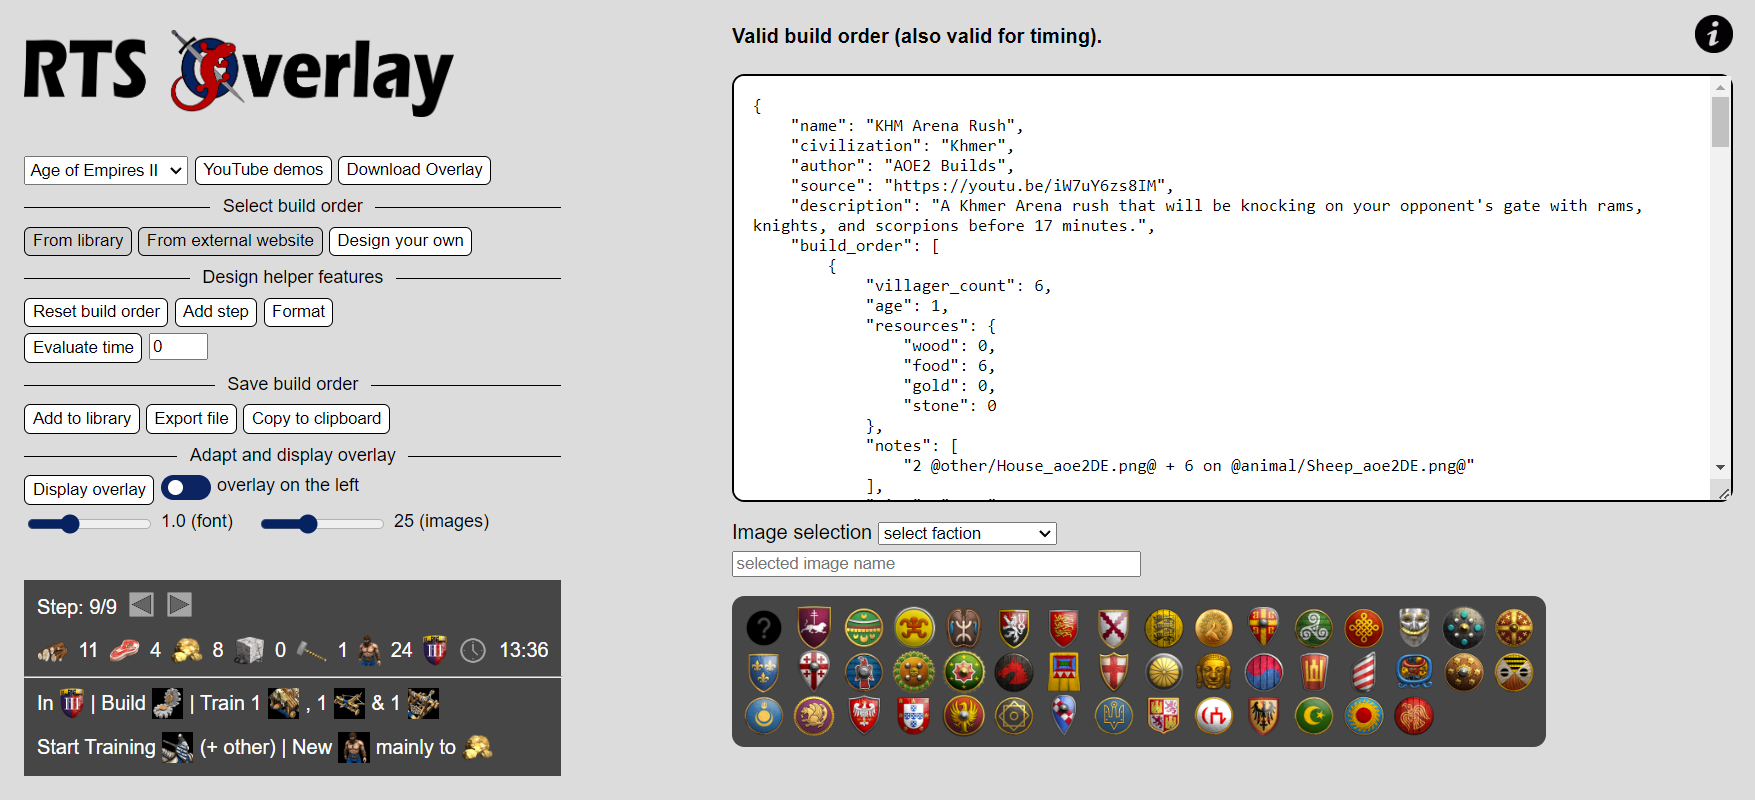
The main page of the web version is visible below. Full instructions are available when hovering during a short time on the "i" icon on the top right of the page.
Once the build order is ready, click on the Display overlay button to generate a new (small) window with the requested build order. Be sure to use an Always On Top application to keep it in front of your game.
Microsoft PowerToys is a good solution. It is free, developed by Microsoft and available on the Microsoft Store. Download it from the Microsoft Store, configure the hotkey for the Always On Top feature (you can also configure the border color) and use it on the RTS Overlay window. This solution however does not come with any transparancy feature.
Alternatively, a slighty more advanced solution (capable of providing transparency, Always On Top feature and window cropping) is the following script with AutoHotkey. Download the version v2, install it, launch it and click on New script. Give it a name and edit it to add the code below (you can adapt some values to your preference). Double clicking on the script will allow you to use the Ctrl+Alt+O sequence to pin the window currently in focus (e.g. RTS Overlay) as Always On Top with some transparency and without the top border (to tune, see script).
#Requires AutoHotkey v2.0

; Adapt selected window for Overlay: Ctrl+Alt+O
^!o:: ; Hotkey sequence: Ctrl(^) + Alt(!) + O
{
    WinSetTransparent 200, "A" ; Opacity: [0, 255] (0: fully transparent)
    WinSetAlwaysOnTop 1, "A" ; Always on top
    WinSetRegion "0-65 w2000 h2000", "A" ; Crop the top 65 pixels (to adapt)
    WinSetStyle "-0xC00000", "A" ; Remove window's caption
    ; Disable DWM rendering of the window's frame
    DllCall("dwmapi\DwmSetWindowAttribute", "ptr", WinExist("A")
     , "uint", DWMWA_NCRENDERING_POLICY := 2, "int*", DWMNCRP_DISABLED := 1, "uint", 4)
}

; Set selected window back to normal: Ctrl+Alt+P
^!p:: ; Hotkey sequence: Ctrl(^) + Alt(!) + P
{
    WinSetTransparent 255, "A" ; Opacity: [0, 255] (255: no transparency)
    WinSetAlwaysOnTop 0, "A" ; Remove always on top
    WinSetRegion "", "A" ; Back to full window
    WinSetStyle "+0xC00000", "A" ; Restore window's caption
    DllCall("dwmapi\DwmSetWindowAttribute", "ptr", WinExist("Window Title")
     , "uint", DWMWA_NCRENDERING_POLICY := 2, "int*", DWMNCRP_ENABLED := 2, "uint", 4)
}
Select one of the two methods below (EXE solution or Python configuration). As mentioned above, there are two added benefits (compared to the web-based solution): Less intrusive and Global hotkeys.
This method is easier to do and runs a compiled version (so more efficient) of the overlay. The python code was compiled and zipped with all the dependencies in a zip folder. Note that some antivirus softwares do not appreciate zip folders with executables and dependencies downloaded from the internet, and will potentially send false positive warnings. Here are the instructions:
- Download the zip folder of the requested game here. On some computers, you might need to unblock the zip folder before extracting it (right click on the zip folder, select properties and then select "unblock").
- Unzip it in any location on your computer (ideally in a location where no special computer rights are requested).
- To launch the program, simply launch the executable of the requested game (all these executables are located in the overlay sub-folder, see specific details for each game).
To update the library to a new release, just delete the old folder and replace it with the new release. Note that your settings and build orders are saved in the user data directory (e.g. C:\Users\XXXXX\AppData\Local\RTS_Overlay). So, updating to a new release should not remove your old settings, nor your build orders. In case you want to use a local configuration folder, create a folder called "local_config" in the overlay sub-folder. The configuration (and build orders) will be saved there.
If you encounter issues, have a look at the Troubleshooting section.
You can run the program from source using Python. It should not be difficult to do, even without any coding knowledge. Here are the instructions:
- If you do not yet have a Python environment, you can download and install a Python distribution with conda package manager using the Anaconda installer (other distributions can also work like Miniforge). Optionnaly, you can add the program (e.g. Anaconda3) to your PATH environment variable (to run it from any terminal).
- Download the code of RTS Overlay: click on the Code button (on top of this page), then on Download ZIP and extract the ZIP folder (or clone it with Git).
- Open Anaconda Prompt. If you added the python path to your PATH environment variable, you can open any terminal (e.g. Command Prompt on Windows).
- Go to the python directory of your extracted folder (e.g.
cd RTS_Overlay-master/python). - Create the Conda environment:
conda create --name rts_overlay python=3.8 - Activate your environment:
conda activate rts_overlay - Install the library requirements:
pip install -r utilities/requirements.txt - Optionally, run
pip install python-Levenshtein==0.12.2(for slightly faster performances). - Run the application:
python main_aoe2.py(for AoE2, similar for other games).
Steps 3, 4, 6 and 9 must be re-done each time you want to launch the program.
In case you want to build the application as an exe program, the command python prepare_release.py (after cd utilities) will create the standalone libraries, and prepare additional files for the releases (you will need pip install nuitka==1.0.6 and pip install orderedset==2.0.3).
When you launch the EXE/Python version of RTS Overlay, you first see the Configuration panel. It is used to configure the layout and the build order.
The first row contains the following action buttons (from left to right):
- Quit application: Quit the tool.
- Save settings: Save the configuration in a settings file (e.g. aoe2_settings.py).
- Load settings: Load the settings of the aforementioned file (this file is automatically loaded at launch).
- Configure hotkeys: Configure the hotkeys (using keyboard and/or mouse inputs) and open the folder where the corresponding settings are saved. The following hotkeys are global in the sense that they can be used even when you do not have the focus on the overlay (typically while playing the game):
- next_panel: cycle through the next panel
- show_hide: show/hide the application
- build_order_previous_step: go to the previous build order step, or update the timer to -1 sec (see below)
- build_order_next_step: go to the next build order step, or update the timer to +1 sec (see below)
- switch_timer_manual: swicth between manual and timer-based transitions (see below)
- start_timer: start the timer
- stop_timer: stop the timer
- start_stop_timer: start or stop the timer
- reset_timer: reset the timer to 0:00
- Add build order: Add a build order (write it using widgets or copy it from a dedicated website) and open the folder where the build orders are stored. If a website can generate build orders with the correct format, a button will be available to reach this website.
- Choose the font size of the text police.
- Choose the scaling of the layout (images, spacing...).
- When using a 4K display, you can for instance set this value to 200 %.
- Next panel: go to the Next panel (cycling between Configuration and Build Order).
You can move the window with drag and drop, using the left click. Because the window will be resized depending on its content, what matters is only the upper right corner position. This upper right position will be maintained (and saved in the settings file using the Save settings button).
The overlay window should stay on top of your other applications (game included). Sometimes, it might not work properly at launch, but clicking a single time on Next panel should solve the issue.
More options are available in this settings file (police font, size of the images...). Click on Configure hotkeys, then on Open settings folder to find it. You can edit it (JSON format) with any text editor and reload it (using the Load settings button or by quitting and relaunching the application).
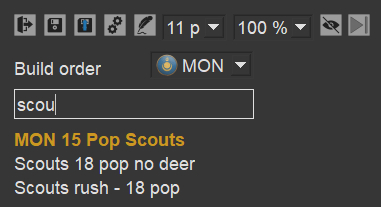
In the configuration panel, you find the Build Order search bar. To choose the build order to display, start by typing a few keywords. A list of up to 10 corresponding build orders appear. This is performed using a fuzzy search. Alternatively, you can deactivate this fuzzy search (or tune it) in the aforementioned settings file (JSON format) with the bo_list_fuzz_search flag. When set to False, all the keywords separated by spaces must appear in the selected build orders names. Finally, if you only type a single space character, the first 10 build orders will appear. The overlay has a filtering option to select your faction or a generic build order (and potentially the one of your opponent).
Press Enter to select the build order appearing in bold. By default, the one selected is the first of the list, but you can use Tab to select another one. Another solution is to click with the mouse on the requested build order.
When available, the easiest way to design a build order is through a dedicated website which can output the build orders in correct format (e.g. buildorderguide.com for AoE2). Many existing build orders can be found on these websites.
Alternatively, you can write it in the build order design panel (text area on the right of the web version or Add build order button on the EXE/Python solution). A few helper buttons allow you to automatically get a basic template, format it, display it and select images by clicking on them. For some games, it is also possible to evaluate the time for each step (to be used with the timer feature). See the full instuctions on the corresponding panel.
Here are the main fields of any build order:
- The "name" field is used to select your build order using the corresponding search bar (in the Configuration panel).
- The "author" and "source" fields describe the origin of the build order, but do not affect the application.
- The "build_order" field contains the different steps of the build order.
- "notes": Extra notes indicating what to do.
- You can replace words by images located in the assets folder.
- Write the name of the picture, with its path relative to the game folder (docs/assets/aoe2/ for AoE2) between
@markers.
- Write the name of the picture, with its path relative to the game folder (docs/assets/aoe2/ for AoE2) between
- You can replace words by images located in the assets folder.
- "time": Optional field (for each step) where you can add a target time indicated as a string.
- The other items of "build_order" are game dependent.
- "notes": Extra notes indicating what to do.
On the EXE/Python version, you cannot click on this window (allowing to still click on the game behind it), except on the buttons of the first row. The web version does not have this feature (i.e. it is not transparent to mouse interactions).
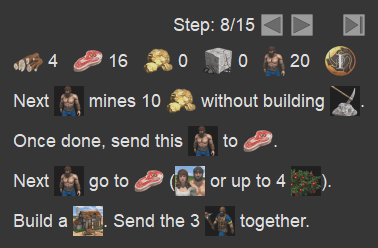
You can select the step of the build order, using the two arrow buttons. The current step of the build order is indicated next to it. You can also use the aforementioned hotkeys to change the build order step, even when you do not have the focus on the overlay.
In case the timer update feature is available and is compatible with the current build order, the feather/hourglass button will appear. When clicking on it, the build order update will use timing instructions. To stop/run, click on the corresponding button. The arrow buttons now updates the timer by 1 second, while the reset button with set the timer to 0:00. When running, the current instruction is highlighted, while the previous and next ones are also shown. Hotkeys are also available for all these actions.
The build order typically indicates the number of workers to assign to each resource, the total number of workers/supply and some notes. When applicable, the age to reach, the time and/or the number of builders are also indicated.
To run the application, select Age of Empires II (web version) or launch aoe2_overlay.exe (download here, or run from Python source).
Most of the information to design/download a build order is provided in the Designing a build order section. Here is the additional information relative to AoE2 (adaptations for the other games are available in their corresponding sections).
You can download build orders from buildorderguide.com by clicking on Copy to clipboard for RTS Overlay on any build order.
Otherwise, here are the instructions to manually design a build order (JSON format).
- Add a "civilization" field: The selected civilization (to choose among the ones of python/aoe2/aoe2_civ_icon.py).
- You can add a single civilization or put several in an array (e.g. ["Aztecs", "Incas", "Mayans"]).
- You can also set it as "Any"/"Generic" if the build order is generic and works for any (or most) civilization.
Each step of the "build_order" field must contain (on top of the aforementioned "notes"):
- "villager_count": The total count of villagers to reach at the end of this step, negative if irrelevant.
- "age": The age to reach at the end of this step (1: Dark, 2: Feudal, 3: Castle, 4: Imperial), negative if irrelevant.
- "resources": The number of villagers to assign to each resource by the end of this step, negative if irrelevant.
- The required fields are
"food","wood","gold"and"stone". The field"buildercan be added as an optional 5th resource to indicate the number of builders to add. - Instead of writing a single value per resource, it is possible to write a dictionary like
{name_1: value_1, name_2: value_2}wherename_xis any string or an image in docs/assets/aoe2 andvalue_xis an integer.
- The required fields are
To run the application, select Age of Empires IV (web version) or launch aoe4_overlay.exe (download here, or run from Python source).
This overlay is similar to the AoE2 overlay, except:
- Each build order step indicates the number of villagers and the population space expected (only number of villagers in AoE2).
- You can download compatible build orders from aoe4guides.com by clicking on
Overlay Toolon any build order, or from age4builder.com by clicking on the salamander icon on any build order. - To design a build order manually:
- You must specify the civilization ("civilization" to choose among the ones of python/aoe4/aoe4_civ_icon.py).
- You can add a single civilization or put several in an array (e.g. ["English", "Chinese"]).
- You must also specify the population count in the "population_count" field of each step.
- Use -1 if it is irrelevant for this step of the build order.
- You must specify the civilization ("civilization" to choose among the ones of python/aoe4/aoe4_civ_icon.py).
To run the application, select Age of Mythology (web version) or launch aom_overlay.exe (download here, or run from Python source).
This overlay is similar to the AoE2 overlay, except:
- To design a build order manually:
- You must specify the major god ("major_god" to choose among the ones of python/aom/aom_major_god_icon.py).
- You can add a single major god or put several in an array (e.g. ["Zeus", "Hades", "Poseidon"]).
- You must specify the major god ("major_god" to choose among the ones of python/aom/aom_major_god_icon.py).
To run the application, select StarCraft II (web version) or launch sc2_overlay.exe (download here, or run from Python source).
This overlay is similar to the AoE2 overlay, except:
- You must specify both your race and the one of your opponent ("Any" is an option for your opponent).
- You can copy any build order from Spawning Tool (only for EXE/Python solution).
- Read additional instructions in the Add build order panel.
- Except the initial information of a build order (race, opponent race, name, patch, author and source), you need to fill each step of the build order containing notes (compulsory) and the following optional fiels: time, supply, minerals and vespene_gas.
In case of issues, try first the tips below. If none of them solve the issue, you can add an issue on GitHub (https://github.com/CraftySalamander/RTS_Overlay/issues) describing your problem (the more details, the better). For the EXE/Python solution, be sure to mention the version number (located in version.json at the root of the folder).
If you encounter issues with the web-based version, you can try to run with another web browser (Chrome, Edge...) to see if the same issue still appears. For this overlay, Edge and Chrome seem to work better than other browsers like Firefox.
On some computers, you might need to allow the access to the executable or the whole folder. In particular, if you see "cannot proceed because python38.dll was not found", you must unblock the zip folder before extracting it (right click on the zip folder, select properties and then select "unblock").
Similarly, Windows (or your antivirus) might read .exe files as threats and remove them. You might have to add some defender exceptions.
In case the application launches (i.e. you can see its icon in the Taskbar) but is not visible, it might be that the overlay appears outside your screen (e.g. in case you used multiple monitors and unplugged one of them). Check if the settings seem correct (the file will most likely be located in C:\Users\xxx\AppData\Local\RTS_Overlay\xxx\settings\xxx_settings.json). For instance, the location of the overlay upper corners are saved in the settings layout > upper_right_position (for overlay_on_right_side set to True) and layout > upper_left_position (for overlay_on_right_side set to False).
On Linux, if the overlay does not stay on top of other applications, use Alt+Space to bring out the titlebar menu for non-GTK applications in Gnome, then just press "Always on top".
It was successfully tested on Linux with X11.
If the aforementioned tips are not enough, you might try to run the application from sources (using Python). This is documented in the Python configuration section (and should not be difficult, even without Python knowledge).
RTS Overlay is not associated with the developers/publishers of the aforementioned games.
For Blizzard-Microsoft games, RTS Overlay was created under Microsoft's "Game Content Usage Rules" using assets from the corresponding games, and it is not endorsed by or affiliated with Microsoft.
