Project to Spawn a titanium crucible Installation with Cloud Foundry and Kubernetes (optional: can integrate with istio and deploy serverless workloads on Project riff)
Credits to komljen for the kubernetes yaml files for deploying ELK
Project to Spawn a titanium crucible (ELK stack + multiple honeypots) installation in an automated way across different Clouds (AWS and GCP) using Docker containers, Kubernetes, Cloud Foundry, project riff (optional) all supported by basic Service Discovery.
- A script provisions a Kubernetes cluster on GCP (optionally this can be done on top of Pivotal Container services (PKS))
- An ELK stack gets started in Kubernetes (GKE)
- Honeypot instances are started in Cloud Foundry (leveraging Pivotal Web services or any cloud foundry based service)
- Local docker containers perform Service discovery and mapping for the different application and stack components
- A local honeypot is deployed (as a docker container using the launcher VM in AWS) that listens to port 8081 and logs to the ELK stack
- [Optional] Istio to provide telemetry for some of the pods deployed to Kubernetes
- [Optional] Project riff to show how to deploy Functions on top of Kubernetes
A dockerized etcd instances is used to store variables/application parameters in a KV store. The code stores all application information in etcd and uses the data stored to scale up, scale down, perform a basic TDD/CI and eventually tear down the application.
This is a setup targeted at demonstranting the different abstactions (Container as a service, platform as a service) and Cloud native Tools (Service Discovery, KV stores) that you can use to build your new applications.
Tested on a t1.micro AMI
To install the prerequisites on an AMI image use this piece of code:
https://github.com/FabioChiodini/AWSDockermachine
[the script is run in the context of ec2-user account]
Install kubectl
Create an instance on AWS (t1 micro, update it and install components using this script https://github.com/FabioChiodini/AWSDockermachine ) Launch the main script with no parameters (all parameters are stored in the configuration file **Cloud1)
./GKEProvision.sh
This will create a Kubernetes Cluster on GKE and connect to it.
./SpawnSwarmtcK.sh
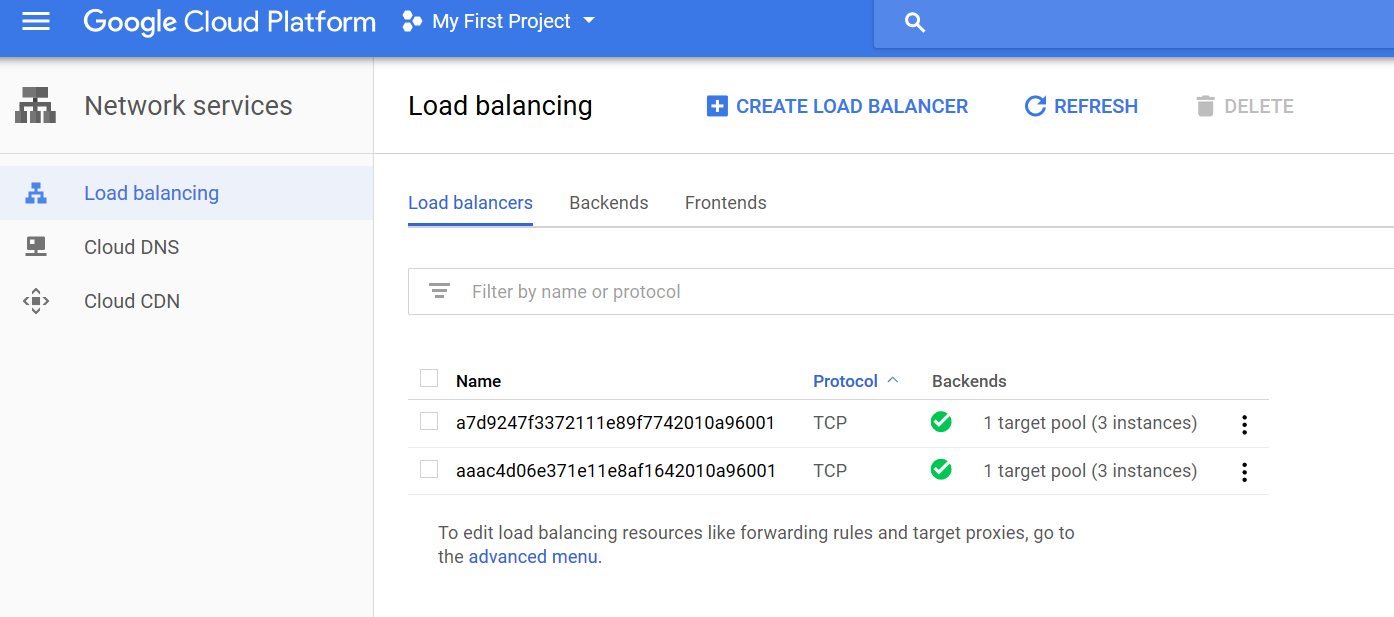
This will provision an ELK stack in Kubernetes and publish its services over the internet (all parameters are logged in an etcd instance)
./CFProvision.sh
This script will start honeypot instances on Cloud Foundry. Instances will be configured to log to the ELK stack previously created
./TDD.sh
This script will perform abasic testing of the stack components and the ELK stack. It will logs the results in etcd
To run this script you have to prepare one configuration file (in /home/ec2-user)
- Cloud1 see below for syntax
This script performs these tasks (leveraging Docker):
- Loads config files
- Prepares etcd and other infrastructure services starting docker containers locally
- Starts Kubernetes cluster
- Logs Kubernetes cluster configuration in etcd
- Executes ELK on Kubernetes
- Logs ELK variables in etcd
- Launch honeypots in Cloud Foundry
- [Optional] Launch workloads in a FaaS platform (project riff)
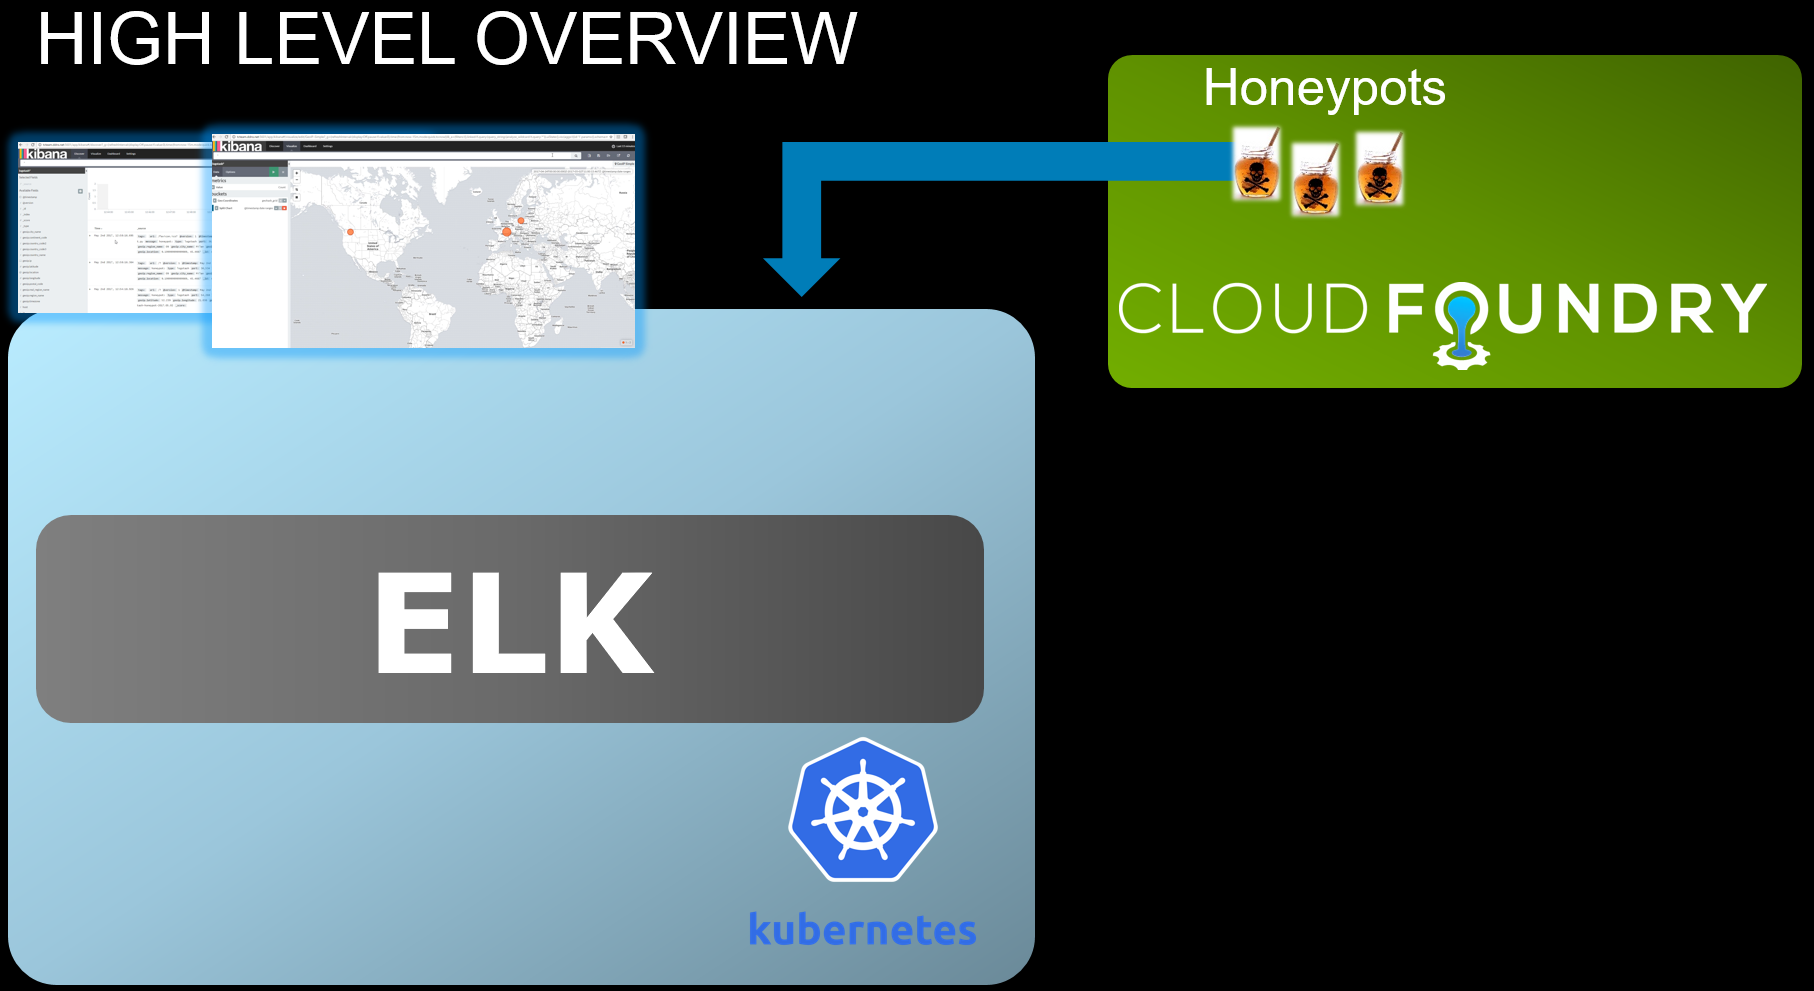
Here's an high level diagram:
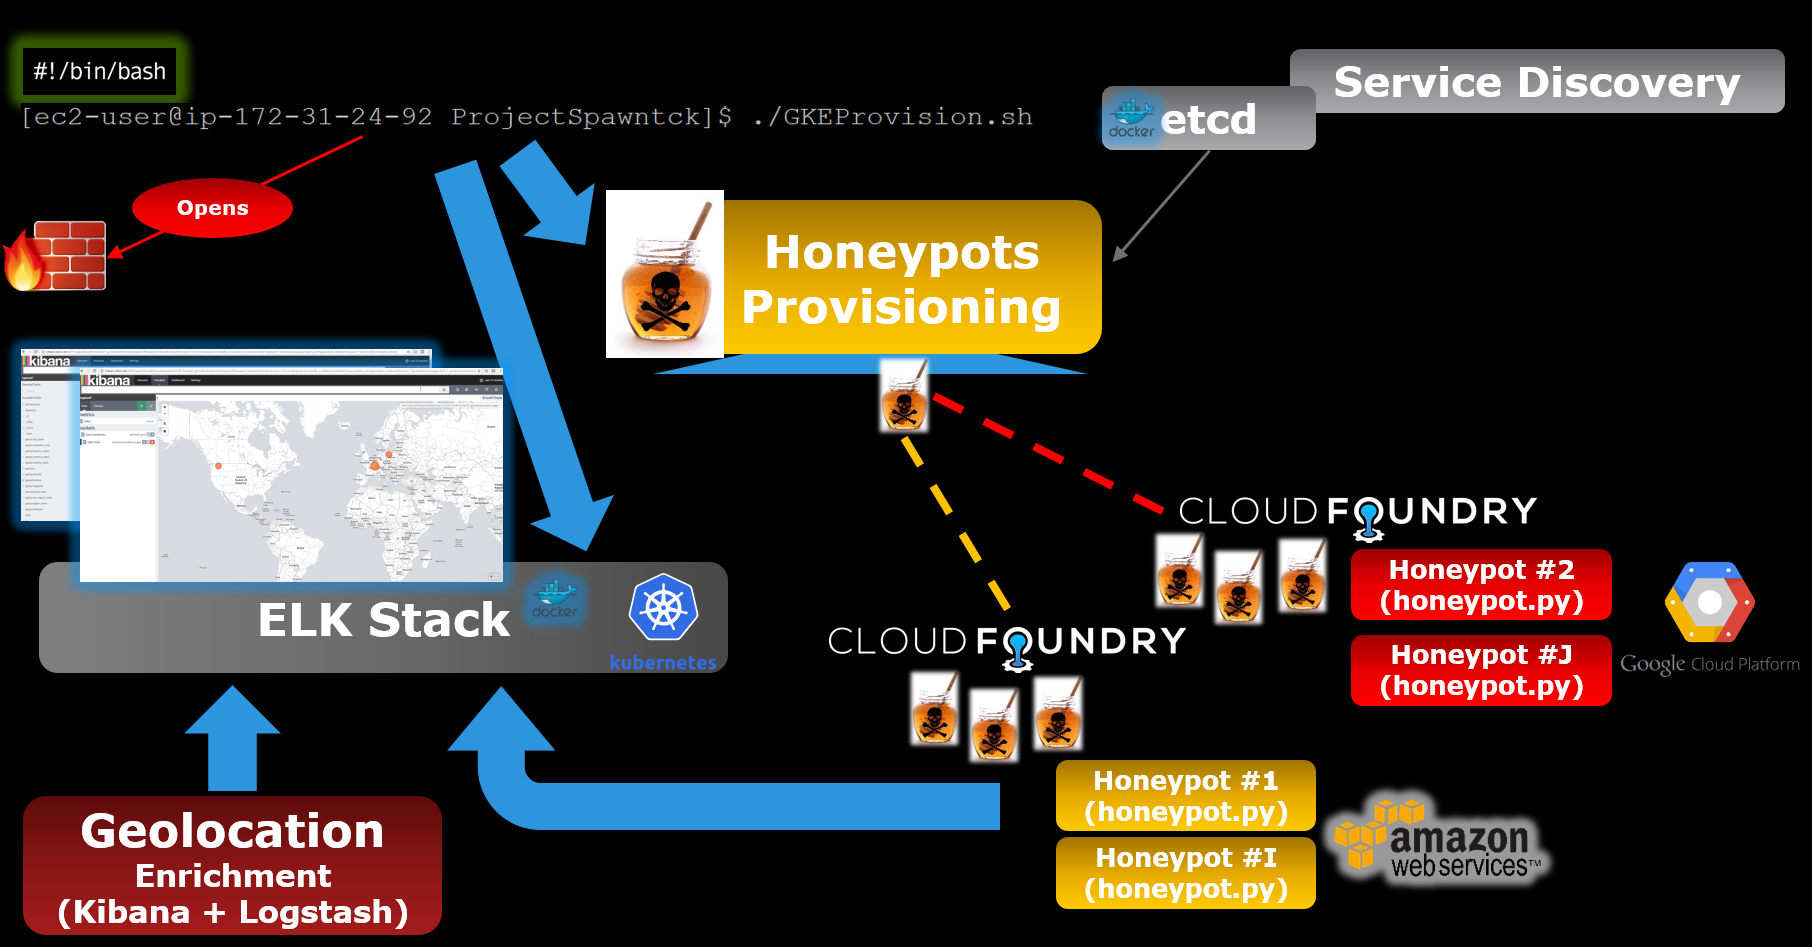
And a more detailed one:
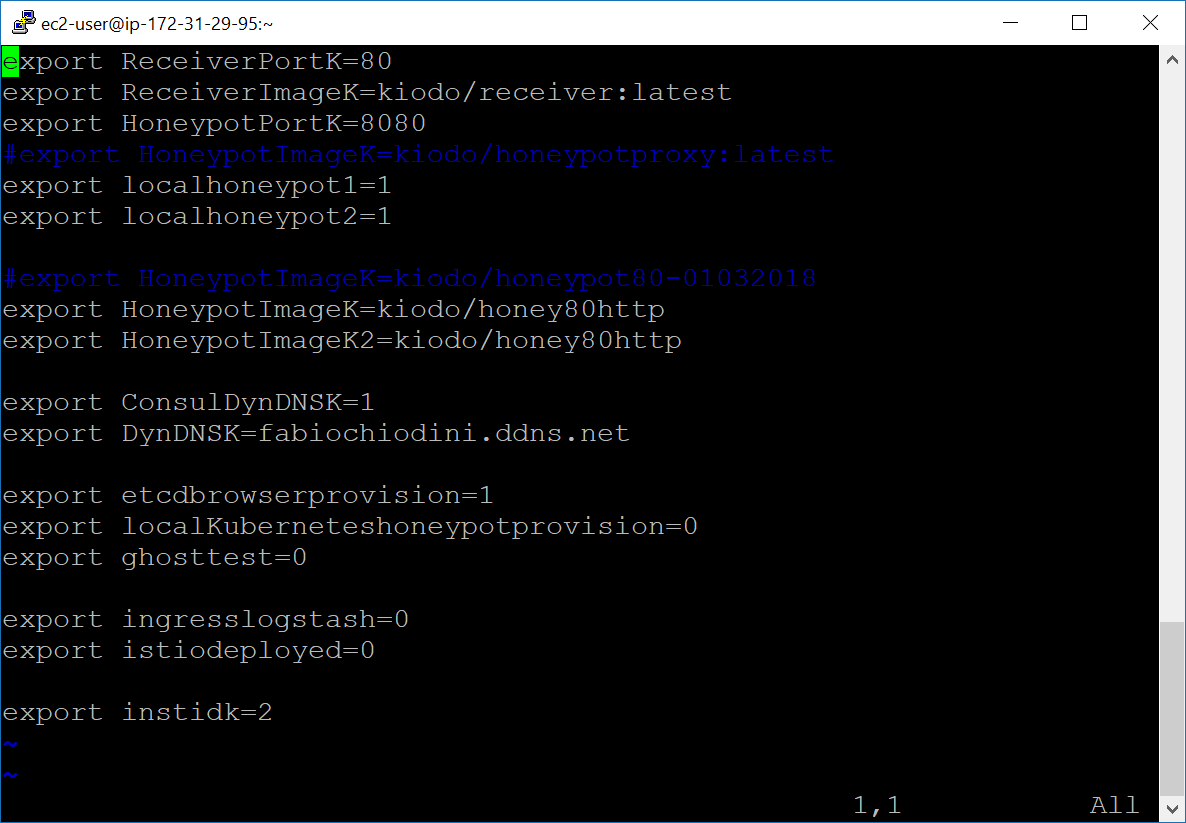
The code uses a file to load the variables needed (/home/ec2-user/Cloud1).
This file has the following format:
export cfapik1=api.123.io
export cforgk1=MyOrg
export cflogink1=Mylogin1
export cfpassk1='MycomplexPWD'

export dologink=dockerusername
export dopassk='MyUBERComplexPWD'

export K8sVersion=1.8.10-gke.0
export K8sNodes=3

export ReceiverPortK=80
export HoneypotPortK=8080
export localhoneypot1=1
export localhoneypot2=1
export HoneypotImageK=kiodo/honeypot:latest
export HoneypotImageK2=kiodo/honeypot:latest

export DynDNSK=fabiochiodini.ddns.net

export etcdbrowserprovision=0

export localKuberneteshoneypotprovision=0

export ingresslogstash=0
export istiodeployed=0

export instidk=2
Here are the details on how these variables are used:
-
cfapik1 cforgk1 cflogink1 cfpassk1 are the parameters (respectively API endpoint, Organization, usernamen and password) to connect to a Cloud Foundry instance (where an honeypot will be deployed)
-
K8sVersion and K8sNodes are the version and the number of nodes to be created in a Kubernetes Cluster
-
dologink and dopassk are the username and password to push images to a dockerhub (when deploying tc in riff via the script ./Riffprovision.sh
-
ReceiverPortK is the destination port for honeypot logs. Set to 80 as that is the port exposed by the GKE loadbalancer in this setup
-
HoneypotPortK is the port used by local (testing only) honeypot containers
-
HoneypotImageK and HoneypotImageK2 are the docker image for the local (testing) honeypot Applications
-
localhoneypot1 and localhoneypot2 are flags to determine if local honeypots (testing) will be launched
-
HoneypotImageK2 is a test docker image that gets launched locally for testing purposes
-
DynDNSK is the (DynDNS) FQDN of the launcing AWS instance (where etcd and etcd browser are running)
-
etcdbrowserprovision is a flag to determine if an etcd-browser containerized instance will be launched in GCE
-
localKuberneteshoneypotprovision is a flag to provision an honeypot instance inside the kubernetes environment
-
ingresslogstash is a flag to determine if an ingress for logstash will be created
-
istiodeployed is a test flag, keep it to 0 (TBI)
-
instidk is a string (that will be added as a prefix to all names of items created) to allow for multiple deployment of tc in the same AWS and GCE instances (avoiding duplicate names) (you MUST use lowercase string due to GCE docker machine command line limitations)
Yaml files for the Kubernetes deployment are located in /kubefiles
These files start an ELK application deployed in multiple containers and publish it over the internet on a GKE cluster.
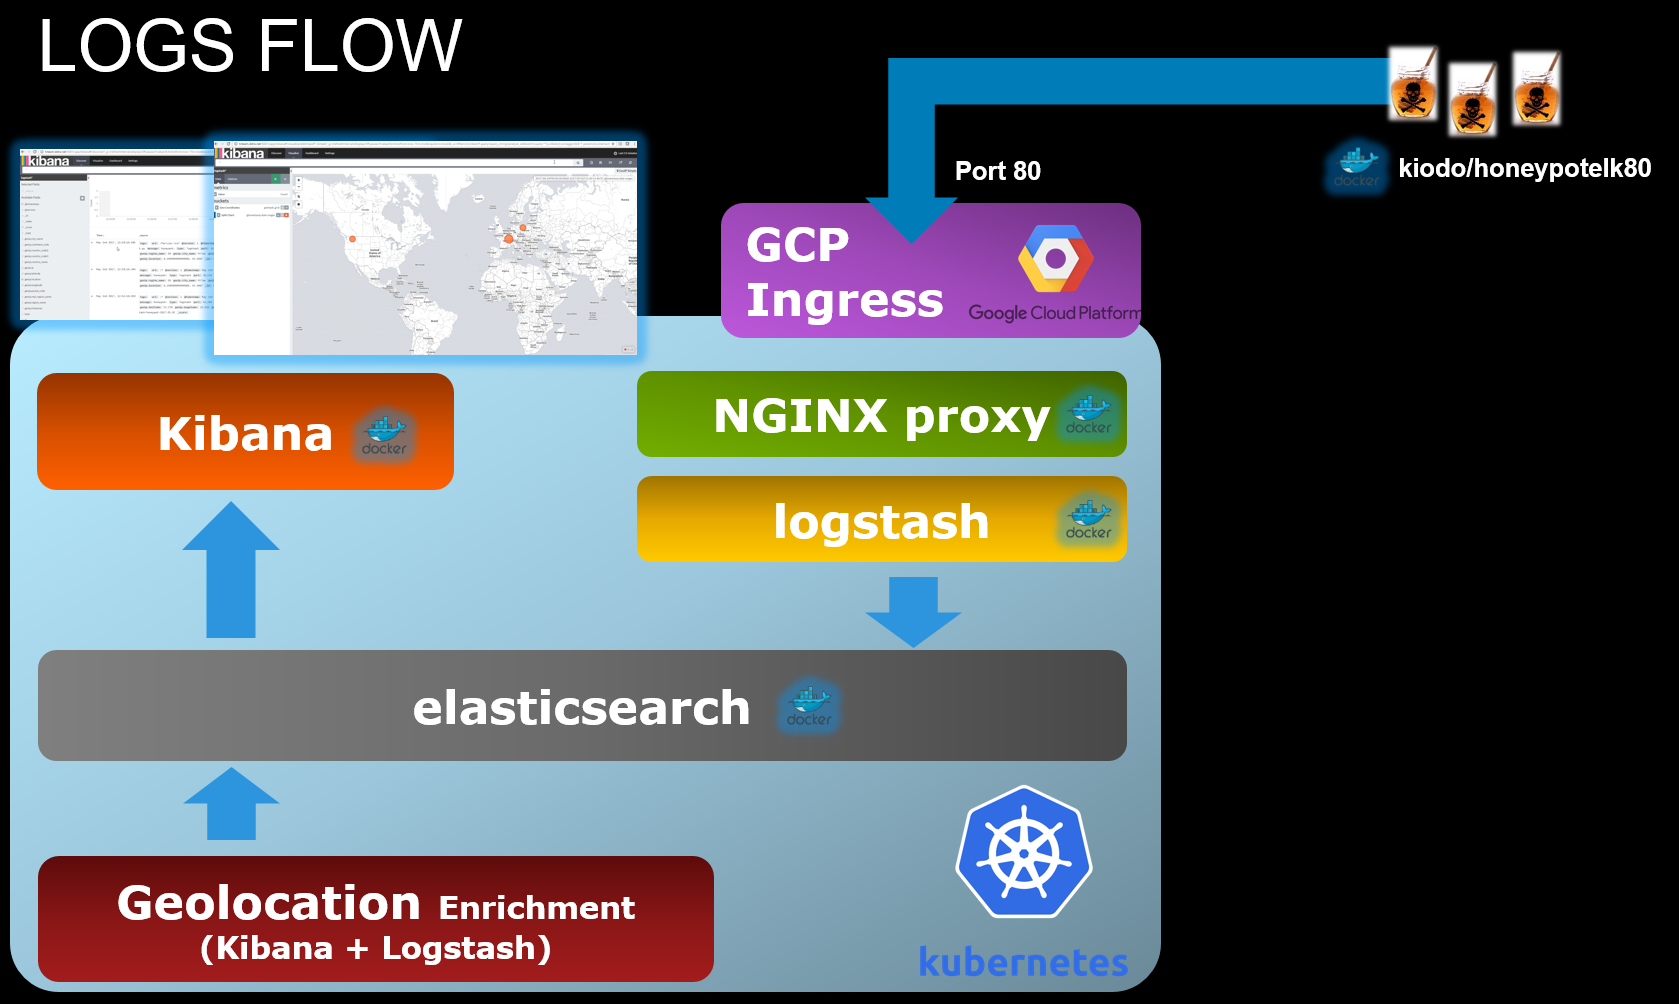
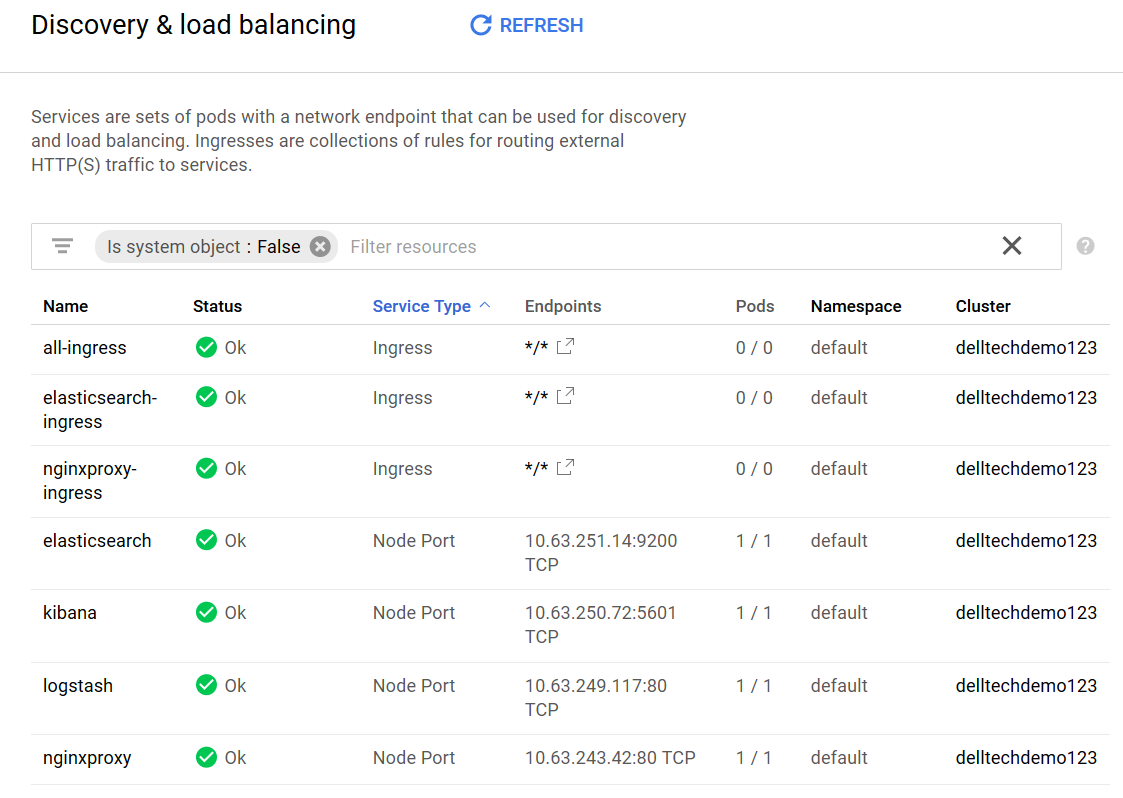
Here is a picture of the applications that get deployed on Kubernetes:
An nginx container is used to reverse proxy logstash. We used nginx in order to be able to publish an health page that is needed by GKE to provision an healthy load balancer:
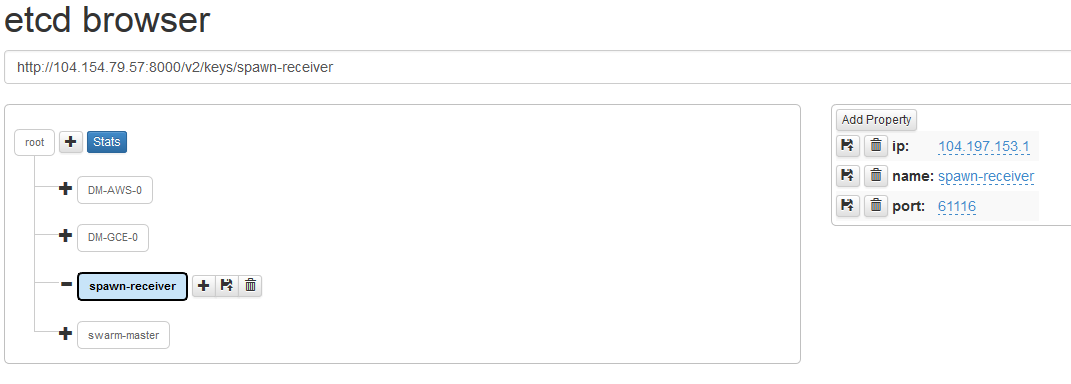
All the items created by the code are registered in the KV store of etcd to allow for further manipulation (scaling, troubleshooting etc).
etcd is launched as a local dockerized applications and stores variables that are used in the main Spawn, in the scale up and tear down code
jq is installed on the local AMI (automatically during Spawn execution) to manipulate JSON files in shell scripts
An application (etcd-browser) has been added for showing in a web GUI the data that gets stored to etcd:
To enable the use of this application it is necessary to manually open port 4001 on the VM where the main script is launched. App port (8000) for etcd-browser needs to be manually opened up on your AWS security group for the launcher machine.
Added value: The etcd broswer is also useful for testing this code as you can change values inside etcd directly from its web interface
To use this script (and let it interact with Google Cloud platform) Install the GCE SDK on your AMI image (install and configure the SDK in the context of the ec2-user user):
- [Optional if Python2 is installed] export CLOUDSDK_PYTHON=python2.7
- curl https://sdk.cloud.google.com | bash
- exec -l $SHELL
- gcloud init (this will start an interactive setup/configuration (using 4 ie us-east4-c as a region))
- gcloud components install kubectl (to install kubectl)
You also need to properly set up your GCE account, following are the high level steps:
-
Enable the Compute Engine API
-
Create credentials (Service account keys type - JSON format) and download the json file to /home/ec2-user/GCEkeyfile.json
-
Enable billing for your account
-
Change teh settings to have more IPs available
Finally activate your service account by issuing this command:
gcloud auth activate-service-account
TBI Leetha.sh is the code that automates the scale out of the setup after the first deployment
It reads configuration information from the etcd local instances (to connect to swarm, set up docker-machine and to launch honeypots).
It then launches a number of Docker VMs and honeypot containers as specified with the following launch parameters
TBI
./Leetha.sh instancestoaddAWS instancestoaddGCE HoneypotsToSpawn
During the launch it also respawns Honeypots containers that were already started in previous runs as these are ephemeral workloads (Still TBI, now it just adds containers specified in launch parameters)
Added value (:P) : If launched without parameters the code opens up all firewall port needed by the application
TBI Redeemer.sh is the code that automates the scale down of the setup after the first deployment
It reads configuration information from the etcd local instances (to connect to swarm, set up docker-machine, gets the number of Docker machines and honeypots and to restart honeypots).
It then destroys the specified Docker machine instances in GCE or AWS. It also cleans up the relevant registrations in etcd and Consul (Consul TBI).
It then restarts honeypot containers to match the number specified with the following launch parameters
./Redeemer.sh instancestoremoveinAWS instancestoremoveinGCE HoneypotsToremove
During the launch it also respawns Honeypots containers that were already started in previous runs as these are ephemeral workloads.
This code does NOT reopen firewall ports in GCE or AWs.
Malebolgia.sh is the code that automates the environment teardown
It reads configuration information from the etcd local instances (to connect to Kubernetes, set up docker and to launch honeypots).
It then destroys:
- Pods provisioned on Kubernetes
- GCP Ingresses and IPs proviosioned
- Remote Kubernetes Cluster
- Infrastructure Components (etcd-browser)
- Local Docker instances (etcd if local)
- riff workloads
###How to launch
./Malebolgia.sh
Violator.sh destroys only the workloads deployed on Kubernetes and the local containers but it does not remove the GKE cluster. You can then relaunch ./Spawnswarmtck to test the deployment (in a faster way).
[This is more like Test Driven Deployment (TDD) :P ]
This code is meant to help in testing the elements deployed by the main code and validate that any change to the base code has been successful
The code tests these components:
- Data written in etcd
- Honeypots
- Receiver Instance
After getting the setup details from etcd it tests if the ports are open for the components listed and basically test the Honeypots application (parsing a curl output).
###How to launch
./TDD.sh
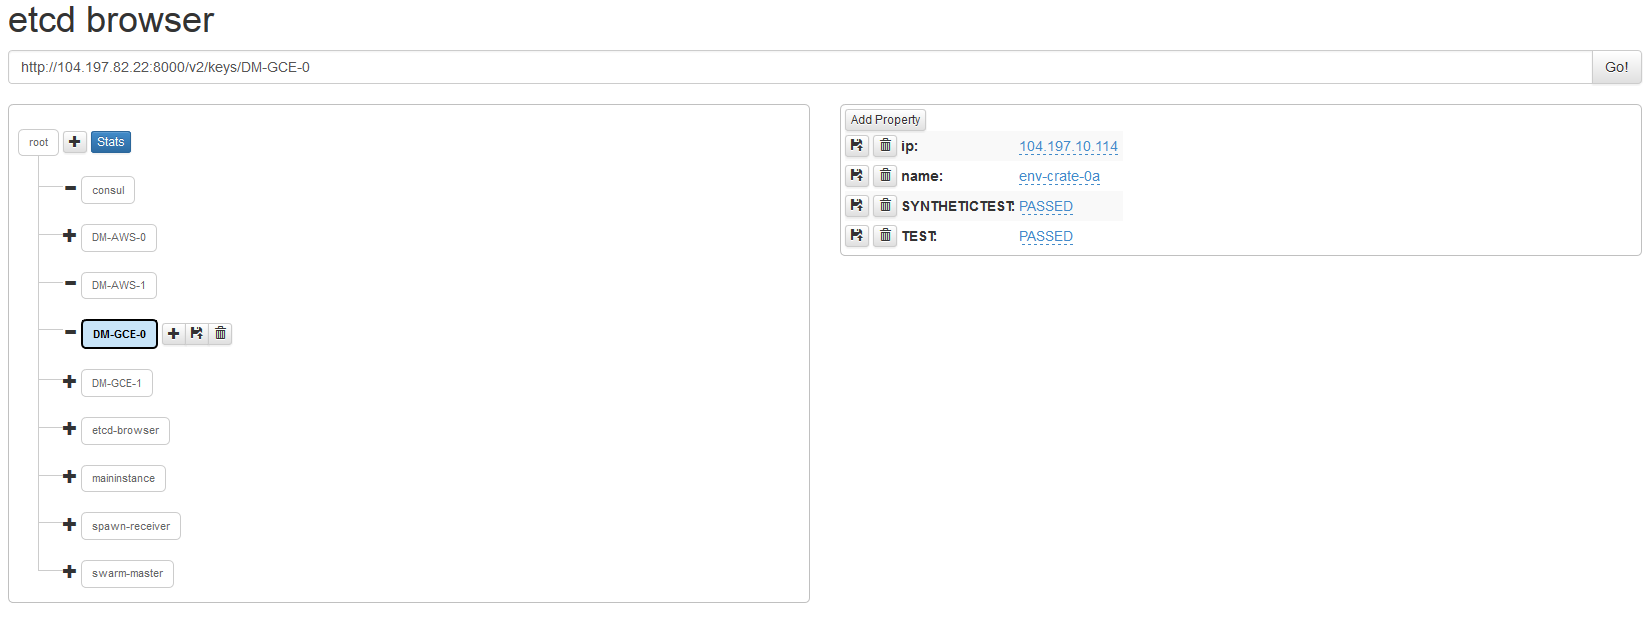
The results of the tests are written in etcd:
Running these tests multiple times updates the test flags value in etcd.
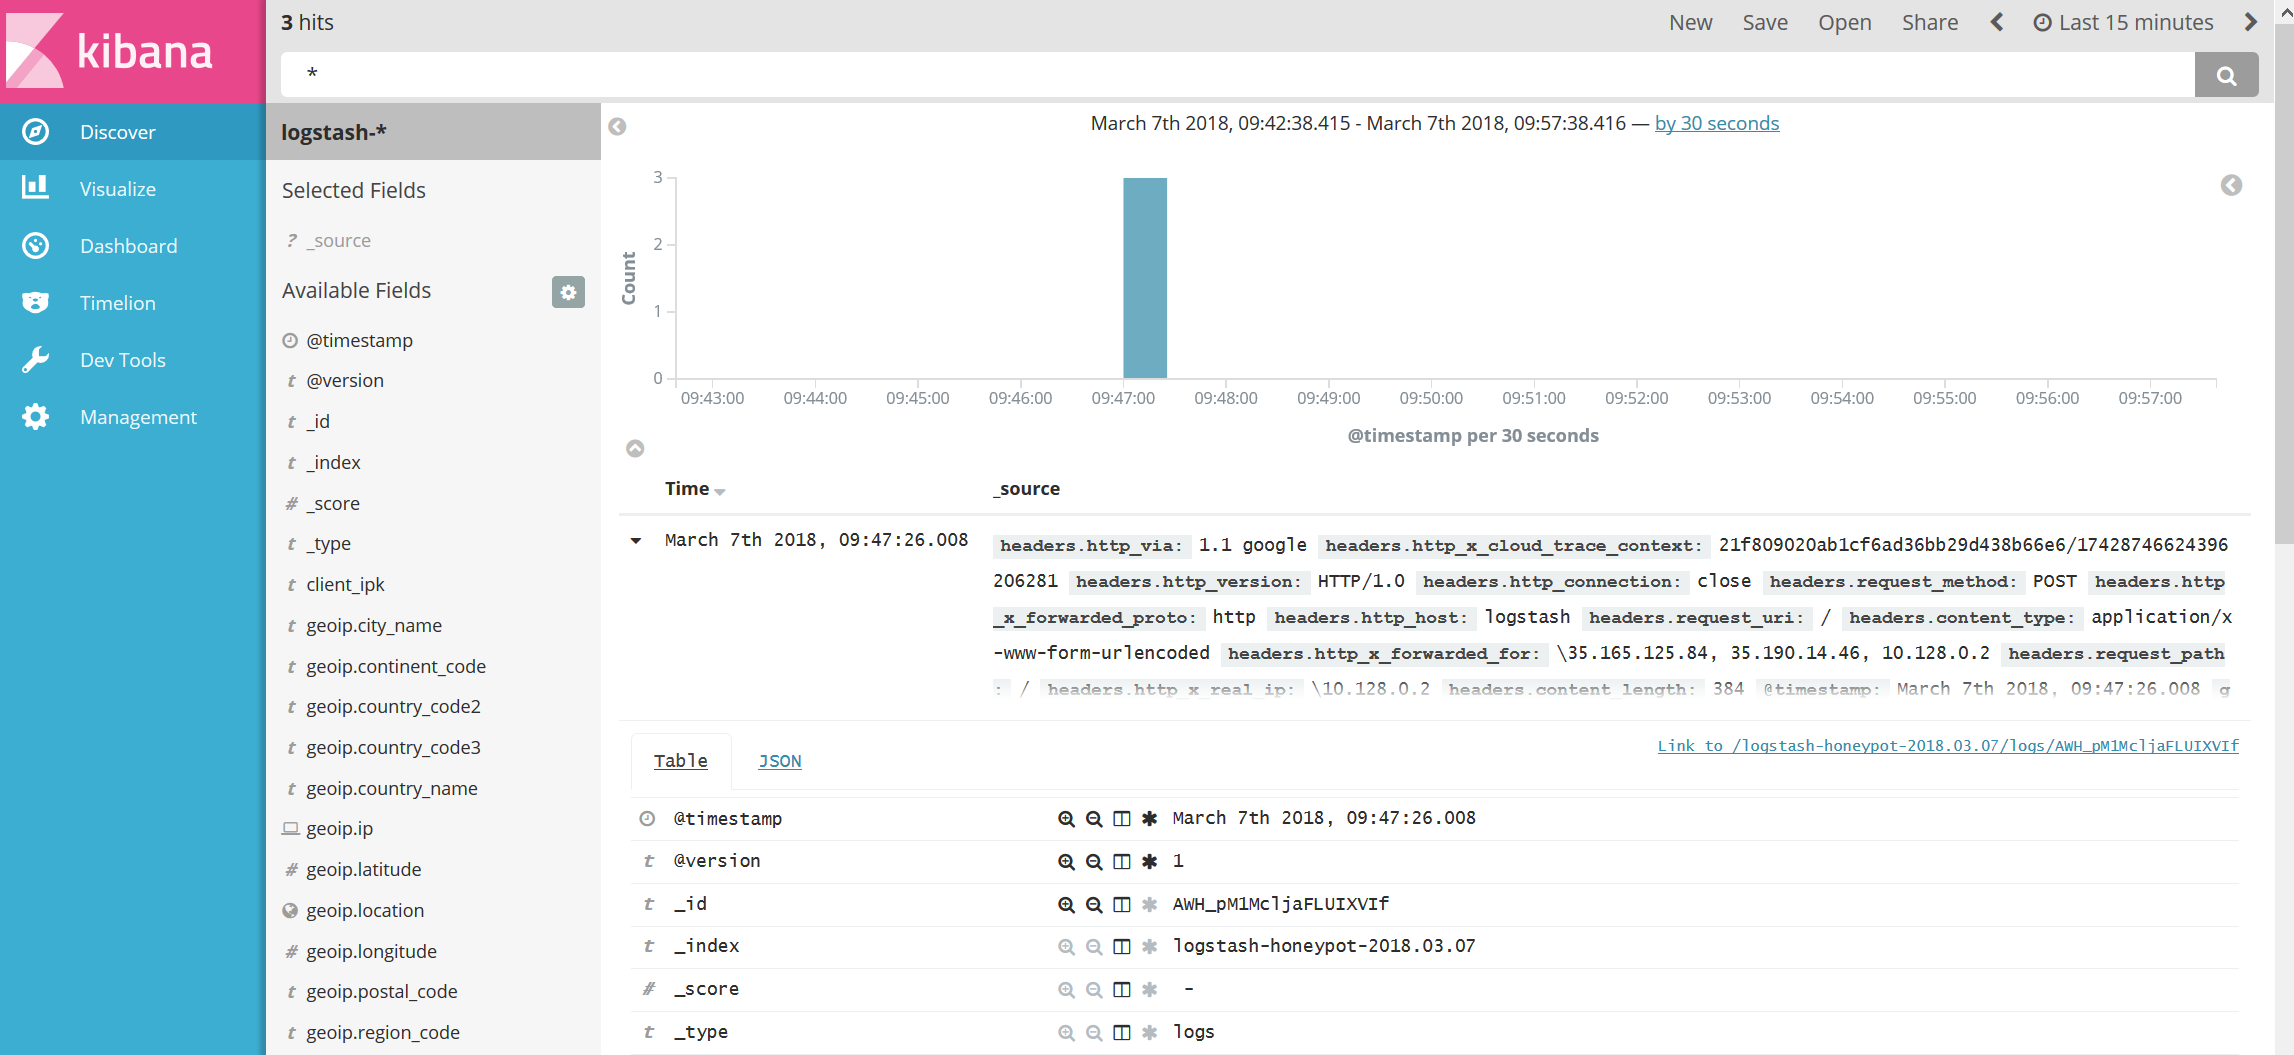
As soon as some traffic will get in from the Honeypots you should see some logs like this:
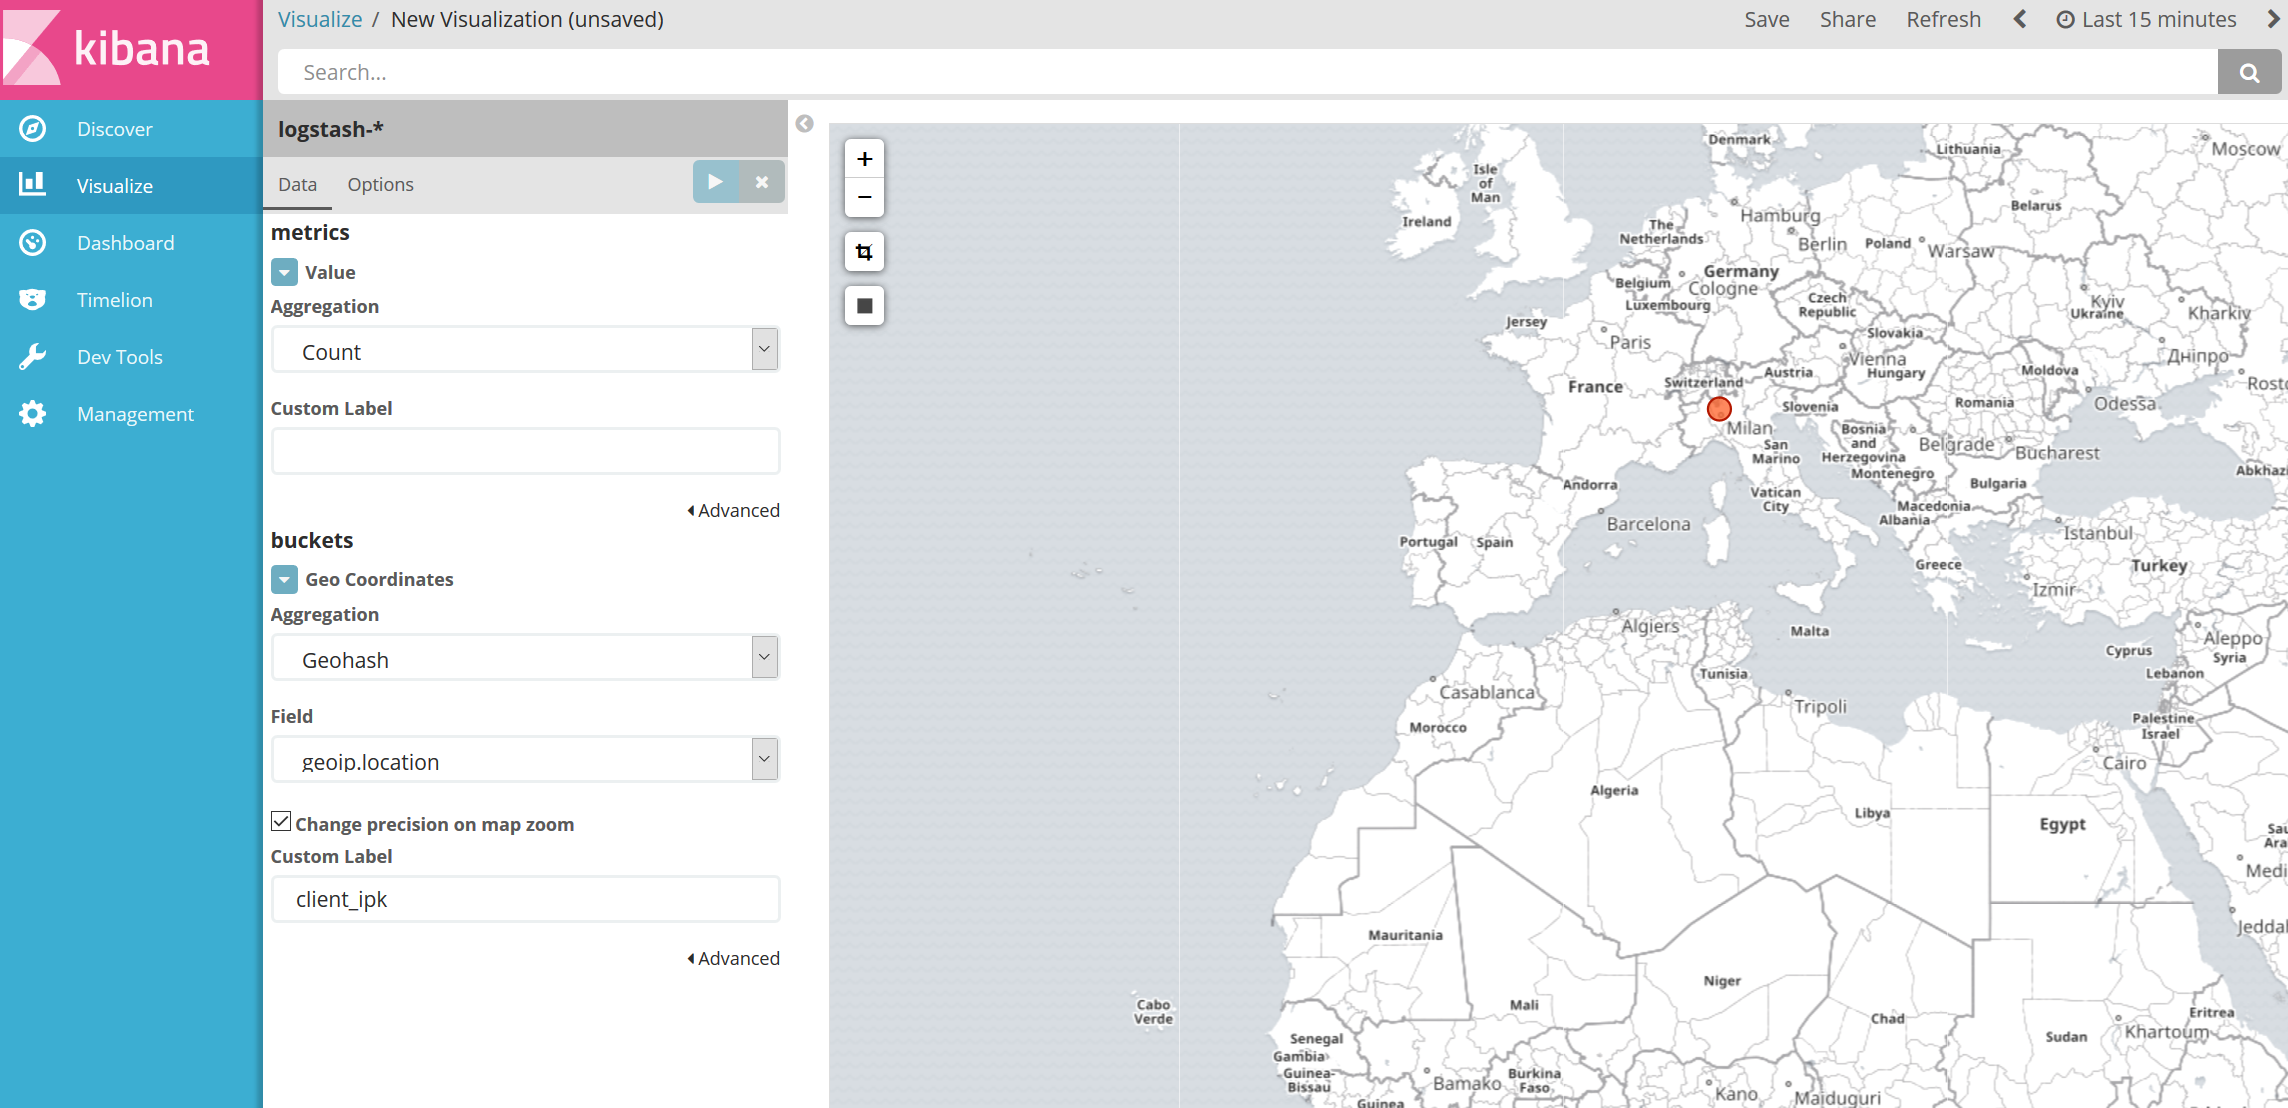
To create a geoip visuaaztion just go to the Kibana -> Visualize page add a new Tile map.
Then add a client_ipk filter on the map. You'll get a map like this showing the source IPs of all client connecting to your honeypots:
Following are high level notes on how to get this running quickly:
-
Start a t1.small on AWS
-
Open ports for this VM on AWS
-
22 (to reach it ;) )
-
4001 (all IPs) for etcd-browser to reach etcd
-
8000 for etcd-browser UI
-
8500 (all IPs) for etcd
-
8081 for local honeypots
-
Connect via SSH to your AWS instance (ie in my case: Get PuTTy configured with AWS key :P )
-
Run AWSDockermachine code
-
Populate /home/ec2-user/Cloud1
-
Install gcloud (and kubectl)
-
Validate GCE account [ gcloud auth activate-service-account ]
-
git clone this code : https://github.com/FabioChiodini/ProjectSpawnSwarmtck.git
-
Launch scripts
A script is provided to install istio in the Kubernetes cluster.
The code is istiok.sh
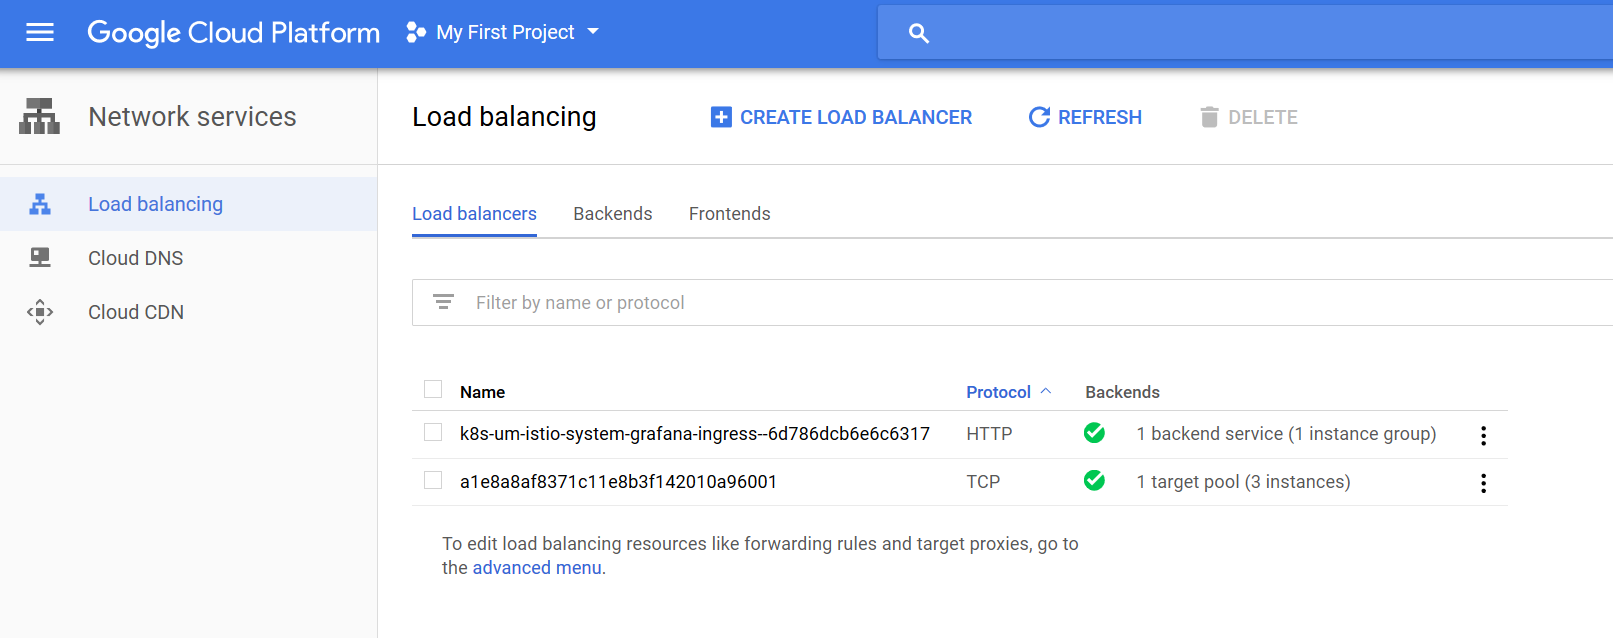
The script also installs prometheus and grafana and makes grafana available via an external ip on GKE.
Grafana is published using an nginx reverse proxy and GKE ingress
Please note that even if you delete istio and the corresponding Kubernetes cluster hosting it some of the GCP network constructs could still be in place. The same applies for Health Checks (https://console.cloud.google.com/compute/healthChecks) You may need to remove them manually
A script is provided to install project riff (FaaS for K8S) on the Kubernetes cluster
The code is in riff.sh
The script currently also install Helm in the cluster (in a specific namespace) and then uses Helm to install Project riff for serverless functions.
The script also installs and activates the riff CLI.
You can test riff using some examples located here: https://github.com/BrianMMcClain/riff-demos/tree/master/functions/echo/shell
The script currently installs riff version 0.0.6
Please note that even if you delete riff and the corresponding Kubernetes cluster hosting it some of the GCP network constructs could still be in place. The same applies for Health Checks (https://console.cloud.google.com/compute/healthChecks) You may need to remove them manually
To use riff function I leverage a local linux user that has the same name of my docker hub login (kiodo) [infact riff messes up with ec2-user in pushing the docker container to docker hub and takes the current logged in linux user, maybe it's me not getting how this works UPDATE: There's a way using riff CLI; I need to make it work]
So to add this user here are the (rough) steps to perform:
- useradd kiodo
- passwd kiodo
- gpasswd -a kiodo wheel
- sudo visudo
- Uncomment the line starting with %wheel. i.e. remove the # before %wheel ALL=(ALL) ALL
- Add this at teh end of the file kiodo ALL = NOPASSWD : ALL
- sudo usermod -a -G docker kiodo
When installing riff and using it use the kiodo user with this command su - kiodo
And perform a docker login to make sure that you can do a docker push to docker hub
Logstash 5.3.2 Kibana Elasticsearch
@FabioChiodini
