MVVM UI Framework for Godot Engine
News
v1.3 Update:
- Add listening properties
- Add computing properties
- Add conditional compilation
- Fix known bugs
- Install plugins in the godot asset store
You can also download
gmui.zipand import it manually
- Open project settings and enable plugins(check box)
Create a new index.gmui file in the pages folder under the root directory, and then write:
Run the project and you will see the blank page you have written. That's right, you don't need to write any code, a GMUI project will run! The starting point of GMUI is to be as simple as possible, without the need to write any extra code.
Your page will be built as a scene in addons/gmui/dist/scenes/pages/{page_name}.tscn. As such, it can be set as the main scene or used within other scenes. This is the same for any other pages you create.
In order to come up with a usable version as soon as possible, GMUI has reused Godot's built-in nodes as components. In the future, we will provide more beautiful default components, and we welcome friends from the community to contribute to the component library. Next, we will demonstrate through a registration and login interface without actual functionality:
<Row align="center">
    <Column align="center">
        <Row>
            <Text text="Username"></Text>
            <LineEdit placeholder_text="Pls enter username"></LineEdit>
        </Row>
        <Row>
            <Text text="Password"></Text>
            <LineEdit placeholder_text="Pls enter password"></LineEdit>
        </Row>
        <Row>
            <Button text="login"></Button>
            <Button text="reset"></Button>
         </Row>
    </Column>
</Row>
Running the project can see :
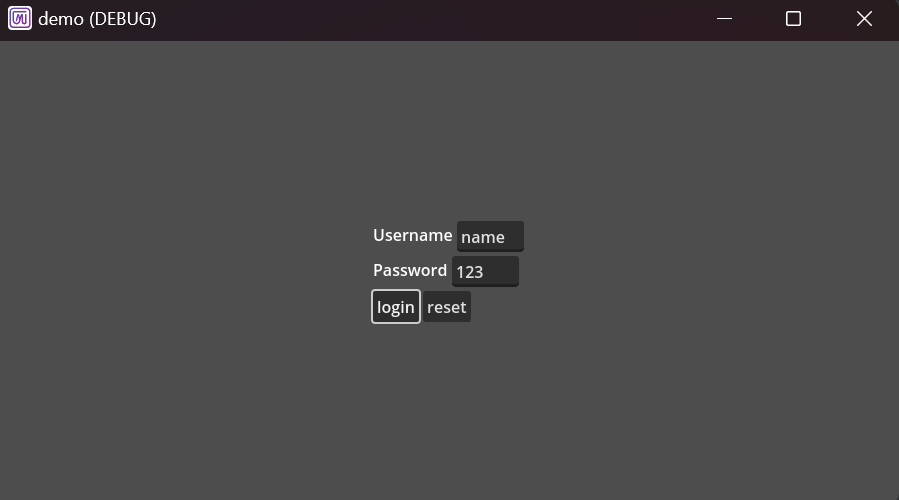
Bidirectional data binding is also a piece of cake! To write logical code, add a 'Script' tag at the bottom of the. gmui file. In the case below, clicking the login button will print the user's input.
<Row align="center">
    <Column align="center">
        <Row>
            <Text text="Username"></Text>
            <LineEdit placeholder_text="Pls enter username" g-model="username"></LineEdit>
        </Row>
        <Row>
            <Text text="Password"></Text>
            <LineEdit placeholder_text="Pls enter password" g-model="password"></LineEdit>
        </Row>
        <Row>
            <Button text="Login" ref="loginBtn"></Button>
            <Button text="Reset" ref="resetBtn"></Button>
         </Row>
    </Column>
</Row>

<Script>
@onready var data = await reactive({'username': 'name', 'password': '123'})
func _mounted():
    gmui.refs['loginBtn'].rnode.pressed.connect(
        func():
        print('username:', data.rget('username'))
        print('password:', data.rget('password'))
    )
    gmui.refs['resetBtn'].rnode.pressed.connect(
    func():
        data.rset('username', '')
        data.rset('password', '')
    )
func _updated():
    print('username:', data.rget('username'))
    print('password:', data.rget('password'))
</Script>
You can also use bidirectional binding for components:
<LineEdit g-model="text"></LineEdit>

<Script>
@onready var data = await reactive({'text': 'new text'})
</Script><Control>
<Component g-model:text="text"></Component>
<Label :text="text"></Label>
</Control>
<Script>
@import('Component', 'res://components/component.gmui')
@onready var data = gmui.reactive({'text': 'my text'})
</Script>If you declare ref on a normal node, you get a virtual node. You can get virtual nodes by mv.refs['name'] :
<Control>
    <Label text="my text" ref="label"></Label>
</Control>

<Script>
func _mounted():
    print(gmui.refs['label'].rnode.text)
</Script>
If you declare ref on a component, you will get a gmui instance of that component:
<Control>
    <Label text="component text" ref="text1"></Label>
</Control><Control>
<UsernameInput ref="component"></UsernameInput>
</Control>
<Script>
@import('UsernameInput', 'res://components/username_input.gmui')
func _mounted():
var component = gmui.refs['component'].refs['text1']
</Script>When you want to execute a method inside a node, use the exec_func method with the method name and an array of arguments:
<Control>
    <Label text="my text" id="label"></Label>
</Control>

<Script>
func _mounted():
    gmui.refs['label'].exec_func('set_text', ['new text'])
</Script>
Note: Although the virtual node has a real node, it is best not to modify the state of the real node directly through it, please call
exec_funcor bind responsive data!
Use jump_to method to jump, the parameter is .gmui file path in the page directory:
<Column align="center">
    <Row align="center">
        <Text text="my text"></Text>
    </Row>
    <Row align="center">
        <Button text="jump" ref="btn"></Button>
    </Row>
</Column>

<Script>
func _mounted():
    gmui.refs['btn'].rnode.pressed.connect(
        func():
            self.jump_to('res://pages/page2.gmui')
    )
</Script>When you want to render a list from an array, you can use the g-for directive on the tag:
<Row align="center">
    <Column align="center" g-for="text in textArr">
        <Label :text="text"></Label>
    </Column>
</Row>

<Script>
@onready var data = await reactive({'textArr': ['text1', 'text2', 'text3']})
</Script>
At the same time, you can also use the g-for directive on the component:
<Row>
    <Component g-for="(item, index) in arr" :text="item"></Component>
</Row>

<Script>
@import('Component', 'res://components/component.gmui')
@onready var data = await reactive({'arr': [1,2,3,4]})
</Script><Row>
<Label :text="text"></Label>
</Row>
<Script>
</Script>You can use g-if to display what you want to display:
<Control>
    <Label text="1" g-if="flag"></Label>
    <Label text="2" g-else-if="true"></Label>
    <Label text="3" g-else-if="true"></Label>
    <Label text="4" g-else="true"></Label>
</Control>

<Script>
@onready var data = await reactive({'flag': false})
</Script>As long as you use the slot tag when defining the component, you can replace the slot by writing the content directly when using the component:
<Row>
    <Component>
        <Label text="my text"></Label>
    </Component>
</Row>

<Script>
@import('Component', 'res://components/component.gmui')
</Script><Row>
<Slot></Slot>
</Row>
<Script>
</Script>The effect equals:
<Row>
    <Row>
        <Label text="my text"></Label>
    </Row>
</Row>If you want to use more than one slot, you need to use a named slot, specifying names in slot and template:
<Row>
    <Component>
        <Template #slot1="NULL">
            <Label text="my text1"></Label>
        </Template>
        <Template #slot2="NULL">
            <Label text="my text2"></Label>
        </Template>
    </Component>
</Row>

<Script>
@import('Component', 'res://components/component.gmui')
</Script><Row>
<Slot name="slot1"></Slot>
<Slot name="slot2"></Slot>
</Row>
<Script>
</Script>You can declare a variable in the slot and then declare a variable in the component to store all the variables in the slot:
<Row>
    <Component #default="props">
        <Label :text="props.text"></Label>
    </Component>
</Row>

<Script>
@import('Component', 'res://components/component.gmui')
</Script><Row>
<Slot text="my text"></Slot>
</Row>
<Script>
</Script>You can use watch to monitor responsive data:
<Row align="center">
	<Column align="center">
		<LineEdit g-model="text"></LineEdit>
	</Column>
</Row>

<Script>
var data = await reactive({'text': 'text'})

func _ready():
	watch('text', change_text)

func change_text(newValue, oldValue):
	print(newValue, ',', oldValue)
</Script>You can use computed when you need to perform a computation on an property:
<Row align="center">
	<Column align="center">
		<Label :text="fullName"></Label>
		<Button ref="btn" text="Rename"></Button>
	</Column>
</Row>

<Script>
var data = await reactive({'firstName': 'White', 'lastName': 'Red'})

func fullName():
	return data.rget('firstName') + data.rget('lastName')

func _ready():
	computed(fullName)

func _mounted():
	gmui.refs['btn'].rnode.pressed.connect(
		func():
			data.rset('firstName', 'Green')
	)
</Script>You can use conditional compilation to specify which platforms the current code will be used on :
#ifdef [Windows]
<Label text="Windows"></Label>
#endif

#ifdef [Android]
<Label text="Android"></Label>
#endif

<Script>
#ifdef [Windows]
var platform = 'Windows'
#endif
<Script>
#ifndef [Windows]
<Label text="Not Windows"></Label>
#endif
<Script>
#ifndef [Windows]
var platform = 'Not Windows'
#endif
</Script>You can find the gmui.json config-file in the root directory of your project and configure the basic information of the project within that file. For example:
- set the name of the project in the
nameattribute - set the version number in the
versionattribute - set the icon in the
iconattribute - set the project's entry file with the
gmui_indexattribute - set the default screen resolution with the
screenattribute
After these attributes are modified, Godot's project settings will be overwritten automatically to complete the modification of related information.
- Bidirectional data binding
- Material Design UI
- C # language support