Documentation of the AV system used by Multiply Christian Church to host a service and stream it live to social media.
This is a git repository, and needs to be forked before it can be edited.
Research Markdown syntax to learn how to modify files such as this README.md file.
Navigate to draw.io to modify *.drawio files such as the main diagram.
Export the modified diagram to an image format and link to it in the README.md to update it here.
The MacBook has 4 USB-C ports and one 3.5mm audio jack for TRS (tip ring sleeve) connections. These ports are used for two HDMI outputs, one HDMI input, one audio output, and the power brick to charge the MacBook.
This is for the raw, unmodified output.
It is displayed on the side stage TVs and can be used as slides on the live stream.
It’s fed into the HDMI splitter (mounted at the bottom of the audio cart) via a flat HDMI cable labeled “Computer”.
That same feed is returned from the audio cart via a flat HDMI cable, which is labeled “RESI”.
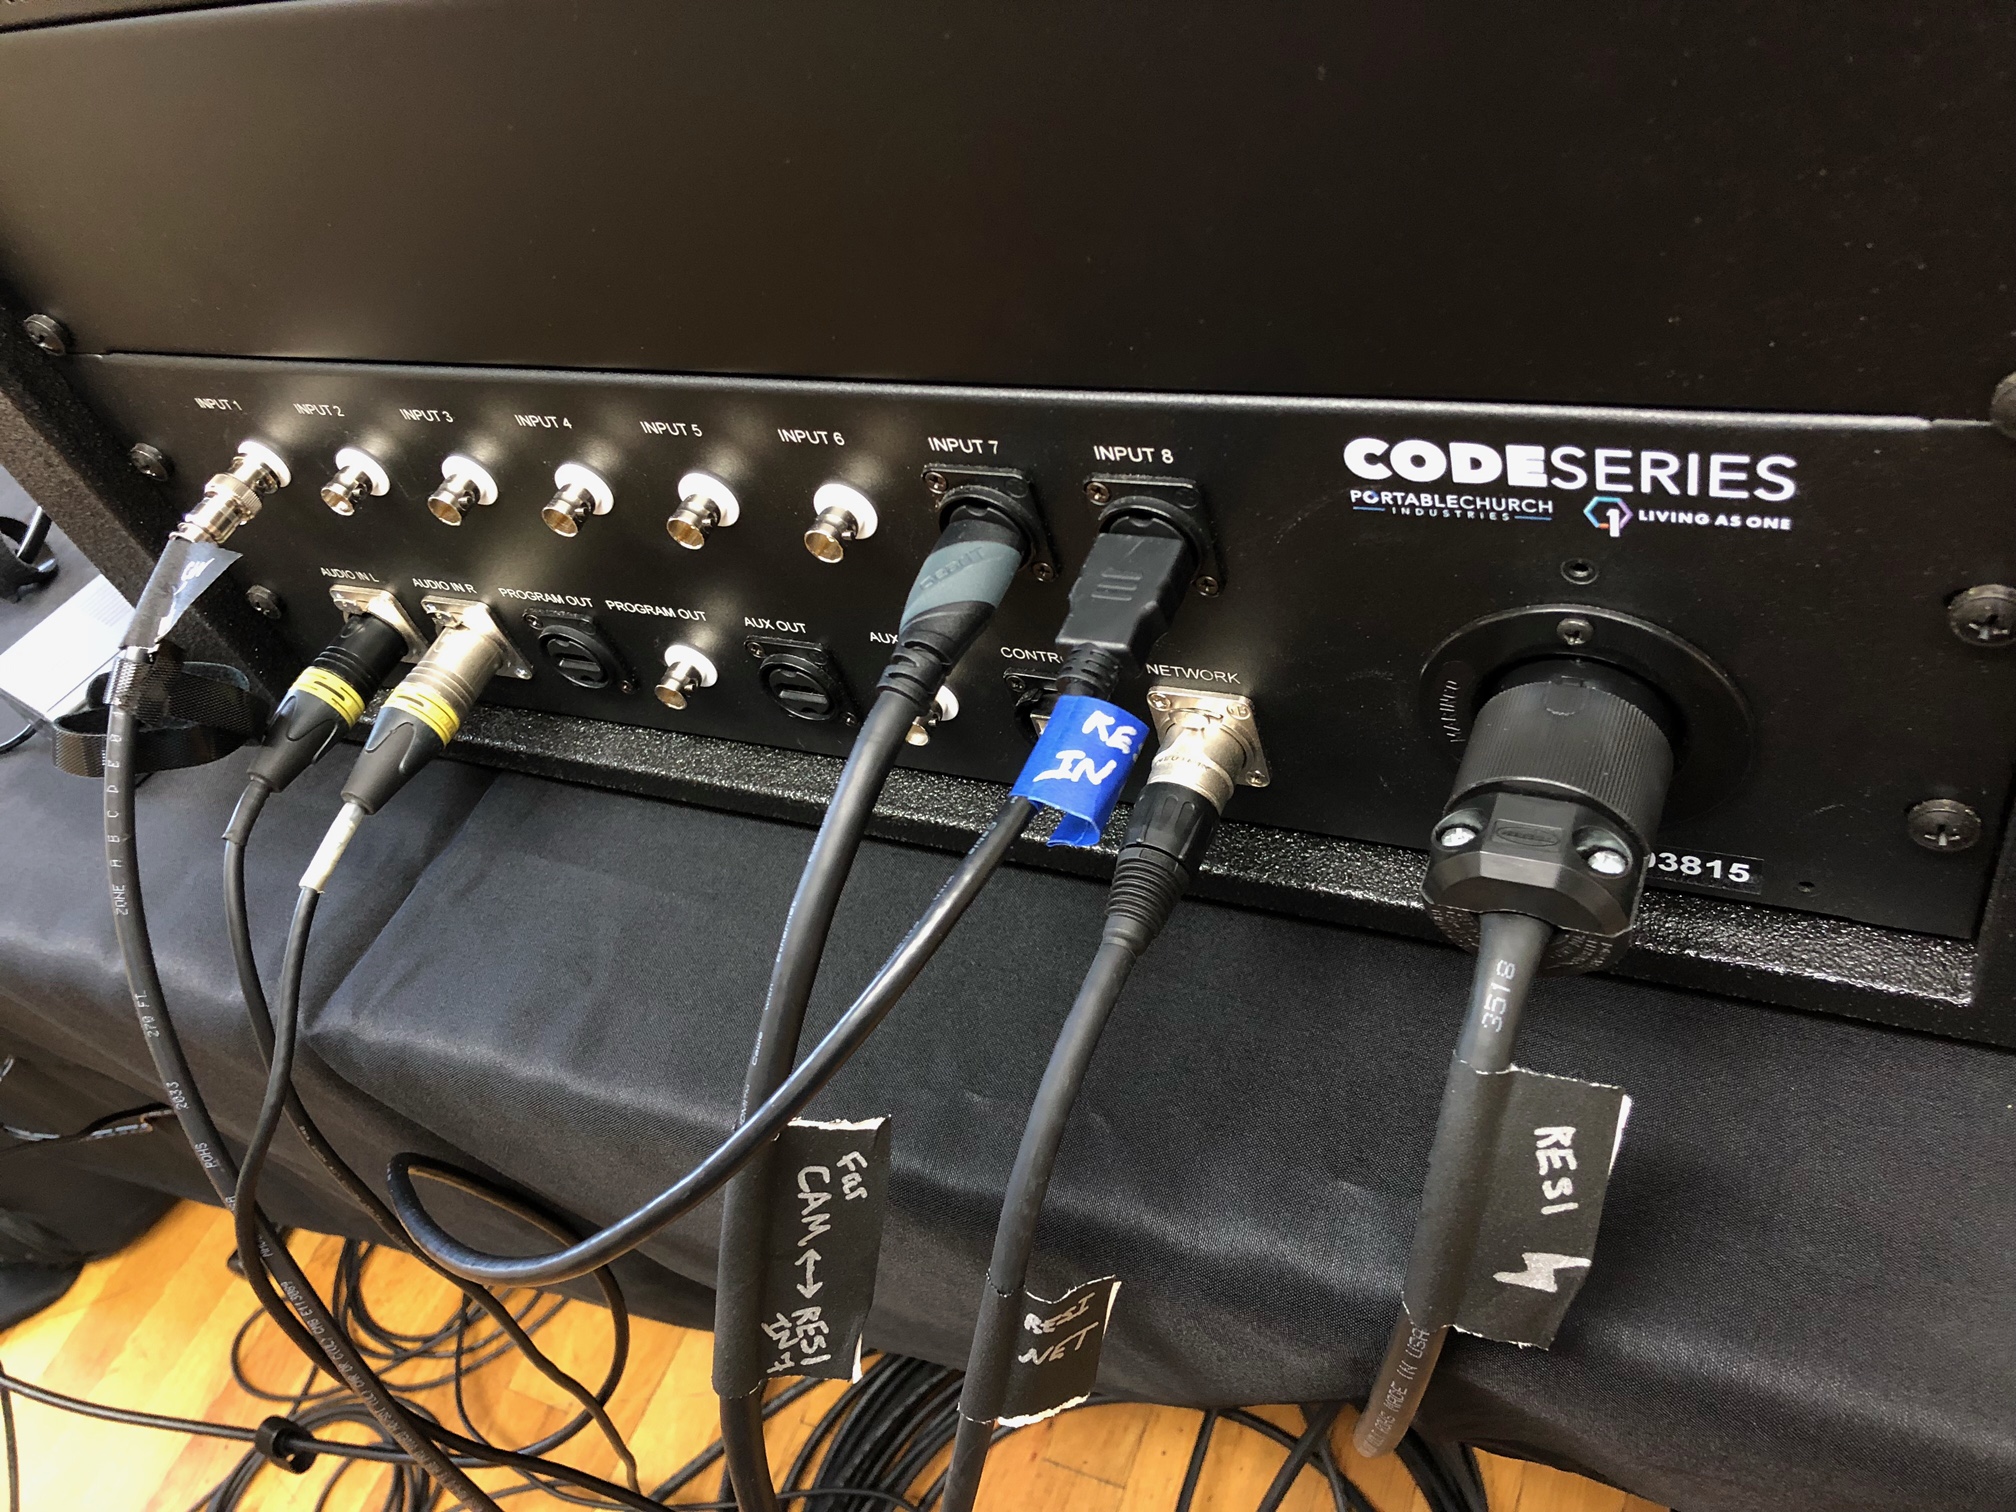
Plug it into either INPUT 7 or INPUT 8.

This is for song lyrics.
It is often called “lower-third” since the content is aligned to the bottom and limited to the lower third of the screen.
It feeds directly into the RESI through either INPUT 7 or INPUT 8.
Any HDMI cable can be used route the feed.
This is for video capture and recording.
Use the Video Capture USB dongle.
Record use OBS Studio which should already be installed on the MacBook.
Plug into PROGRAM OUT.
Confirm PROGRAM OUT is working, as it has not been working previously.
If PROGRAM OUT is not working, plug into AUX OUT instead.
From the RESI settings, go to the AUX menu, and set source to PROGRAM.
Videos played on the MacBook send audio to the audio cart via the 3.5mm male TRS audio cable coming from the audio cart.
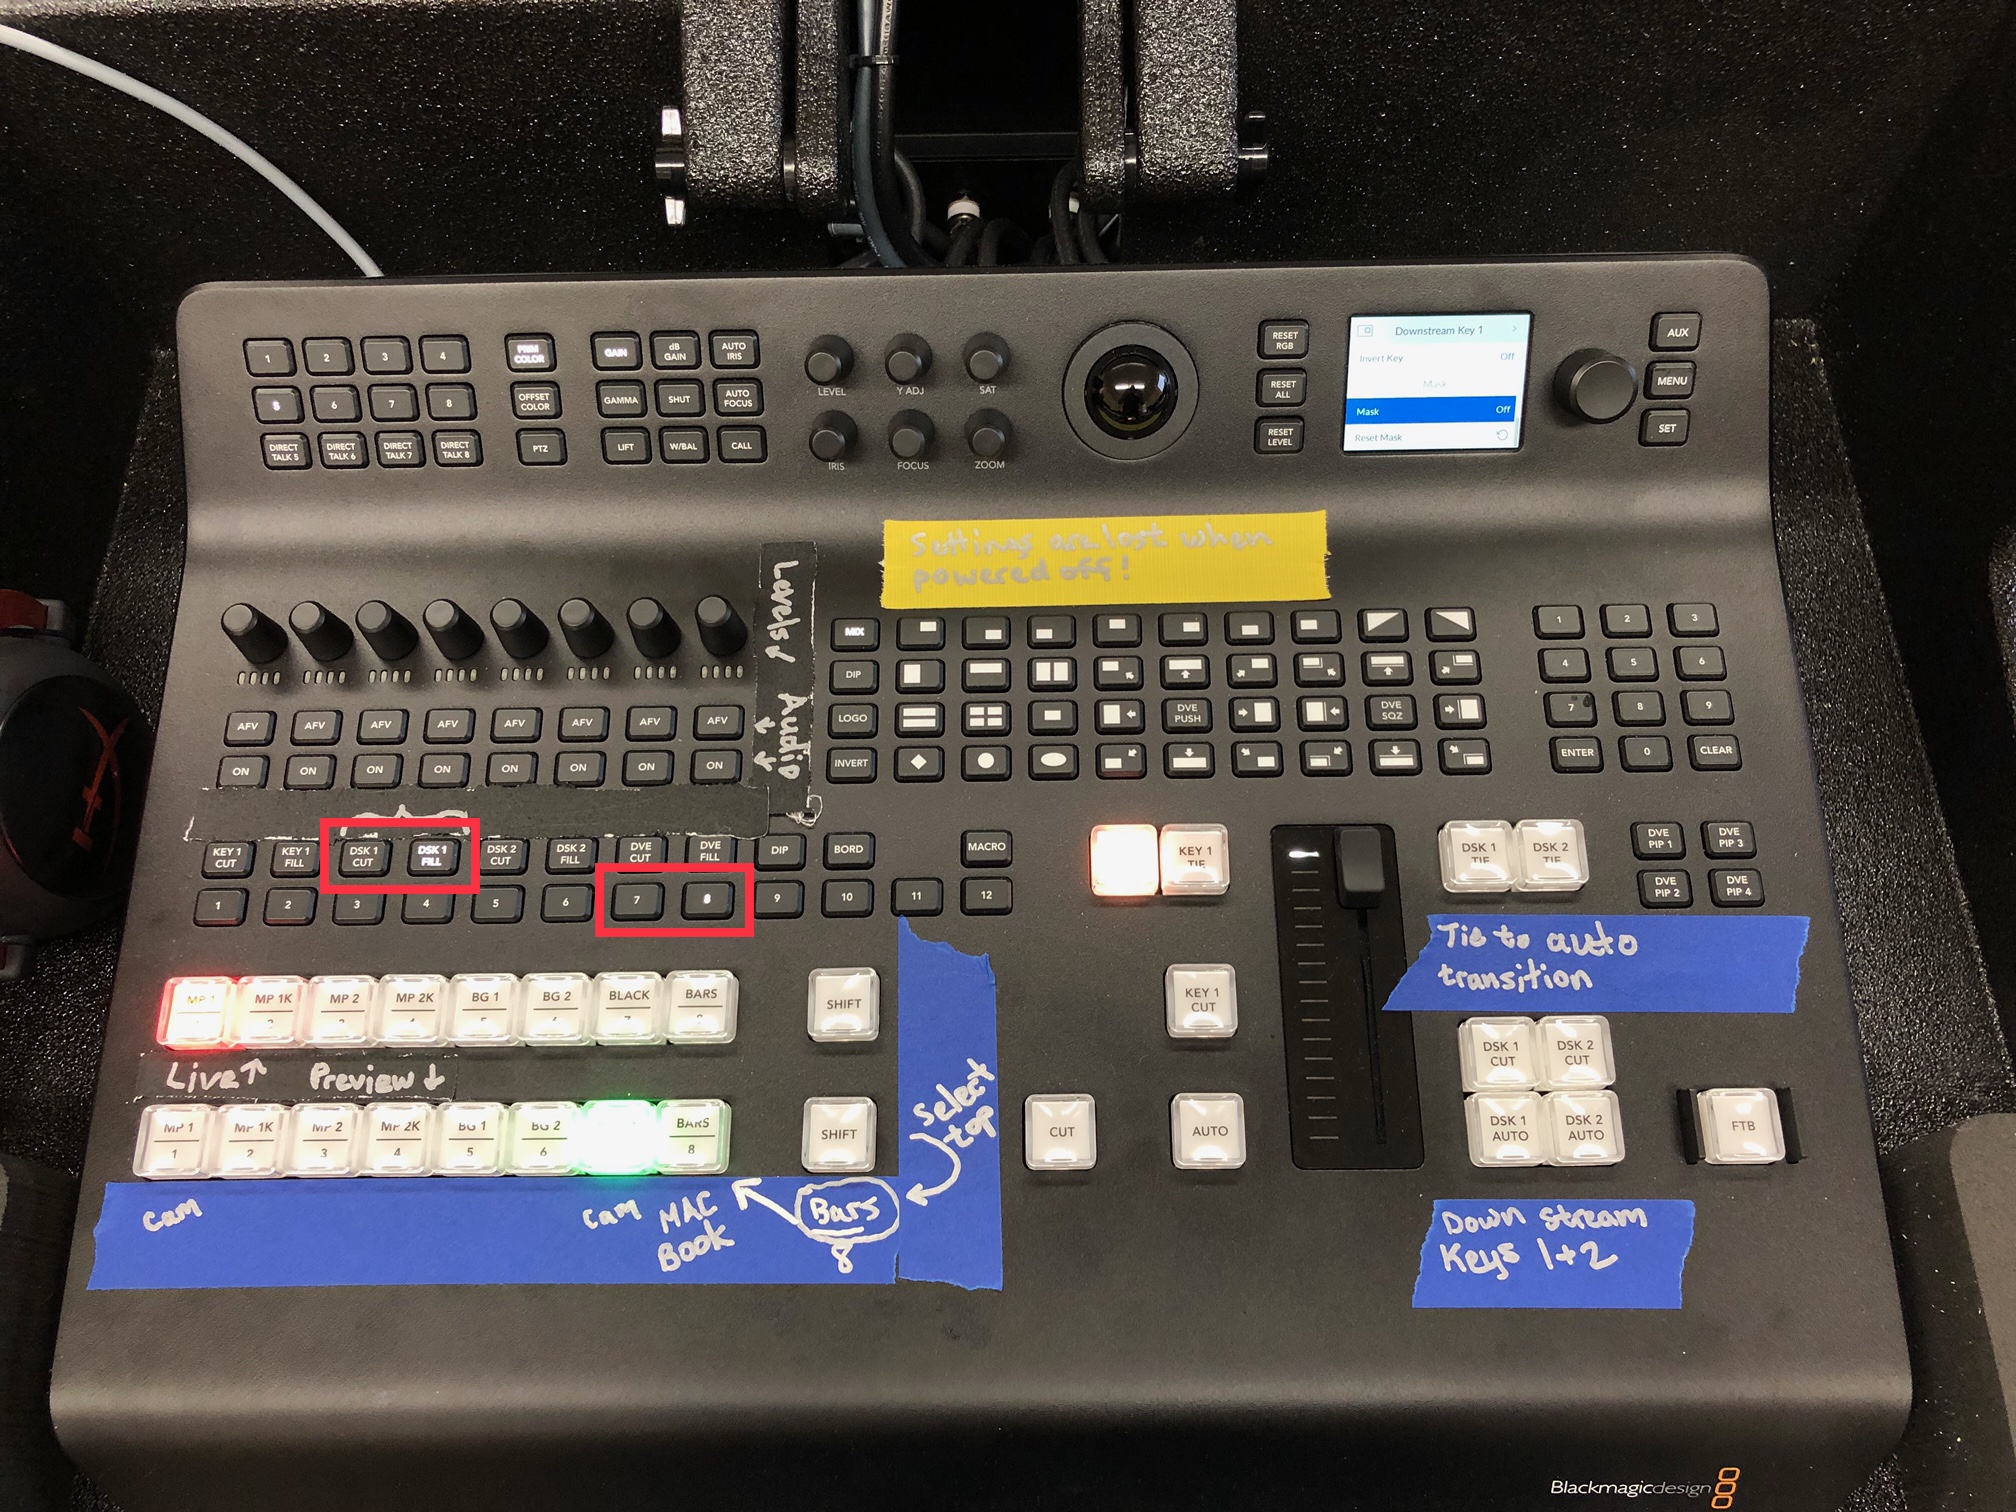
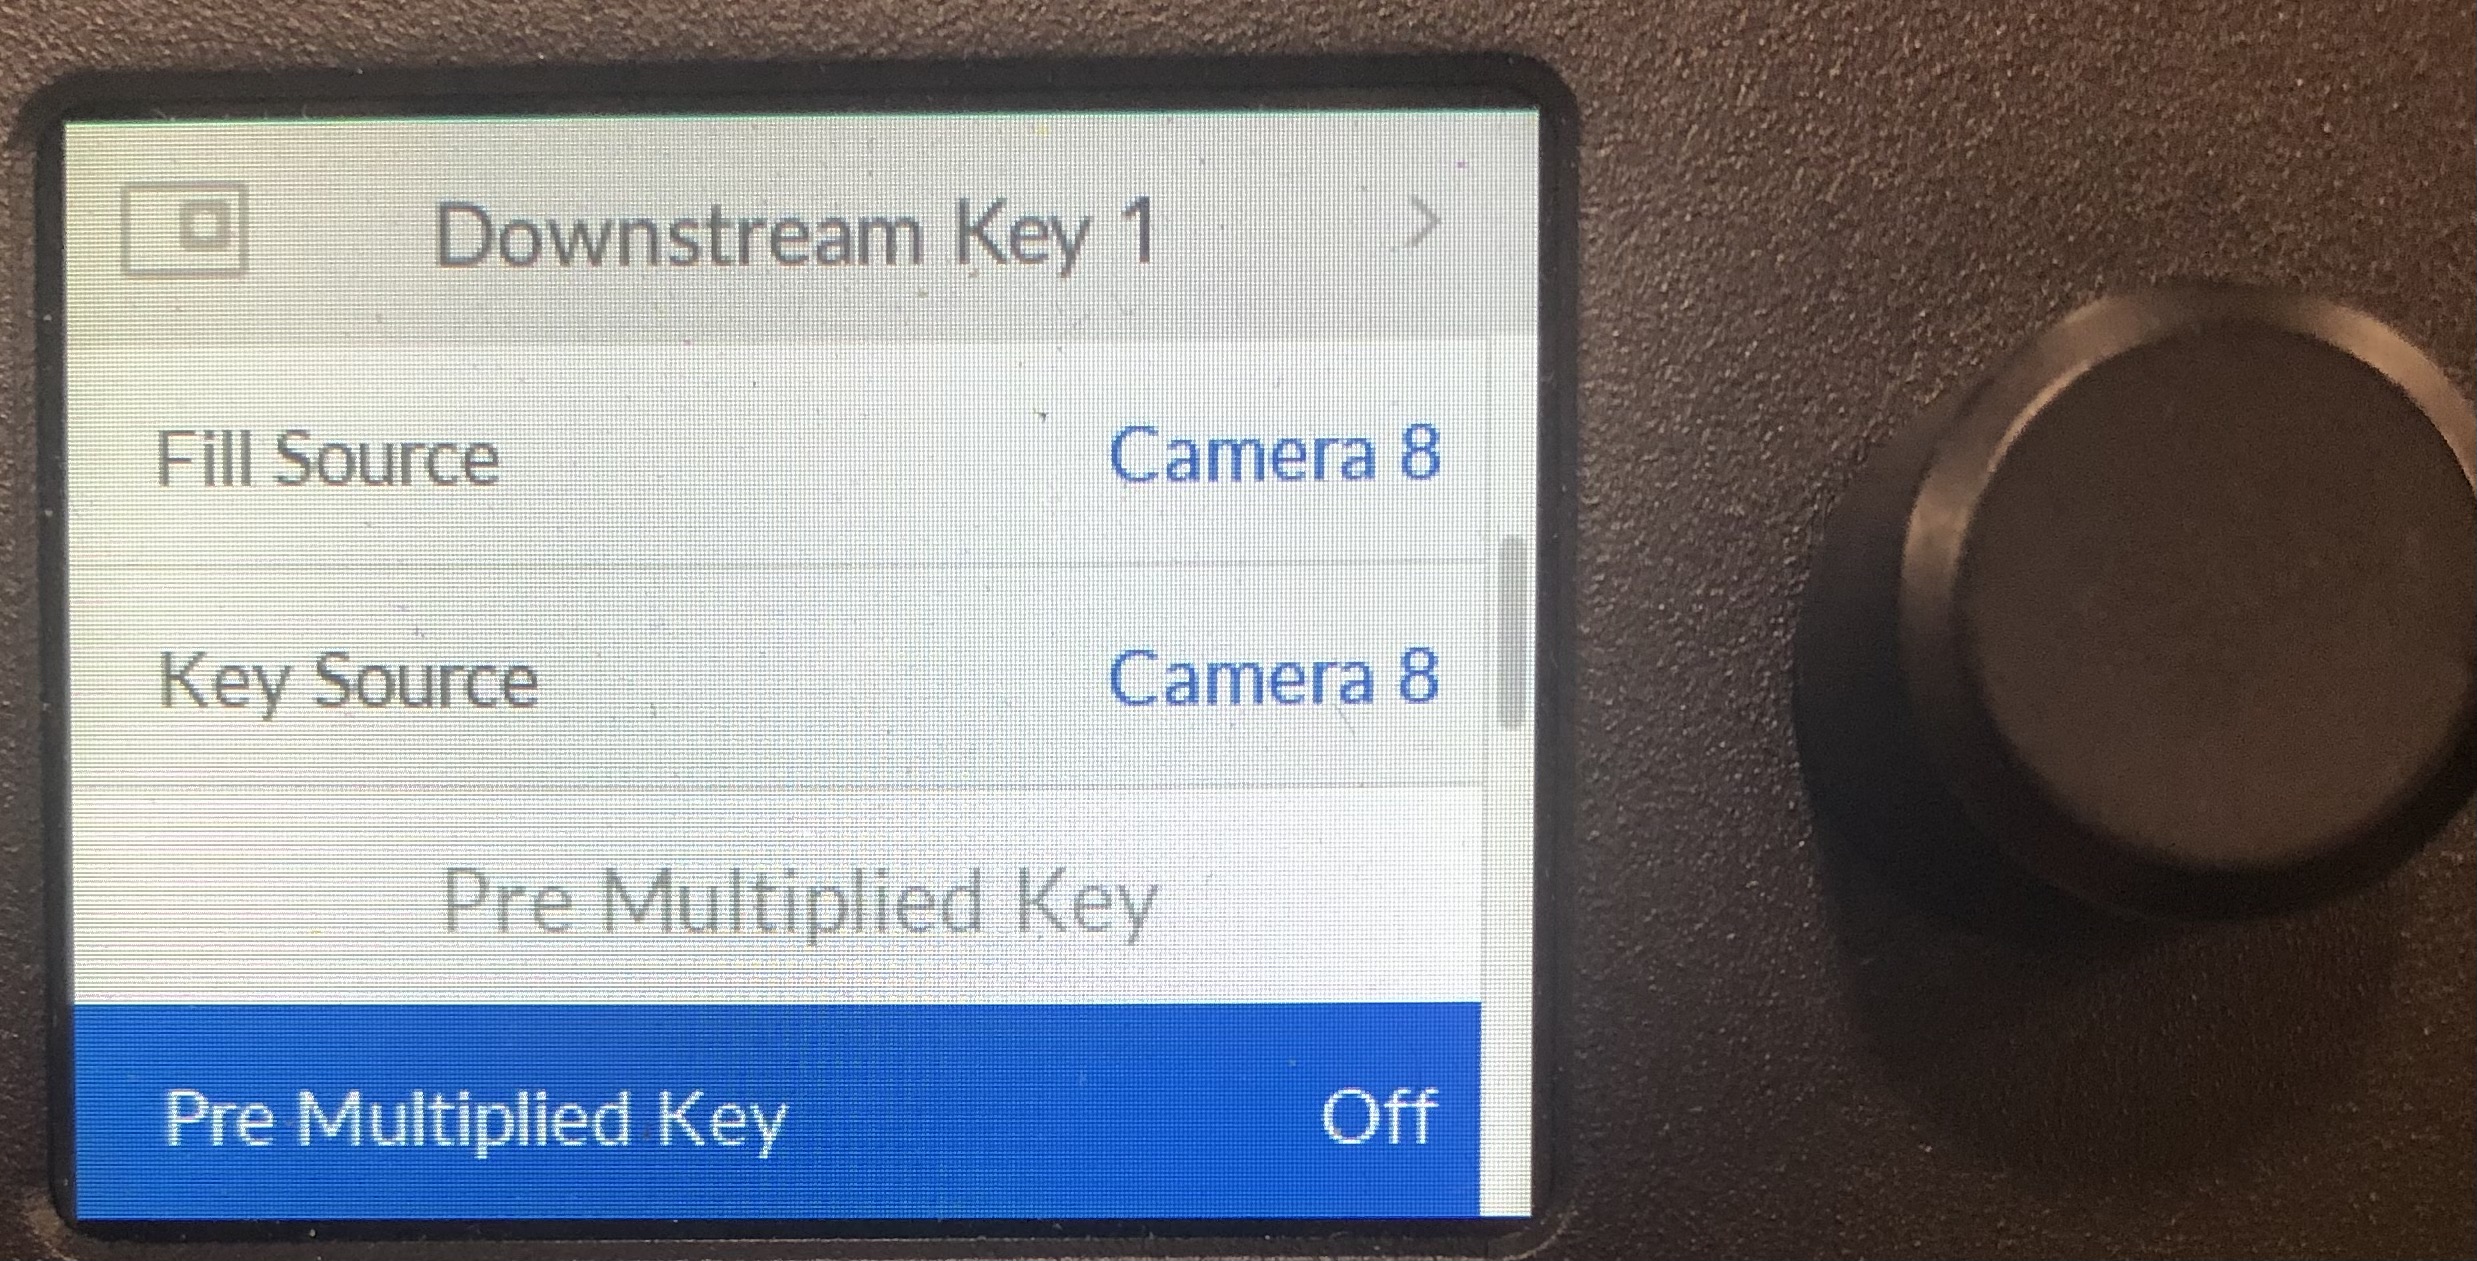
Set DSK1 (down stream key 1) cut and fill to either INPUT 7 or INPUT 8, whichever has the feed for lyrics (lower-third).
See the red highlight, if you want to use the buttons to set the sources.
 See the next picture, if you want to use the
 Downstream Key 1 menu to set the sources.

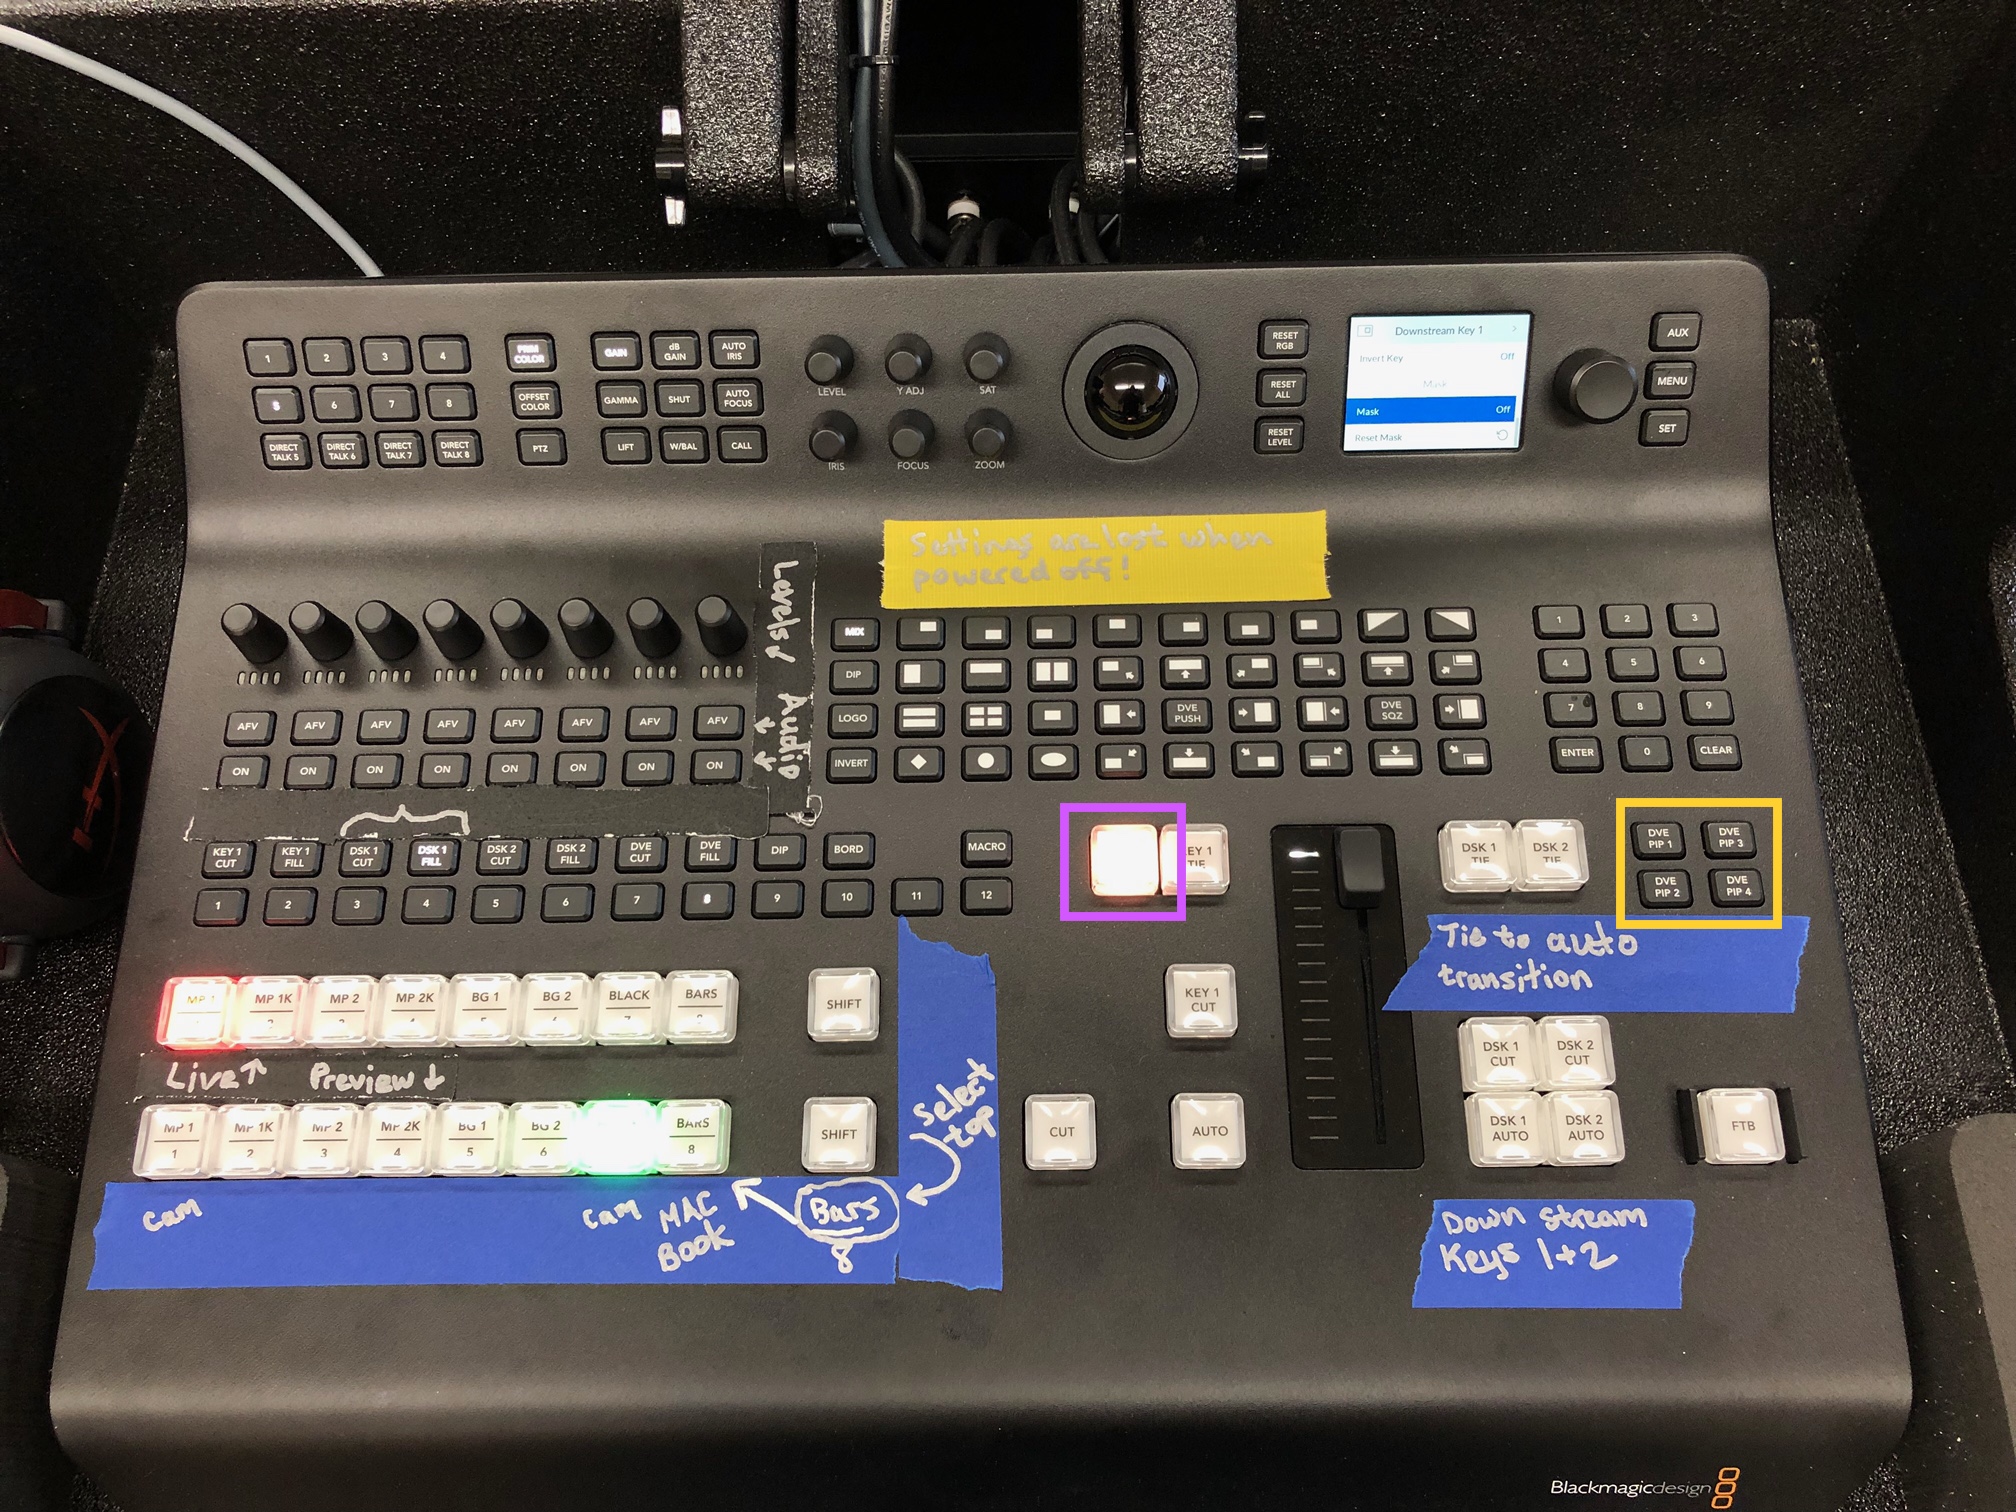
Hitting one of the PIP buttons (see the yellow highlight) displays the PIP in preview and “ties” it to the next transition.
To remove PIP, hit the “Background” button (see the purple highlight), while the PIP is in Preview.
:warning: Hitting the “Background” button while the PIP is in Program causes strange behavior.
Transition to Preview first!

The buttons, with “tie” in them, ties that setting to the next transition.
Transitions cycle between Preview and Program.
Any tied setting will display in Preview (or Program depending on if it's live or not) before the transition.
//TODO: Depict “channels” on the board and how they correspond to the audio cart snake.
