This library package works with four plugins:
All four are used to log into a Firebase backend. If you're familiar with these plugins, you'll be able to quickly use this class library.
I don't always like the version number always suggested in the 'Installing' page. Instead, always go up to the 'major' semantic version number when installing my library packages. This means always entering a version number trailing with two zero, '.0.0'. This allows you to take in any 'minor' versions introducing new features as well as any 'patch' versions that involves bugfixes. Semanitic version numbers are always in this format: major.minor.patch.
- patch - I've made bugfixes
- minor - I've introduced new features
- major - I've essentially made a new app. It's broken backwards-compatibility and has a completely new the user experience. You won't get this version until you increment the major number in the pubspec.yaml file.
And so, in this case, add this to your package's pubspec.yaml file instead:
dependencies:
  auth:^6.0.0
For more information on this topic, read the article, The importance of semantic versioning.
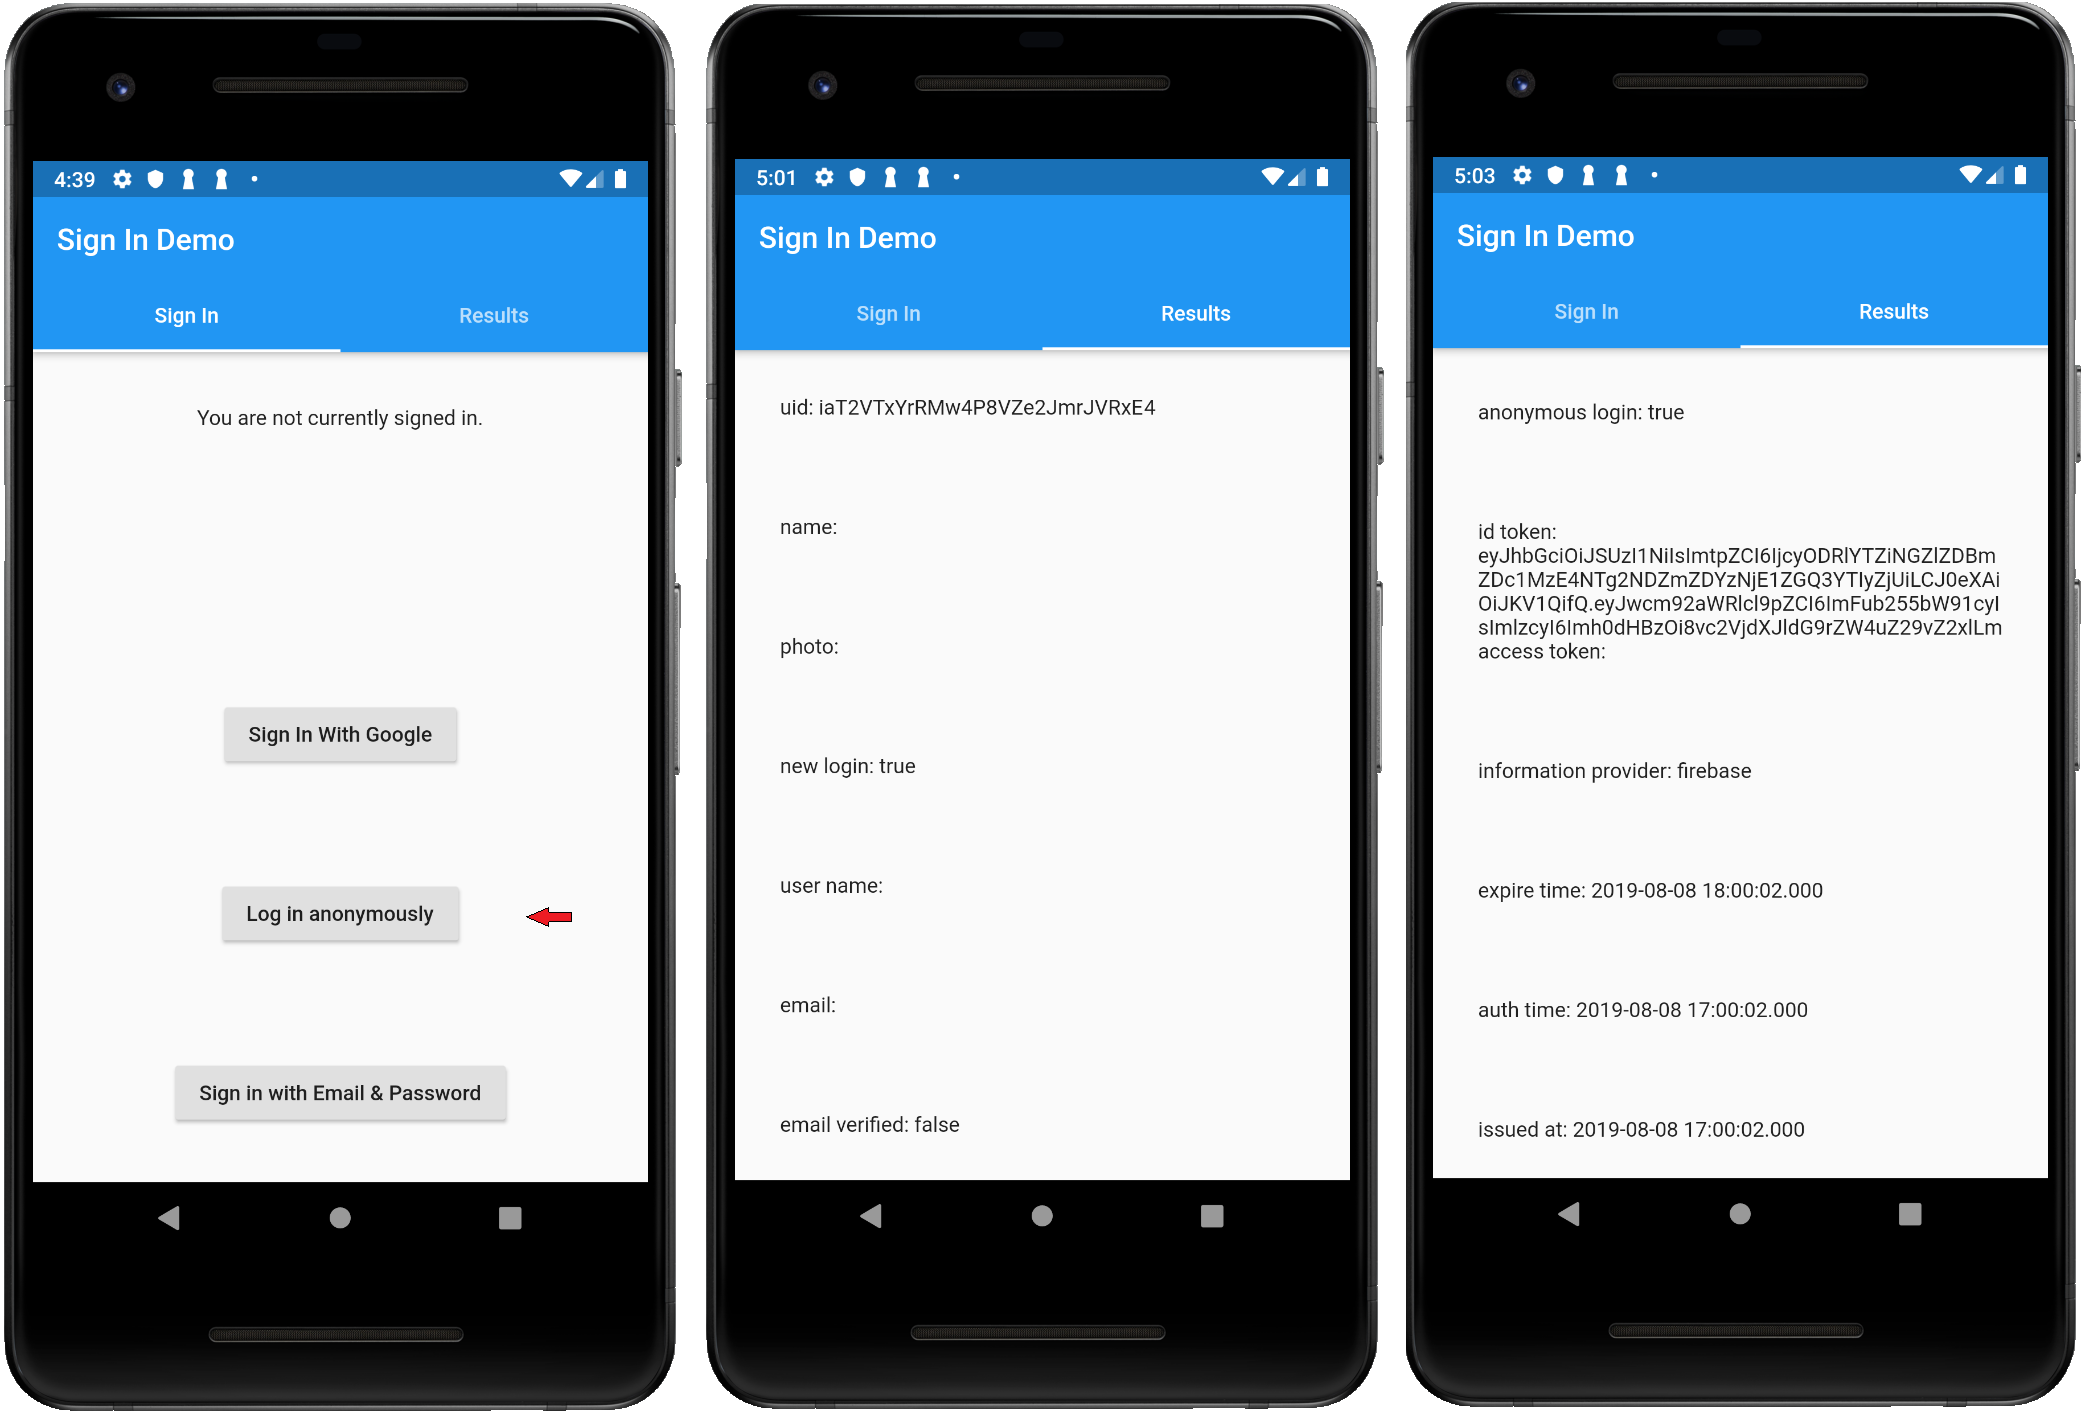
Below are a series of screenshots depicting how to initialize and authenticate or 'sign in' an individual into your app's Firebase database using a either an email and password or a Google account. The following will sign in 'silently' (i.e. automatically if the user had already signed in in the past.). Note, settings are passed as parameters in the screenshot below.
auth = Auth.init(
    scopes: [
      'email',
      'https://www.googleapis.com/auth/contacts.readonly',
    ],
    listener: (user) {
      loggedIn = user != null;
      setState(() {});
    });

auth.signInSilently(
  listen: (account) {
    loggedIn = account != null;
    setState(() {});
  },
);
These examples have the class library called in the State object's initState() function, but, of course, you could instead 'initialize' the class library in the initState() function and then 'sign in' elsewhere. Below, the init() function is used instead just to initialize the class library.
@override
void initState() {
  super.initState();

  auth = Auth.init(
    scopes: [
      'email',
      'https://www.googleapis.com/auth/contacts.readonly',
    ],
    listener: (user) {
      loggedIn = user != null;
      setState(() {});
    },
    listen: (account) {
      loggedIn = account != null;
      setState(() {});
    },
  );

  auth.signInSilently();
}

@override
void dispose() {
  /// Important to dispose of the Auth's resources.
  auth.dispose();
  super.dispose();
}Widget get _authResults => ListView(
padding: const EdgeInserts.all(30.0),
itemExtent: 80.0,
children: <Widget>[
Text("uid: ${auth.uid}"),
Text("name: ${auth.displayName}"),
Text("photo: ${auth.photoUrl}"),
Text("new login: ${auth.isNewUser}"),
Text("user name: ${auth.username}"),
Text("email: ${auth.email}"),
Text("email verified: ${auth.isEmailVerified}"),
Text("anonymous login: ${auth.isAnonymous}"),
Text("id token: ${auth.idToken}"),
Text("access token: ${auth.accessToken}"),
Text("information provider: ${auth.providerId}"),
Text("expire time: ${auth.expirationTime}"),
Text("auth time: ${auth.authTime}"),
Text("issued at: ${auth.issuedAtTime}"),
Text("signin provider: ${auth.signInProvider}"),
], // <Widget>[]
); // ListViewThis package works with multiple auth providers including Facebook and Twitter.
Even if you've no intention of allowing users to use Facebook to log in, you will have to modify a few files any way so to use this library package. You can then ignore these files as they just need to be there. If you don't add to these three files, you'll get the following error when trying to use this Auth package:
The SDK has not been initialized, make sure to call FacebookSdk.sdkInitialize() first.
You must acknowledge to Android that the Facebook SDK is being utilized. Hence, a means to initialize it is required. So, go to the 'Android Manifest file' (android/app/src/main/AndroidManifest.xml) and add the following after the first tag, </activity> but before the last tag, </application>. See below:
You can copy and paste the code here:
<meta-data android:name="com.facebook.sdk.ApplicationId"
    android:value="@string/facebook_app_id"/>

<activity android:name="com.facebook.FacebookActivity"
    android:configChanges=
            "keyboard|keyboardHidden|screenLayout|screenSize|orientation"
    android:label="@string/app_name" />

<activity
    android:name="com.facebook.CustomTabActivity"
    android:exported="true">
    <intent-filter>
        <action android:name="android.intent.action.VIEW" />
        <category android:name="android.intent.category.DEFAULT" />
        <category android:name="android.intent.category.BROWSABLE" />
        <data android:scheme="@string/fb_login_protocol_scheme" />
    </intent-filter>
</activity>
Now go to the 'styles' (android/app/src/main/res/values/styles.xml) file and add the following:
<string name="app_name">Your App Name here.</string>
<!-- Replace "000000000000" with your Facebook App ID here. -->
<string name="facebook_app_id">000000000000</string>
<!-- Replace "000000000000" with your Facebook App ID here.    -->
<string name="fb_login_protocol_scheme">fb000000000000</string>
With that, you can get on with your app even if you're not going to log in with Facebook. Here's what it would possibly look like in your particular file:
Note: Place this file in .gitignore so not to save this Facebook App ID numbers on a public Github repository.
You will have to go to your Facebook Developers account and create or select the app you'll use.
Under Settings, click on the show button to copy down your App ID and App Secret those later (Firebase will need them).
Read quickstart section from Facebook documentation to set up Facebook on the Android side.
The following steps in particular will get your app working with Facebook:
- Select an App or Create a New App
- Edit Your Resources and Manifest
- Associate Your Package Name and Default Class with Your App
- Provide the Development and Release Key Hashes for Your App
Remember, all this effort is to connect to a backend Firebase database. You some things to do in the Firebase Projects Console.
You'll have to go into the Sign-in method tab and enable the Facbook option and any other options you may wish to use to log into this Firebase app:
You can use Twitter as well if you want to. You'll just need to create an app on Twitter and then supply the Consumer API keys to this library package.
This is a class library is covered again in the Medium article, Auth in Flutter.
Other Dart packages from the author can also be found at Pub.dev


