MozStumbler

The build system is smart enough to automatically download and install all the parts of the Android SDK for you. If you cannot build, you can either try to fix your Android dev enviroment to fit the android/build.gradle requirements - or you can simply remove ANDROID_HOME, and all traces of your Android SDK from your PATH.
make
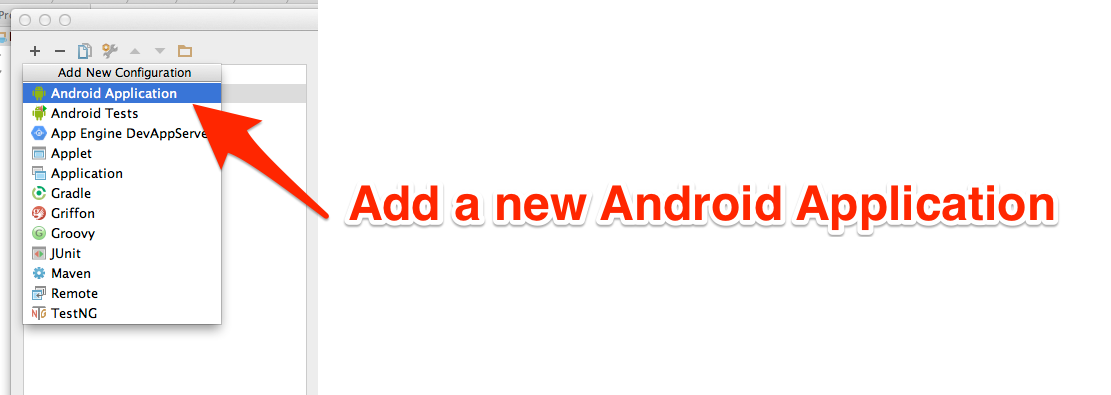
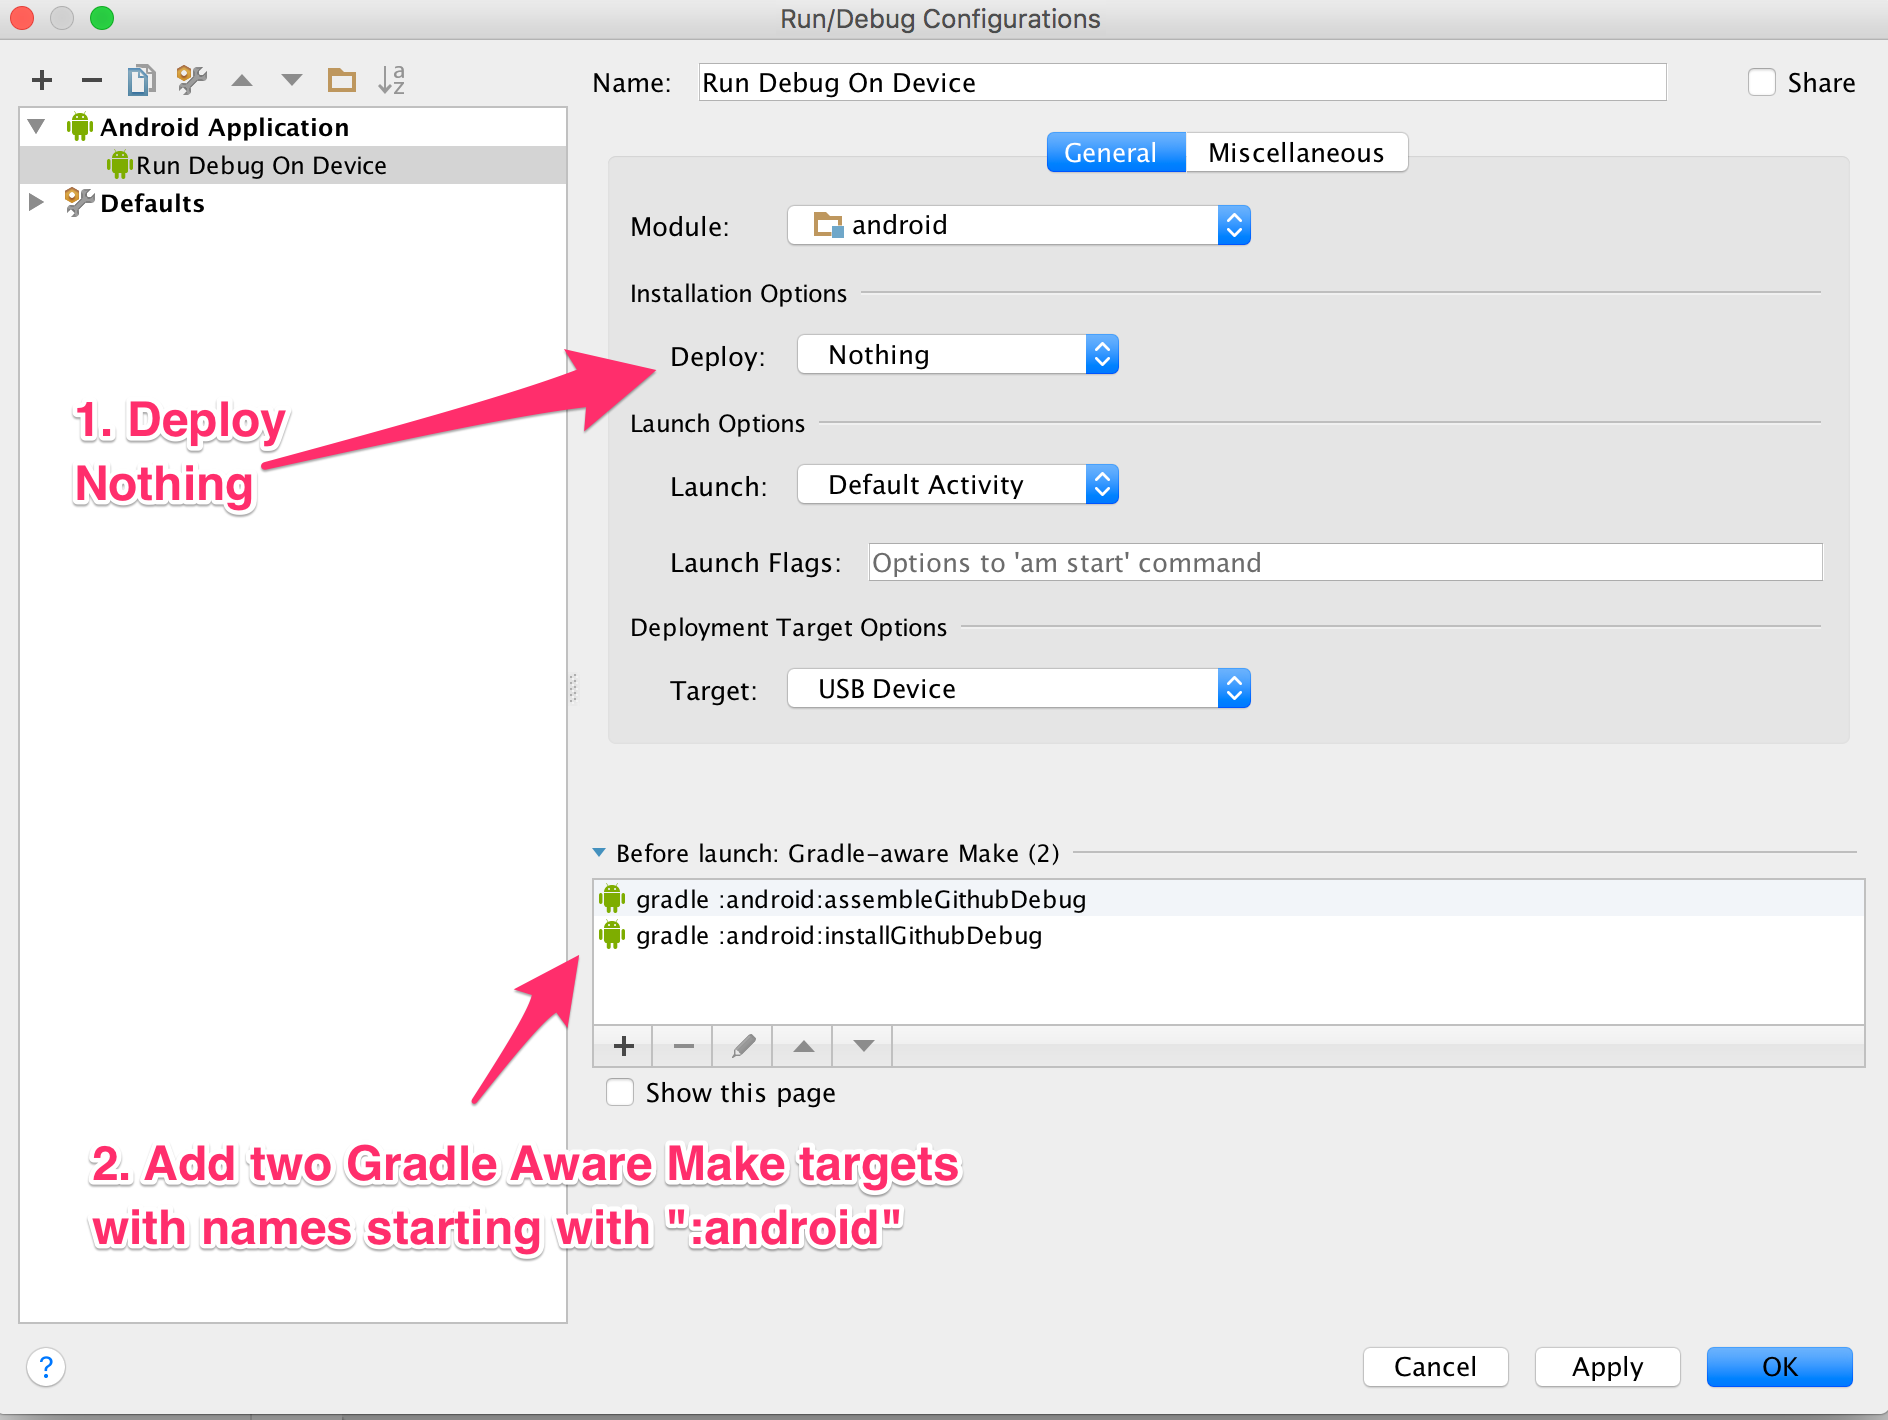
Setup the Android Application to use two gradle aware make targets. You must set Package to be installed to "Do not deploy anything". Make sure you run assembleGithubDebug, then installGithubDebug.
In order to sign the APK, you will want to create a
'signing.properties' file under android/properties. The content
should look like the following except it should contain your key
signing information:
StoreFile=<path to file>
StorePassword=<password>
KeyAlias=<key alias>
KeyPassword=<password>
To submit data using your own Mozilla API key to the Mozilla Location
Service, you will need a private-.properties file in
android/properties. An example properties file is available in
android/properties/example.properties.
The gradle build will pick up private-.properties automatically.
So with :
./gradlew assembleGithubDebug
The build system will pick up
android/properties/private-github.properties as well as
android/properties/signing.properties. If either of these property
files do not exist, then empty strings will be used.
For the OSM (OpenStreetMap) Tile Server, you have several options:
-
MapBox (easy, secure) is a hosted OSM solution, allowing users to easily create beautiful maps and featuring full SSL. To use MapBox:
- Visit mapbox.com and sign up
- From the MapBox Dashboad click the big blue "Create Project" button
- Customize your map as you please. The only requirement is that you allow public API access. To do this click on the gear in the white box at the top, select the "Advanced" option at the bottom, and uncheck the "Hide project from public API" box. Be sure to hit the save button after doing this.
- Obtain the API key for your map (visible from the dashboard under Projects and Data, or in the URL of the editor)
- Set
TileServerURLin thegradle.propetiesfile tohttp://api.tiles.mapbox.com/v3/<API key>/. Do not miss the tailing slash, it will break things if you do.i
Note that, for historical reasons, you can simply specify the API
key in the gradle.properties file and not the full URL, using the
MapAPIKey key
-
Another hosted solution (difficulty varies, as does security). There are many OSM tile servers available. This is a nice list of some.
-
Run your own Tile Server (advanced, as secure as you want) You can, of course, run your own tileserver. Switch2OSM has several excellent guides on the subject and is a good place to get started.
To generate a signing key, search the internet for details. This command is probably what you want:
keytool -genkey -v -keystore my-release-key.keystore -alias mozstumbler -keyalg RSA -keysize 2048 -validity 10000
To verify the apk has been signed, you can run this command:
jarsigner -verify -verbose -certs android/build/outputs/apk/android-release.apk
Note that if signing failed, the gradle build system should not generate an android-release.apk file.
You will probably find only the android-release-unsigned.apk file.
- Bump the version numbers at the top of android/build.gradle
- Make sure you have your signing keys, private-.properties and signing.properties file configured.
- You should have your keystore file in the
android/propertiesdirectory. - Ensure all code is commited. Tag the release with v.. versions. You must prefix the version with a 'v'.
- Push tags to wherever you need to.
- There are now Github and Google Play Store releases. Execute
them with
make githubormake playstore. - You should end up with a signed apk MozStumbler-v<whatever_the_version_is>.apk in the
outputsdirectory. - Browse to https://github.com/mozilla/MozStumbler/releases.
- Update the release tag with the apk file.
- Add some release notes and give @credit to contributors!