English | Tiếng Việt
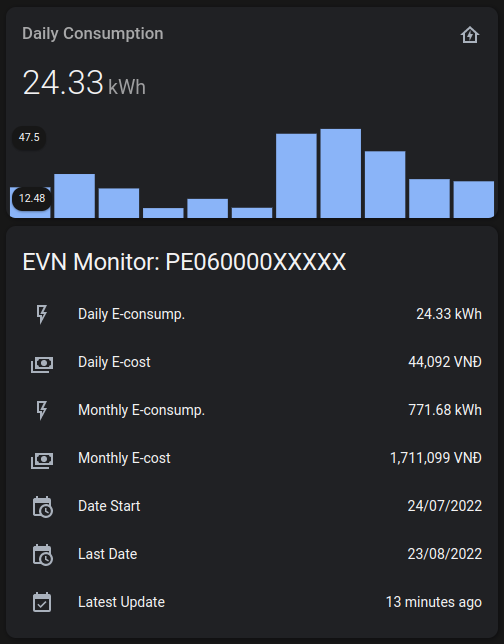
This component utilized the simple yet powerful HTTP(S) protocol to periodically fetch the latest e-consumption data from EVN Endpoint into Home Assistant with AIOHTTP module (and a brilliant assist from BeautifulSoup for scaping useful data).
Hence, it supports installation through UI, and can easily integrate monitoring devices into HA without configuring yaml.
There are some EVN branches that require authentication to fetch the daily electric consumption data, but others do not need this field.
A qualified EVN account will consist of:
-
A username (usually your EVN Customer ID or Phone Number).
-
A password.
Note: Check the table below, if your area needed EVN Account to setup the component, please contact the corresponding support center link to get the required credentials.
Starting from the v1.2.5 version, the component has successfully provided support for all of the areas in Vietnam.
| EVN Branch | Vietnam Area | Is Supported | Is EVN Account Required | Support Center |
|---|---|---|---|---|
| EVNHCMC | Ho Chi Minh City | ☑️ | ☑️ | Link |
| EVNSPC | Southern Vietnam | ☑️ | Link | |
| EVNNPC | Northern Vietnam | ☑️ | Link | |
| EVNHANOI | Ha Noi Capital | ☑️ | ☑️ | Link |
| EVNCPC | Central Vietnam | ☑️ | ☑️ | Link |
Method 1: Installation via HACS (recommended).
-
Download the repository to your HA Server.
HACS > Integrations > ➕ Explore & download repositories >
EVN Data Fetcher> Choose the latest version > Download this repository -
Reboot/restart your HA Server.
-
Voilà, your installation is completed, now you should move to Configurations section to complete.
-
Clone/download the latest release (or the repos. master branch).
-
Unzip/copy the
custom_components/nestup_evnfolder to thecustom_componentsdirectory of your HomeAssistant installation.-
The
custom_componentsdirectory depends on your HomeAssistant configuration directory. -
Usually, the configuration directory is within your OS Home Directory
~/homeassistant/. -
In other words, the configuration directory of HomeAssistant is where the
configuration.yamlfile is located. -
After a correct installation, your configuration directory should look like the following.
└── ...
└── configuration.yaml
└── secrets.yaml
└── custom_components
    └── nestup_evn
        └── __init__.py
        └── sensor.py
        └── nestup_evn.py
        └── ...
Note: if the
custom_componentsdirectory does not exist, you need to create it manually. -
-
Search for
EVN Data Fetcherin installed integrations.Settings > Devices and Services > Integrations > Add Integrations > Find
EVN Data Fetcher -
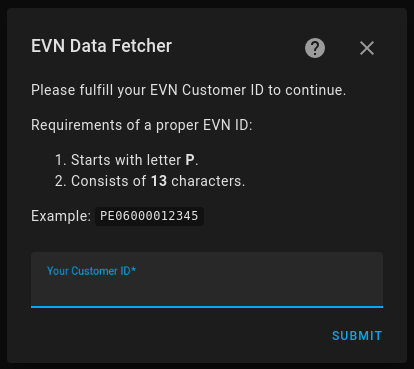
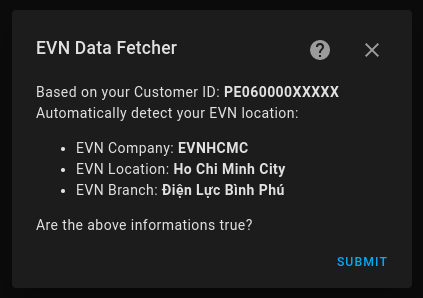
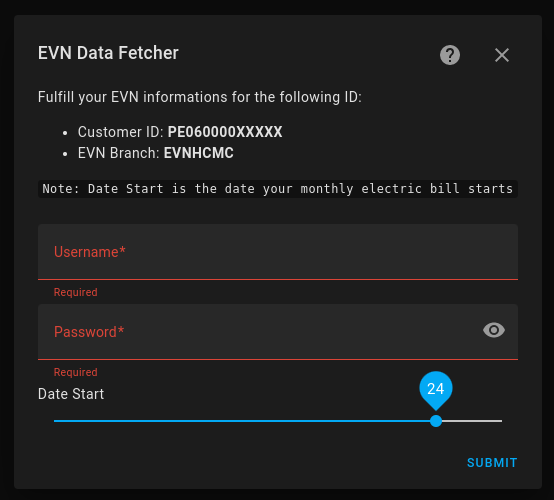
Fulfill your
EVN Customer ID.Requirements: the ID must meet all of the conditions below:
- Consists of 11 to 13 characters.
- Starts with 'P' letter.
-
Fulfill your
EVN Credentials(Username & Password). -
Choose your
Billing Start Date. Note: this is the montly billing date of your electric bill from EVN. -
Congrats, everything has been done, you can use the component now.
This feature has not been released yet, this is a TO-DO task, to which the maintainer himself won't do.
However, the configuration seems not neccessary to adjust, fixed configurations are listed below.
-
EVN Retail Electricity Tariff:
The reference would always be
Household Customer Groupalthough this variable may varies due to usage purpose.Visit this link for more informations about electricity price.
-
Default Polling Interval:
60 minutesis the default interval for fetching new data from EVN, which is reasonable break, otherwise it would take up resources and overwhelm the server.
- Mr. Pham Dinh Hai and Mr. Huynh Nhat for believing and providing the author his EVN Credentials, thus the project could be available for those living in Hanoi Capital and Central Vietnam.
- Mr. Hoang Tung V for giving a huge support to the author.
Without those guys, the
nestup_evnrepo would not be here, being an open-source integration to the community.
Last word, the maintainer wants to thank himself for making this project happen.


