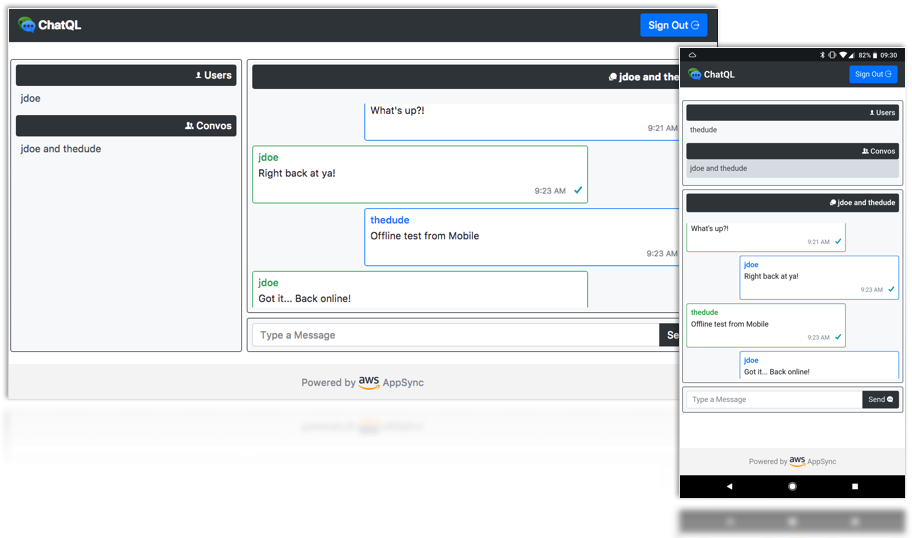
This is a Starter Angular Progressive Web Application (PWA) that uses AWS AppSync to implement offline and real-time capabilities in a chat application as part of the blog post https://aws.amazon.com/blogs/mobile/building-a-serverless-real-time-chat-application-with-aws-appsync/. In the chat app, users can have conversations with other users and exchange messages. The application demonstrates GraphQL Mutations, Queries and Subscriptions using AWS AppSync. You can use this for learning purposes or adapt either the application or the GraphQL Schema to meet your needs.
-
PWA: A Progressive Web Application takes advantage of the latest technologies such as Service Workers to combine the best of web and mobile apps. Think of it as a website built using web technologies but that acts and feels like an app in a mobile device.
-
GraphQL Mutations (
src/app/graphql/mutations)- Create users
- Create conversations and link them to users
- Create messages in a conversations
-
GraphQL Queries (
src/app/graphql/queries)- Get all users
- Get all messages in a conversation
- Get all user related conversations
-
GraphQL Subscriptions (
src/app/graphql/subscriptions)- Real time updates for new messages in conversations
-
Authentication
- The app uses Cognito User Pools to onboard users and authenticate them into the app
-
Authorization
- The app uses JWT Tokens from Cognito User Pools as the authorization mechanism
- AWS Account with appropriate permissions to create the related resources
- NodeJS with NPM
- AWS CLI
- AWS Mobile CLI (configured for a region where AWS AppSync is available)
- Angular CLI
-
First, clone this repository and navigate to the created folder:
$ git clone https://github.com/aws-samples/aws-mobile-appsync-chat-starter-angular.git $ cd aws-mobile-appsync-chat-starter-angular -
Set up your AWS resources in AWS Mobile Hub with the awsmobile cli:
$ awsmobile init
Provide the following details and name the project:
- Source directory:
<Press ENTER to accept defaults> - Distribution directory that stores build artifacts:
dist - Build command:
ng build --prod - Start command for local test run:
<Press ENTER to accept defaults>
- Source directory:
-
Copy the file
./backend/mobile-hub-project.ymlto./awsmobilejs/backend/and push the configuration change to AWS Mobile Hub.$ cp ./backend/mobile-hub-project.yml ./awsmobilejs/backend/ $ awsmobile push
This deploys User Sign-In, Analytics and Hosting features, and downloads your project's
aws-exports.jsfile to the./srcfolder. -
Run the following command and provide your account number:
$ ./backend/setup.sh
The script will create an IAM Service Role, DynamoDB tables, an AppSync API, a GraphQL schema, Data Sources, and Resolvers. Make note of the AppSync API ID.
-
Point your browser to the AWS AppSync Console (keeping mind of the region), and select the API (named 'ChatQL') created in the previous step. Scroll down to the Integrate your GraphQL API section, select Web and download the AWS AppSync.js config file. Place the
AppSync.jsfile in your project's./srcdirectory.$ cp <download-directory>/AppSync.js ./src/AppSync.js
-
Finally, execute the following command to install your project package dependencies and run the application locally:
$ awsmobile run
-
Access your ChatQL app at http://localhost:4200. Sign up different users and test real-time/offline messaging using different browsers.
The application is composed of the main app module and 2 independent feature modules:
- auth.module
- chat-app.module
Both modules make use of AWS Amplify, which is initialized with the ./src/aws-exports.js configuration in ./src/app.module.ts. The auth.module allows to easily onboard users in the app. To sign up to use the app, a user provides his username, password and email address. Upon succesful sign-up, a confirmation code is sent to the user's email address to confirm the account. The code can be used in the app to confirm the account, after which a user can sign in and access the chat portion of the app.
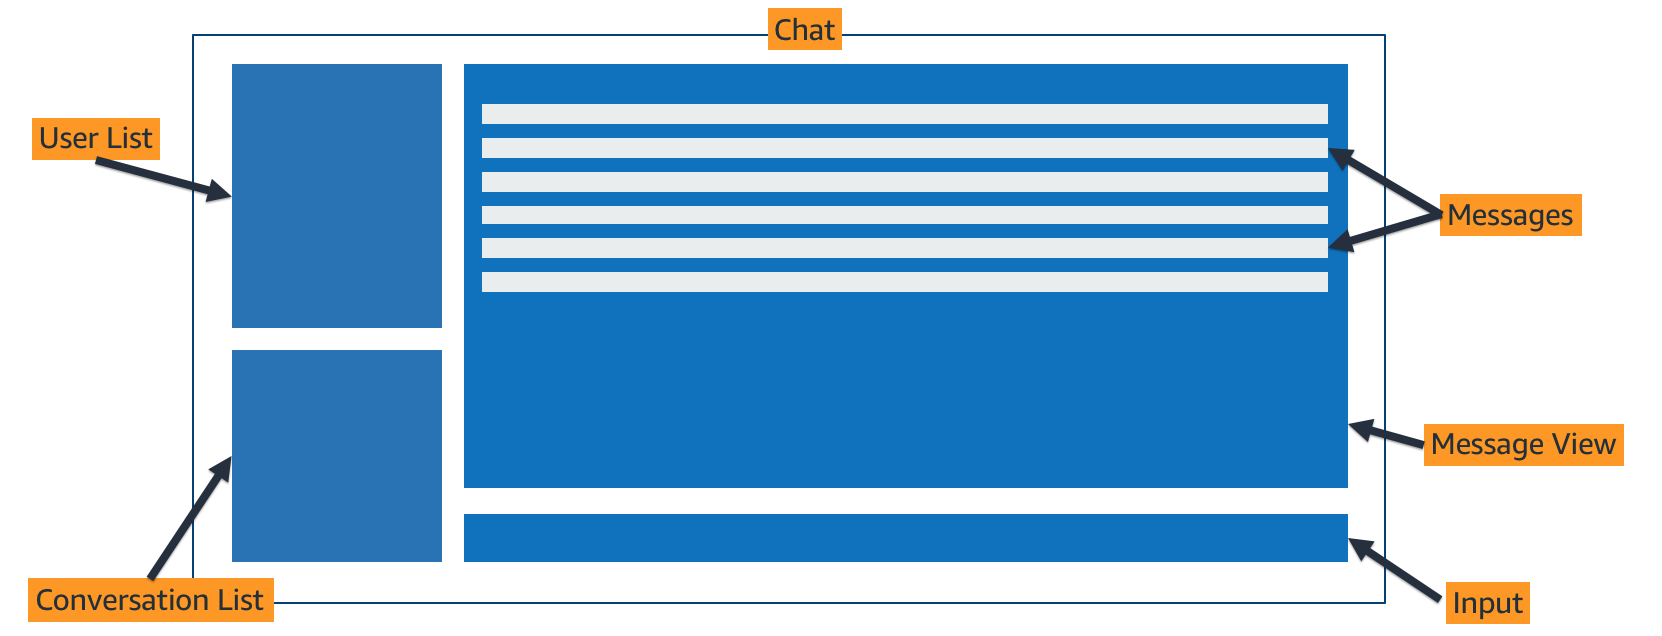
In the chat, a user can see a list of other users who have registered after sign in to the app for the first time. A user can click on a name to initiate a new conversation (./src/app/chat-app/chat-user-list) or can click on an existing conversation to resume it (./src/app/chat-app/chat-convo-list). Inside of a conversation, a user automatically receives new messages via subscriptions (./src/app/chat-app/chat-message-view/). When a user sends a message, the message is initially displayed with a grey check mark. This indicates that receipt confirmation from the backend server has not been received. The checkmark turns green upon confirmation the message was received by the backend. This is easily implemented by including the isSent flag, set to false, when we send the createMessage mutation. In the mutation, we request for the isSent flag to be returned from the backend. The flag is set to true on the backend and when returned, our template updates the css class associated with the checkmark (see ./src/src/app/chat-app/chat-message).
-
The
./src/aws-exports.jsfile also provides the Amazon Pinpoint project details to start collecting analytics data from the chat activity in the application. AWS Amplify is configured to send custom events to Pinpoint when a conversation is created (/src/app/chat-user-list/chat-user-list.component.ts) and when a message is sent (/src/app/chat-input/chat-input.component.ts). -
After a couple of minutes, use the awsmobile cli to open your project in the AWS Mobile Hub console:
$ awsmobile console
Click on Analytics in the top right corner of the console to open the Amazon Pinpoint console. Click on Analytics on the left, then select the Events tab to see your application's events. Use the Event dropdown menu to see data from your custom events (
Chat MSG SentorNew Conversation).
-
Execute
awsmobile publishfrom the project's root folder. -
While the application is building/publishing, go back to the Mobile Hub console using the
awsmobile consolecommand. Select the Hosting And Streaming tile and click Manage files. In the Amazon S3 console, select Properties, and in the Static website hosting section, under 'Error document', specifyindex.html. -
Back in the Mobile Hub console, in Hosting And Streaming, click Edit your CDN distribution. In the Amazon CloudFront console, select Error Pages and click Create Custom Error Response. Use the following settings:
- HTTP Error Code:
403 - Minimum TTL:
300 - Customize Error Response:
Yes - Response Path:
/index.html - HTTP Response Code:
200
The last two steps are necessary because of the way Angular internal routing works as a Single Page Application (SPA) with client-side routing.
- HTTP Error Code:
-
Wait until the CloudFront settings are replicated (Status: Deployed)
-
Access your public ChatQL application using the S3 Website Endpoint URL or the CloudFront URL returned by the
awsmobile publishcommand. Share the link with friends, sign up some users, and start creating conversations and exchanging messages. Be mindful PWAs require SSL, in order to test PWA functionality access the CloudFront URL (HTTPS) from a mobile device and add the site to the mobile home screen.
In your project folder, execute the following command to teardown the resources deployed by the setup.sh script. Provide your account number and the ID of your AWS AppSync GraphQL API. This will DELETE all the ChatQL resources in your account.
$ ./backend/teardown.sh
