Dragon VR code for Children's Museum of Jordan
- You will need a Wifi Router to create a local network. You can probably use any but I had used this Netgear one
- Power on and setup your router.
- This wifi router should not to be connected to the internet
- You will need to connect all your devices to this router:
- Mac Laptop - this runs the server (socket_server)
- GearVR phone - this runs the dragon simulation (DragonFinalOptimizedGear)
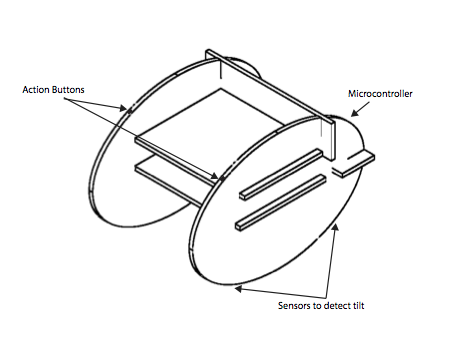
- Arduino Yun - this controls the button inputs from the dragon controller (arduino/dragon_controller)
- When a device connects to the laptop, make a note of the unique IP address that the router assigns to each device
- This has been tested to run on a MacOS laptop
- Install Node
- Connect your laptop to the Wifi network of the Wifi router
- Note down the IP address that your laptop gets assigned once it connects to this router
- Go inside the folder socket-server in this repo
- You can run the server from the Terminal with the command
node beep.js
- Install Unity 5.3.0 - this is the version the code is tested in
- Open the project from this repo titled DragonFinalOptimizedGear
- Create a Oculus Signature File for your GearVR capable Android device https://dashboard.oculus.com/tools/osig-generator/
- Copy this Oculus Signature file into the Unity Project
/Plugins/Android/assets/ - Select 'SocketIO' gameobject from Heirarchy Panel in Unity Project
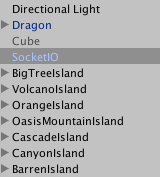
- In 'Url' field in the Inspector Panel update IP address
- Replace
10.0.32.2with IP address of the laptop which is connected to your wifi router e.g 192.168.1.5 - Leave everything else in the 'Url' field exactly the way it is, only update those 4 numbers
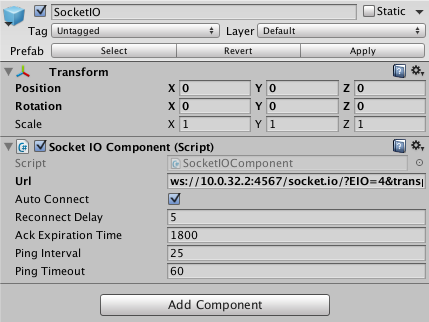
- You will need a GearVR compatible Samsung phone
- Connect this phone to your wifi router
- Note down the IP address that is assigned to this phone by the router
- Follow the instructions in one of these links for uploading to the GearVR phone
- CGCookie
- Immersion
- Unity3D tutorial
- You will require an [Arduino Yun]
- Download Arduino IDE
- Check setup of Arduino
- Setup Arduino Yun to connect to your Wifi Router. Follow instructions here
- Open dragon_controller.ino
- Replace IP address
10.0.32.2with IP address of your laptop after it has connected to your router - Only replace those 4 digits, nothing else

- Upload sketch dragon-controller from this repo to the Yun
- The arduino requires 5 buttons plugged into it in digital pins 8,9,10,11,12
- Pin 8 - turns dragon right
- Pin 9 - turns dragon left
- Pin 10 - puts dragon into a dive
- Pin 11 - makes dragon rise up
- Pin 12 - puts dragon into a barrel roll
- You can see how to connect a button to the arduino here
- Ensure all devices are connected to the local network of your wifi router
- Make sure server is running on your laptop
- Make sure app is installed on your mobile device. Tap the app and slide it into your GearVR headset
- Make sure Arduino Yun is powered on, it can be plugged into a laptop or into a wall socket as long as you provide it 5V
